Homemade Caramels: Your Guide to Soft, Chewy, and Buttery Perfection
There’s nothing quite like the irresistible allure of classic homemade caramels. Imagine sinking your teeth into a piece of candy that’s incredibly soft, perfectly chewy, and bursting with rich, buttery flavor. This isn’t just a dessert; it’s an experience, a delightful tradition that brings warmth and sweetness to any occasion, especially during the holidays.
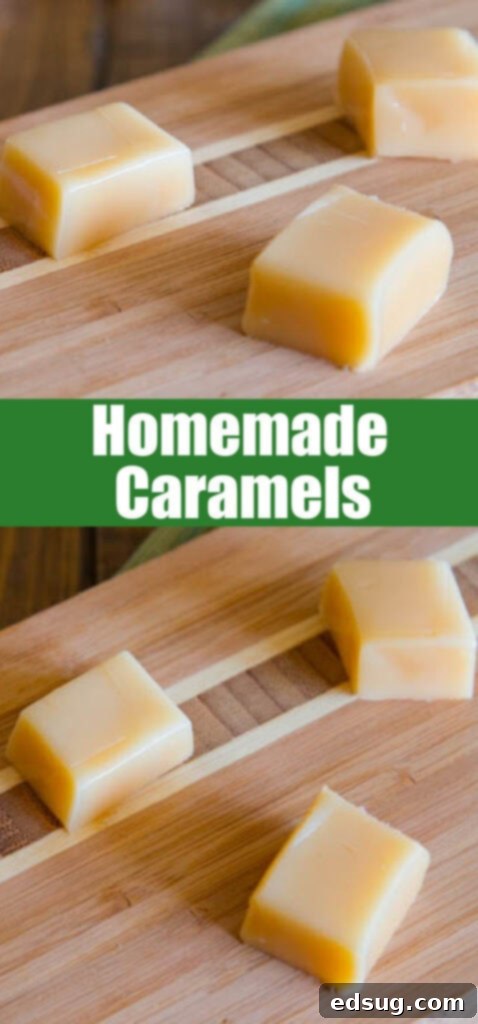
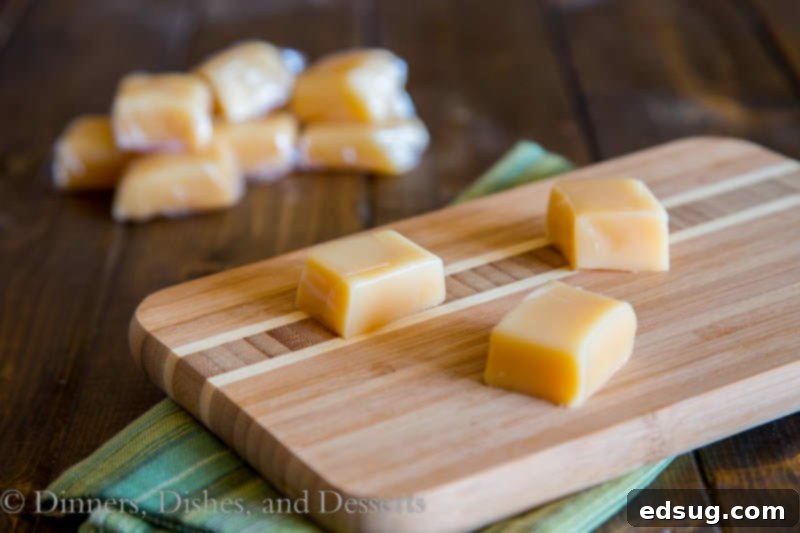
For many, making homemade caramels is a cherished holiday ritual, a time to gather in the kitchen and create something truly special. While store-bought options can satisfy a craving, they simply can’t compare to the depth of flavor and tender texture of caramels made from scratch. These aren’t just any caramels; they’re the kind that melt in your mouth, leaving behind a delightful buttery sweetness that lingers. Whether you enjoy them on their own, or use them in other decadent treats like Caramel Cashew Clusters or Salted Caramel Brownies, the homemade version always shines.
My journey into making homemade caramels began during my college years, largely influenced by my husband. He’s always been the engineer in our family, meticulous and precise, so it wasn’t a surprise when he decided to master the art of candy making. What started as his hobby quickly became our cherished holiday tradition. And you know what? Despite their reputation, homemade caramels are surprisingly simple to make.
The beauty of this classic caramel recipe lies in its simplicity. It requires only a few basic ingredients and comes together on the stovetop. The most critical step, and arguably the hardest, is achieving the exact right temperature. This precision ensures your caramels set up perfectly – chewy but never so hard that they’ll challenge your teeth. With a little patience and the right tools, you’ll be making batches of perfect, buttery caramels every time.
Essential Ingredients for Irresistible Caramels
Creating these delightful treats starts with high-quality ingredients. Each plays a crucial role in achieving that perfect texture and flavor:
- Butter: Essential for that rich, creamy, and distinctively buttery flavor. We recommend unsalted butter so you can control the salt content, though you’re welcome to add a pinch of sea salt at the end for salted caramels!
- Granulated Sugar: The foundation of our caramel, providing sweetness and contributing to the candy’s structure once cooked to the right temperature.
- Heavy Cream: This is what gives our caramels their luxurious smoothness and keeps them wonderfully soft and chewy. Don’t substitute with lighter creams; heavy cream is key!
- Light Corn Syrup: A crucial ingredient that helps prevent the sugar from crystallizing, ensuring a smooth, silky texture. It also adds a subtle sweetness and helps with chewiness.
- Vanilla Extract: Added at the very end, vanilla enhances all the other flavors, giving the caramels a warm and inviting aroma. Pure vanilla extract offers the best taste.
While the ingredients are few, the right equipment makes all the difference. The easiest way to ensure consistently perfect caramels is by using a good quality candy thermometer. This is the one I personally use, and it’s proven to be incredibly accurate, saving many batches from potential disaster!
How to Make Homemade Caramels: A Step-by-Step Guide
Crafting homemade caramels is a rewarding process that, with attention to detail, yields incredible results. Here’s a detailed guide to achieve buttery, chewy perfection. Be sure to scroll to the bottom of the post for the FULL PRINTABLE recipe card with exact measurements.
- Prepare Your Pan: Start by preparing an 8-inch square baking dish. Lightly grease it, then line it with parchment paper, leaving an overhang on the sides. This parchment paper sling will make it incredibly easy to lift the cooled caramels out of the pan.
- Combine and Cook Ingredients: In a large, heavy-bottomed saucepan (this is important to prevent scorching and ensure even heating), combine the granulated sugar, unsalted butter, heavy cream, and light corn syrup. Place the saucepan over medium heat. Stir constantly, using a heat-resistant spatula, until the mixture begins to boil and reaches 245º F (118º C) on your candy thermometer. This process typically takes 15-20 minutes of diligent, constant stirring over medium-high heat. Resist the temptation to turn up the heat to speed things up; higher heat can cause the sugar to crystallize or burn, ruining your caramels. If you don’t have a thermometer, you can use the cold water test: drop a small amount of the caramel mixture into a cup of very cold water. Once it’s cool enough to handle, it should form a firm but pliable ball that holds its shape when pressed lightly.
- Remove from Heat and Flavor: As soon as the caramel reaches the target temperature (245º F or passes the cold water test), immediately remove the pan from the heat. Promptly stir in the vanilla extract. Be careful as the vanilla hits the hot caramel, it will steam rapidly.
- Pour and Cool: Carefully pour the hot caramel mixture into your prepared baking dish. Do not scrape the bottom of the pan, as this can introduce crystallized sugar into your smooth caramel. Allow the caramel to cool completely at room temperature, undisturbed, for several hours or overnight. This cooling process is crucial for the caramels to set properly.
- Cut and Wrap: Once completely cooled and firm, use the parchment paper overhang to lift the entire slab of caramel out of the pan. Place it on a cutting board and cut it into 1-inch squares or desired shapes using a sharp, greased knife or kitchen shears. Individually wrap each caramel in plastic wrap, foil, or wax paper to prevent sticking and maintain freshness.
Mastering Homemade Caramels: Essential Recipe Tips for Success
- Patience is Key: Caramel making is a slow and steady process. Do not rush it. Heating the mixture over medium heat and stirring constantly is crucial. It will take 15-20 minutes once it starts boiling to reach the target temperature of 245º F. Rushing the process by increasing the heat can lead to burnt sugar or an unevenly cooked caramel.
- Invest in a Quality Candy Thermometer: A candy thermometer is your best friend for caramel making. It provides the most accurate way to know when your caramels are perfectly done. While the cold water test is an option, a thermometer offers consistent results, reducing guesswork significantly.
- The Cold Water Test (No Thermometer? No Problem!): If you don’t have a candy thermometer, keep a cup of super cold water (with ice if possible) next to your stove. When you think the caramel is close, drop a small amount into the water. Let it cool for a few seconds, then remove it and try to shape it into a ball. For perfect caramels, it should form a firm ball that holds its shape when gently pressed but is still pliable and chewy. Unlike fudge, which sets when it just holds its shape, caramels need to cook a little further to achieve that distinct chew.
- Calibrate Your Thermometer: Even the best candy thermometers can be slightly off. Calibrating it ensures accuracy, preventing over or undercooked caramels. This simple step can save an entire batch!
- Avoid Scraping the Pan: When pouring the caramel into your prepared dish, avoid scraping the sides or bottom of the saucepan. Any crystallized sugar particles from the edges could fall into your smooth caramel and cause the entire batch to become grainy.
- Handle with Care: Boiling sugar is extremely hot and can cause severe burns. Always exercise caution, use long-handled utensils, and keep children and pets away from the stovetop while cooking.
How to Calibrate Your Candy Thermometer for Perfect Results
Calibrating your candy thermometer is a quick and easy test that ensures accuracy for all your candy-making endeavors. This simple step can prevent many common caramel mishaps:
Place your candy thermometer in a large pot of water. Bring the water to a rolling boil over high heat. Water boils at 212º F (100º C) at sea level. Observe what temperature your thermometer reads once the water is at a full boil. If it reads 215º F, your thermometer is off by +3º F. This means you would need to cook your caramel to 242º F (245º – 3º) instead of 245º F. If it boils at 205º F, your thermometer is off by -7º F, so you would cook your caramel to 238º F (245º – 7º). Adjust your target temperature based on this calibration. This small adjustment makes a huge difference in the final texture of your caramels.
Frequently Asked Questions About Homemade Caramels
Hard caramels are a common issue and usually indicate that the caramel was overcooked, meaning it reached too high a temperature. This can also happen if the pan gets too hot and cooks the sugar too quickly. To prevent this, you need to keep a very close eye on your candy thermometer and remove the pan from the heat immediately when it reaches the target temperature of 245º F (or your calibrated temperature). If using the cold water test, ensure the ball formed is firm but still pliable, not brittle.
You can certainly try to rescue overcooked, hard caramels! The best approach is to return the hardened caramels to a clean saucepan with a few tablespoons of water. Gently melt them down over low heat, stirring occasionally until smooth. Once melted, carefully re-cook the mixture to 244º F (just shy of the original target, as some water has been added). Depending on how severely overcooked the original batch was, this may or may not fully restore their ideal texture, but it’s definitely worth attempting before discarding them.
If your caramels are too soft and won’t set, it means they were undercooked and did not reach a high enough temperature. The sugar molecules didn’t cook long enough to create the firm structure needed. Similar to fixing hard caramels, you can try to rescue soft caramels. Return them to a clean saucepan with about 2 tablespoons of water. Re-melt the mixture over low heat, then slowly bring it back up to 244º F (or your calibrated temperature) on your candy thermometer, stirring constantly. While this doesn’t always guarantee a perfect fix, it often helps them set correctly.
Grainy caramels are typically caused by sugar crystallization. This can happen if you don’t use corn syrup, if the mixture is stirred too vigorously during the wrong stage of cooking (especially before boiling), or if sugar crystals clinging to the sides of the pan fall back into the mixture. To prevent this, ensure all sugar crystals are dissolved before the mixture comes to a boil, use a wet pastry brush to wash down any sugar crystals from the sides of the pan during cooking, and avoid scraping the pan when pouring.

Storage Tips for Freshness and Flavor
Proper storage is essential to keep your homemade caramels soft, chewy, and delicious for weeks. After your caramels have cooled completely and been cut into individual squares or rectangles, you’ll want to wrap each piece separately. Use plastic wrap, foil, or wax paper to ensure they don’t stick together and to create an airtight seal that keeps moisture out and freshness in. Stored at room temperature in an airtight container, your homemade caramels should remain wonderfully soft and enjoyable for 2-3 weeks. For longer storage, you can also freeze them for up to 3 months; just be sure to thaw them at room temperature before serving.
More Delicious Holiday Dessert Recipes to Try
If you’ve enjoyed making these classic homemade caramels, you might love exploring other festive treats. Here are some of our favorite dessert recipes perfect for sharing:
- Reese’s Fudge
- Peanut Butter Balls
- Classic Chocolate Fudge
- White Chocolate Peppermint Cookies
- Cream Cheese Spritz Cookies
- Buckeye Cookies (Chocolate Peanut Butter Truffle Cookies)
- Chocolate Covered Oreos
- Gingerbread Biscoff Truffles

Homemade Caramels
Erin Sellin
Classic homemade caramels that are chewy, buttery, and absolutely delicious!
5
35
40
64
Rate Recipe
Print Recipe
Ingredients
- 2 cups granulated sugar
- 1/2 cup unsalted butter
- 2 cups heavy cream
- 3/4 cup light corn syrup
- 1/2 teaspoon vanilla extract
Instructions
-
Grease or line an 8 inch baking dish with parchment paper.
-
Combine all ingredients in a large saucepan over medium heat. Stir constantly until mixture reaches 245º F on a candy thermometer. If you don’t have a thermometer; test in a cup of cold water. Drop a small amount into water, and shape into a ball. Once it holds its shape until pressed, it is done.
-
Remove the pan from the heat immediately and stir in the vanilla extract.
-
Pour into prepared baking dish, and allow to cool completely.
-
Cut into 1 inch squares, and wrap individually in plastic wrap, foil, or wax paper.
Notes
Recipe adapted from Betty Crocker The New Cookbook
Nutrition
Calories: 74kcal |
Carbohydrates: 10g |
Fat: 4g |
Saturated Fat: 3g |
Polyunsaturated Fat: 1g |
Cholesterol: 12mg |
Sodium: 16mg |
Sugar: 10g
Nutrition information is automatically calculated and should be used as an approximation.
Additional Info
Erin Sellin
5
35
40
Dessert Recipes
American
64
74
Like this recipe? Leave a comment below!
I created a fun group on Facebook, and I would love for you to join us! It’s a place where you can share YOUR favorite recipes, ask questions, and see what’s new at Dinners, Dishes and Desserts (so that you never miss a new recipe)!
Be sure to follow me on Instagram and tag #dinnersdishes so I can see all the wonderful DINNERS, DISHES, AND DESSERTS recipes YOU make!
Be sure to follow me on my social media, so you never miss a post!
Facebook | Twitter | Pinterest | Instagram
