The Ultimate Guide to Homemade Peanut Butter Chocolate Balls: Classic Buckeye Candy Recipe
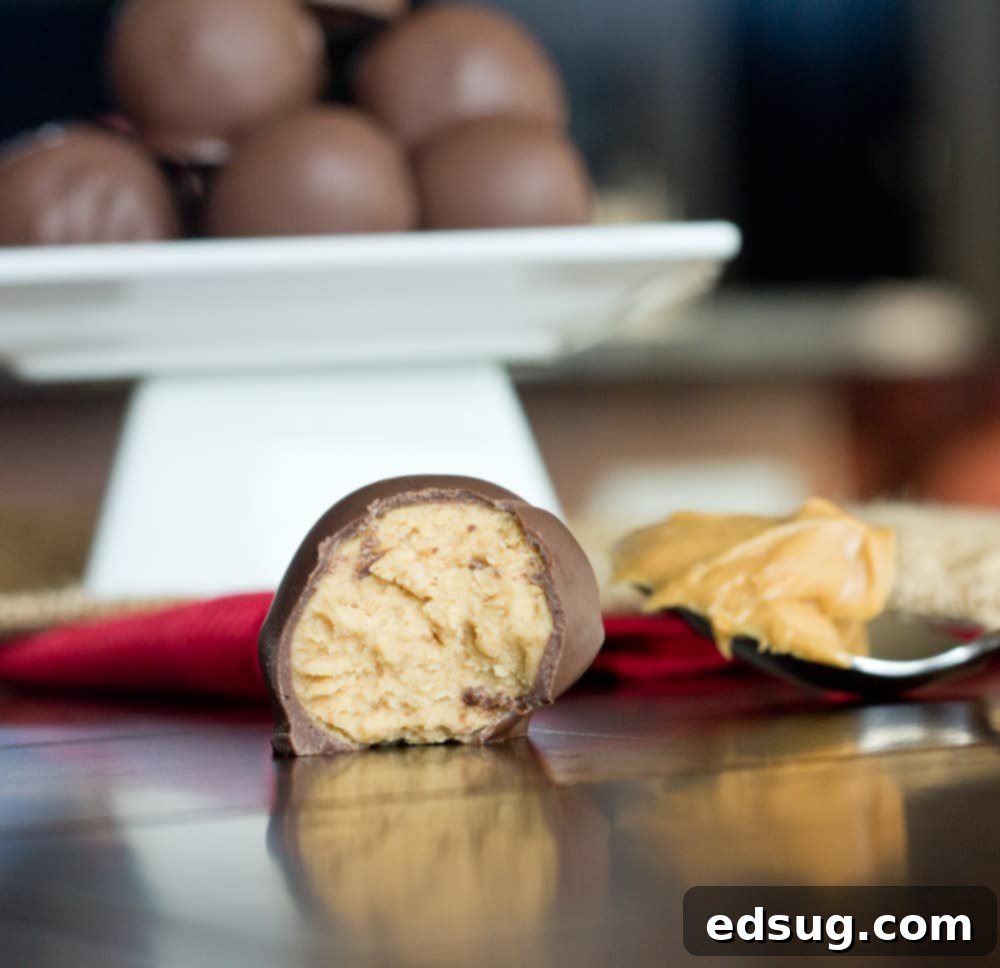
Peanut Butter Chocolate Balls – often known as Buckeye candy – are delightful morsels of creamy peanut butter generously coated in rich chocolate. A quintessential treat for the holiday season and beyond!
If you’re anything like me, the combination of chocolate and peanut butter is an absolute dream come true. So, it should come as no surprise that this recipe holds a very special place in my heart, and certainly in my kitchen. These decadent peanut butter chocolate balls have become a beloved staple in my home, especially when the holidays roll around. While Peanut Blossoms are a timeless holiday cookie, I firmly believe these simple, melt-in-your-mouth confections deserve an equally prominent spot on your “must-make” list.
And if you truly can’t get enough of that glorious peanut butter flavor, then you absolutely must try my Reese’s Fudge. I can confidently say it’s one of the most frequently requested recipes whenever I share it with friends and family. It’s a game-changer!
Buckeye Candy or Peanut Butter Balls? Understanding the Name
The name you use for these delectable treats often depends on your geographic location. Many parts of the country have affectionately adopted the term “Buckeye Candy,” a nod to the state tree of Ohio, the Ohio Buckeye. These nuts, typically dark brown with a light tan spot, resemble the partially chocolate-dipped version of this candy. However, in my upbringing, we simply called them “peanut butter balls.” Regardless of the name, rest assured, you’re making pretty much the exact same heavenly confection!
My personal preference is to fully submerge them in chocolate, creating a completely coated spherical delight, rather than leaving a portion of the peanut butter exposed to mimic the look of a true buckeye nut. This ensures every bite is a perfect balance of rich chocolate and creamy peanut butter.
Simple Ingredients for Irresistible Flavor
One of the best things about this recipe is its simplicity. You only need a handful of readily available ingredients to create these incredibly satisfying treats. No fancy equipment or exotic components required!
What You’ll Need:
- Creamy Peanut Butter: The star of the show, providing that signature smooth, nutty base.
- Butter: Adds richness and helps bind the peanut butter mixture together for a perfect texture.
- Vanilla Extract: A touch of vanilla enhances the overall flavor profile, complementing both the peanut butter and chocolate.
- Powdered Sugar: Essential for achieving a smooth, non-gritty, and perfectly sweet peanut butter center.
- Melting Chocolate: Crucial for the flawless, shiny outer coating that sets beautifully.
That’s right, just five ingredients are all it takes to whip up a batch of these glorious peanut butter chocolate balls! While some variations might call for additions like rice krispie cereal to introduce a textural crunch, I am a firm purist. I prefer to keep the center super creamy and smooth, allowing the rich peanut butter flavor to truly shine through without any distractions.
Crafting Your Own Buckeye Candy: A Step-by-Step Guide
Making these peanut butter chocolate balls is surprisingly easy, even for novice bakers. Follow these simple steps for a perfect batch every time.
How To Make Peanut Butter Balls:
- Prepare the Peanut Butter Mixture: In a large mixing bowl, combine the creamy peanut butter, softened butter, vanilla extract, and powdered sugar. Using a stand mixer with a paddle attachment is the easiest way to achieve a smooth consistency, but a sturdy spatula and a large bowl will also do the trick. Mix until all ingredients are thoroughly combined and the mixture is smooth and pliable, resembling a thick dough.
- Shape and Chill the Balls: Once your peanut butter mixture is ready, begin rolling it into uniform 1-inch sized balls. For consistent sizing, a small cookie scoop works wonderfully. Place the rolled balls onto a baking sheet lined with parchment paper. Refrigerate them for at least 30 minutes. This crucial step allows the mixture to firm up, preventing them from falling apart or becoming too messy when you dip them into the melted chocolate.
- Dip in Melted Chocolate: Once chilled, gently dip each peanut butter ball into your melted chocolate. You can use two forks to carefully roll them in the chocolate until fully coated, or if you prefer the classic “Buckeye” look, insert a toothpick into the top and dip only partially. Allow any excess chocolate to drip off before placing the chocolate-covered balls back onto the parchment-lined baking sheet.
- Allow to Set and Serve: Let the chocolate-coated balls sit at room temperature or in the refrigerator until the chocolate has completely hardened. This usually takes about 15-30 minutes in the fridge. Once set, they are ready to be enjoyed!
Pro Tips for Perfect Buckeye Candy Every Time
Achieving that perfect, professional-looking Buckeye candy is easier than you think with a few insider tips:
- Choose the Right Peanut Butter: For a truly smooth and creamy center, it’s essential to use creamy peanut butter, not crunchy. This is also the time to embrace the classic, processed brands like Skippy or Jif. All-natural peanut butters, which often separate and have a different consistency, tend not to work as well for this recipe, resulting in a drier or more crumbly mixture. The emulsifiers in conventional peanut butter contribute to the desired smooth texture.
- The Secret to Smooth Chocolate Coating: Avoid using regular chocolate chips for dipping. Chocolate chips contain stabilizers that help them maintain their shape when baked, making it much harder to achieve a thin, smooth, and even coating when melted. Instead, opt for chocolate almond bark, candy melts, or chocolate melting disks. These are specifically designed to melt smoothly and set firmly, giving your Buckeyes a beautiful, professional finish.
- Achieving the Classic Buckeye Look: If you want your candy to perfectly resemble a true Buckeye nut, insert a toothpick into the top of each peanut butter ball. Then, dip only about two-thirds of the ball into the melted chocolate, leaving the top one-third of the peanut butter mixture exposed. Personally, I prefer my peanut butter balls completely enrobed in chocolate, so I use two forks to ensure full coverage.
- Melting Chocolate Mastery: When melting your chocolate, do so gently. A microwave can work in 30-second intervals, stirring thoroughly after each, or use a double boiler on the stovetop. Overheating chocolate can cause it to seize and become thick or grainy.
- Flavor Variations: Feel free to experiment! A tiny pinch of sea salt sprinkled on top of the wet chocolate can really enhance the flavors. You could also try adding a different extract to the peanut butter mixture, like a hint of almond or peppermint, for a unique twist.
Storage & Shelf Life
One of the many great things about these peanut butter chocolate balls is how well they store, making them perfect for preparing ahead of time, especially during busy holiday seasons.
Refrigeration: Store your peanut butter balls in an airtight container in the refrigerator. They will remain fresh and delicious for about a month. For optimal enjoyment, I like to take them out of the fridge a few minutes before serving to allow them to come closer to room temperature, which really brings out their creamy texture and full flavor. However, some people enjoy the firm, chilled bite straight out of the refrigerator!
Freezing: These candies freeze exceptionally well! Simply place them in a single layer on a baking sheet to freeze solid, then transfer them to an airtight freezer-safe container or bag. They can be stored in the freezer for 3-4 months. When you’re ready to enjoy them, simply take them out and thaw them in the refrigerator overnight before serving.

More Must-Make Christmas Cookie Recipes
If you’re looking to expand your holiday baking repertoire, here are some other fantastic cookie recipes you won’t want to miss:
- Cornflake Cookies
- Andes Mint Cake Mix Cookies
- Chocolate Covered Pretzels
- Avalanche Cookies
- Christmas Magic Cookie Bars
- Frosted Sugar Cookies
- Reese’s Peanut Butter Cookies
- Grinch Sugar Cookie Bites

Peanut Butter Chocolate Balls
Erin Sellin
30
30
24
Rate Recipe
Print Recipe
Video
Ingredients
- 1 1/2 cups creamy peanut butter
- 1/2 cup butter, softened
- 1 Tablespoon vanilla extract
- 1 pound powdered sugar
- 1 pound chocolate almond bark, melted
Instructions
-
Combine the peanut butter, softened butter, vanilla extract, and powdered sugar in a large bowl. Mix thoroughly until everything is well combined and forms a smooth, firm dough.
-
Roll the mixture into 1-inch sized balls. Place them on a parchment-lined baking sheet and refrigerate for 30 minutes to harden. This step is crucial for easy dipping.
-
Once chilled, dip each peanut butter ball into the melted chocolate. Use two forks for full coverage, or a toothpick for the classic “Buckeye” partially coated look. Let excess chocolate drip off.
-
Place the chocolate-covered balls back on the parchment paper. Allow the chocolate to harden completely before serving. Store finished balls in an airtight container in the fridge or freezer.
Nutrition
Calories: 315kcal |
Carbohydrates: 28g |
Protein: 7g |
Fat: 21g |
Saturated Fat: 7g |
Polyunsaturated Fat: 12g |
Cholesterol: 10mg |
Sodium: 110mg |
Fiber: 4g |
Sugar: 20g
Nutrition information is automatically calculated, so should only be used as an approximation.
Additional Info
Erin Sellin
30
30
Dessert Recipes
American
24
315
peanut butter balls
Like this recipe? Leave a comment below!
I’ve created a fun and engaging group on Facebook, and I would absolutely love for you to join us! It’s a fantastic community where you can share YOUR favorite recipes, ask questions, get inspiration, and stay up-to-date with all the new deliciousness happening at Dinners, Dishes and Desserts. You’ll never miss a new recipe, tip, or trick!
Be sure to follow me on Instagram and tag #dinnersdishes so I can see all the wonderful DINNERS, DISHES, AND DESSERTS recipes YOU make! I love seeing your creations!
Don’t forget to follow me on my other social media channels, so you never miss a post and stay connected with all the latest recipes and culinary adventures!
Facebook |
Twitter |
Pinterest |
Instagram
