Hearty & Flavorful Beef Chili: The Ultimate No-Bean Comfort Food Recipe
Indulge in a truly thick, chunky, and incredibly flavorful beef chili – a hearty, comforting dish absolutely perfect for those chilly winter nights. If you’re looking for a chili recipe that’s all about rich beef flavor and absolutely no beans, you’ve come to the right place!
When you picture a classic bowl of chili, does it feature tender beans, or is it a pure celebration of robust beef? For many, including myself, the quintessential chili is strictly a beef affair, where the meat takes center stage. While my husband and son enjoy variations like our Crock Pot Chili, which includes beans, this recipe caters to those who prefer their chili thick, meaty, and bean-free. It’s a debate that sparks passionate opinions across the country, but one thing is certain: a well-made beef chili is undeniably delicious.

Chili is a dish with incredible regional diversity throughout the United States. From the vinegar-based versions of the Carolinas to the unique spice blends found in the Southwest, there’s truly a chili style for every palate. Take, for instance, Texas Style Chili, which traditionally uses chunks of beef and very minimal tomato, focusing instead on a deep, savory spice base. People in the Mid-West might argue that a chili without a substantial tomato base isn’t “real” chili, highlighting just how deeply personal and regional this dish can be. While opinions can be strong, I believe the beauty of chili lies in its versatility and the endless ways it can be enjoyed. And if you’re firmly in the “no beans in chili” camp, this recipe is crafted specifically with you in mind!
This particular beef chili recipe emphasizes rich, savory flavors and a satisfyingly thick texture. It’s designed to be a comforting meal that warms you from the inside out, making it perfect for a cozy evening at home or a gathering with friends. The absence of beans allows the quality of the beef and the aromatic spices to truly shine, creating a depth of flavor that’s both complex and incredibly satisfying. Let’s dive into what makes this no-bean chili a standout dish!
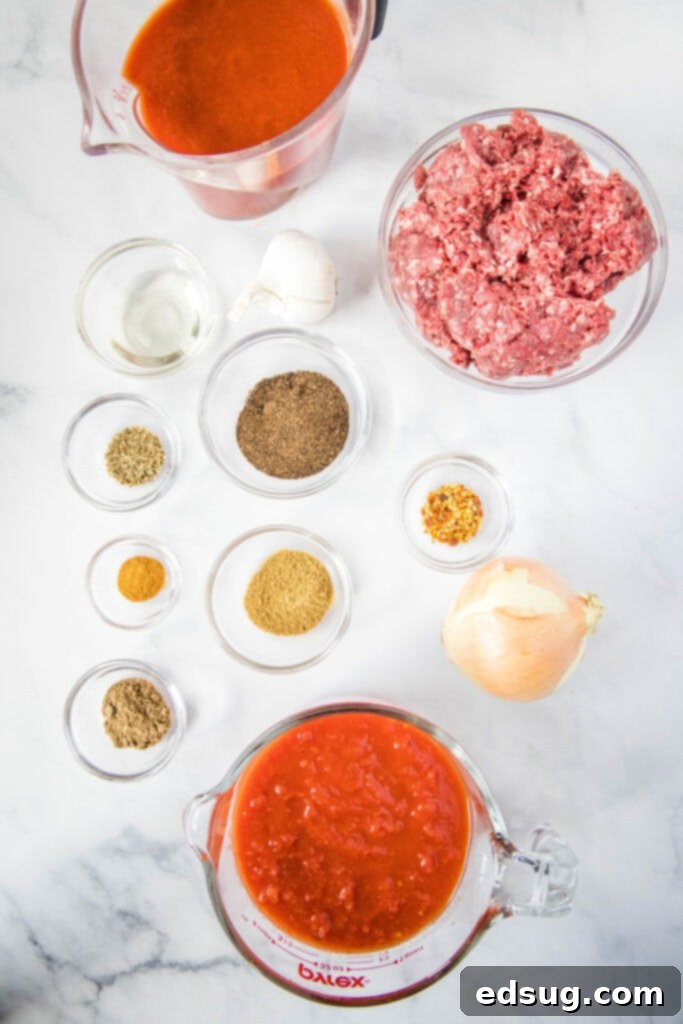
Beef Chili Ingredients: Crafting the Perfect Blend
Creating an incredibly flavorful beef chili starts with a carefully selected array of ingredients. Each component plays a crucial role in building the rich, savory profile and desirable texture of this no-bean masterpiece. Here’s a closer look at what you’ll need:
- Onion: Forms the aromatic foundation of our chili. Finely chopped onion caramelizes beautifully, adding sweetness and depth.
- Ground Beef: The star of the show. We’ll discuss the best choices for optimal flavor and texture below.
- Oil: Essential for browning the beef and sautéing the aromatics. Vegetable oil is a neutral choice.
- Garlic: Adds a pungent, savory kick that is quintessential to a good chili. Minced fresh garlic is always best.
- Chili Powder: This is the primary spice, bringing warm, earthy, and slightly smoky notes. A good quality chili powder is key.
- Cumin: Provides a distinct earthy, warm, and slightly pungent flavor that is characteristic of many Mexican and Tex-Mex dishes.
- Ground Coriander: Adds a subtle citrusy, floral, and slightly sweet undertone, complementing the other spices.
- Red Chili Flakes: For a gentle hint of heat and visual appeal. You can adjust the quantity based on your preference.
- Dried Oregano: Offers a robust, slightly bitter, and peppery flavor that enhances the overall savory profile.
- Cayenne Pepper: This is where you can truly dial up the heat. A little goes a long way, so adjust to your liking for an extra kick.
- Tomato Sauce: Contributes a smooth, rich tomato base that helps thicken the chili and melds the flavors together.
- Crushed Tomatoes: Adds texture and a more intense tomato flavor compared to just sauce, ensuring a hearty consistency.
- Salt & Pepper: Essential for seasoning and balancing all the flavors. Always taste and adjust as you go!
This recipe is designed to be a rich, flavorful, rather than overtly spicy, chili. However, if you’re a fan of serious heat, feel free to amp up the spice level! You can easily add more cayenne pepper, include other fresh peppers like diced jalapeños or serranos when sautéing the onions, or even a dash of hot sauce at the end for an extra fiery kick. Experiment to find your perfect balance of flavor and spice!
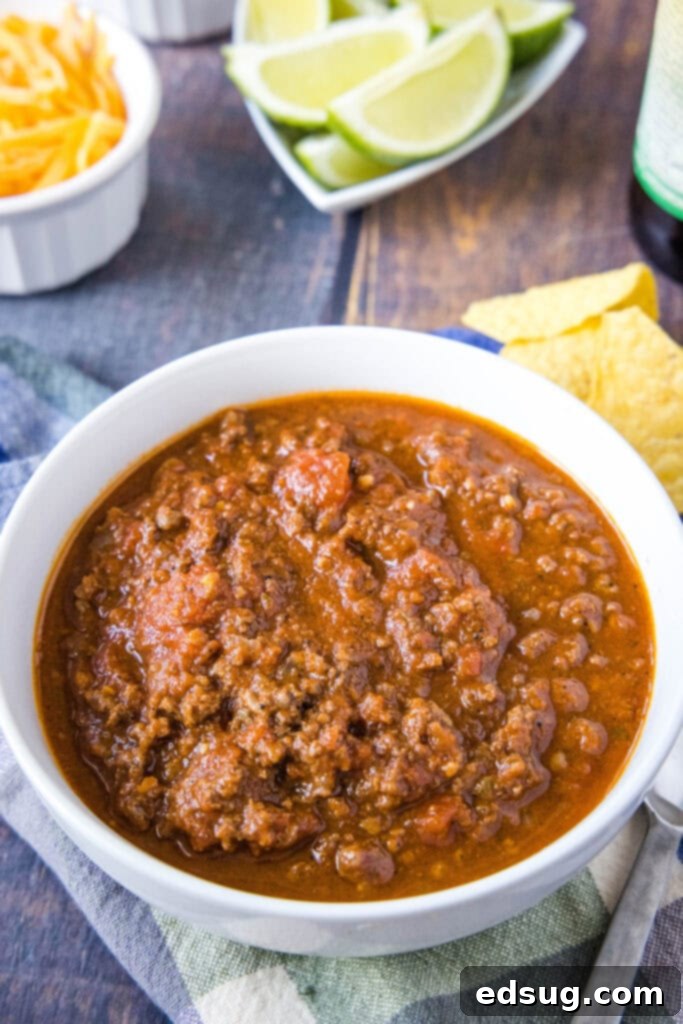
Step-by-Step: How to Make This Hearty Beef Chili
Making this thick and chunky beef chili is a straightforward process that rewards patience with incredible flavor. Follow these steps for a comforting meal:
- Brown the Beef and Onions: In a large, heavy-bottomed pot (like a Dutch oven), heat the vegetable oil over medium-high heat. Add your chosen ground beef and the finely chopped onions. Use a spoon or spatula to break up the ground beef as it cooks. Sauté for 5-7 minutes, stirring occasionally, until the beef is fully browned and the onions have softened and become translucent. This initial browning is crucial for developing deep, rich flavor.
- Infuse with Garlic: Stir in the minced garlic and cook for just 1 minute more. You’ll notice a wonderful aroma filling your kitchen – that’s how you know the garlic is perfectly fragrant. At this point, carefully drain any excess grease from the pot. This prevents the chili from becoming too oily and ensures a cleaner, richer flavor.
- Bloom the Spices: This is a critical step for maximizing flavor. Stir in the chili powder, cumin, coriander, red pepper flakes, dried oregano, and cayenne pepper. Cook, stirring frequently, for about 5 minutes. Heating the spices directly in the pot with the beef and onions helps them “bloom,” releasing their essential oils and intensifying their flavors before any liquid is added. This creates a much more aromatic and flavorful chili.
- Simmer to Perfection: Pour in the tomato sauce and crushed tomatoes. Stir everything together well, ensuring all the ingredients are combined. Bring the mixture to a boil, then immediately reduce the heat to low. Cover the pot and let it simmer gently for 1 hour, stirring occasionally to prevent sticking and ensure even cooking. This initial simmer allows the flavors to meld beautifully.
- Thicken and Finish: After the first hour, remove the lid and continue to cook for another 1 hour on low heat, stirring occasionally. This uncovered simmering allows the chili to thicken to that perfect, rich, and chunky consistency we’re aiming for. The longer it simmers, the more developed and delicious the flavors will become!
- Adjust and Serve: If the chili starts to stick to the bottom of the pan at any point, add about 1/2 cup of water or beef broth to loosen it up. Taste the chili and season generously with salt and pepper to your preference. Serve hot with your favorite garnishes.

Choosing the Best Ground Beef for Your Chili
The type of ground beef you choose can significantly impact the final flavor and texture of your chili. For this no-bean beef chili, where the beef is truly the star, making the right selection is important. I generally recommend using lean ground beef, such as 90/10 (90% lean, 10% fat). This ratio provides excellent beefy flavor without making the chili overly greasy, minimizing the need for excessive draining.
However, if you don’t mind a bit more fat and are diligent about draining the grease, an 85/15 ground beef can offer an even more intensely beefy flavor, which works wonderfully in a no-bean chili. The slightly higher fat content can contribute to a richer mouthfeel. Ultimately, the best ground beef for chili is often what you have on hand or what is readily available to you, as long as you’re prepared to manage the fat content appropriately.
Freezing and Storing Beef Chili: Enjoy Later!
This beef chili is fantastic for meal prepping or simply enjoying delicious leftovers. It freezes exceptionally well, making it a convenient option for quick weeknight dinners. Once cooked, allow the chili to cool completely to room temperature. Transfer it to airtight freezer-safe containers or heavy-duty freezer bags. For bags, lay them flat to freeze for easier storage. Properly stored, your chili will last for up to 4 months in the freezer. When you’re ready to enjoy it again, simply thaw it overnight in the refrigerator and then reheat gently on the stovetop or in the microwave until hot and bubbling.
If you plan to eat your leftovers within a few days, you can store the cooled chili in an airtight container in the refrigerator for up to 4 days. To reheat, pour it back into a saucepan and warm over medium heat, stirring occasionally, until it reaches a gentle simmer. Serve with your favorite toppings for another satisfying meal!

Perfect Pairings: What to Serve With Beef Chili
A bowl of hearty beef chili is a meal in itself, but a complementary side dish can elevate the experience to new heights. For me, cornbread is the ultimate go-to pairing – its slightly sweet, crumbly texture is a match made in heaven for rich chili. However, don’t feel limited! Here are some fantastic options:
- Southern Style Cornbread: A classic, savory choice.
- Corn Muffins: Individual portions, perfect for dipping.
- Sweet Cornbread: For those who love a touch of sweetness with their savory.
- Crusty Bread or Dinner Rolls: Great for soaking up every last drop of the delicious chili.
- Rice: A simple bed of white or brown rice can make the chili even more substantial.
- Baked Potatoes or Sweet Potatoes: Spoon the chili over a fluffy baked potato for a hearty, comforting meal.
- Green Salad: A light, crisp salad can offer a refreshing contrast to the richness of the chili.
Elevate Your Dish: The Best Chili Toppings
Toppings are arguably one of the most exciting parts of enjoying chili! They allow for endless customization, adding layers of flavor, texture, and sometimes even a welcome temperature contrast. Don’t be shy – get creative with your chili bar!
- Shredded Cheese: A classic for a reason. Cheddar, Monterey Jack, or a Mexican blend melt beautifully and add creaminess.
- Diced Onions: Whether red or white, fresh raw onions provide a sharp, pungent crunch that cuts through the richness.
- Sour Cream or Greek Yogurt: A dollop adds a cool, tangy creaminess that’s incredibly soothing, especially if your chili has a bit of heat.
- Avocado or Guacamole: Creamy, rich, and refreshing, avocado adds a lovely healthy fat and mellow flavor.
- Lime Wedges: A squeeze of fresh lime juice can brighten the entire dish, adding a zesty finish.
- Sliced Jalapeños: Fresh or pickled, these offer a vibrant burst of heat and crunch.
- Corn Chips or Tortilla Chips: For that irresistible crunch and salty contrast. Crushed Fritos are also a popular choice!
- Fresh Cilantro: A sprinkle of fresh, chopped cilantro adds a burst of herbaceous freshness.
- Hot Sauce: For those who still crave more heat, a few dashes of your favorite hot sauce can do the trick.

More Comforting Dinner Recipes You’ll Love
If you’re a fan of this hearty beef chili, you’ll surely appreciate these other comforting and flavorful dinner recipes from our collection:
- Chicken Enchilada Chili
- Chipotle Chicken Bowls
- Smothered Burrito
- Chile Relleno Casserole
- Stuffed Tomatoes
- Homemade Pasta
- Oven Baked Ribs

Beef Chili
Pin Recipe
Rate Recipe
Print Recipe
Equipment
-
Large Heavy Duty Pot (e.g., Dutch Oven)
-
Measuring Spoons & Cups
-
Sturdy Spoon or Spatula
Ingredients
- 2 Tablespoons vegetable oil
- 1 large onion, finely chopped
- 6 cloves garlic, minced
- 1/4 cup chili powder
- 1 Tablespoon cumin
- 2 teaspoons ground coriander
- 1 teaspoon crushed red pepper
- 1 teaspoon dried oregano
- 1/2 teaspoon cayenne pepper
- 2 pounds lean ground beef
- 1 28 oz can tomato sauce
- 1 28 oz can crushed tomatoes
- Salt to taste
Garnishes
- Avocado
- Cheddar cheese
- Red onion
- Lime wedges
Instructions
-
In a large heavy duty pot heat the oil over medium-high heat. Add ground beef ad onions, break up the ground beef and cook for 5-7 minutes, until the beef is cooked and the onions start to soften.
-
Stir in the garlic and cook for 1 minute, until you can start to smell it. Drain away any grease.
-
Sir in the chili powder, cumin, coriander, pepper flakes, oregano, and cayenne. Cook, stirring occasionally for 5 minutes, so the spices can start to bloom and release their flavor.
-
Stir in tomato sauce, and crushed tomatoes. Bring to boil. Reduce heat to low, and simmer covered for 1 hour, stirring occasionally. Remove the lid, and cook for another 1 hour, stirring occasionally.
-
If the chili sticks to the bottom of the pan, add 1/2 cup of water, and continue to simmer. Add salt to taste. Serve with desired garnishes.
Notes
If you want to add beans use 2 (15 oz) can kidney beans and mix in when you add the tomato sauce
Nutrition
Nutrition information is automatically calculated, so should only be used as an approximation.
Additional Info
Like this recipe? Leave a comment below!
Frequently Asked Questions About Beef Chili
We’ve gathered some common questions to help you master your beef chili:
- Can I make this chili in a slow cooker? Yes! After browning the beef and onions and blooming the spices in a pot, transfer everything to a slow cooker. Add the tomato sauce and crushed tomatoes. Cook on low for 6-8 hours or on high for 3-4 hours, stirring occasionally. The longer, slower cooking will yield even more tender beef and melded flavors.
- How can I make this chili spicier? To kick up the heat, increase the amount of cayenne pepper, add a pinch of ghost pepper powder, or include finely diced jalapeños or serrano peppers when you sauté the onions. A dash of your favorite hot sauce at the end also works wonders!
- What if my chili is too thick or too thin? If your chili is too thick, simply stir in 1/4 to 1/2 cup of beef broth or water until it reaches your desired consistency. If it’s too thin, remove the lid and let it simmer for an additional 30-60 minutes, allowing more liquid to evaporate.
- Can I use different types of meat? Absolutely! While this recipe focuses on ground beef, you could substitute it with ground turkey, ground pork, or even a mix of different ground meats for varied flavor profiles. For a truly chunky chili, consider using stew beef cut into small cubes, though this will require a longer cooking time to become tender.
I created a fun group on Facebook, and I would love for you to join us! It’s a place where you can share YOUR favorite recipes, ask questions, and see what’s new at Dinners, Dishes and Desserts (so that you never miss a new recipe)! We’re building a community of food lovers, and your contributions and questions are always welcome!
Be sure to follow me on Instagram and tag #dinnersdishes so I can see all the wonderful DINNERS, DISHES, AND DESSERTS recipes YOU make! I love seeing your culinary creations and connecting with fellow home cooks.
Don’t miss out on any of our latest recipes and cooking tips! Be sure to follow me on my social media channels:
Facebook | Twitter | Pinterest | Instagram
