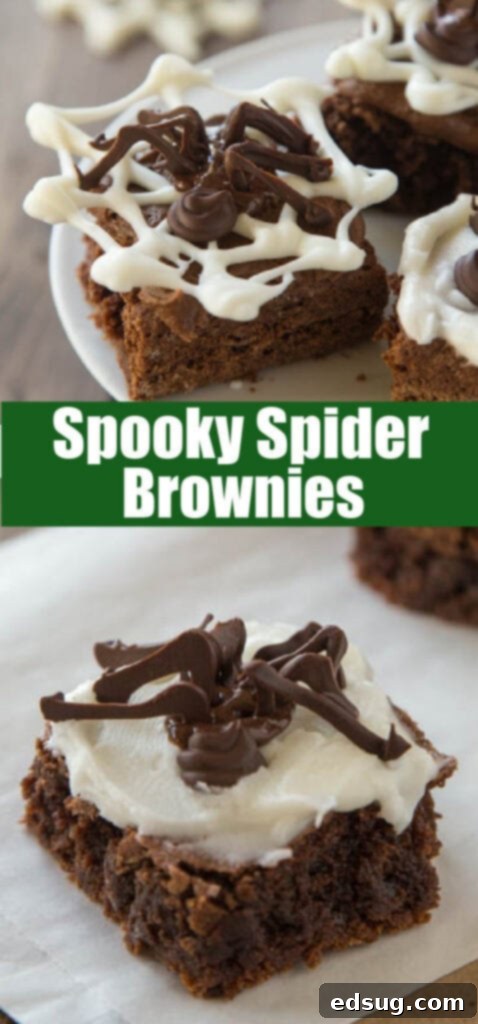
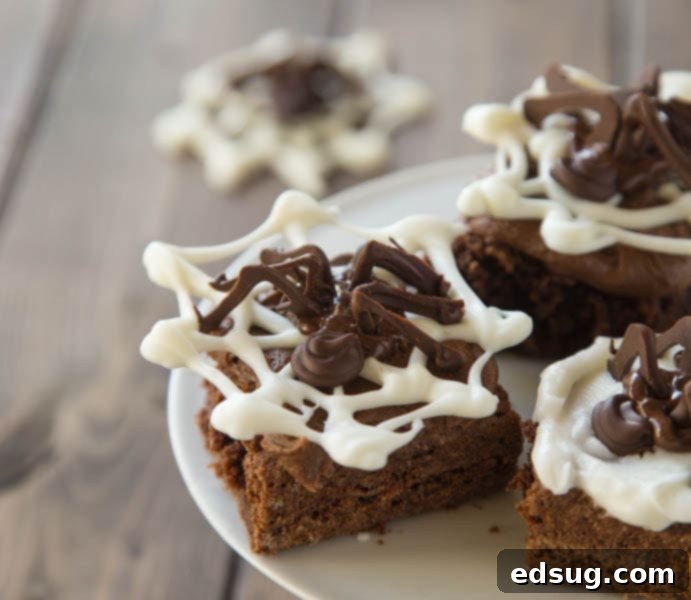
Hauntingly Delicious: Easy Spider Brownies & Spooky Web Decorations for Halloween
Transform your favorite brownies into a ghoulishly delightful Halloween treat! These spooky spider brownies, complete with intricate chocolate webs and creepy-crawly spiders, are surprisingly simple to create and guaranteed to impress.
Halloween is a time for costumes, carved pumpkins, and, of course, deliciously spooky treats! While some Halloween desserts can seem daunting to tackle, these incredibly fun and festive spider brownies are designed to be both impressive and remarkably easy to make. You don’t need to be a professional baker or an expert decorator to whip up a batch of these hauntingly good brownies that will have everyone reaching for more.
The magic behind these creepy-cute creations lies in simple melted chocolate and a basic piping technique. Whether you prefer using a professional piping bag or a convenient zip-top plastic bag with a snipped corner, you’ll find crafting these edible arachnids and their delicate webs to be an enjoyable process. To guide you every step of the way, we’ve included detailed instructions below, along with a link to a helpful video tutorial that visually demonstrates just how straightforward it is to bring these spider brownies to life.
Essential Ingredients for Your Spider Brownies
One of the best aspects of this recipe is its flexibility. You can start with your favorite brownie base, whether it’s a homemade classic or a convenient store-bought option. The key is simply having a delicious canvas ready for your spooky decorations!
- Baked Brownies: An 8-inch pan of your preferred brownies.
- Semi-Sweet Chocolate: For the spider bodies and legs.
- White Chocolate: For creating the intricate spider webs.
When it comes to the brownies, don’t feel limited. I personally love using my go-to Homemade Brownies recipe, a fudgy favorite I’ve been making since childhood. However, if time is of the essence, a box mix or even pre-baked brownies from your local grocery store bakery will work perfectly. The focus here is on the fun decoration, so choose a brownie that you know you and your guests will enjoy.
For the chocolate, semi-sweet chocolate chips are ideal for the dark, spooky spiders. White chocolate, on the other hand, provides the perfect contrast for visible, eerie spider webs. You can use chocolate chips, baking bars, or even candy melts. Just ensure whatever you choose melts smoothly for easy piping.
Step-by-Step Guide: Crafting Your Spooky Spider Brownies
Even if you consider yourself less than artistic, rest assured, these spider brownies are incredibly forgiving and fun to make! I’m certainly not the craftiest person, but these turned out super cute, proving that anyone can master this simple decorating technique. Just follow these steps, and you’ll be amazed at your edible artwork.
- Prepare Your Workspace: Begin by lining two baking sheets with parchment paper. This non-stick surface is crucial for easily removing your delicate chocolate decorations once they’ve set.
- Melt the Semi-Sweet Chocolate: Melt about half to three-quarters of your semi-sweet chocolate. You can do this gently in the microwave in 30-second intervals, stirring between each, or over a double boiler. Once melted and smooth, carefully transfer the chocolate into a sturdy zip-top plastic bag (or a piping bag fitted with a small round tip). Snip a tiny corner off the bag to create a fine opening for piping.
- Pipe the Spider Legs: On one of the parchment-lined baking sheets, pipe “7” shapes. These will form your spider legs. Vary the sizes slightly to create a more natural look for your spiders. Remember, each spider will need eight legs, and it’s always a good idea to pipe a few extra, as some delicate legs might break during handling. Aim to pipe enough for at least 12 spiders, which means about 100-120 legs in total to be safe.
- Pipe the Spider Heads: Next to your legs, pipe small, solid chocolate circles. These will be the spider heads. They should be distinct from the body but proportionate to the legs you’ve piped.
- Prepare for Spider Webs: Now, switch your focus to the white chocolate. Melt it using the same method as the semi-sweet chocolate. On your second parchment-lined baking sheet, use a small glass or a round cookie cutter (roughly the size of your brownie tops) to lightly trace circles onto the parchment paper. These will serve as guides for your spider webs.
- Pipe the Spider Webs: Transfer the melted white chocolate into another zip-top bag (or piping bag) and snip a tiny corner. Following your traced circles, pipe concentric circles of white chocolate. Then, using a toothpick, gently drag lines from the center of each circle outwards to create the classic spider web pattern. Ensure these webs are roughly the same size as the top of your brownies.
- Allow to Set: Let all your chocolate elements (legs, heads, and webs) set up completely. To speed up this process, you can carefully transfer the baking sheets to the refrigerator for about 10-15 minutes. They need to be firm and brittle to the touch before you attempt to move them.
- Assemble Your Spiders: Once the white chocolate webs are firm, carefully peel them off the parchment paper and gently place one on top of each brownie. With the remaining melted semi-sweet chocolate (you might need to re-warm it slightly), pipe a small, solid chocolate circle in the center of each web to form the spider’s body.
- Attach Legs and Heads: While the piped body chocolate is still wet, carefully remove the pre-piped chocolate legs and heads from their parchment paper. Gently press eight legs into the sides of each spider body, four on each side, curving outwards. Then, attach a small head to the top of the body. The warm, melted chocolate of the body will act as an adhesive, securing the legs and head in place as it cools.
- Final Hardening: Allow the assembled spider brownies to sit at room temperature or in the refrigerator for another 10-15 minutes to ensure all the chocolate has completely hardened before serving. This will prevent any pieces from breaking off when handled.
Pro Tips for Flawless Decorations
- Melting Chocolate: Always melt chocolate gently. Overheating can cause it to seize or burn, making it thick and difficult to pipe. If using a microwave, stir frequently. If using a double boiler, ensure the bowl doesn’t touch the simmering water.
- Piping Bag Control: Cut a very tiny hole in your zip-top bag. You can always make it bigger, but you can’t make it smaller! A small hole allows for more control and finer details.
- Work Quickly (but not Rushed): Melted chocolate can start to set, especially the white chocolate. If it thickens, gently re-warm it for a few seconds.
- Extra Pieces are Your Friend: As mentioned, piping extra legs and webs is a smart move. They are delicate, and having spares prevents frustration.
- Chilling is Key: Don’t skip the chilling step! It makes the chocolate decorations firm and easy to handle without smudging or breaking.
Storage and Shelf Life
Once fully assembled and set, these delightful spider brownies will last for 3-4 days when stored in an airtight container at room temperature. For most climates, refrigeration isn’t necessary and can sometimes alter the texture of brownies. However, if you live in a particularly warm and humid environment, or if your chocolate decorations feel soft, it’s perfectly fine to store them in the fridge.
If refrigerating, just make sure they are thoroughly covered in an airtight container to prevent the brownies from drying out and the chocolate from absorbing any unwanted fridge odors. Allow them to come closer to room temperature for about 15-20 minutes before serving for the best taste and texture.
For those who prefer a visual guide or want to refine their piping skills, you can check out this fantastic Video Tutorial. It offers additional tips on how to pipe various chocolate designs, which can be adapted for your spooky spiders!

Discover More Hauntingly Good Halloween Treats
If you’re hosting a Halloween bash or simply looking for more festive recipes to get into the spooky spirit, we have a cauldron full of ideas! From eerie drinks to sweet monster creations, there’s something for every ghoul and goblin to enjoy. Check out these other popular Halloween recipes:
- Halloween Jello Shots: A colorful and spirited treat for adult parties.
- Ghost Cupcakes: Adorably spooky cupcakes topped with friendly white chocolate ghosts.
- Mummy Granola Bars: A healthier, no-bake option that’s perfect for kids’ lunchboxes or after-school snacks.
- Witches Brew: A vibrant, mystical punch that’s a perfect centerpiece for any Halloween table.
- Ghost Pretzels: Simple, sweet, and salty treats that are fun to make with the whole family.
- Monster Juice: A fun, kid-friendly drink that’s both delicious and delightfully creepy.
- Frankenstein Marshmallow Pops: Easy-to-make, charmingly grotesque, and a hit with all ages.
These recipes offer a fantastic way to diversify your Halloween spread and provide a variety of textures and flavors for your guests. Each one is designed with ease and fun in mind, ensuring your Halloween celebrations are filled with delicious memories.

Spooky Spider Brownies
Pin Recipe
Rate Recipe
Print Recipe
Ingredients
- 1 8- inch pan of baked brownies
- 1 cup chocolate chips, melted (semi-sweet)
- 1 cup white chocolate, melted
Instructions
-
Line 2 baking sheets with parchment paper for easy removal of chocolate decorations.
-
Melt semi-sweet chocolate. Fill a zip-top bag with the melted chocolate and cut a tiny corner off. Pipe “7’s” onto one parchment paper-lined sheet for the spider legs. Make them in various sizes and pipe more than needed, as they can break. Each spider requires 8 legs.
-
Pipe small, filled-in circles for the spider heads onto the same parchment paper. Allow both legs and heads to harden completely (you can refrigerate to speed this up).
-
Using a small glass or cookie cutter, lightly trace circles onto the second parchment paper sheet. These will be your guides for the spider webs.
-
Melt white chocolate. Add it to another zip-top bag and cut a tiny corner off. Pipe concentric circles within your traced guides, then drag a toothpick from the center outwards to create the web effect. Let these harden completely.
-
Once all chocolate elements are hardened, carefully peel the spider webs from the paper and place one on each brownie. Pipe a dot of melted semi-sweet chocolate onto the center of each web to form the spider’s body.
-
Gently remove the hardened legs and heads from the parchment paper. While the body chocolate is still wet, carefully arrange 8 legs around each body and attach a head. Repeat for all brownies.
-
Allow the assembled spider brownies to harden completely before serving, ensuring all parts are firmly attached.
-
For a detailed video tutorial on piping spider decorations, click here.
Nutrition
Nutrition information is automatically calculated, so should only be used as an approximation.
Additional Info
Love this eerie treat? Leave a comment and a rating below!Your feedback helps others discover amazing recipes.
Join Our Spooky Culinary Community! I’ve created a fun and friendly group on Facebook, and I’d absolutely love for you to become a part of it! It’s the perfect place to share your favorite recipes, ask any cooking or baking questions you might have, and stay updated on all the new and exciting recipes from Dinners, Dishes and Desserts. Never miss a delicious post again!
Be sure to follow me on Instagram and tag #dinnersdishes so I can see all the wonderful DINNERS, DISHES, AND DESSERTS creations YOU make! I love seeing your culinary masterpieces come to life.
Don’t forget to follow me on all my social media channels, so you never miss a post or a new recipe announcement!
Facebook | Twitter | Pinterest | Instagram
