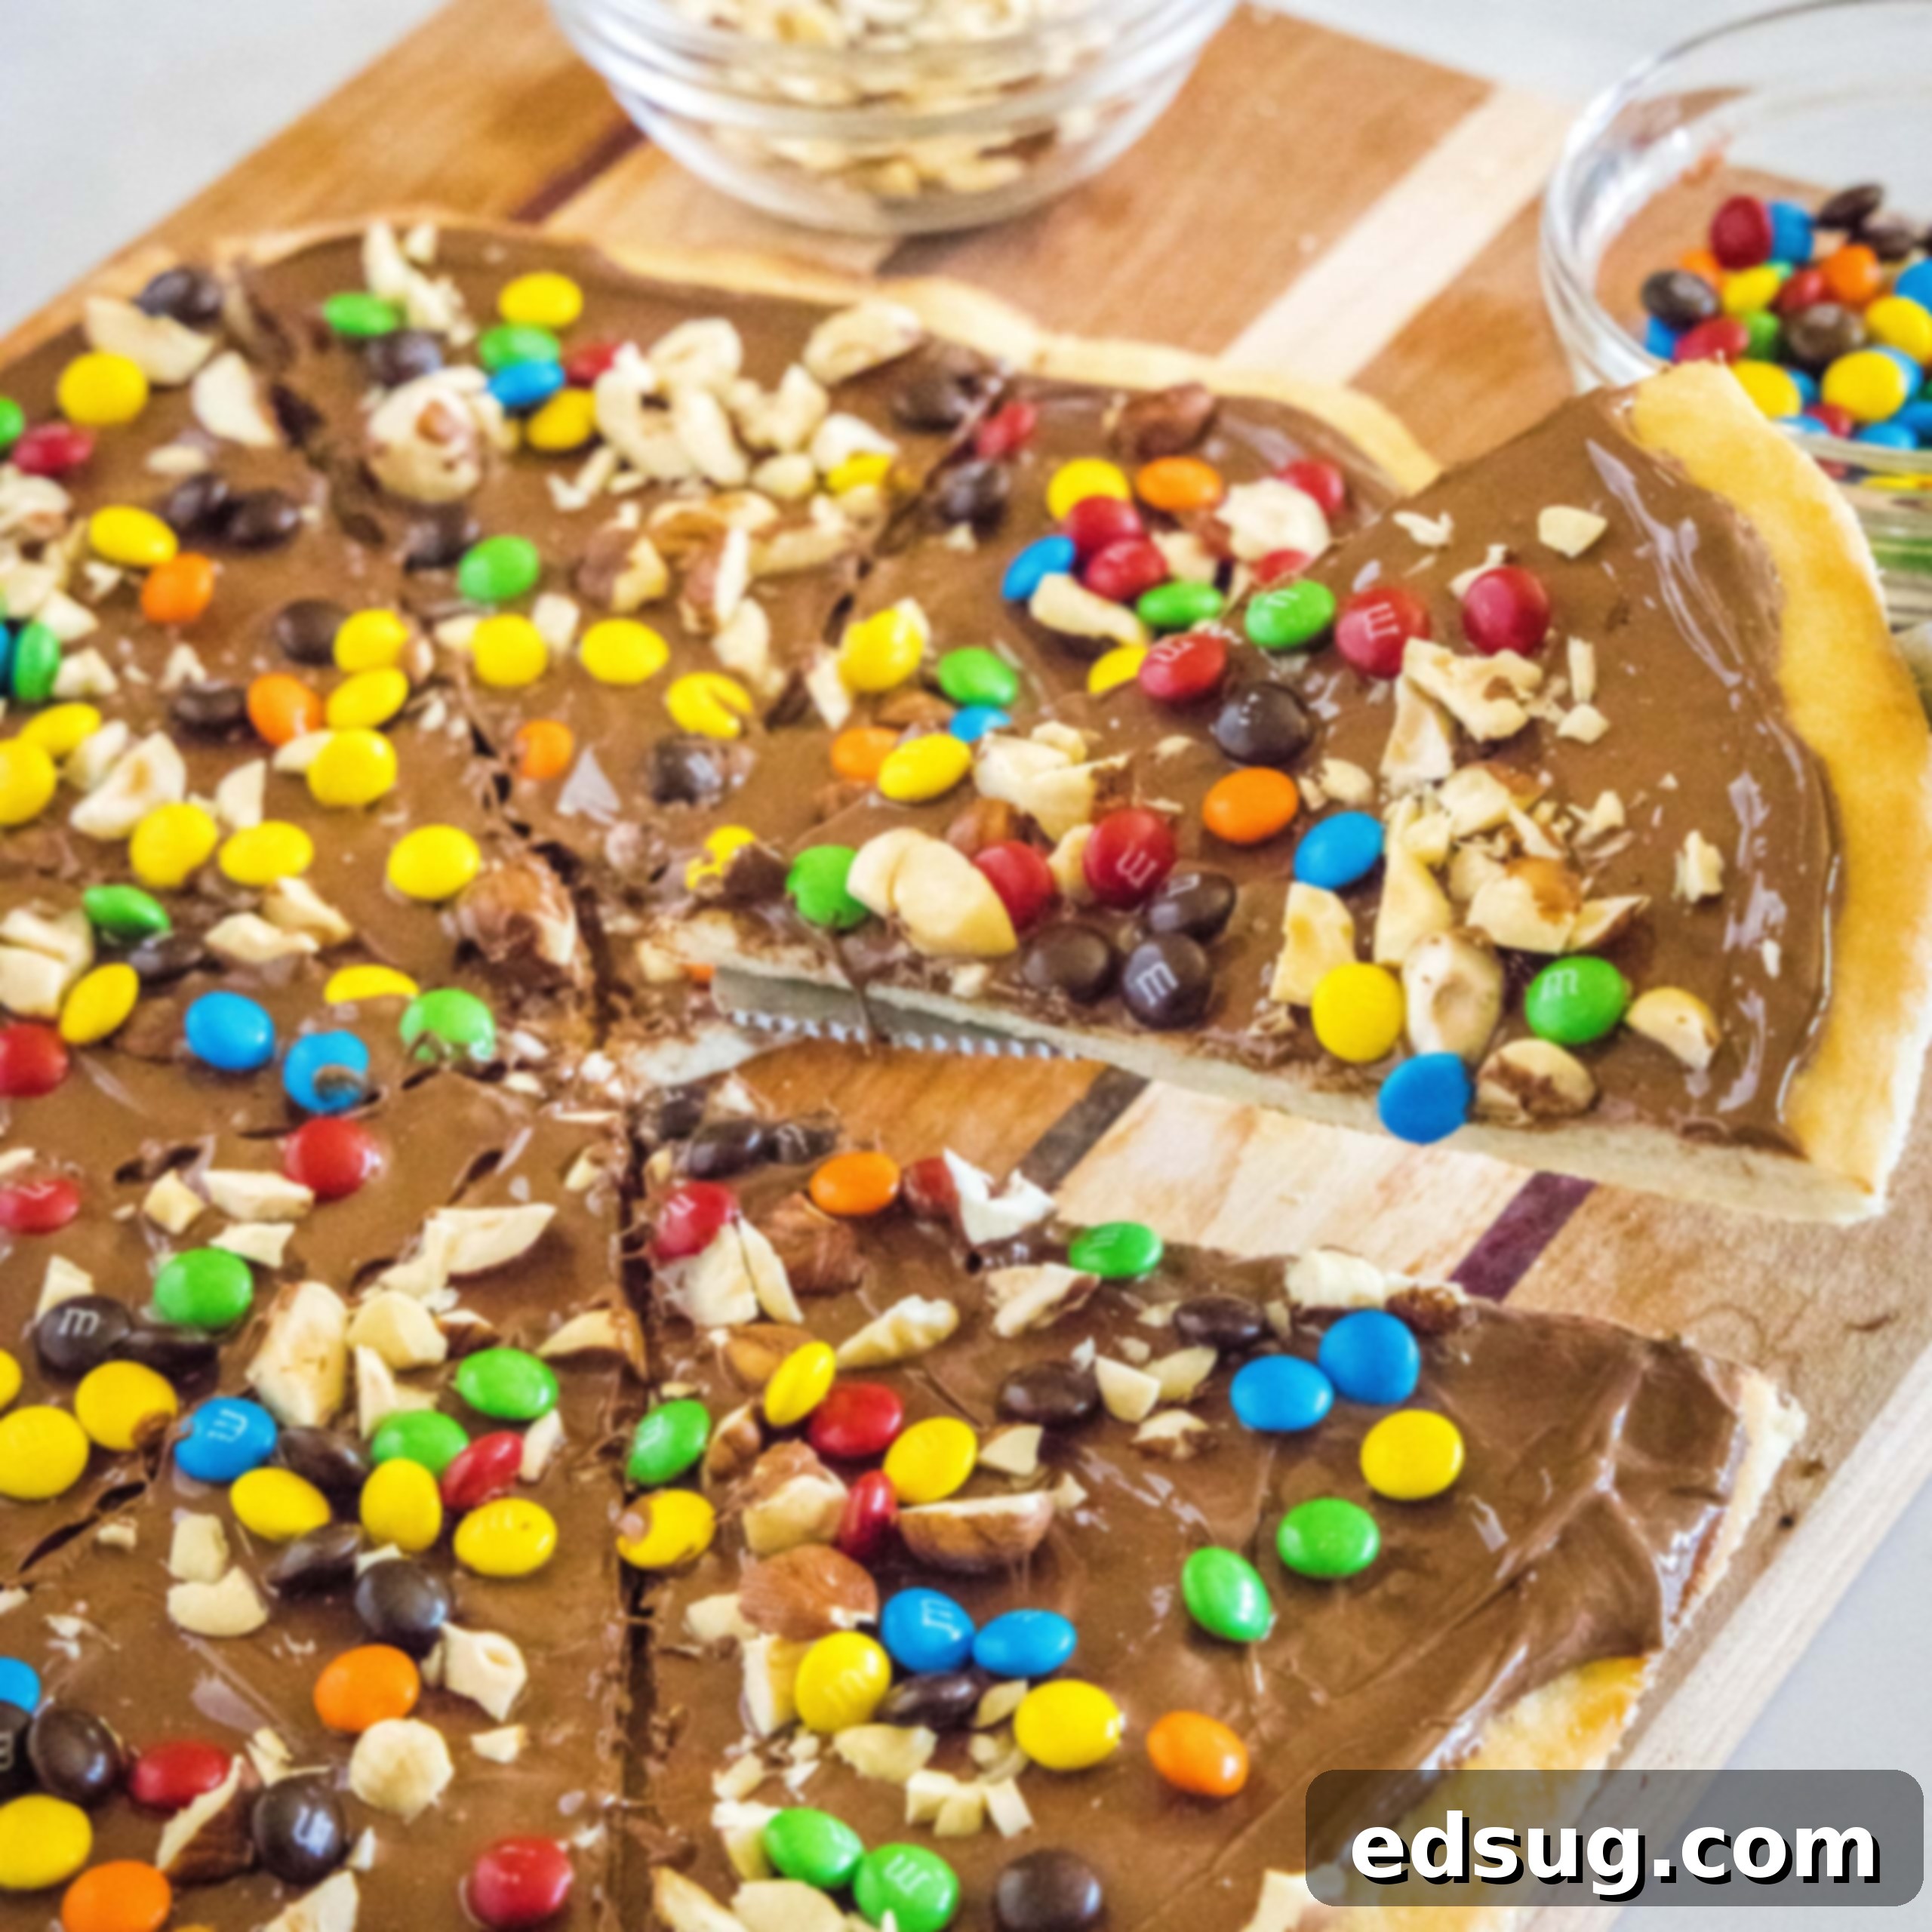
Irresistible Homemade Chocolate Pizza: Your Ultimate Guide to a Sweet Pizzeria-Style Dessert
Indulge in the joy of a homemade chocolate dessert pizza, crafted just like your favorite pizzeria masterpiece! Personalize it with an array of delightful toppings to elevate every single bite.
There’s a certain magic that happens when a pizzeria offers a dessert pizza on its menu. It’s a delightful surprise, a sweet departure from the savory, and something I always look forward to trying. Each place has its unique take, but the essence remains the same: a perfectly baked pizza crust transformed into a canvas for a rich chocolate spread, adorned with an assortment of fruits, candies, or nuts. This fusion of classic pizza comfort and decadent dessert indulgence is truly a culinary treat that brings smiles to faces of all ages.
The beauty of making chocolate pizza at home lies in its boundless customization. While the example here keeps things delightfully simple, this recipe is truly a starting point for your culinary creativity. Imagine the possibilities! Gather your family, brainstorm your favorite sweet treats, and let your imagination run wild. Whether you’re craving a burst of fresh berries, a satisfying crunch of toasted nuts, a playful scattering of colorful candies, or a sophisticated drizzle of caramel, this recipe allows you to tailor every aspect to your exact preferences. It’s perfect for birthday parties, movie nights, or simply as a fun, memorable dessert that everyone will adore. The customization ensures a unique and delicious experience every time you make it.
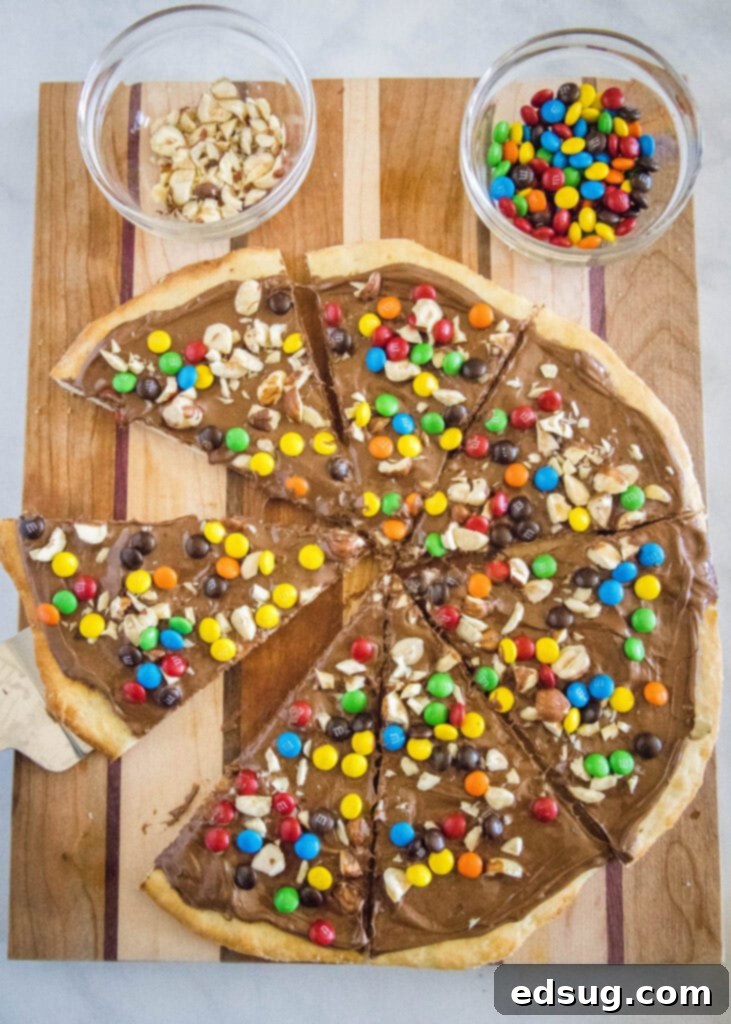
The Foundation: Perfect Pizza Dough for Your Sweet Creation
Every exceptional pizza, whether savory or sweet, begins with an outstanding crust. For this delectable chocolate pizza, the base is a simple yet incredibly satisfying pizza dough. While you have options for convenience, I wholeheartedly recommend making your own homemade dough. My recipe features a super easy NO-KNEAD method that takes just about 30 minutes from start to finish, including a crucial 20-minute resting period. This means you’re looking at merely 3 minutes of active work to create a wonderfully pliable, flavorful dough that truly makes all the difference in the final taste and texture of your dessert pizza.
The homemade approach yields a crust that is perfectly balanced – golden brown, slightly chewy, and provides a delightful texture contrast to the creamy chocolate and various toppings. It’s surprisingly simple, even for novice bakers, and the minimal effort is profoundly rewarded with maximum flavor and a genuine sense of accomplishment. Moreover, controlling the ingredients means you know exactly what goes into your delicious dessert, allowing for fresher, higher-quality results.
Of course, convenience is sometimes key, and this chocolate pizza recipe is wonderfully flexible. Feel free to use your favorite store-bought pizza dough if time is short or you prefer a quicker route. Many supermarkets offer excellent pre-made options that can simplify the process without compromising too much on quality. For an even more authentic touch, you could even stop by your local pizzeria and ask to purchase a fresh ball of their dough – a fantastic shortcut that often results in a wonderfully rich and flavorful crust. Whichever option you choose, the goal is a delicious, sturdy, and slightly sweet base, perfectly baked and ready to support a generous layer of chocolatey goodness and your chosen sweet toppings.
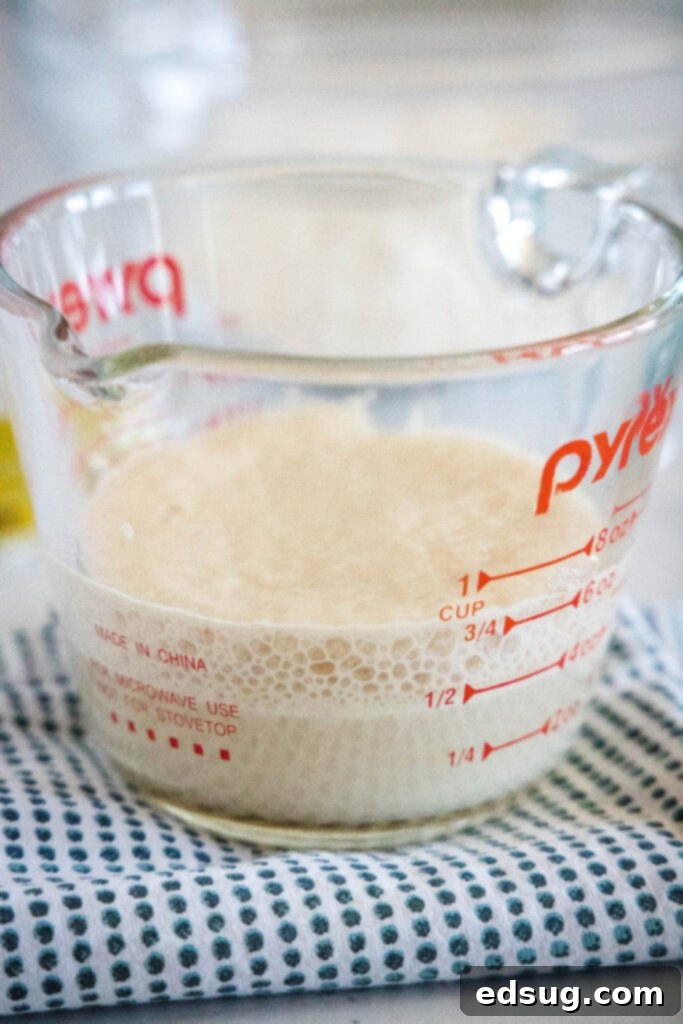
Gather Your Ingredients: Essential Supplies for Chocolate Pizza Bliss
For detailed measurements and the FULL PRINTABLE recipe card, be sure to scroll to the bottom of this post!
Preparing this irresistible chocolate dessert pizza is straightforward once you have your ingredients ready. A little planning goes a long way in ensuring a smooth and enjoyable baking process. Here’s a breakdown of what you’ll need, organized for easy shopping and efficient preparation:
For the Homemade Dough: The Heart of Your Pizza
- All-Purpose Flour: This is the fundamental building block for our crust, providing structure and the perfect chewiness. Ensure it’s fresh for the best results.
- Salt: Essential for flavor, a small amount of salt balances the sweetness of the overall dessert and enhances the taste of the crust itself.
- Olive Oil: Adds richness, a subtle Mediterranean flavor, and contributes to a tender and slightly crisp crust. Extra virgin olive oil can add a deeper flavor.
- Warm Water (110-115°F / 43-46°C): This temperature range is crucial for properly activating the active dry yeast. Water that’s too hot will kill the yeast, preventing your dough from rising, while water that’s too cold won’t activate it effectively. A kitchen thermometer is highly recommended here.
- Active Dry Yeast: The magic ingredient that makes our dough rise, resulting in a light, airy, and fluffy crust. Make sure your yeast isn’t expired for optimal performance.
- Granulated Sugar: A small but important amount of sugar is added to the dough. It acts as food for the yeast, helping it to activate vigorously, and also gives the crust a delicate touch of sweetness, making it perfectly suited for a dessert pizza.
For the Toppings: Unleash Your Sweet Creativity!
This is where the fun truly begins, and your chocolate pizza transforms into a personalized masterpiece! The topping possibilities are virtually endless, allowing you to cater to any preference or occasion. Think of your warm, golden pizza crust as a blank canvas awaiting your sweetest artistic expression. Here are some highly recommended and absolutely delicious ideas to inspire you:
- Chocolate Hazelnut Spread: This is unequivocally the star of our show and forms the decadent base layer. Popular brands like Nutella are fantastic, but don’t hesitate to use any other quality chocolate hazelnut spread you love. For an extra special and intensely flavorful touch, you can even try making your own Homemade Nutella for an unparalleled depth of rich, nutty, and creamy chocolate goodness. Its smooth texture is ideal for spreading evenly.
- Alternative Chocolate Toppings: If hazelnut isn’t your preference, or you simply desire an even more intense chocolate experience, a luxurious Homemade Hot Fudge sauce makes an incredible, gooey, and deeply chocolatey layer. Alternatively, you could melt your favorite chocolate bars (milk, dark, or white chocolate) and generously spread them over the warm crust for a simpler yet equally satisfying base.
- Candy Galore: This is truly where you can “go crazy” and add a playful burst of flavor and texture! Think about your favorite fun-sized candies or chocolate bites. Colorful M&M’s add a satisfying crunch and visual appeal, Reese’s Pieces bring a delightful peanut butter pop, chopped Peanut Butter Cups offer creamy and chocolatey goodness, while chopped Snickers or Butterfinger bars provide delightful chewiness and a complex blend of flavors. Mini chocolate chips (milk, dark, white, or a delightful mix) are also a fantastic and easy option that melts slightly into the warm chocolate spread.
- Nuts for Texture and Flavor: Toasted nuts add a wonderful contrasting crunch and a sophisticated depth of flavor to your chocolate pizza. Consider coarsely chopped peanuts, hazelnuts (which pair absolutely beautifully with chocolate hazelnut spread), walnuts, almonds, or pecans. Lightly toasting them in a dry pan beforehand significantly enhances their aroma and flavor, making them even more irresistible.
- Fresh Fruit Medley: The natural sweetness and subtle tartness of fresh fruit beautifully cut through the richness of the chocolate, creating a balanced and refreshing bite. Sliced strawberries and plump raspberries are classic combinations with chocolate, offering both vibrant color and juicy, tangy flavor. Banana slices add a creamy texture, while blueberries or even thinly sliced kiwi can also be wonderful, unexpected additions. Choose fruits that are in season for the best taste.
- Miscellaneous & Themed Toppings: Don’t limit yourself to the classics! Get imaginative!
- S’mores Theme: For a nostalgic treat, scatter mini marshmallows and graham cracker crumbles over the chocolate, then finish with an extra drizzle of melted chocolate for that authentic campfire experience.
- White Chocolate Drizzle: A visually appealing and delicious addition. Melt white chocolate chips (or use a pre-made squeeze bottle) and artfully drizzle it over the entire pizza for an elegant touch.
- Sprinkles: For birthdays, holidays, or any festive occasion, a generous scattering of colorful sprinkles immediately adds a joyful and celebratory touch.
- Coconut Flakes: Toasted coconut flakes add a tropical, slightly chewy element and a unique flavor profile that pairs surprisingly well with chocolate.
- Caramel or Peanut Butter Drizzle: For even more indulgence, drizzle with a warm caramel sauce or melted peanut butter for an extra layer of flavor complexity.
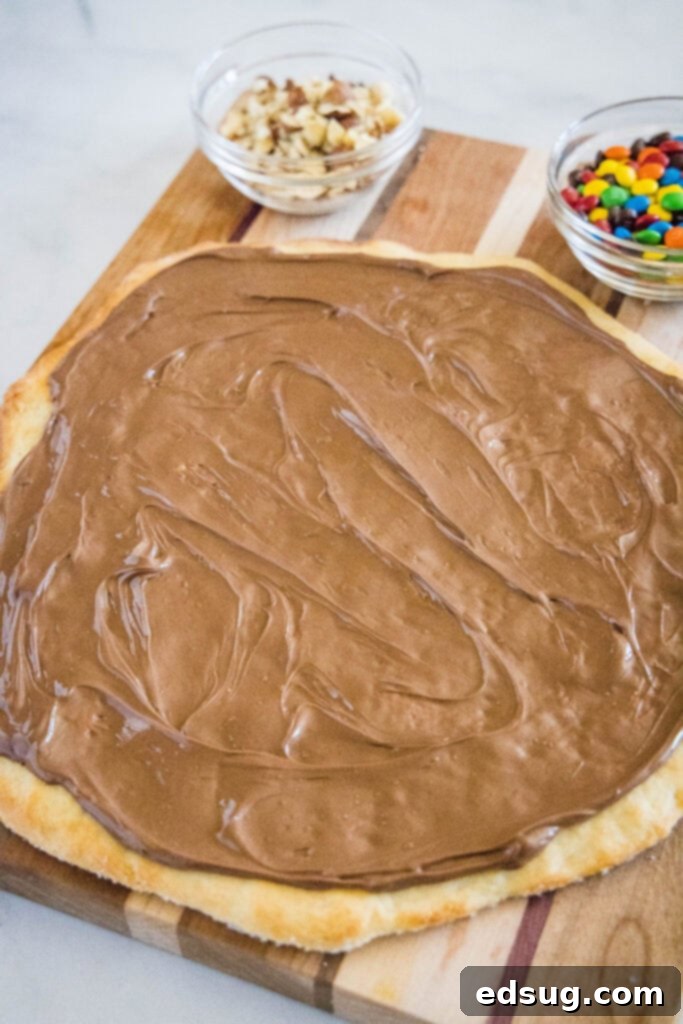
Step-by-Step Guide: Crafting Your Delicious Chocolate Pizza
Making this homemade chocolate pizza is a rewarding and relatively quick process that yields impressive results. Follow these steps carefully to ensure a perfect, sweet treat every time, from the golden crust to the melty toppings:
- Activate the Yeast: In a liquid measuring cup or a small bowl, combine the warm water (it must be between 110-115°F / 43-46°C – water that is too hot will kill the yeast, preventing your dough from rising, while water that is too cold won’t activate it effectively), granulated sugar, and active dry yeast. Stir gently until the sugar dissolves and the yeast is mostly submerged. Let this mixture stand undisturbed for 5 minutes. You’ll know it’s ready when it becomes visibly foamy and bubbly on top, indicating that the yeast is active and alive, eagerly awaiting its role in your delicious crust.
- Combine Dry Ingredients: While the yeast is activating and bubbling up, in a large mixing bowl, whisk together the all-purpose flour and salt. This simple step ensures that the salt is evenly distributed throughout the dry ingredients, leading to a uniformly flavored dough.
- Form the Dough: Once your yeast mixture has become beautifully foamy, pour it into the large bowl with the flour and salt. Add the olive oil. Using a sturdy wooden spoon or your clean hands, mix all the ingredients until they are well combined and a rough, shaggy dough forms. At this stage, it won’t be perfectly smooth or elastic, and that’s exactly what we want for a no-knead dough; the resting period will do the work.
- First Rise/Rest: Cover the bowl containing the rough dough with a clean kitchen towel or plastic wrap. Let the dough rest at room temperature for 20 minutes. This crucial resting period allows the gluten to relax and develop naturally, making the dough much easier to spread and shape later. It also contributes significantly to the dough’s flavor and overall texture.
- Prepare Baking Sheet: While the dough rests, preheat your oven to a robust 425°F (220°C). Then, generously grease a baking sheet (a 12-14 inch round pizza pan or a standard rimmed baking sheet will work perfectly) with nonstick cooking spray or a thin, even layer of melted butter. Crucially, sprinkle 1-2 tablespoons of granulated sugar evenly over the entire greased surface. This innovative use of sugar replaces the traditional cornmeal used for savory pizzas, serving a dual purpose: it prevents sticking and, more importantly, adds a delightful caramelized sweetness and a slightly crispy texture to the bottom of your dessert crust. This subtle sweetness truly elevates the final product.
- Shape the Crust: After the 20-minute rest, carefully transfer the rested dough onto your prepared baking sheet. Using your fingertips, gently press and spread the dough outwards from the center to form a 10-12 inch circle. Alternatively, you can lightly flour a rolling pin and roll it out. Aim to achieve an even thickness throughout the crust for consistent baking.
- Pre-bake the Crust: Using a fork, prick holes all over the top surface of the dough, making sure to pierce through to prevent large, uneven bubbles from forming during baking and ensuring an evenly cooked crust. Then, brush the entire surface of the dough generously with the melted butter. Place the crust in the preheated oven and bake for approximately 12 minutes, or until it is beautifully golden brown around the edges and cooked through in the center. Keep a close eye on it during the last few minutes to prevent over-browning.
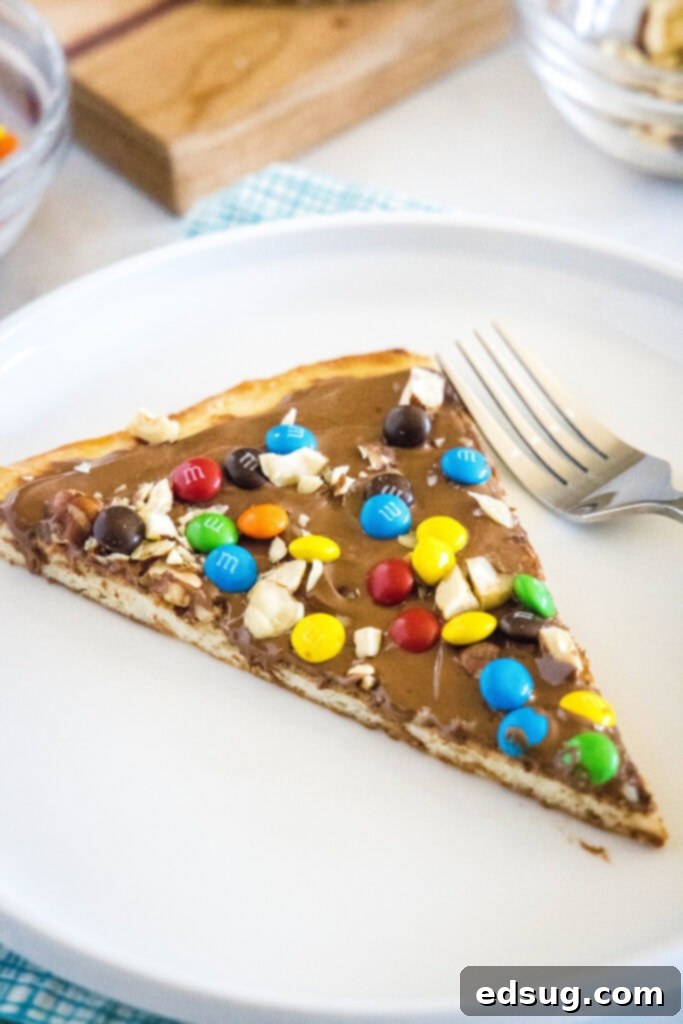
- Cool and Top: Carefully remove the baked crust from the oven. Resist the urge to top it immediately! It’s vital to let it cool on the baking sheet for approximately 10 minutes. This cooling step is paramount – if the crust is too hot, your chocolate spread will melt too quickly, becoming runny and difficult to apply evenly, causing toppings to slide off and resulting in a messy pizza. After 10 minutes, the crust should be warm enough for the chocolate to spread easily and become slightly melty, yet cool enough to hold its shape and allow your toppings to adhere beautifully. Evenly spread your chosen chocolate hazelnut spread (or other chocolate topping) over the warm pizza crust, leaving a small border around the edge for the “crust.”
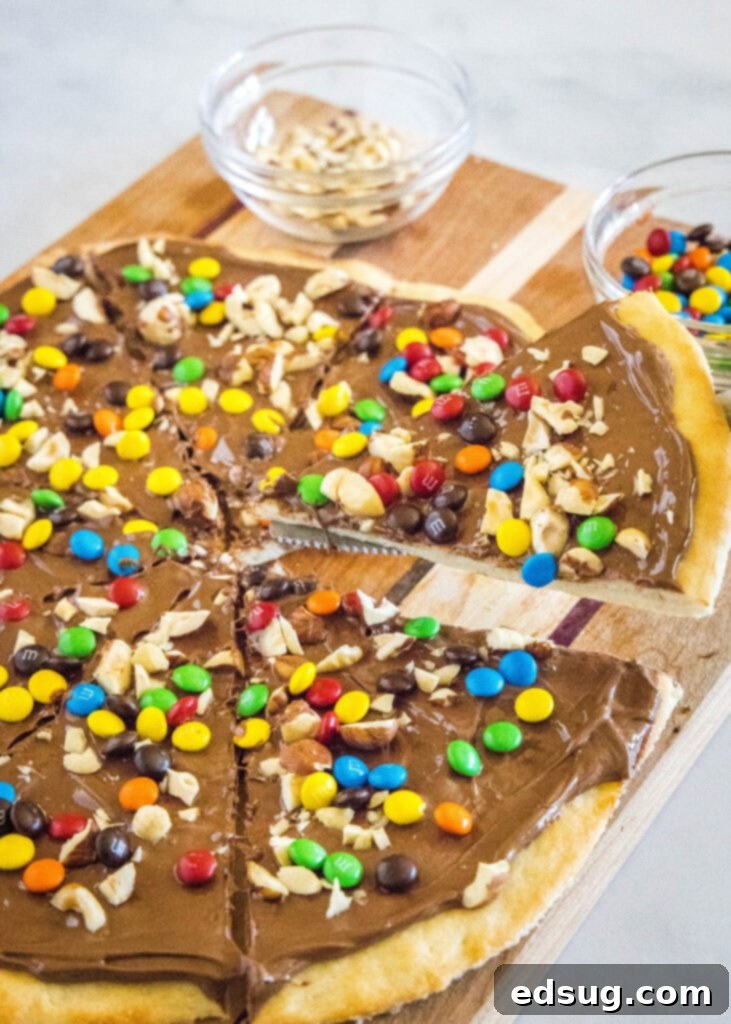
- Add Your Toppings & Serve: Now for the grand finale! Generously sprinkle your desired candies, nuts, fresh fruits, or other fun, colorful toppings over the rich chocolate spread. Arrange them aesthetically, or simply scatter them for a joyful effect. Once topped to perfection, use a sharp pizza cutter to slice the chocolate pizza into individual wedges. For the absolute best experience, serve it immediately while it’s still slightly warm, and the chocolate is perfectly melty and inviting, creating a truly irresistible dessert.
Expert Tips for Your Best Chocolate Pizza Yet
To ensure your homemade chocolate pizza turns out absolutely perfect every single time and to help you master this delightful dessert, keep these expert tips and tricks in mind. They’ll make your baking process smoother and your final product even more delicious:
- The Sweet Secret to a Non-Stick & Flavorful Crust: When baking traditional savory pizza, it’s common practice to grease your baking sheet and then sprinkle it with cornmeal. This prevents the dough from sticking and helps to create a crispy bottom, absorbing any excess moisture. For our sweet chocolate pizza, we apply a similar ingenious principle but with a delightful dessert twist: use sugar! After generously greasing your baking sheet, sprinkle it evenly with 1-2 tablespoons of granulated sugar. This achieves the same essential non-stick effect as cornmeal, but instead of an unusual savory flavor, you get a lovely, subtle caramelized sweetness and a wonderfully crisp bottom crust that perfectly complements the rich chocolate and sweet toppings above. Trust this tip for truly exceptional results – it’s a game-changer for dessert pizzas!
- Embrace Your Inner Pastry Artist: Remember, this chocolate pizza recipe is more than just a set of instructions; it’s a creative concept, a versatile foundation for your culinary expression. Don’t be afraid to get incredibly creative with your toppings! While a simple chocolate spread and a few candies are undeniably wonderful, consider exploring a wider palette of flavors and textures. Think about seasonal fruits like juicy summer berries (strawberries, blueberries, raspberries) beautifully complemented by a delicate white chocolate drizzle for a light and refreshing flavor profile. For holiday seasons, crushed peppermint candies, gingerbread crumbles, or festive sprinkles can add a wonderful thematic touch. Experiment with different types of chocolate chips (dark, milk, semi-sweet), mini pretzels for a salty-sweet crunch, or even a swirl of warm caramel or peanut butter sauce for an extra layer of decadence. The possibilities are truly endless, so have fun making it uniquely yours!
- Timing is Everything for Optimal Freshness: While you can certainly prepare the pizza dough ahead of time (see the FAQ section below for details), the chocolate pizza itself is truly at its absolute peak when served fresh, right out of the oven. The gentle warmth allows the chocolate spread to become perfectly melty, gooey, and incredibly aromatic, creating an inviting experience. The toppings also retain their ideal texture – candies are slightly softened, nuts are crisp, and fruits are vibrant. Plan to bake and top your pizza just before you’re ready to serve dessert. This ensures every single bite is a delightful, warm, and fresh experience that will be remembered.
- Don’t Skip the Homemade Dough (Seriously!): I cannot stress this enough – please, don’t be intimidated by the idea of making the pizza dough from scratch. This no-knead recipe is genuinely super easy and designed for minimal effort. There’s absolutely no strenuous kneading involved; just a simple mix of ingredients, a quick stir, and a short resting period. As long as you can accurately measure the temperature of your water (a simple, inexpensive kitchen thermometer is a fantastic investment for any baker!), you’ll have a foolproof, consistently delicious dough that you’ll want to make again and again, not just for dessert pizza but for all your pizza creations. The superior flavor and texture of a homemade crust elevate this dessert to an entirely different, more satisfying level.
- Cooling the Crust is Crucial: Patience truly is a virtue, especially after baking the crust. Allowing it to cool for at least 10 minutes before adding the chocolate spread is a vital step. This prevents the chocolate from becoming too liquidy and runny, which would make it challenging to spread evenly and cause your delicious toppings to sink or slide off. This brief cooling period ensures your chocolate layer stays rich, creamy, and intact, allowing your chosen toppings to sit beautifully on top without creating a messy situation.
- Even Spreading is Key: When it’s time to apply the chocolate hazelnut spread, aim for an even, consistent layer across the entire crust. This ensures a balanced flavor in every single slice and a pleasant texture throughout the pizza. A rubber spatula, the back of a spoon, or even an offset spatula works wonderfully for achieving a smooth, uniform chocolate base.
- Don’t Overcrowd Your Toppings: While it’s tempting to pile on every single topping you love, be mindful not to overcrowd the pizza. Too many toppings can make the pizza difficult to slice, create an uneven texture, and sometimes even overwhelm the delicate balance of flavors. Choose 2-3 main toppings that complement each other well for the best results.
While the final assembly and serving of chocolate pizza is genuinely best done immediately after baking for optimal freshness and texture, you can absolutely get a significant head start by preparing the dough ahead of time. The homemade pizza dough can be made up to 24-48 hours in advance and stored in an airtight container or a lightly oiled bowl covered with plastic wrap in the refrigerator. This allows the dough to cold-proof, which can even enhance its flavor development. When you’re ready to bake, simply bring the dough to room temperature for about 30-60 minutes (depending on your kitchen’s temperature) before rolling it onto your baking sheet. This pre-preparation of the dough significantly cuts down on active cooking time on the day of serving, allowing you to enjoy a freshly baked dessert pizza with much less fuss when the craving strikes. Remember, for the best experience, once the pizza crust is baked and topped with chocolate and other goodies, it truly shines when served slightly warm.
Reheating chocolate pizza once it’s fully assembled and topped is generally not recommended if you want to maintain its ideal texture and appearance. The primary reason is that reheating will cause the chocolate spread to melt excessively and become very runny, potentially making a messy situation and significantly altering the intended creamy texture. Any candy toppings (like M&M’s or chopped chocolate bars) will also likely melt and lose their structural integrity, and fresh fruit would become soft, mushy, and generally unappetizing. If you happen to have leftover plain pizza crust that hasn’t been topped, you can certainly rewarm just the crust in a low oven (around 250-300°F or 120-150°C) for a few minutes until slightly crisp. However, for the best and most enjoyable experience, it’s best to savor your chocolate pizza fresh. If you anticipate having leftovers, consider a strategic approach: only top and bake a portion of the crust initially, saving the remaining plain, baked crust to be topped and baked fresh later when you’re ready for another sweet treat.
Explore More Decadent Chocolate Dessert Recipes
If you have an undeniable passion for all things chocolate, you’re absolutely in the right place! After enjoying this delightful and customizable chocolate pizza, be sure to explore these other fantastic chocolate dessert recipes that are sure to satisfy any sweet craving. From chewy cookies to rich, creamy pies, and even light, airy meringues, there’s a chocolatey treat for every occasion and every mood:
- Hot Chocolate Cookies
- Chocolate Pavlova
- French Silk Pie
- Death By Chocolate Pie
- Texas Sheet Cake Cookies
- Brownie Batter Dip
- Cosmic Brownies

Chocolate Pizza
Ingredients
Pizza Crust
- 1 cup all-purpose flour
- 1/2 teaspoon salt
- 1 tablespoon olive oil
- 1/2 cup water, 110-115º F
- 1 teaspoon granulated sugar
- 1 teaspoon active dry yeast
Pizza
- Nonstick spray or butter for greasing tray
- 1-2 tablespoons granulated sugar
- 2 tablespoons unsalted butter, melted
- 1/2 cup chocolate hazelnut spread or other chocolate spread
- 1 cup candies, nuts, sprinkles etc.
Instructions
- In a liquid measuring cup mix together warm water, sugar, and yeast. Let stand for 5 minutes until it starts to foam up. Meanwhile, in a large bowl mix together flour and salt.
- Add foaming yeast mixture and olive oil, and mix until well combined and forms a rough dough.
- Cover with a towel and let rest for 20 minutes.
- Preheat oven to 425° F.
- Meanwhile, grease a baking sheet and sprinkle with 1-2 tablespoons sugar.
- Once dough has rested, spread into a 10-12 inch circle on the baking sheet.
- Use a fork to prick holes all over top of dough, and brush with melted butter. Bake crust for about 12 minutes until it is golden brown and cooked through.
- Remove from oven and let it cool for about 10 minutes. Spread chocolate hazelnut spread over your pizza crust and sprinkle with your desired toppings.
- Slice into wedges and serve immediately.
Nutrition
Nutrition information is automatically calculated, so should only be used as an approximation.
Additional Info
I’ve cultivated a vibrant community group on Facebook, and I’d be absolutely thrilled for you to become a part of it! It’s a fantastic space where you can share your own cherished recipes, ask any cooking or baking questions you might have, and stay completely up-to-date with all the latest happenings and new recipes from Dinners, Dishes and Desserts (ensuring you never miss out on a delicious new creation)!
Be sure to follow me on Instagram and tag #dinnersdishes so I can see all the wonderful DINNERS, DISHES, AND DESSERTS recipes YOU create and share!
To ensure you never miss an update or a delectable new post, be sure to connect with me across all my social media platforms!
Facebook | Twitter | Pinterest | Instagram
.
