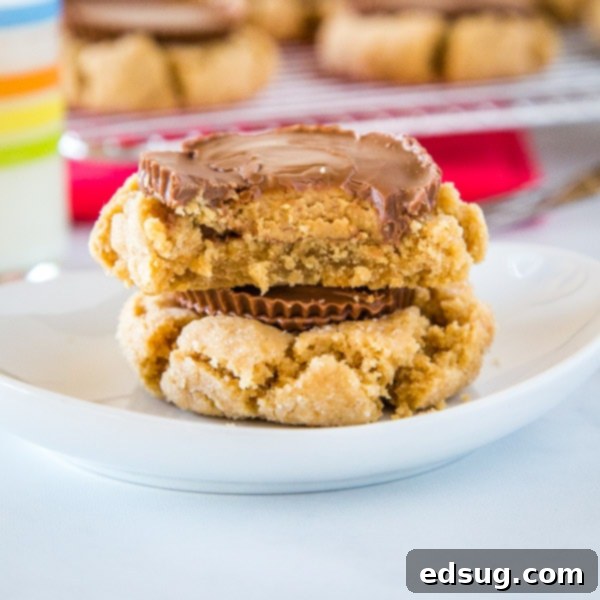
Peanut Butter Cup Blossom Cookies: The Ultimate Chewy & Chocolatey Holiday Treat
Dive into the delectable world of Peanut Butter Cup Blossom Cookies – a fantastic twist on a beloved classic. These cookies take the traditional peanut butter blossom to an extraordinary new level, guaranteed to impress every peanut butter and chocolate lover!
The holiday season ushers in the joyous tradition of cookie baking, filling homes with warmth and the irresistible aroma of freshly baked treats. From frosted sugar cookies to delicate coconut macaroons, there’s an endless array of recipes to explore. For many, including myself, the classic peanut butter blossom cookie has always been an indispensable part of these festive celebrations. Its soft, chewy peanut butter base crowned with a chocolate kiss is a nostalgic favorite that evokes cherished memories.
However, the culinary world is always evolving, and a few years ago, I discovered a delightful innovation that completely reimagined this classic: the Peanut Butter Cup Blossom Cookie! Imagine the same perfect peanut butter cookie, but instead of a small chocolate kiss, it’s topped with a rich, creamy peanut butter cup. This simple yet brilliant modification elevates the cookie experience, offering an “over-the-top” indulgence that true peanut butter enthusiasts will adore. It’s not just a cookie; it’s a celebration of two iconic flavors combining to create something truly magical, perfect for Christmas gatherings, cookie exchanges, or simply a cozy evening treat that will quickly become a cherished part of your holiday baking traditions.
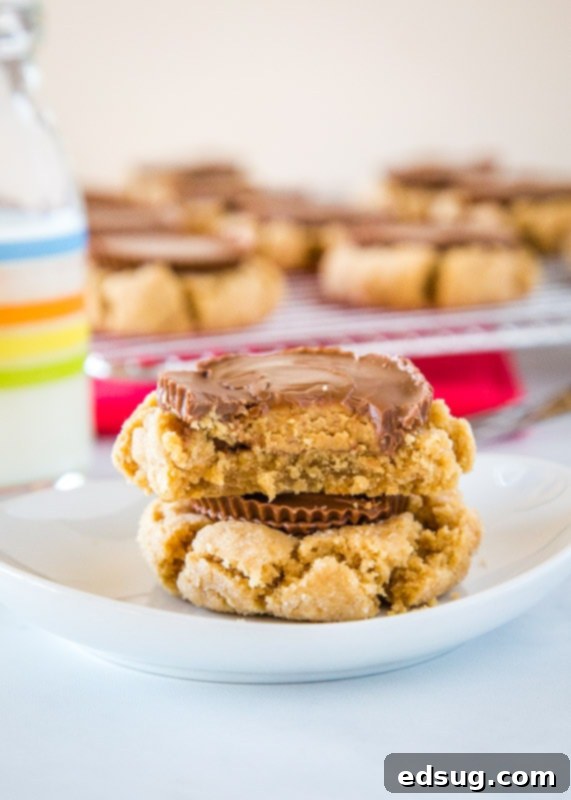
Why You’ll Love These Peanut Butter Cup Blossom Cookies
These Peanut Butter Cup Blossom Cookies aren’t just another cookie recipe; they’re a guaranteed crowd-pleaser and an instant classic in their own right. Here’s why this recipe stands out and why you should add it to your baking repertoire, especially during the festive season:
- **An Elevated Classic:** While we adore the traditional peanut butter blossom with its iconic chocolate kiss, replacing that small chocolate piece with a full-sized, creamy peanut butter cup transforms the cookie entirely. This ingenious swap adds an extra layer of rich peanut butter and smooth chocolate goodness, making each bite even more luxurious, decadent, and satisfying. It’s essentially the classic, but made even better, offering a more robust flavor and a truly substantial treat that will delight any chocolate and peanut butter aficionado.
- **Perfect for Make-Ahead Baking:** The dough for these delightful peanut butter cup cookies is incredibly versatile and forgiving, making it ideal for busy schedules. You can easily prepare the cookie dough in advance, roll it into neat balls, and then either refrigerate it for a few days or freeze it for longer storage. This invaluable flexibility means you can have freshly baked cookies ready at a moment’s notice, whether you’re preparing for an impromptu holiday party, expecting unexpected guests, or simply craving a warm, homemade treat after a long day. It significantly cuts down on same-day baking stress, allowing you to enjoy the process without the rush.
- **Customizable Sizes for Every Occasion:** While a full-sized peanut butter cup creates a generously proportioned and satisfying cookie, Reese’s offers a wonderful variety of peanut butter cup sizes. If you prefer a more modest cookie, perhaps for a diverse cookie platter or for children’s portion sizes, you can easily opt for Reese’s Thins or Mini peanut butter cups. These smaller versions are closer to the size of a traditional Hershey’s Kiss, allowing you to control the cookie’s overall size and sweetness level to perfectly suit your preferences and occasion, all without compromising on that incredible peanut butter and chocolate flavor.
- **Incredible Flavor and Texture Harmony:** These peanut butter cup blossom cookies are meticulously designed to deliver an unparalleled experience: soft, wonderfully chewy, and melt-in-your-mouth delicious. The moment the warm, freshly baked cookie cradles a peanut butter cup, the chocolate gently softens and melts, creating an irresistible, gooey texture that forms a perfect contrast and complement to the rich, slightly salty peanut butter base. It’s a harmonious blend of flavors and textures that creates a truly unforgettable bite, leaving you eager for another.
- **Impressive Yet Easy Presentation:** Beyond their exquisite taste, Peanut Butter Cup Blossom Cookies are visually stunning. Their golden-brown, crinkled edges, coupled with the distinctive and inviting melted peanut butter cup on top, make them a beautiful and professional-looking addition to any dessert spread, holiday cookie exchange, or homemade gift box. They appear gourmet and complex but are surprisingly simple to execute, making you look like an absolute baking superstar without hours of effort.
My personal love for peanut butter runs deep – I mean, who can resist the undeniable allure of a good Reese’s treat? Reese’s Fudge is often my ultimate weakness, especially during this time of year when sweet cravings hit hardest. But there’s truly something uniquely special and comforting about a soft, perfectly chewy cookie. These Peanut Butter Cup Blossom cookies are at their absolute peak when they’ve just cooled down enough to handle comfortably, but are still delightfully warm for the chocolate of the peanut butter cup to be perfectly melted and gooey. Oh, the sheer delight and pure bliss of that first, warm, gooey bite is simply unparalleled and utterly satisfying!
Essential Ingredients for Perfect Peanut Butter Cup Blossom Cookies
Crafting these extraordinary peanut butter cup blossom cookies requires a straightforward list of pantry staples, ensuring that anyone can whip up a batch of these delectable treats with ease. Each ingredient plays a crucial role in achieving that perfect chewy texture, rich peanut butter flavor, and the ideal consistency. Here’s a detailed look at what you’ll need to gather before you start baking:
- **Vegetable Shortening:** This is a key ingredient for achieving a wonderfully tender crumb in your cookies and helps prevent them from spreading too much during baking, thereby maintaining that classic blossom shape. It contributes to a consistently soft texture.
- **Creamy Peanut Butter:** The undisputed star of the show! For the best texture and most consistent flavor in your cookie dough, use a good quality, creamy peanut butter. It’s crucial to avoid using natural peanut butter that separates, as its oil content can be inconsistent and may negatively affect the dough’s texture and overall consistency.
- **Granulated Sugar & Light Brown Sugar:** The strategic combination of both granulated sugar and light brown sugar provides a perfectly balanced sweetness profile. Granulated sugar offers crispness, while light brown sugar adds moisture and contributes significantly to the cookie’s signature chewiness and depth of flavor, infusing a subtle molasses note that beautifully complements the rich peanut butter.
- **Large Egg:** The egg serves multiple vital functions: it acts as a binder, holding all the ingredients together; it adds essential richness to the dough; and it helps create a cohesive structure for the cookie. Ensure it’s at room temperature for better incorporation.
- **Milk:** A small touch of milk helps to further moisten the dough, ensuring it’s pliable, easy to work with, and results in a more tender baked cookie. Any type of milk (dairy or non-dairy) will work.
- **Vanilla Extract:** This aromatic extract is crucial for enhancing all the other flavors in the cookie. It adds a warm, inviting, and aromatic depth that elevates the overall taste profile, making the peanut butter and chocolate flavors pop.
- **All-Purpose Flour:** This forms the fundamental structural base of your cookies. It’s important to measure flour correctly – spoon it lightly into your measuring cup and level it off with a straight edge to avoid over-measuring, which can lead to dry, dense cookies.
- **Baking Soda:** As the primary leavening agent, baking soda helps the cookies rise slightly and develop their characteristic soft, airy texture, contributing to their delightful chewiness.
- **Salt:** A critical ingredient often overlooked, a pinch of salt is essential for balancing the sweetness of the sugars and bringing out the robust, savory flavor of the peanut butter, enhancing the overall taste experience.
- **Peanut Butter Cups:** The crowning glory and defining element of these “cup blossom” cookies! Whether you opt for full-sized, mini, or Reese’s Thins, these candies are absolutely essential for creating the unique visual appeal and the irresistible melty chocolate-peanut butter center.
- **Extra Granulated Sugar (for rolling):** This additional sugar is used to coat the dough balls before baking. It not only gives the cookies a beautiful, sparkling, and slightly crisp exterior but also plays a role in creating those delightful, characteristic crinkled edges.
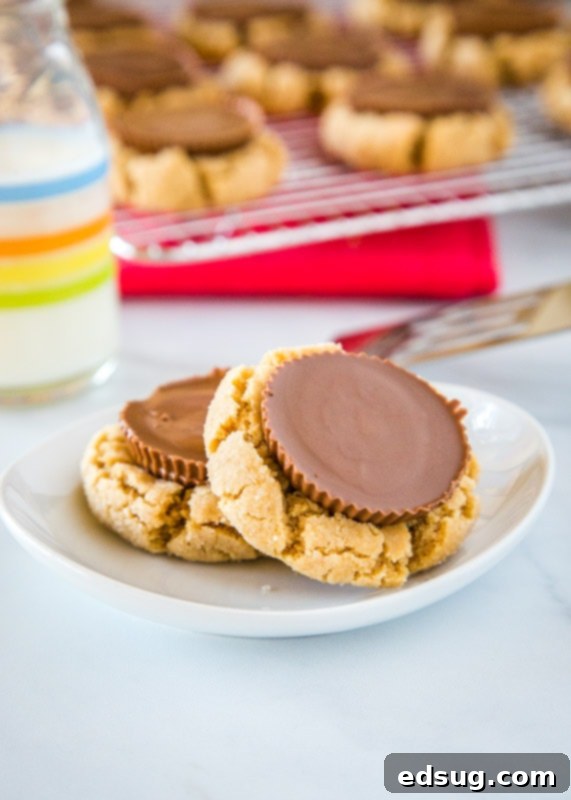
Crafting Your Own Peanut Butter Cup Blossom Cookies
Making these delightful cookies is a straightforward and enjoyable process that consistently yields incredibly satisfying results. With just a few simple steps, you can create a batch of perfect Peanut Butter Cup Blossom Cookies that will disappear from any plate in no time. Let’s get baking!
- **Prepare Your Oven and Baking Sheets:** Begin by preheating your oven to the precise temperature of 350ºF (175ºC). While the oven heats, take the time to line your baking sheets with either parchment paper or silicone mats. This crucial step prevents the cookies from sticking, ensures even baking, and makes for easy cleanup. Don’t forget to unwrap all your peanut butter cups so they are readily available to be placed on the hot cookies as soon as they emerge from the oven.
- **Cream the Fats and Peanut Butter:** In the large bowl of an electric mixer fitted with the paddle attachment, combine the vegetable shortening and creamy peanut butter. Beat these ingredients together on medium speed until the mixture is beautifully light, fluffy, and thoroughly blended. This creaming process is vital as it incorporates air, which significantly contributes to the cookies’ wonderfully tender texture.
- **Incorporate the Sugars:** Gradually add both the granulated sugar and the light brown sugar to the creamed peanut butter mixture. Continue mixing on medium speed until the sugars are fully incorporated, and the mixture becomes even lighter and fluffier, typically taking about 2-3 minutes. Remember to scrape down the sides of the bowl periodically to ensure all ingredients are well combined and no sugar is left unmixed.
- **Add Wet Ingredients:** Next, beat in the large egg, milk, and vanilla extract. Mix these wet ingredients until they are just combined and the mixture appears smooth. It’s important to avoid overmixing at this stage, as excessive agitation can develop too much gluten in the flour, potentially leading to tougher cookies.
- **Combine Dry Ingredients:** In a separate, medium-sized bowl, whisk together the all-purpose flour, baking soda, and salt until they are well combined. This ensures the leavening and seasoning are evenly distributed. Gradually add this dry mixture to the wet ingredients in the mixer bowl. Mix on low speed until the flour is just incorporated and the cookie dough comes together into a cohesive mass. Again, be mindful not to overmix to maintain the cookies’ desired tenderness.
- **Form and Roll the Cookies:** Scoop out approximately 2 tablespoons of cookie dough for each cookie. Roll each portion into a smooth, uniform ball between your palms. Place the extra granulated sugar in a shallow bowl and roll each dough ball through it, coating it evenly on all sides. This sugar coating is not just for appearance; it creates a lovely sparkle and a slight crispness on the exterior. Arrange the sugar-coated dough balls onto the prepared baking sheets, ensuring they are spaced about 2 inches apart to allow for spreading. Gently press down on each dough ball slightly with your thumb or the back of a spoon – this helps them spread evenly and creates the perfect base for the peanut butter cup.
- **Bake to Perfection:** Bake the cookies in your preheated oven for 11-13 minutes, or until the edges are lightly golden brown and the centers appear just set. It’s common for them to still look a little soft in the middle, but rest assured, they will firm up as they cool. Overbaking is the enemy of chewy cookies, so keep a close eye on them to prevent them from becoming dry.
- **Add the Peanut Butter Cups:** This is the magical moment that transforms these into “blossom” cookies! As soon as you remove the baking sheets from the oven, immediately place one unwrapped peanut butter cup directly on top of each hot cookie. Gently press down on the peanut butter cup until the cookie slightly cracks around the edges. The residual heat from the freshly baked cookie will gently soften and melt the chocolate, creating that iconic, appealing blossom look and gooey center.
- **Cool and Enjoy:** Carefully transfer the cookies to a wire rack to cool completely. Allowing them to cool fully helps the peanut butter cups set properly and prevents them from sliding off. Once cooled, these utterly delicious cookies are ready to be devoured! Pair them with a cold glass of milk, a warm cup of coffee, or share them with friends and family.
Expert Tips for the Best Peanut Butter Cup Blossom Cookies
Achieving bakery-quality Peanut Butter Cup Blossom Cookies is easier than you think with these expert tips and tricks. Whether you’re a seasoned baker looking for perfection or just starting your culinary journey, these pointers will help ensure your cookies turn out perfectly moist, chewy, and utterly delicious every single time:
- **Preventing Over-Melted Peanut Butter Cups:** If you prefer your peanut butter cups to maintain their original, distinct shape and firmness rather than melting completely into a gooey pool, here’s an ingenious trick: As soon as you remove the cookies from the oven and carefully press the peanut butter cups into them, immediately transfer the entire baking sheet to the freezer for about 15-30 minutes. This rapid cooling process will quickly set the chocolate and peanut butter, helping the cups retain their structural integrity and preventing excessive melting, resulting in a more defined ‘blossom’.
- **Optimal Storage for Lasting Freshness:** To keep these incredibly delicious cookies soft, chewy, and fresh for an extended period, store them in an airtight container at room temperature. They will maintain their superior quality and delightful chewiness for 3-4 days. For an extra tip to ensure maximum softness, you can even place a half-slice of plain bread inside the container; the bread absorbs excess moisture, preventing the cookies from drying out too quickly.
- **Make-Ahead Dough for Ultimate Convenience:** Planning ahead can make your baking experience incredibly smooth and stress-free. You can easily prepare the cookie dough as directed in the recipe, form it into neat balls, and then either refrigerate the dough balls for up to 2-3 days or freeze them for longer storage. To freeze, arrange the dough balls in a single layer on a baking sheet until frozen solid, then transfer them to a freezer-safe bag or container. When you’re ready to bake, simply let them thaw slightly at room temperature (approximately 15-20 minutes) and then bake according to the recipe instructions, possibly adding an extra minute or two to the baking time to ensure they’re cooked through.
- **Freezing Already Baked Cookies:** If you’ve baked a large batch and want to save some for later, these cookies freeze beautifully once baked! Once the Peanut Butter Cup Blossom Cookies are completely cooled, place them in an airtight, freezer-safe container or bag, separating layers with parchment paper if stacking. They will stay wonderfully fresh for up to 3 months. To enjoy, simply thaw them at room temperature. For an extra indulgent treat, you can even warm them slightly in the microwave for a few seconds to reactivate that freshly baked, gooey chocolate experience.
- **Experiment with Peanut Butter Cup Sizes:** Don’t feel confined to just using the standard full-sized peanut butter cups. For a slightly smaller cookie, a more delicate bite, or a different chocolate-to-cookie ratio, consider using Reese’s Thins or Mini peanut butter cups. These smaller options are perfect for creating a diverse cookie platter or for when you desire a treat that is closer in size and feel to the traditional Hershey’s Kiss blossom, offering a subtle variation without sacrificing flavor.
- **Achieving the Perfect Crinkle Top:** The extra granulated sugar coating isn’t just for a pretty look; it plays a crucial role in creating those desirable, classic crinkly edges on your cookies. Ensure each dough ball is thoroughly and evenly coated with sugar before baking. A gentle press on the top of each dough ball before it goes into the oven also aids the cookie in spreading beautifully and developing that signature cracked, crinkly appearance.
- **Avoid Overbaking at All Costs:** This is perhaps the most critical tip for chewy cookies! Keep a very close eye on your cookies during baking. They should be lightly golden around the edges but still appear slightly soft and not fully set in the very center when removed from the oven. Remember, cookies continue to cook for a short while on the hot baking sheet after removal, and then firm up as they cool. Overbaking is the quickest way to end up with dry, crumbly cookies, so err on the side of underbaking if you’re unsure.
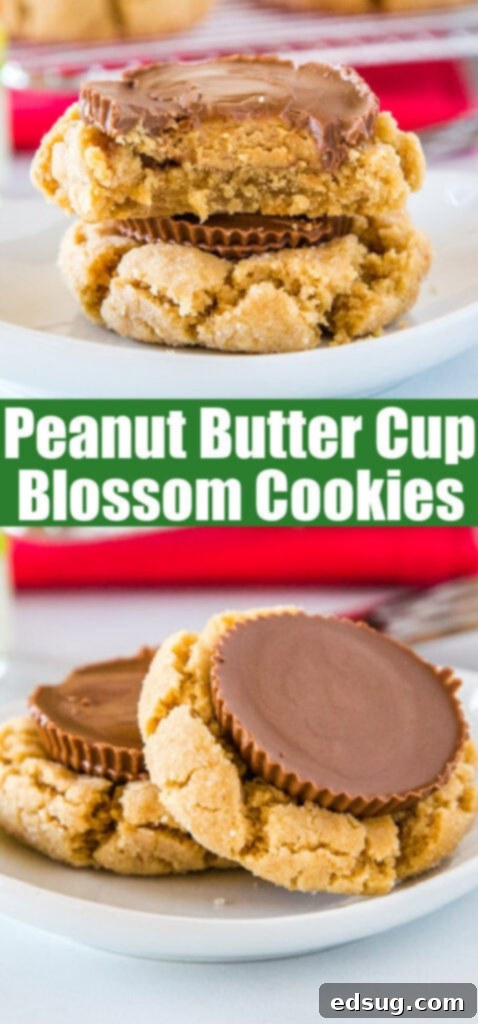
Explore More Delicious Cookie Recipes
If you’ve fallen in love with these Peanut Butter Cup Blossom Cookies and are looking to expand your baking repertoire, you’re in for a treat! The world of homemade cookies is vast, varied, and wonderfully rewarding, offering endless opportunities to satisfy your sweet tooth and delight your loved ones. Here are some more fantastic cookie recipes that are sure to become new favorites in your kitchen:
- Andes Mint Cake Mix Cookies: Incredibly easy to make and bursting with refreshing mint and rich chocolate flavor, perfect for a quick yet impressive dessert.
- Bakery Style Sugar Cookies: Learn how to achieve that perfect soft, chewy, and beautifully decorated sugar cookie, just like the ones from your favorite professional bakery.
- Cosmic Brownie Cookies: A delightful, nostalgic treat that perfectly captures the essence of the classic Little Debbie snack, but in a homemade, chewy cookie form!
- Reese’s Peanut Butter Cookies: For the ultimate peanut butter fan, these cookies are intensely peanut buttery and packed with extra Reese’s Pieces for an added burst of flavor and texture.
- Homemade Star Crunch Cookies: Recreate this iconic candy bar with a delicious homemade version that is wonderfully chewy, chocolatey, and delightfully crispy.
- Cornflake Cookies: A unique and satisfying cookie that offers a delightful crunch from cornflakes, combined with a sweet, chewy base.
- Grinch Sugar Cookie Bites: Festive, fun, and irresistibly cute, these bite-sized cookies are perfect for holiday parties and are guaranteed to make your heart grow three sizes!
- Chewy Molasses Cookies: A warm, spiced classic that is incredibly soft, richly flavored, and full of comforting, nostalgic aromas – ideal for colder weather.

Peanut Butter Cup Blossom Cookies
Pin Recipe
Rate Recipe
Print Recipe
Equipment
-
Kitchen Aid Stand Mixer
-
Baking Sheets
-
Parchment Paper or Silicone Mats
-
Wire Cooling Rack
-
Measuring Cups and Spoons
-
Rubber Spatula
Ingredients
- 1/2 cup vegetable shortening
- 3/4 cup creamy peanut butter
- 1/3 cup granulated sugar
- 1/3 cup light brown sugar
- 1 whole large egg
- 2 Tablespoon milk
- 1 teaspoon vanilla extract
- 1 1/2 cups all-purpose flour
- 1 teaspoon baking soda
- 1/2 teaspoon salt
- 24 Peanut Butter Cup candies
- 1/4 cup sugar, for rolling
Instructions
-
Preheat your oven to 350º F (175ºC) and line baking sheets with parchment paper or silicone mats. Unwrap all your peanut butter cups so they are ready to be placed on the hot cookies immediately after baking.
-
In a large bowl for an electric mixer, combine the vegetable shortening and creamy peanut butter. Beat on medium speed until the mixture is thoroughly blended and smooth, approximately 2-3 minutes.
-
Add the granulated sugar and light brown sugar to the mixture. Continue to beat until the mixture is light, fluffy, and well combined, ensuring to scrape down the sides of the bowl as needed.
-
Beat in the egg, milk, and vanilla extract until they are just incorporated and the mixture is smooth. Be careful not to overmix at this stage.
-
In a separate medium bowl, whisk together the all-purpose flour, baking soda, and salt. Gradually add this dry ingredient mixture to the wet ingredients in the mixer bowl. Mix on low speed until the dough just comes together; avoid overmixing.
-
Using about 2 tablespoons of dough per cookie, form into smooth balls. Roll each ball through the extra granulated sugar, coating it evenly. Place the sugar-coated dough balls onto the prepared baking sheets, leaving about 2 inches between each cookie. Gently press down slightly on the top of each dough ball.
-
Bake for 11-13 minutes, or until the edges are lightly browned and the centers are just set but may still look slightly soft. Do not overbake.
-
Immediately upon removing the cookies from the oven, place one unwrapped peanut butter cup on top of each hot cookie. Gently press down on the peanut butter cup until the cookie starts to crack slightly around the edges, allowing the chocolate to begin melting.
-
Carefully transfer the cookies to a wire rack to cool completely. The peanut butter cups will set as the cookies cool. Enjoy your perfect Peanut Butter Cup Blossom Cookies!
Notes
Nutrition
Nutrition information is automatically calculated and should only be used as an approximation. Individual results may vary based on exact ingredients and preparation.
Additional Info
Love these cookies as much as we do? Leave a comment and rating below!
Join Our Vibrant Baking Community!
I’ve cultivated a vibrant and welcoming community on Facebook, and I’d be absolutely thrilled for you to become a cherished part of it! It’s a dedicated and supportive space where you can actively
share YOUR treasured recipes, seek answers to your baking questions, exchange tips and tricks with fellow food enthusiasts, and stay effortlessly updated on all the exciting new content, delectable recipes, and latest culinary adventures from Dinners, Dishes and Desserts (so you’ll never miss a delicious new recipe or a fun cooking inspiration)!
Be sure to follow me on Instagram and
tag #dinnersdishes so I can see all the wonderful DINNERS, DISHES, AND DESSERTS
recipes YOU lovingly create and proudly share! Your culinary creations inspire me and the entire community!
Stay connected with me across my social media channels, ensuring you
never miss a post, a new culinary adventure, or a delicious update!
Facebook | Twitter | Pinterest | Instagram
.
