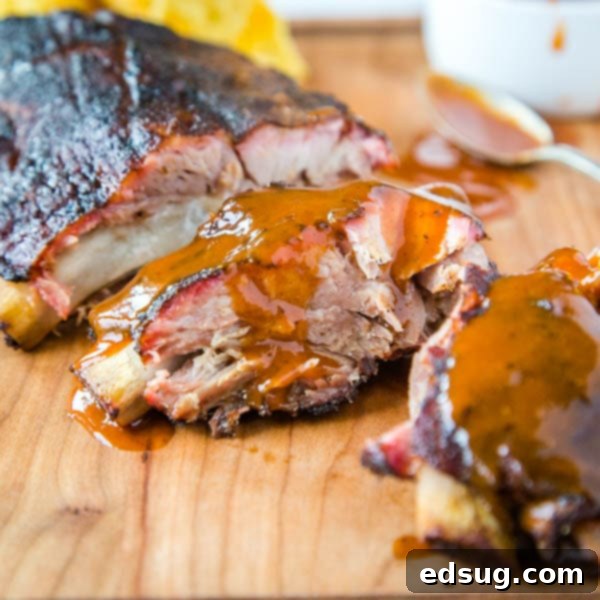
Perfect Fall-Off-The-Bone Smoked Baby Back Ribs: Your Ultimate Guide
Master the art of smoking baby back ribs with our modified 3-2-1 method, guaranteeing irresistibly tender, fall-off-the-bone results every single time!
There’s nothing quite like the aroma of tender, smoky baby back ribs wafting from the smoker on a beautiful summer day. For many, it’s the quintessential outdoor cooking experience, a true testament to the joy of low and slow barbecue. The quest for consistently perfect, fall-off-the-bone smoked ribs has been a dedicated journey for us, and we’ve poured our passion into perfecting a method that ensures remarkable success for every home cook. Forget dry, tough, or unevenly cooked ribs – this comprehensive guide will equip you with all the knowledge, tips, and tricks to create succulent, melt-in-your-mouth smoked ribs that will impress everyone at your next backyard gathering.
While outdoor smoking is a summer ritual we cherish, sometimes the weather or time constraints call for alternative methods to achieve that deep, smoky pork flavor and incredible tenderness. When the smoker isn’t an option, we often turn to our Instant Pot Country Style Ribs for a quick and satisfying fix, delivering a delicious smoky essence in a fraction of the time. Another fantastic technique for achieving unparalleled tenderness, which you can later finish on the smoker for that signature flavor, is our Sous Vide Ribs. These can be finished on your smoker, grill, or even under the broiler for that perfect crust and smoky kiss – truly an amazing way to enjoy ribs year-round!
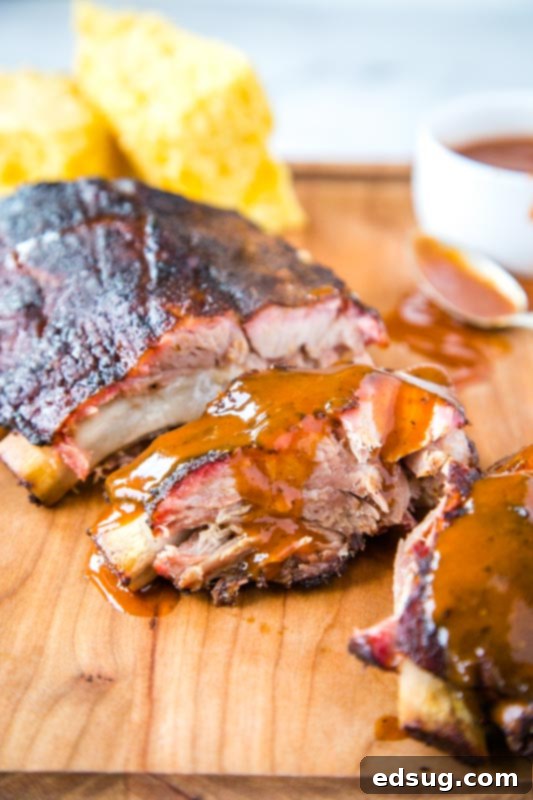
Choosing Your Ribs: Baby Back, Spare, or St. Louis Style?
This recipe specifically details how to prepare and smoke baby back ribs, as they are a popular and relatively quick-cooking cut. However, the fundamental principles and our modified 3-2-1 method are incredibly versatile. You’ll find it works equally well for Spare Ribs or St. Louis Style Ribs, with only minor adjustments to cooking times which we will discuss. So, don’t worry if baby backs aren’t available; this guide will help you achieve outstanding results regardless of your preferred cut.
Let’s briefly discuss the characteristics of each major rib type to help you make an informed choice:
- Baby Back Ribs: These ribs come from the loin section of the hog, specifically the area connected to the backbone, just below the loin muscle. They are shorter, curvier, and boast a significant amount of lean meat on top of the bone, hence the “baby” moniker – not indicating a young pig, but rather their shorter length compared to spareribs. Baby back ribs are generally very tender and less fatty, making them a favorite for many.
- Spare Ribs: Cut from the belly section of the hog, spare ribs are larger, flatter, and contain more bone and cartilage, but also a generous amount of intramuscular fat. This higher fat content translates to incredible flavor and moisture when cooked low and slow. They require a bit more trimming but reward you with rich, savory results.
- St. Louis Style Ribs: These are essentially spare ribs that have been expertly trimmed. The sternum bone, cartilage, and any ragged ends are removed, resulting in a more uniform, rectangular rack. This trimming makes them easier to handle, cook more evenly, and present beautifully. St. Louis style ribs offer the rich flavor and tenderness of spare ribs with a neater, more manageable form factor.
No matter which type you choose, the key to success lies in proper preparation, understanding the unique qualities of the meat, and consistent temperature management on your smoker.
The Quest for Fall-Off-The-Bone Tenderness
For most home cooks and barbecue enthusiasts, the ultimate goal for smoked ribs is achieving that exquisite tenderness where the meat practically slides off the bone with a gentle tug. This “fall-off-the-bone” texture is the hallmark of perfectly smoked ribs in countless households, including ours, and is what often defines a successful barbecue experience.
However, it’s an interesting point of debate in the barbecue world. If you ever speak to a professional barbecue competition judge, they might tell you that “fall-off-the-bone” is actually considered overcooked in competition circles. Technically, competition ribs are supposed to stay on the bone, allowing a judge to take a clean bite of meat, leaving the bone perfectly clean but intact. They are still incredibly tender, but they require a slight tug, a subtle resistance, rather than completely disintegrating. This is often referred to as “tooth-tender.”
While we deeply respect the nuanced art of competition barbecue, our focus at home is on delivering that unparalleled “fall-off-the-bone” experience that so many crave. And from countless conversations with fellow food lovers, we know most people share this preference! This recipe is meticulously crafted specifically to achieve that desired level of extreme tenderness, ensuring your guests will be reaching for more.
The secret to this incredible texture lies in the magic of the low and slow cooking process inherent in smoking. Over extended periods at low temperatures, the tough connective tissues (primarily collagen) and fats within the ribs slowly break down. This collagen transforms into gelatin, which melts into the meat, creating an incredibly moist, succulent, and tender texture. Essentially, the longer you cook them gently within the optimal temperature range, the more completely these tissues will break down, allowing the meat to easily separate from the bone. Our modified method is designed to maximize this breakdown, yielding ribs that are undeniably tender and bursting with flavor.
Understanding the Classic 3-2-1 Method for Smoking Ribs
The 3-2-1 method is a widely recognized and incredibly effective technique for smoking ribs, particularly popular among home cooks for its simplicity and reliable results. It breaks the smoking process into three distinct phases, each serving a crucial purpose in achieving perfectly tender and flavorful ribs. The numbers refer to the approximate hours spent in each stage: 3 hours smoking unwrapped, 2 hours wrapped in foil (often called “the crutch”), and 1 hour smoking unwrapped again for the finish.
Let’s dive into what each phase accomplishes and why it’s vital for delicious ribs:
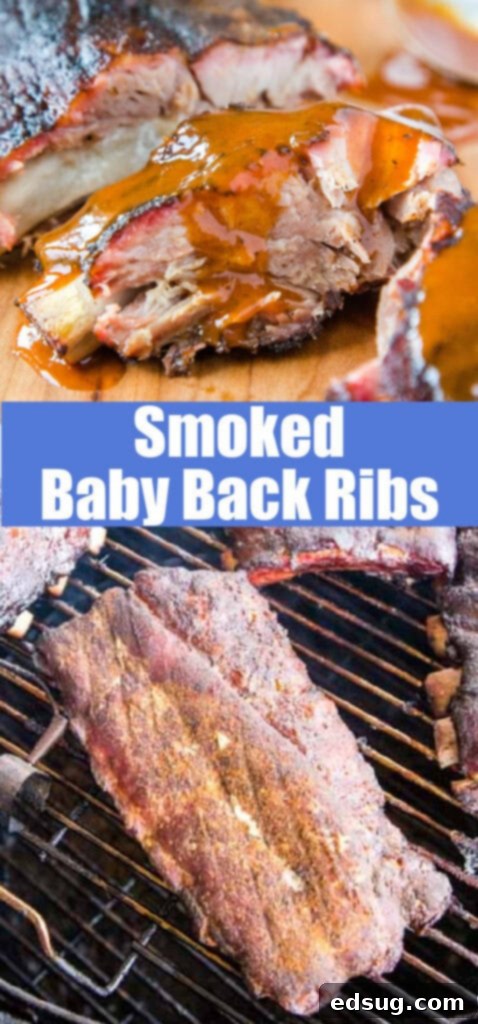
- Phase 1: Smoke for 3 Hours (Unwrapped) – This initial stage is perhaps the most crucial for flavor development. The ribs are placed directly on the grates, exposed to the ambient smoke from your wood chips or chunks. During these three hours, the meat absorbs a significant amount of smoky flavor, which permeates deep into the muscle fibers. This is also when the exterior of the ribs begins to develop a flavorful “bark” – a dark, crusty, and savory surface that is characteristic of well-smoked meats. Furthermore, this phase contributes to the formation of the coveted pink “smoke ring” just beneath the surface, a visual indicator of low-and-slow smoking.
- Phase 2: Wrap for 2 Hours (Foil Wrapped with Liquid – “The Crutch”) – After the initial three hours of smoke, the ribs are removed from the smoker and carefully wrapped tightly in heavy-duty aluminum foil. Crucially, a small amount of liquid (such as apple juice, beer, or even just water) is added to the foil packet before sealing. This stage is often referred to as “the crutch” because it provides a significant boost in tenderization. The foil creates a mini-steaming environment, which rapidly helps to break down any remaining tough connective tissues and renders the fat more efficiently. The added liquid helps to keep the ribs incredibly moist and can infuse them with subtle additional flavors, preventing them from drying out during this intensive tenderizing period.
- Phase 3: Smoke for 1 Hour (Unwrapped, often Sauced for the Finish) – For the final hour, the ribs are unwrapped, removed from the foil, and placed back on the smoker grates. This last stage serves several important functions. First, it allows the bark, which may have softened slightly in the foil wrap, to firm up and regain its desired texture. Second, and for many, most importantly, this is the perfect opportunity to brush on your favorite barbecue sauce. The heat of the smoker allows the sauce to caramelize and “set” onto the ribs, creating a sticky, glossy, and intensely flavorful glaze. This final hour ensures a perfect balance of tenderness, bark, and a delicious saucy finish.
This traditional 3-2-1 method provides an excellent and reliable framework for beginners to learn the dynamics of their smoker and understand the smoking process. From this baseline, you can then fine-tune the timings and choice of liquids to perfectly suit your specific smoker and personal taste preferences, making it a highly adaptable technique.
Our Modified 3-2.5-1.5 Method for Ultimate Fall-Off-The-Bone Tenderness
While the traditional 3-2-1 method yields great results, we’ve found that a slight modification truly elevates the ribs to an extraordinary level of fall-off-the-bone tenderness and juiciness that we absolutely love. In our kitchen, we consistently achieve this perfection using a **3-2.5-1.5 method**. That extra 30 minutes in both the second (wrapped) and third (unwrapped finish) stages makes a significant difference, ensuring the ribs are incredibly tender and juicy, consistently delivering that sought-after texture where the meat practically melts in your mouth.
The slight extension in the wrapped phase gives the connective tissues more time to break down, resulting in a more gelatinous, moist, and tender interior. The additional time in the final unwrapped phase allows the bark to firm up even more effectively and gives any applied barbecue sauce ample opportunity to caramelize into a rich, glossy glaze without burning. This slight increase in total cooking time, from 6 hours to 7 hours, is a small investment for a truly superior result that you and your guests will undoubtedly appreciate.
It’s also crucial to consider the size and meatiness of your particular racks of ribs. Some grocery stores and butchers offer baby back ribs with a thicker layer of meat on top of the bone. These “meaty” ribs, while offering more substance, will naturally require a little more time in the wrapped and final unwrapped stages to reach optimal tenderness. The general timing of our modified method is calibrated for the average ribs you’ll find at most markets, but always be prepared to adjust based on visual cues and tenderness tests. This flexibility and attentiveness are key to mastering any smoked meat recipe and ensuring your ribs are perfect every time.
How to Make Perfectly Smoked Baby Back Ribs: Step-by-Step
Achieving truly great smoked ribs is a process of careful preparation and patient cooking. Follow these detailed steps to ensure your baby back ribs are legendary, packed with flavor, and incredibly tender.
- Prepare the Ribs: Remove the Membrane. This is a crucial, often overlooked, step. Start by placing your racks of ribs meat-side down on a clean cutting board. On the bone side, you’ll notice a thin, silvery membrane covering the bones. While technically edible, this membrane becomes tough, rubbery, and chewy when cooked, preventing the rub from fully penetrating and hindering maximum tenderness. To remove it, use a butter knife or the blunt end of a spoon to gently lift an edge of the membrane from one of the center bones. Once you have a small corner lifted, grab it firmly with a paper towel (it can be quite slippery!) or a kitchen cloth, and pull it cleanly off the entire rack. If it tears, simply repeat the process from another spot until all membrane is removed.
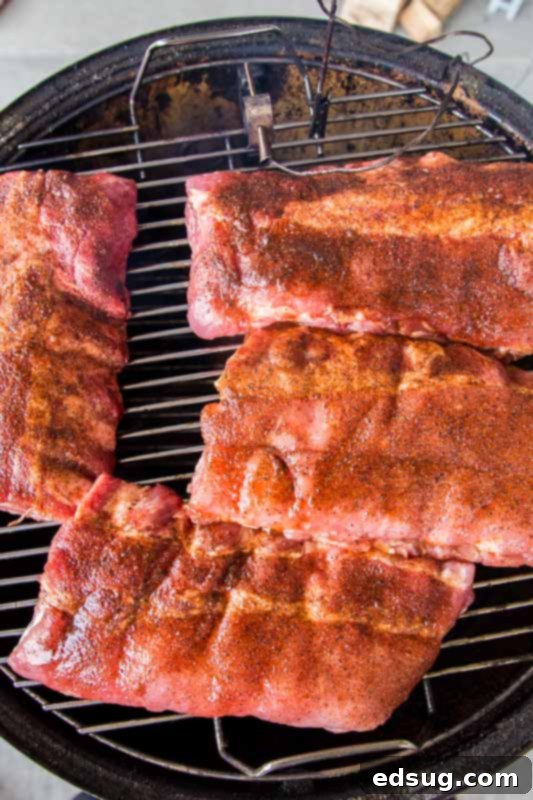
- Cut and Apply the Dry Rub. After the membrane is removed, we recommend cutting each full rack of ribs in half. This makes them significantly easier to handle on the smoker, particularly during the wrapping phase, and also for portioning when serving. Once cut, it’s time for the flavor foundation: your dry rub. Generously coat both sides of the ribs with your favorite rub. We highly recommend our proven Best Dry Rub for Ribs – it’s a pantry staple in our home for its balanced flavor. Don’t be shy; a good, even coating of rub is essential for developing that flavorful exterior bark.
- Rest the Ribs and Prepare Smoker. After applying the rub, let the ribs sit out at room temperature for at least 45 minutes to an hour. This resting period allows the rub’s flavors to meld with the meat and helps the meat come up slightly in temperature, preparing it for a more even cooking process. During this time, you should prepare your smoker.
- Preheat Your Smoker. Set up your smoker according to the manufacturer’s instructions and bring it up to a steady, consistent temperature of 225 degrees Fahrenheit (107 degrees Celsius). Maintaining a consistent low temperature is absolutely vital for the slow cooking process and for properly rendering the fats and connective tissues. For wood, we typically use apple or hickory chips or chunks, which impart a classic, slightly sweet or robust smoky flavor that complements pork beautifully. Feel free to experiment with other woods like cherry (for a milder, fruitier smoke), pecan (nutty and rich), or oak (medium, classic barbecue smoke) to find your personal favorite.
- Smoke Phase 1 (Unwrapped – 3 Hours): Once the smoker is at temperature and producing clean, thin blue smoke, carefully place the seasoned ribs directly onto the grates, meat-side up. Ensure there’s good airflow around each piece. Close the lid and smoke for the first 3 hours. It’s important to resist the urge to frequently open the lid, as this causes significant temperature fluctuations and prolongs the overall cooking time. This initial phase is where the ribs absorb most of their deep, smoky flavor and begin to form that desirable, savory exterior bark.
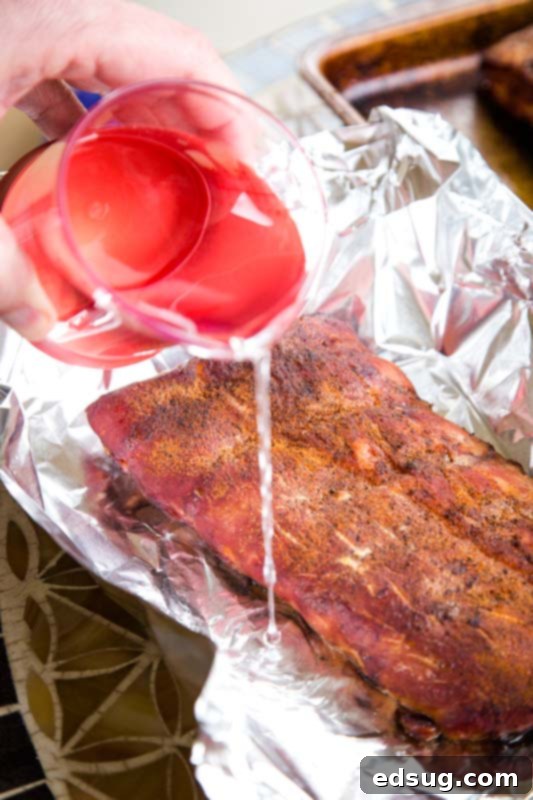
- Smoke Phase 2 (Wrapped with Liquid – 2 1/2 Hours): After the initial 3 hours, gently remove the ribs from the smoker. Prepare large sheets of heavy-duty aluminum foil (or use butcher paper if preferred, for a slightly different bark texture). For each half rack, create a secure, airtight packet, adding about 1/4 cup of liquid. Water, apple juice, or beer are all excellent choices, with apple juice adding a touch of sweetness and beer offering a deeper, malty note that pairs wonderfully with pork. Wrap the ribs tightly to create a steamy, braising environment. Place the foil-wrapped ribs back on the smoker and continue cooking for 2 1/2 hours. This “crutch” stage is paramount for achieving extreme tenderness by thoroughly breaking down connective tissues.
- Smoke Phase 3 (Unwrapped and Sauced – 1 1/2 Hours): Once the 2 1/2 hours are up, carefully remove the ribs from the foil, discarding the foil and any remaining liquid. Place the ribs back on the smoker, unwrapped, for an additional 1 1/2 hours. This final stage allows the bark to firm up again after being softened by the foil wrap and helps to lock in moisture. This is also the perfect opportunity to brush on your favorite barbecue sauce. Apply the sauce during the last 30-60 minutes of this phase, allowing it to caramelize and set into a sticky, delicious, glossy glaze.
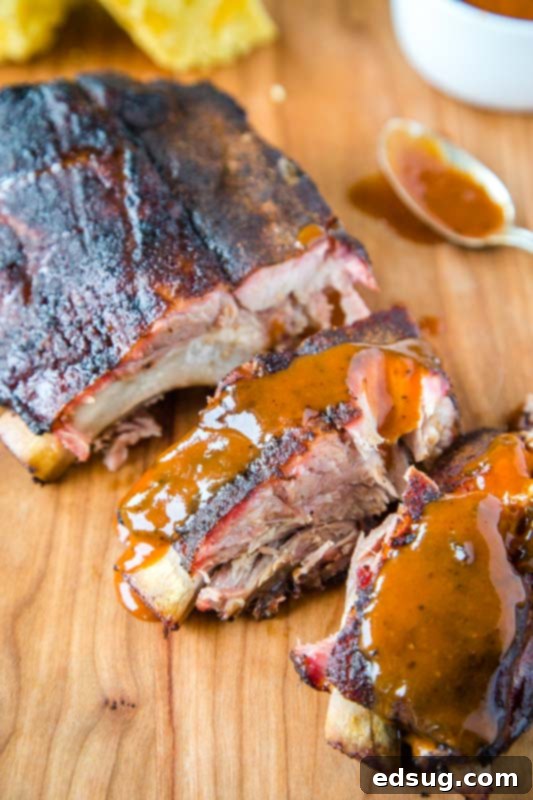
- Test for Doneness and Serve. To check if your ribs are perfectly done and have achieved that coveted fall-off-the-bone tenderness, use a fork or tongs to gently pull on the meat between the bones. The meat should be very tender and yield easily, showing significant separation from the bone. If they still feel a bit firm or resist, continue cooking, checking every 30 minutes until they reach your desired consistency. Once done, remove from the smoker, let them rest for 10-15 minutes (this helps redistribute juices and ensures maximum moisture), and then slice between the bones. Serve immediately with your favorite extra barbecue sauce on the side.
Mastering Smoker Temperature Management
The consistent maintenance of a low smoking temperature is paramount for producing tender, juicy ribs with a beautiful smoke ring and bark. Our target temperature for smoking ribs is approximately 225 degrees Fahrenheit (107 degrees Celsius). This temperature range allows for the slow breakdown of connective tissues without drying out the meat or cooking it too quickly.
However, we understand that smokers, especially charcoal or wood-fired models, can be temperamental and fluctuate. Don’t stress if your temperature isn’t precisely 225°F at all times! A range between 215-240 degrees Fahrenheit (102-116 degrees Celsius) is perfectly acceptable and will still yield fantastic results. The key is consistency within this range rather than obsessing over an exact number.
Using a reliable thermometer (or two!) is highly recommended. Position one thermometer near the ribs to monitor the ambient smoker temperature directly at the grate level, and another meat probe thermometer to track the internal temperature of one of the rib racks, although for ribs, tenderness is often a better indicator of doneness than internal temperature alone. Adjust vents, air intakes, and fuel as needed to keep your smoker within this optimal range, making small, gradual changes rather than drastic ones.
Smoking ribs is more than just a cooking method; it’s an experience, a craft, and a delicious way to enjoy the outdoors. There’s truly nothing better than spending a relaxed Saturday tending to your smoker, filling the air with intoxicating aromas, and enjoying the anticipation of creating something truly delicious. It’s the ultimate summer food, a perfect centerpiece for gatherings with family and friends, or a rewarding meal after a long week. Embrace the process, and the rewards will be incredibly tasty!
What to Serve with Your Perfect Baby Back Ribs
No rack of perfectly smoked ribs is complete without a selection of classic barbecue side dishes. These accompaniments not only enhance the meal but also provide a delightful contrast in flavors and textures, rounding out the ultimate barbecue feast. Here are some of our top recommendations for side dishes that perfectly complement the richness of smoked ribs:
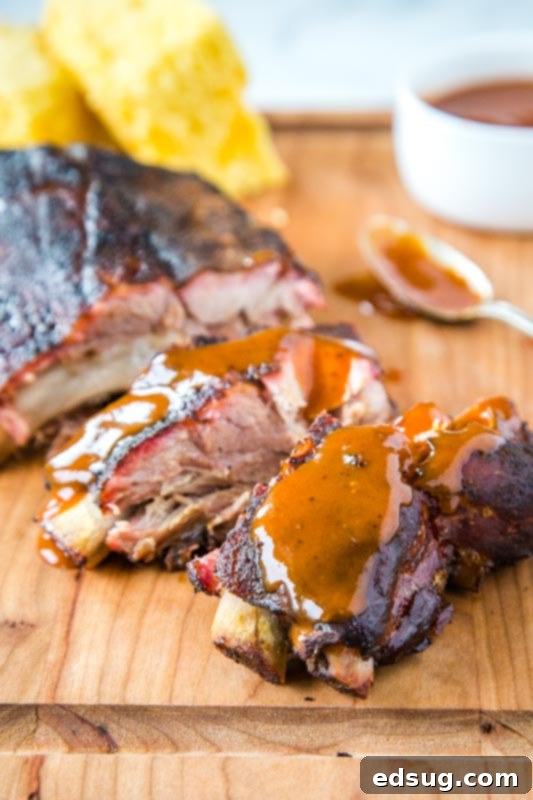
- Southern Style Cornbread: A sweet and savory classic, with its slightly crumbly texture, perfect for soaking up any extra barbecue sauce or meat juices.
- Cranberry Apple Coleslaw: A refreshing and tangy slaw with a hint of sweetness from cranberries and apples, providing a bright, crunchy counterpoint to the rich ribs.
- Loaded Potato Salad: Creamy, hearty, and packed with flavor from bacon, cheese, and chives, this potato salad is a barbecue essential that satisfies every time.
- Homemade Baked Beans: Slow-cooked beans with a rich, smoky-sweet sauce are an absolute must-have. Our recipe adds depth and a comforting warmth to your plate.
- Grilled Corn on the Cob: Sweet corn, lightly charred on the grill, adds a burst of natural sweetness and a satisfying crunch.
- Fresh Green Salad: A simple, crisp green salad with a light vinaigrette can offer a refreshing break from the richer flavors.
More Delicious Summer Grilling & Smoker Recipes to Explore
If you’ve enjoyed perfecting your smoked ribs, you’re likely a fan of delicious outdoor cooking. We’ve got plenty more recipes to keep your grill and smoker busy all summer long, expanding your culinary horizons beyond ribs. Fire up your equipment and try these fantastic grilling and smoking ideas that are sure to be crowd-pleasers:
- Smoked Tri-Tip: A lean yet flavorful cut of beef that takes beautifully to smoke, offering a rich, beefy experience.
- Spicy Bacon Cheeseburger: Elevate your burger game with a fiery kick and the irresistible crunch of bacon.
- Perfect Grilled Ribeye: Learn the secrets to achieving steakhouse-quality, perfectly seared and juicy ribeye at home.
- Grilled Turkey Tenderloin: A healthy and incredibly flavorful alternative to traditional grilling, perfect for a lighter meal.
- Jerk Chicken: Transport your taste buds to the Caribbean with this bold, spicy, and aromatic chicken dish.
- Grilled Flank Steak: Marinated in a zesty chile-lime blend and quickly grilled for maximum flavor and tenderness.
- Grilled Pork Tenderloin: A versatile and incredibly tender cut, enhanced with fresh herbs, perfect for any occasion.
Smoked Baby Back Ribs
Pin Recipe
Rate Recipe
Print Recipe
Ingredients
- 2 racks baby back ribs
- 1/3 cup Dry Rub for Ribs, recipe linked in notes
- 1 cup liquid, water, apple juice, beer
- Barbecue Sauce
Instructions
-
Place the ribs so the meat side is down. Use a butter knife to get under the membrane that coats the bone side of the ribs. Use a paper towel or something that helps you grip the membrane and pull to remove it completely.
-
Cut each full rack of ribs in half, resulting in 4 half racks. This makes them easier to handle on the smoker and for serving.
-
Generously coat the ribs on both sides with your chosen dry rub. Allow the seasoned ribs to sit out for at least 45 minutes to an hour while you prepare your smoker. This resting period enhances flavor penetration.
-
Set up your smoker and preheat it to a steady 225 degrees Fahrenheit (107°C). We recommend using apple, hickory, or a blend of your favorite wood chips or chunks for optimal smoky flavor.
-
Carefully place the dry-rubbed ribs directly onto the smoker grates, close the lid, and smoke for the first 3 hours. Maintain consistent temperature and resist opening the lid unnecessarily.
-
After 3 hours, remove the ribs from the smoker. Tightly wrap each half rack in heavy-duty aluminum foil. Add approximately 1/4 cup of liquid (water, apple juice, or beer work well) to each foil packet before sealing.
-
Return the foil-wrapped ribs to the smoker and continue cooking for 2 1/2 hours. This steaming phase is crucial for achieving extreme tenderness.
-
Carefully unwrap the ribs, discarding the foil. Place the ribs back on the smoker, unwrapped, for an additional 1 1/2 hours. During this final stage, you can brush your favorite barbecue sauce onto the ribs during the last 30-60 minutes to create a delicious glaze.
-
Remove the perfectly smoked ribs from the smoker. Let them rest for 10-15 minutes before slicing and serving with extra sauce on the side.
Notes
We highly recommend our homemade dry rubs to elevate your ribs:
Best Dry Rub (General Purpose) – https://dinnersdishesanddesserts.com/the-best-dry-rub-recipe/
Specifically for Ribs – https://dinnersdishesanddesserts.com/best-dry-rub-for-ribs/
Nutrition
Nutrition information is automatically calculated and provided as an estimate. It should be used as an approximation only.
Additional Info
Loved this recipe? Share your thoughts below!
I invite you to join our vibrant community on Facebook, a dedicated group for food enthusiasts! It’s a fantastic space where you can share your culinary triumphs, ask questions, exchange favorite recipes, and stay updated on all the exciting new creations from Dinners, Dishes and Desserts (so you never miss a new recipe)! If you’d like to be part of our growing family, you can request to join HERE.
Make sure to follow me on Instagram and don’t forget to tag #dinnersdishes in your posts. I love seeing all the wonderful DINNERS, DISHES, AND DESSERTS recipes YOU create!
Connect with Dinners, Dishes, and Desserts across all platforms to stay inspired!
Facebook | Twitter | Pinterest | Instagram
