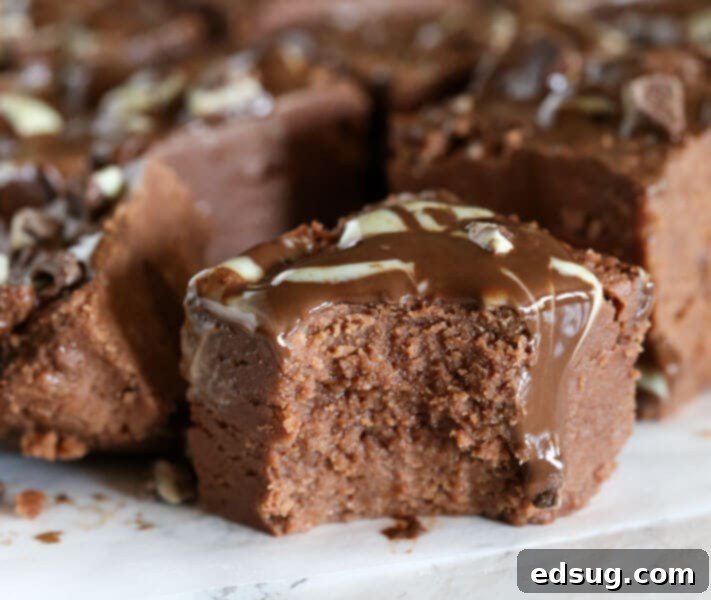
Easy Microwave Fudge: Your Ultimate 15-Minute Recipe for Creamy, Foolproof Holiday Indulgence
Welcome to the season of festive cheer, holiday gatherings, and the delightful aroma of homemade treats! If you’re looking for a dessert that’s both incredibly delicious and remarkably simple to prepare, look no further than this **Easy Microwave Fudge**. This creamy, decadent fudge is an absolute crowd-pleaser, especially during the bustling holiday season. Forget complicated candy thermometers and endless stirring; with this fool-proof recipe, you can whip up a batch of rich, smooth fudge in just 15 minutes, making your holiday baking stress-free and wonderfully rewarding.
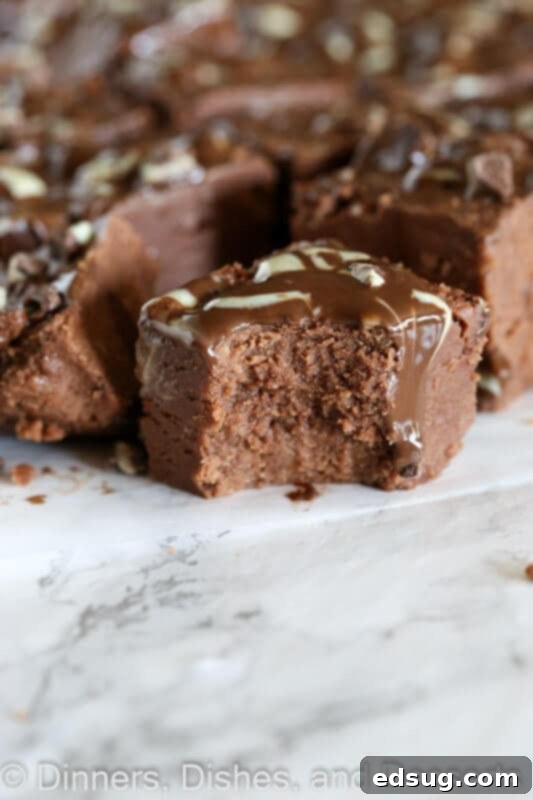
The holidays often bring a mile-long list of to-dos, from decorating and gift shopping to attending parties and hosting loved ones. Amidst all the delightful chaos, finding time for elaborate baking can feel impossible. That’s where this **quick microwave fudge recipe** becomes your ultimate secret weapon. It’s designed for those moments when you need a fantastic homemade treat in a flash, whether for a last-minute potluck, a cookie exchange, or simply to satisfy a sudden sweet craving.
This microwave fudge isn’t just fast; it’s also incredibly reliable. It’s earned a permanent spot on my “stress-less holiday baking list,” right alongside beloved recipes like No Bake Avalanche Cookies and Graham Cracker Toffee. Its consistent results mean you can always count on a batch of perfectly creamy, melt-in-your-mouth fudge, impressing everyone with minimal effort. Whether you’re a seasoned confectionery enthusiast or a complete beginner in the kitchen, this recipe is your golden ticket to holiday baking success and pure sweet bliss. So, take a well-deserved break from the holiday hustle, join me in the kitchen, and let’s create delicious memories, one delectable bite of fudge at a time.
Why You’ll Love This Easy Microwave Fudge Recipe
There are countless reasons why this **easy microwave fudge** will become your go-to recipe, especially when time is of the essence. Its unparalleled convenience combined with its delicious outcome makes it a true holiday hero.
- Unbeatable Time-Saver: During the busy holiday season, every minute counts. This microwave fudge is a genuine lifesaver, allowing you to create a batch of rich, homemade candy from start to finish in just 15 minutes. No more waiting for hours for ingredients to set or cool – instant gratification guaranteed! This makes it ideal for unexpected guests or last-minute party contributions.
- Completely Stress-Free Preparation: Bid farewell to the anxieties of traditional fudge making. This recipe eliminates the need for tricky candy thermometers, precise sugar stages, and the risk of kitchen meltdowns. It’s truly a fool-proof method that ensures your fudge turns out perfectly creamy and flawless every single time, removing all the guesswork and pressure.
- Irresistibly Creamy and Decadent: Fudge should be a luxurious indulgence, not a test of patience. This microwave version delivers an exquisitely smooth, rich, and creamy texture that rivals any old-fashioned recipe. It’s the perfect sweet escape from holiday chaos, offering a moment of pure, decadent bliss with every bite. Plus, it makes for a fantastic homemade gift that looks and tastes gourmet.
- Effortless Customization: One of the best aspects of this fudge is its versatility. Want to add a personal touch or cater to different tastes? Easily stir in your favorite chopped nuts like walnuts or pecans, sprinkle vibrant candy bits, crushed candy canes for a minty twist, or even experiment with different flavored extracts like almond or orange. The possibilities are endless, allowing you to create unique variations to suit any occasion.
Essential Ingredients for Your Microwave Fudge
For the exact measurements and full instructions, please scroll down to the bottom of the post for the COMPLETE PRINTABLE recipe card.
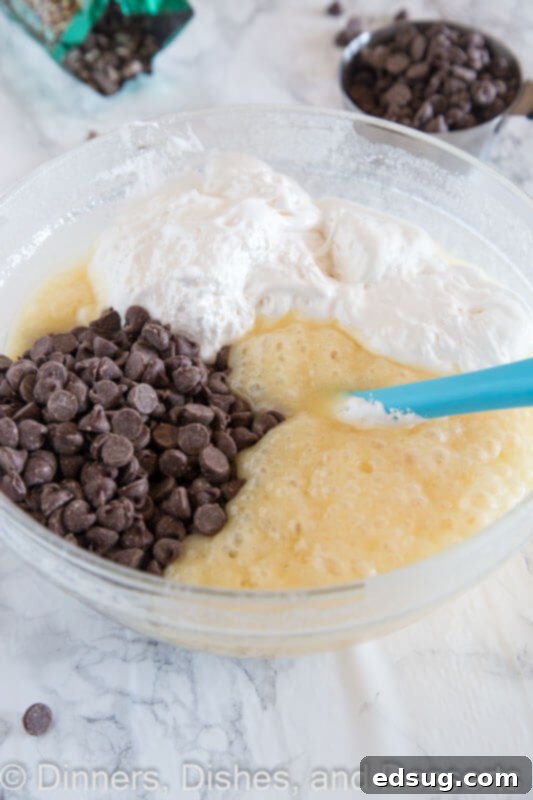
Crafting this quick and easy fudge requires just a handful of common ingredients. Each plays a vital role in achieving that signature creamy texture and rich flavor:
- Unsalted Butter: Using unsalted butter is crucial for this sweet recipe. It allows you to control the overall saltiness of the fudge. While a tiny pinch of salt can enhance flavors, you definitely don’t want your sweet fudge tasting overly salty, which can happen with salted butter. Unsalted butter ensures a pure, rich base.
- Granulated Sugar: Granulated sugar is the sweetener of choice here because its fine crystals dissolve quickly and disperse evenly throughout the mixture during the microwave cooking process. This uniform distribution is key to preventing a grainy texture and ensuring every single bite of your fudge has a consistent, delightful level of sweetness.
- Evaporated Milk: This ingredient is absolutely crucial for the success of this microwave fudge recipe. Evaporated milk provides a concentrated dairy flavor and a thicker, creamier texture compared to regular milk. It helps create the smooth, luscious consistency that sets this fudge apart. While you can technically substitute with sweetened condensed milk, you would need to significantly reduce the granulated sugar to account for the added sweetness, which can alter the final balance.
- Semi-Sweet Chocolate Chips: What’s classic fudge without rich chocolate? High-quality semi-sweet chocolate chips are essential for delivering that deep, satisfying chocolate flavor and ensuring the fudge sets properly to a firm yet tender consistency. Investing in good quality chocolate chips truly elevates the taste. If you prefer a more intense, less sweet chocolate flavor, dark chocolate chips make an excellent alternative. Milk chocolate chips can also be used for a sweeter, milder fudge.
- Marshmallow Fluff: Marshmallow fluff is a key player in achieving the perfect texture. It introduces air and lightness into the fudge, preventing it from becoming overly dense or hard when it cools and sets. The fluff contributes to a wonderfully soft, almost pillowy texture that melts beautifully in your mouth.
- Vanilla Extract: A splash of pure vanilla extract enhances all the other flavors, adding a warm, aromatic depth that is quintessential to classic fudge. Don’t skip this, as it brightens the overall profile of the dessert.
- Andes Mints (Optional): Andes Mints are a favorite festive topping, especially perfect for the holidays. They add a refreshing, cooling peppermint and chocolate flavor that pairs wonderfully with the rich fudge. However, this is where your creativity can shine! Feel free to swap them out for other toppings like crunchy toffee bits, toasted chopped nuts (pecans, walnuts), colorful sprinkles, sea salt flakes for a sweet-and-salty contrast, or even mini chocolate chips for extra chocolatey goodness.
How To Make This Quick and Easy Microwave Fudge
Making this **15-minute microwave fudge** is incredibly straightforward. Follow these simple steps for a perfect batch every time:
- Prepare Your Pan: Begin by lining a 9×13-inch baking pan with parchment paper. Ensure there’s enough overhang on the sides to create “handles,” which will make lifting the set fudge out of the pan much easier. Alternatively, you can generously grease the pan to prevent sticking.
- Melt the Butter: In a large, microwave-safe bowl, place your unsalted butter. Microwave it in short 15-second bursts, stirring between each interval, until the butter is completely melted and liquid. This prevents it from overheating.
- Combine Sugar & Evaporated Milk: Add the granulated sugar and evaporated milk to the melted butter in the bowl. Stir vigorously until all ingredients are thoroughly combined and the sugar begins to dissolve into the liquid.
- First Microwave Interval: Place the bowl back into the microwave and heat the mixture for 3 minutes on high power. The mixture will be hot and bubbly.
- Stir and Second Heat: Carefully remove the bowl from the microwave (it will be hot!) and stir the mixture extremely well with a sturdy spatula or spoon. Ensure you scrape down the sides to incorporate everything. Return it to the microwave for another 2 minutes.
- Scrape and Third Heat: Once again, remove the bowl. Scrape down the sides of the bowl thoroughly to ensure even cooking and prevent any sugar crystals from forming on the edges. Then, microwave the mixture for an additional 3 minutes.
- Final Stir and Heat: Give the mixture one more thorough stir, making sure it’s smooth and well combined. Return it to the microwave for a final 2 minutes. The mixture should be hot and glossy.
- Combine with Fluff and Chocolate: Immediately after the final microwave interval, remove the bowl. While the mixture is still piping hot, quickly stir in the marshmallow fluff, semi-sweet chocolate chips, and vanilla extract. Stir continuously and vigorously until the chocolate chips are completely melted and the mixture is smooth, glossy, and uniform.
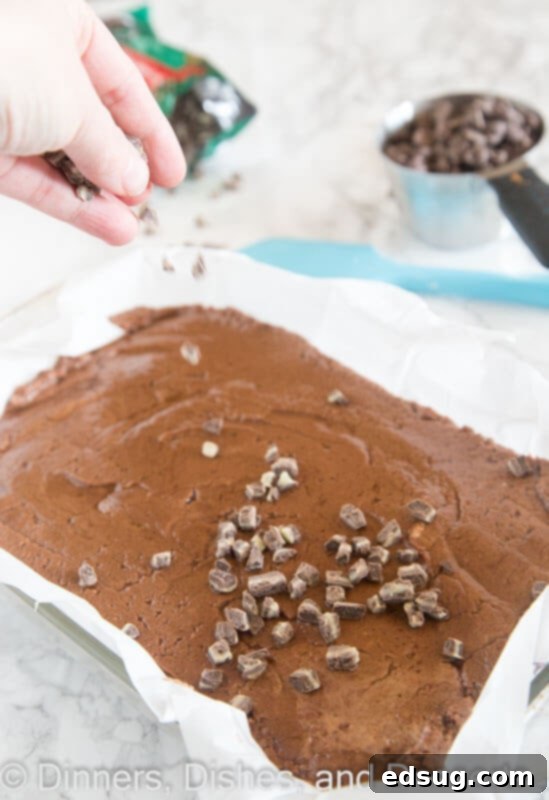
- Pour into Pan: Promptly pour this delectable, warm fudge mixture into your prepared 9×13-inch pan. Use your spatula to spread it evenly across the bottom of the pan, ensuring a consistent thickness.
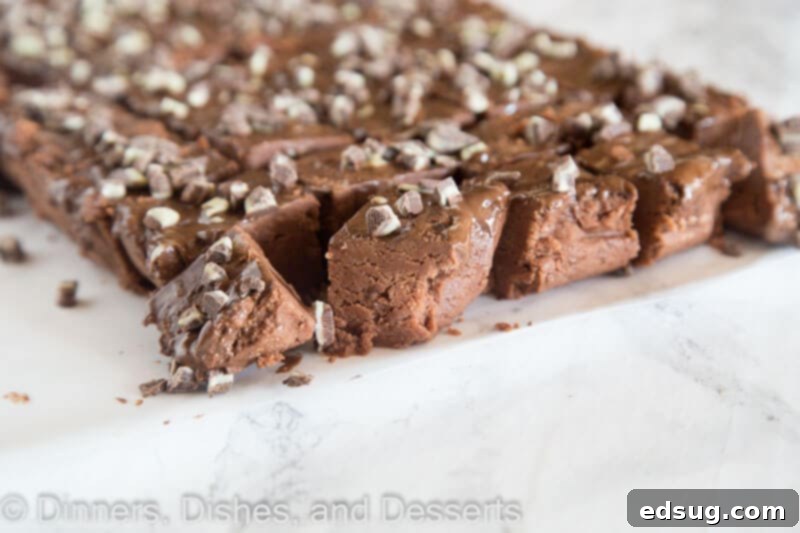
- Cool and Garnish: Allow the fudge to cool at room temperature for about 10 minutes. If you’re using optional toppings like chopped Andes mints, sprinkle them evenly over the fudge at this point, gently pressing them in if desired. Let the fudge cool completely and set, preferably at room temperature for several hours or in the refrigerator for 1-2 hours, before cutting into squares and serving.
Expert Tips & Tricks for Perfect Microwave Fudge
While this **microwave fudge recipe** is incredibly forgiving, a few expert tips can help ensure your fudge is absolutely perfect every time, achieving that desirable creamy texture and rich flavor.
- Prioritize High-Quality Chocolate Chips: The quality of your chocolate significantly impacts the final taste of your fudge. Opt for premium semi-sweet or dark chocolate chips from a reputable brand. Better chocolate melts more smoothly and offers a richer, more nuanced flavor profile, elevating your fudge from good to absolutely outstanding.
- Be Mindful of Microwave Wattage: Microwave ovens vary greatly in power. A higher wattage microwave will cook faster, while a lower wattage one may require slightly longer heating times. Pay close attention to your fudge mixture during each interval. If it looks like it’s boiling too vigorously or not heating enough, adjust your cooking times accordingly to prevent overcooking or undercooking.
- Stir Thoroughly After Each Interval: Consistent and vigorous stirring after every microwave interval is key. This ensures that the sugar dissolves completely, prevents the mixture from scorching at the bottom, and promotes even melting of all ingredients. A well-stirred mixture leads to a smooth, non-grainy fudge. Don’t just skim the surface; get down to the bottom and sides of the bowl.
- Avoid Overheating the Mixture: Overheating the sugar and milk mixture can lead to a grainy or crumbly fudge. The goal is to bring it to a boil, but not to caramelize or burn the sugar. Visually inspect the texture between each microwave interval. If it looks like it’s changing color or developing a thicker skin too quickly, reduce the remaining cooking time.
- Get Creative with Mix-Ins and Toppings: This fudge is a fantastic canvas for customization. Beyond Andes mints, consider stirring in chopped nuts like toasted pecans, walnuts, or almonds for added crunch. For a festive touch, try crushed candy canes, holiday sprinkles, or even a swirl of peanut butter. Different flavored extracts like almond, orange, or peppermint can also add exciting twists.
- Utilize Parchment Paper Overhang: When lining your 9×13-inch pan with parchment paper, make sure to leave a generous overhang on the long sides. These “handles” are a simple yet incredibly effective trick. Once the fudge has cooled and set, you can easily grasp these parchment handles to lift the entire block of fudge out of the pan, making cutting and serving a breeze without any sticky mess.
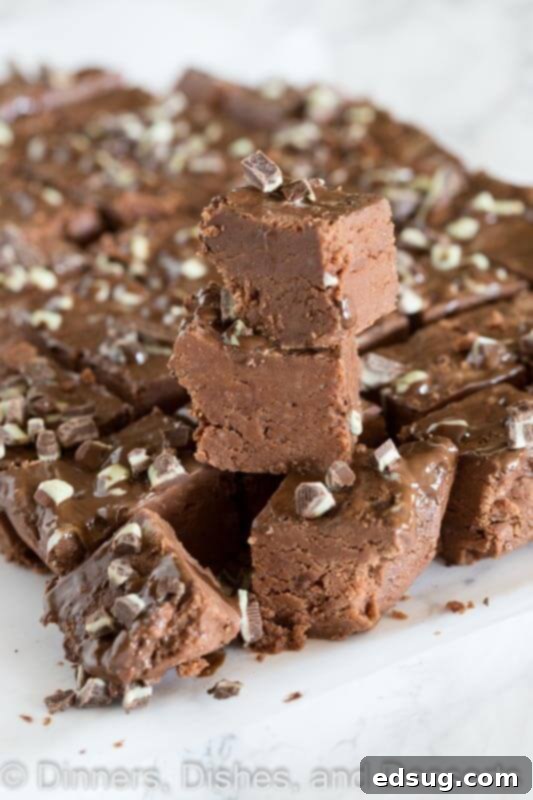
- Allow for Complete Cooling Before Cutting: Patience is a virtue, especially with fudge! Resist the urge to cut into your fudge too soon. Allow it to cool completely and set firm in the pan before attempting to slice it. This ensures clean, neat squares that hold their shape beautifully, rather than messy, crumbly pieces. Cooling for at least 2 hours at room temperature or 1 hour in the refrigerator is recommended.
Frequently Asked Questions About Microwave Fudge
I highly recommend sticking to evaporated milk for its unique properties. Its rich, concentrated creaminess is essential for achieving the perfect texture in this microwave fudge. Regular milk is much thinner and contains more water, which prevents the fudge from coming together and setting properly in the microwave. In a pinch, heavy cream could be a possible substitute, but be aware that the final texture and flavor may differ slightly from the intended recipe result.
When stored correctly, this delicious microwave fudge has a good shelf life. In an airtight container at cool room temperature, it can stay wonderfully fresh for up to one week. For extended freshness, especially in warmer climates or if you’ve made a large batch, it’s best to refrigerate it, where it will last for several weeks. You can also freeze fudge for several months; just be sure to wrap it tightly to prevent freezer burn.
To maintain the fudge’s creamy texture and prevent it from drying out, store it in an airtight container. Keep it in a cool, dry place away from direct sunlight for up to 1 week. If you need to store it longer, or if your home is warm, refrigerate the fudge in its airtight container. For long-term storage, wrap individual pieces or blocks of fudge tightly in plastic wrap, then place them in an airtight freezer-safe container or bag and freeze for up to 3 months. When ready to enjoy frozen fudge, simply let it thaw in the refrigerator overnight before bringing it to room temperature for the best texture.
Grainy fudge is typically caused by sugar crystals that didn’t fully dissolve. This can happen if the sugar mixture wasn’t stirred enough, was overheated too quickly, or if sugar crystals splattered onto the sides of the bowl and weren’t scraped back into the mixture. To prevent this, ensure you stir thoroughly after each microwave interval, scraping down the sides of the bowl meticulously, and avoid overheating. A clean, smooth melting process is key for smooth fudge.
More Tasty Christmas & Holiday Recipes You’ll Love
- Mint Chocolate Pudding Cookies
- Hot Chocolate Dip
- Sugar Cookie Fudge
- White Chocolate Coconut Balls
- Christmas Bark
- Grinch Truffles
Easy Microwave Fudge
Pin Recipe
Rate Recipe
Print Recipe
Video
Ingredients
- 3/4 cup unsalted butter
- 3 cup granulated sugar
- 2/3 cup evaporated milk
- 1 12 oz bag semi-sweet chocolate chips
- 1 7 oz container marshmallow fluff
- 1 teaspoon vanilla extract
- 1 cup chopped Andes mints, (optional)
Instructions
-
Line a 9×13 pan with parchment paper or grease and set aside.
-
In a large microwave safe bowl melt butter.
-
Stir in sugar and evaporated milk. Heat for 3 minutes.
-
Stir well, and heat for an additional 2 minutes.
-
Scrape down the sides and heat for another 3 more minutes.
-
Stir well, and heat once more for 2 minutes.
-
Remove from the microwave and stir in marshmallow fluff, chocolate chips and vanilla. Pour into prepared pan.
-
Let cool for 10 minutes and sprinkle with Andes mints if using.
Nutrition
Nutrition information is automatically calculated, so should only be used as an approximation.
Additional Info
Like this recipe? Leave a comment below!
I created a fun group on Facebook, and I would love for you to join us! It’s a vibrant community where you can share YOUR favorite recipes, ask questions, and stay updated on what’s new at Dinners, Dishes and Desserts so you never miss a delicious new recipe!
Be sure to follow me on Instagram and tag #dinnersdishes so I can see all the wonderful DINNERS, DISHES, AND DESSERTS recipes YOU make!
Don’t forget to follow me on my social media channels, so you never miss a post and stay connected with our culinary adventures!
Facebook | Twitter | Pinterest | Instagram
