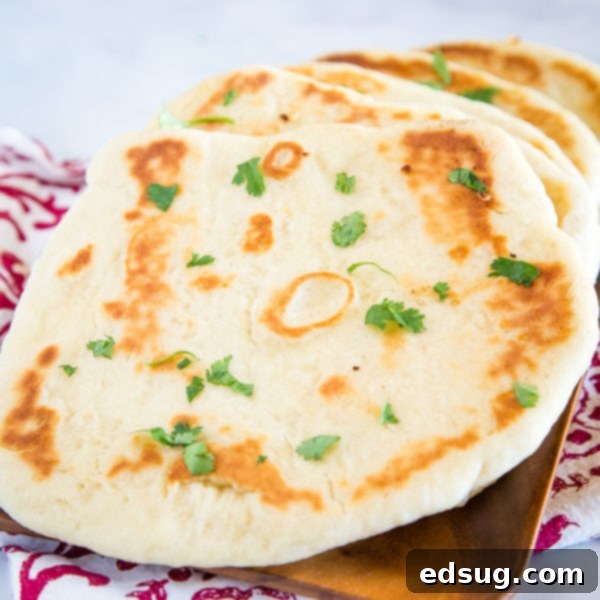
Homemade Naan Bread: Your Ultimate Guide to Soft, Chewy Indian Flatbread
There’s something truly magical about the aroma of freshly baked bread, and when it comes to Indian cuisine, that magic often comes in the form of Naan. This isn’t just any flatbread; it’s a soft, pillowy, and delightfully chewy staple that perfectly complements a wide array of savory dishes. For years, enjoying authentic Indian food at home felt incomplete without the traditional Naan bread served at restaurants. But what if we told you that creating this beloved Indian flatbread from scratch in your own kitchen is not only achievable but also incredibly rewarding? This comprehensive guide will walk you through everything you need to know to master homemade Naan, turning your kitchen into an Indian bakery.
My journey with Indian food began over a decade ago, and it quickly became a cherished part of our family’s meal rotation. While many dishes stole our hearts, the one accompaniment we couldn’t do without was Naan. Specifically, we developed a strong preference for garlic naan, brushed generously with aromatic garlic butter right before grilling. Whether plain or garlic-infused, Naan is an absolute essential, especially when serving classics like Butter Chicken or any rich curry. The good news is, you don’t need a traditional tandoor oven to achieve that perfect, bubbly Naan at home – a simple skillet or griddle will do the trick!
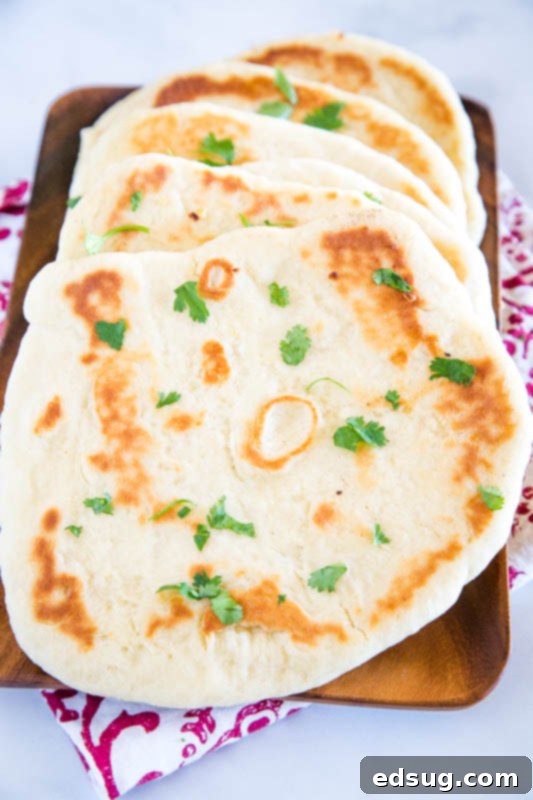
What Exactly is Naan Bread? A Culinary Deep Dive
Naan is a leavened flatbread, deeply rooted in the culinary traditions of South Asia, Central Asia, and the Caribbean. Unlike unleavened flatbreads, Naan uses yeast (or a combination of yeast and other leavening agents) which gives it its characteristic soft, airy, and slightly chewy texture. Historically, Naan was baked in a tandoor, a cylindrical clay oven that provides intense, even heat, allowing the dough to puff up beautifully and develop a smoky, charred exterior. While a tandoor imparts a unique flavor, modern home cooks can achieve excellent results using a hot cast-iron skillet, griddle, or even a grill, mimicking the high heat needed to achieve those desirable bubbles and golden-brown spots.
The beauty of Naan lies in its versatility. It serves as an edible utensil, perfect for scooping up curries, stews, and gravies. It’s also a delightful canvas for various toppings, from fresh herbs to melted cheese. The distinctive taste and texture of Naan come from its rich dough, which typically includes ingredients like yogurt, milk, and sometimes eggs or butter, distinguishing it from many other flatbreads.
Naan Bread vs. Pita Bread: Understanding the Differences
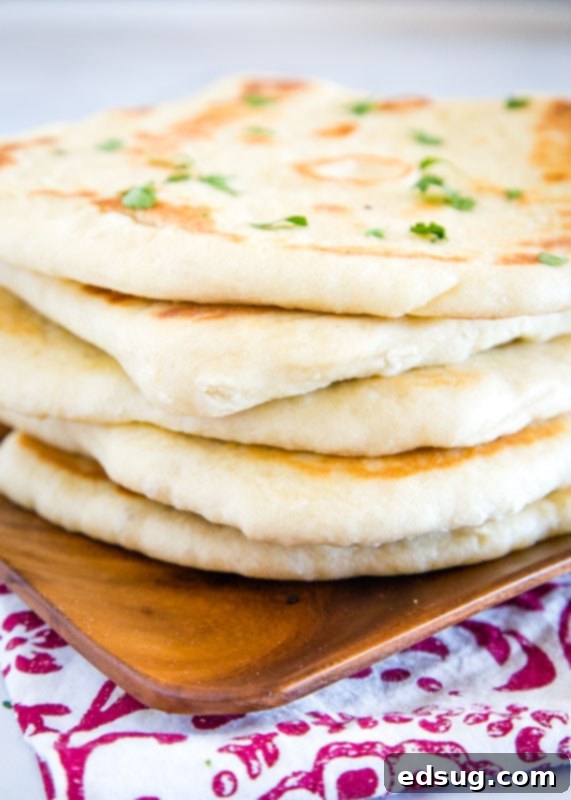
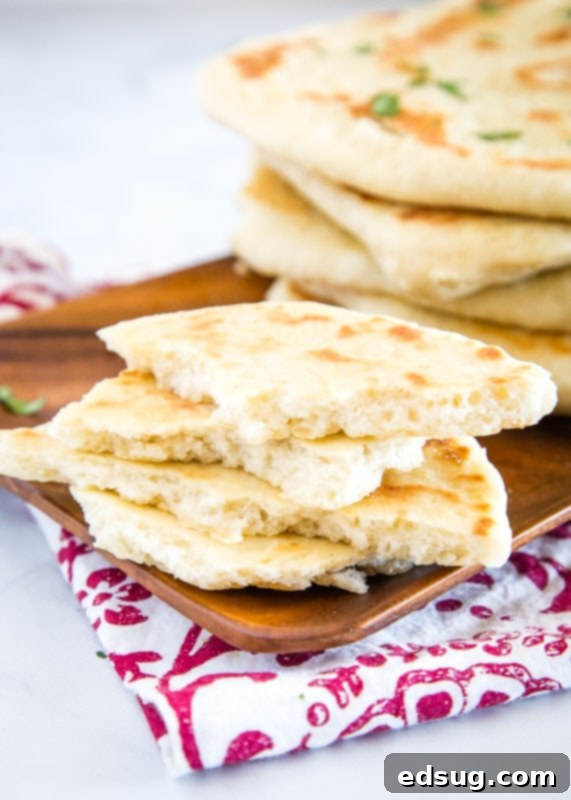
While both Naan and pita are popular flatbreads, they possess distinct characteristics that set them apart. The primary difference lies in their ingredients and the resulting texture. Naan bread is notably softer, chewier, and often thicker than pita bread. This tenderness is largely attributed to the inclusion of dairy products like yogurt or milk, and sometimes an egg, which enrich the dough and contribute to its supple texture. Yogurt, in particular, adds a slight tang and helps tenderize the gluten, resulting in a bread that remains soft even after cooling.
Pita bread, on the other hand, is typically made with simpler ingredients – flour, water, yeast, salt, and often olive oil. It bakes at a very high temperature, causing it to puff up dramatically and create a distinctive pocket in the center. While pita is excellent for stuffing with fillings, Naan’s richer, more pliable nature makes it ideal for scooping, dipping, or enjoying alongside saucy dishes. Essentially, if you’re looking for a softer, more indulgent flatbread with a rich flavor profile, Naan is your go-to, whereas pita offers a lighter, pocket-forming alternative perfect for sandwiches.
The Undeniable Joy of Baking Homemade Naan
For me, there’s an incomparable satisfaction that comes from baking bread from scratch. The journey from simple ingredients to a warm, fragrant loaf is deeply gratifying. While Naan is a flatbread and doesn’t involve slicing into a rustic loaf, it offers the same profound sense of accomplishment. The subtle yeasty aroma as the dough rises, the anticipation as small bubbles appear and plump up on the hot surface of the skillet – these moments are pure culinary delight, igniting an immediate hunger. Beyond the sensory experience, homemade Naan offers unparalleled freshness and flavor that store-bought versions simply can’t match. You have complete control over the ingredients, ensuring a wholesome and delicious product free from unnecessary additives. Plus, the process itself is surprisingly straightforward, making it an accessible baking project for cooks of all skill levels.
How to Master Homemade Naan Bread: A Step-by-Step Guide
Creating perfect Naan at home involves a few simple yet crucial steps. Don’t be intimidated; the process is quite forgiving, and the rewards are absolutely worth it!
- Activate the Yeast: Begin by combining warm water, sugar, and a package of active dry yeast in a large bowl. The water should be between 110-115°F (43-46°C) – too hot, and it will kill the yeast; too cold, and it won’t activate properly. Let this mixture stand for about 5-10 minutes. You’re looking for the yeast to “bloom,” forming a frothy layer on the surface. This indicates your yeast is alive and ready to work its magic.
- Combine Dry Ingredients: In a separate, large mixing bowl, or the bowl of a stand mixer fitted with a dough hook, whisk together about 3 cups of bread flour (starting with less allows for adjustments), baking soda, and salt. Bread flour is often preferred for its higher protein content, which contributes to Naan’s chewy texture, but all-purpose flour works well too.
- Form the Dough: Pour the activated yeast mixture into the dry ingredients. Add the olive oil, beaten egg, and plain yogurt. Begin mixing on low speed in a stand mixer, or stir with a wooden spoon until the ingredients start to come together. Gradually add more flour, a tablespoon at a time, if the dough is too sticky, until a soft, pliable dough forms that pulls away from the sides of the bowl. Avoid adding too much flour, as this can result in tough Naan.
- Knead and Rise: Once the dough has formed, knead it for 4-5 minutes. If using a stand mixer, set it to low speed. If kneading by hand, sprinkle your counter with a light dusting of flour. Knead until the dough is smooth and elastic. Lightly oil a clean bowl, place the dough in it, and turn it once to coat all sides. Cover the bowl with plastic wrap or a clean kitchen towel and let it rise in a warm place for about 1 hour, or until it has visibly doubled in size. This crucial step allows the yeast to ferment, creating air pockets that give Naan its signature texture.
- Divide and Shape: After the dough has risen, gently “punch it down” to release the air. Transfer the dough to a lightly floured surface and divide it into 8 equal-sized pieces. Roll each piece into a smooth ball. Using a rolling pin, flatten each ball into an oval or circular shape, roughly 6 inches in diameter and about ¼-inch thick. Aim for an even thickness to ensure even cooking.
- Cook to Perfection: Heat a cast-iron griddle, large skillet, or even an outdoor grill to medium-high heat. Lightly brush the cooking surface with a little oil or use a non-stick spray. Place one piece of rolled Naan dough onto the hot surface. Cook for 2-3 minutes per side. You’ll know it’s time to flip when you see little bubbles forming and puffing up on the surface, and the underside has golden-brown spots. For delicious garlic naan, brush the uncooked side with a mixture of melted butter and minced garlic before flipping. After flipping, brush the other side with garlic butter (if desired) and cook for another 2 minutes until it’s golden and cooked through. Remove from the heat and continue with the remaining pieces of dough, brushing each cooked Naan with more butter or garlic butter for extra flavor and shine.
Flavor Variations: Elevating Your Naan Experience
While plain Naan is undeniably delicious, its simple base makes it perfect for endless customization. Here are a few popular variations to try:
- Garlic Naan: As mentioned, this is a crowd favorite. Simply melt butter and mix it with finely minced garlic (and a sprinkle of fresh cilantro if you wish). Brush this mixture generously over the Naan before and after cooking.
- Butter Naan: For a rich, simple flavor, brush freshly cooked Naan with melted unsalted butter. A sprinkle of sea salt can enhance this further.
- Cheese Naan: Before cooking, sprinkle shredded mozzarella, cheddar, or a blend of Indian cheeses (like paneer) over one side of the rolled dough. Fold the dough over, seal the edges, and then gently roll it out again. Cook as directed, allowing the cheese to melt and become gooey.
- Herb Naan: Incorporate finely chopped fresh herbs like cilantro, parsley, or mint into the dough, or sprinkle them on top with butter after cooking.
- Kalonji Naan: Add a sprinkle of black cumin (kalonji) seeds to the dough or press them into the surface before cooking for a distinct, aromatic flavor.
How to Store Naan Bread: Keeping it Fresh
To enjoy your homemade Naan at its best, proper storage is key. Once your Naan has completely cooled to room temperature, stack the pieces and place them in an airtight plastic storage bag or container. Stored this way, Naan will remain fresh and soft in your pantry for 4-5 days. For reheating, I find the best method is to gently warm it in a skillet over medium-low heat for 1-2 minutes per side. This revives its soft, pliable texture and brings back that lovely warm bread feel, making it almost as good as freshly cooked.
Can You Freeze Naan Bread? Absolutely!
Yes, Naan bread freezes beautifully, making it an excellent candidate for meal prep. Once the Naan has cooled completely, wrap each piece individually in plastic wrap or aluminum foil. Then, place the wrapped Naan into a freezer-safe bag or an airtight container to prevent freezer burn. It can be stored in the freezer for up to 2-3 months. To thaw, simply remove the desired number of pieces and let them sit at room temperature for a few hours until soft. You can then reheat them in a skillet, microwave, or a toaster oven until warm and pliable. Freezing Naan allows you to always have a delicious, ready-to-eat accompaniment on hand for last-minute meals or entertaining. It’s fantastic for impromptu sandwiches, as a quick pizza crust base, or cut into wedges for dipping into hummus or other spreads.

What to Serve with Naan Bread: Beyond the Basics
Naan bread is incredibly versatile and pairs wonderfully with a vast array of dishes, not just Indian cuisine. Its soft texture and mild flavor make it a perfect complement to rich, saucy meals. Of course, classic Indian curries are a natural fit:
- Chicken Tikka Masala: The creamy, spiced sauce is a dream for scooping up with warm Naan.
- Quick Chicken Curry: Naan’s ability to soak up aromatic curries makes it an ideal pairing.
- Coconut Chicken Curry: The sweetness of coconut milk beautifully balances with the savory bread.
- Chicken Vindaloo: The heat of Vindaloo is tempered and complemented by the comforting texture of Naan.
- Indian Lentil Soup (Dal): A hearty soup that becomes a complete meal when served with fresh Naan.
- Basil Coconut Curry: A lighter curry that still benefits from the substantiality of Naan.
Beyond traditional Indian dishes, think creatively! Use Naan as a base for mini pizzas, slather it with hummus and veggies for a quick wrap, or cut it into triangles and serve it with your favorite dips like baba ghanoush or spinach artichoke dip. It can even replace traditional sandwich bread for a heartier, more flavorful lunch. The possibilities are truly endless once you have a batch of delicious homemade Naan ready to go!

Naan Bread
Pin Recipe
Rate Recipe
Print Recipe
Ingredients
- 1 package active dry yeast
- 1 cup warm water, 110-115º F
- 1 Tablespoon sugar
- 3 Tablespoons olive oil
- 1 large egg, beaten
- 1/4 cup plain yogurt
- 2 teaspoons salt
- 1/2 teaspoon baking soda
- 3 1/2 cups bread flour
- 2 teaspoon garlic, minced
- 1/4 cup butter
Instructions
-
In a large bowl, dissolve yeast and sugar in warm water. Let it stand for 10 minutes, until it becomes frothy.
-
In a separate bowl mix together 3 cups flour, salt and baking soda. Mix in the water mixture, olive oil, egg, and yogurt and stir until a soft dough forms. Knead for 4-5 minutes on a lightly floured surface, until smooth. Place dough in a well oiled bowl, cover and let rise for 1 hour, until it has doubled in size.
-
Punch down the dough. Divide into 8 equal size balls of dough. Roll into a 6 inch circle.
-
Heat grill, large skillet or griddle to medium high heat. Lightly oil the pan or use non-stick spray. Cook for 2 or 3 minutes, until it starts to get puffy, and little bubbles form. Brush the uncooked side with the garlic butter, and turn over. Brush the other side with butter, and cook for another 2 minutes. Remove from grill, and finish cooking the rest of the bread
Notes
Nutrition
Nutrition information is automatically calculated, so should only be used as an approximation.
Additional Info
Like this recipe? Leave a comment below!
Be sure to follow me on Instagram and tag #dinnersdishes so I can see all the wonderful DINNERS, DISHES, AND DESSERTS recipes YOU make!
Connect with Dinners, Dishes, and Desserts!
Be sure to follow me on my social media, so you never miss a post!
Facebook | Twitter | Pinterest | Instagram
