Ultimate Homemade Ding Dong Cake Recipe: A Decadent Hostess Copycat
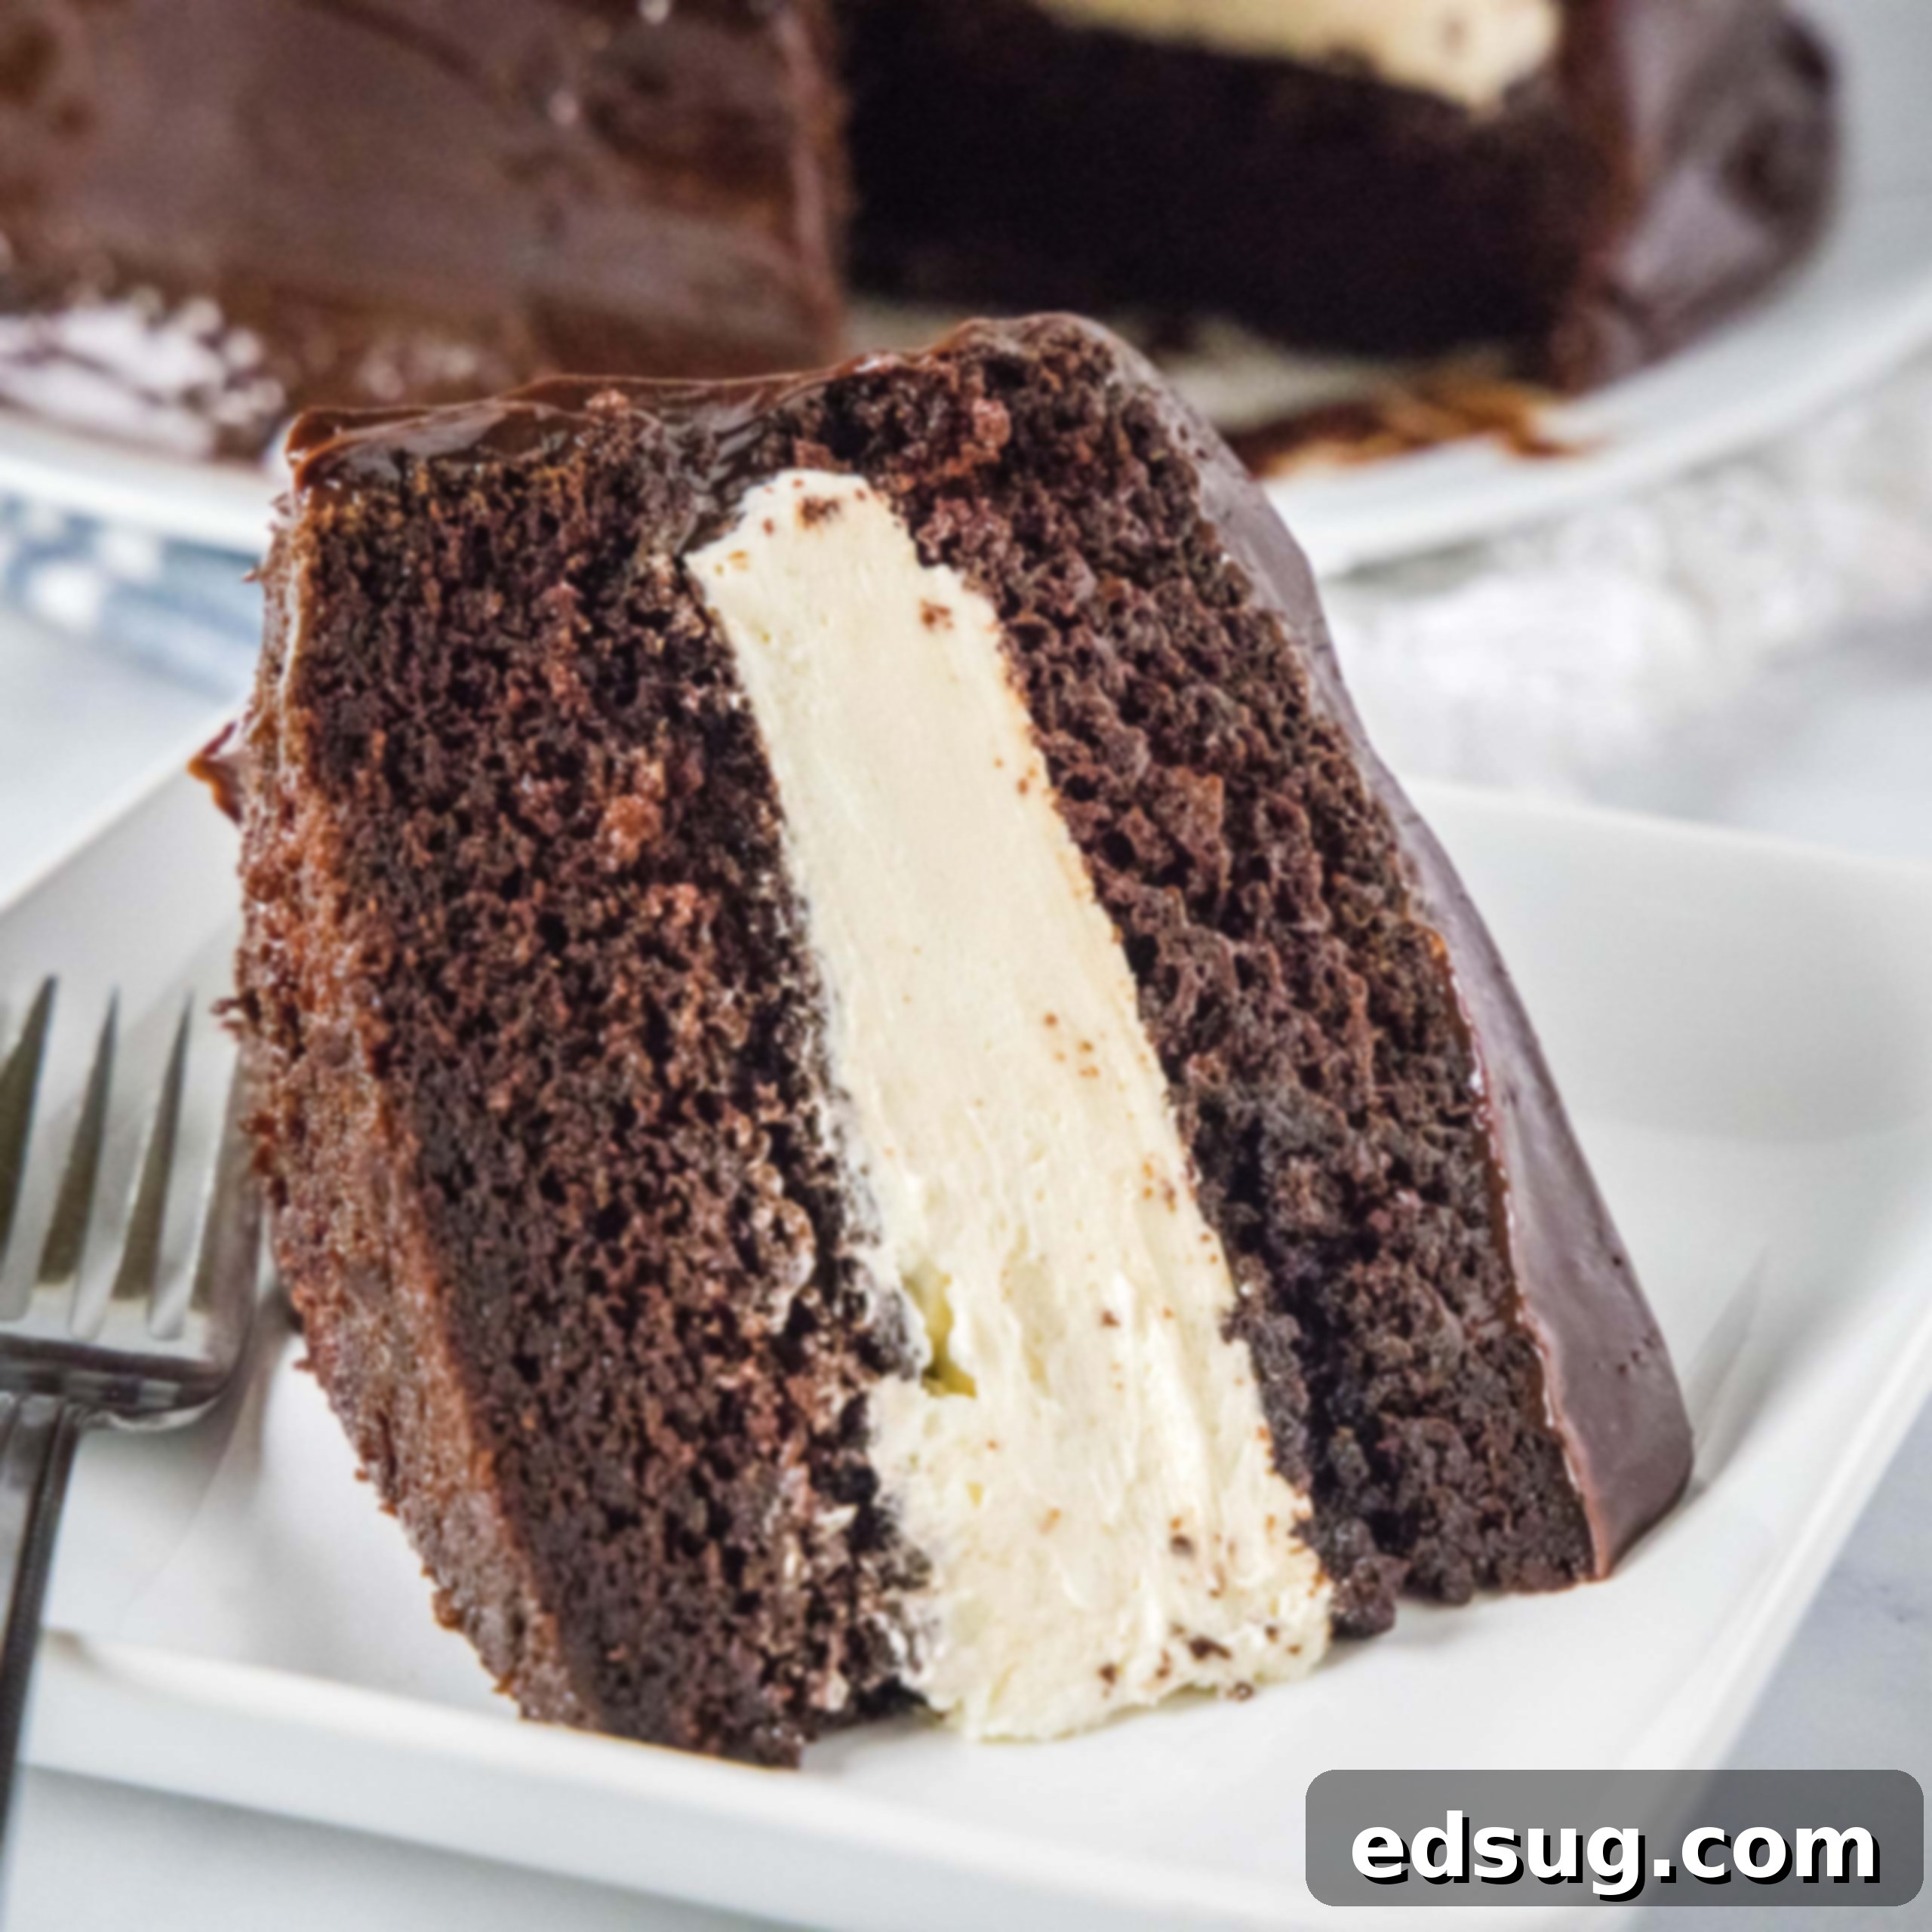
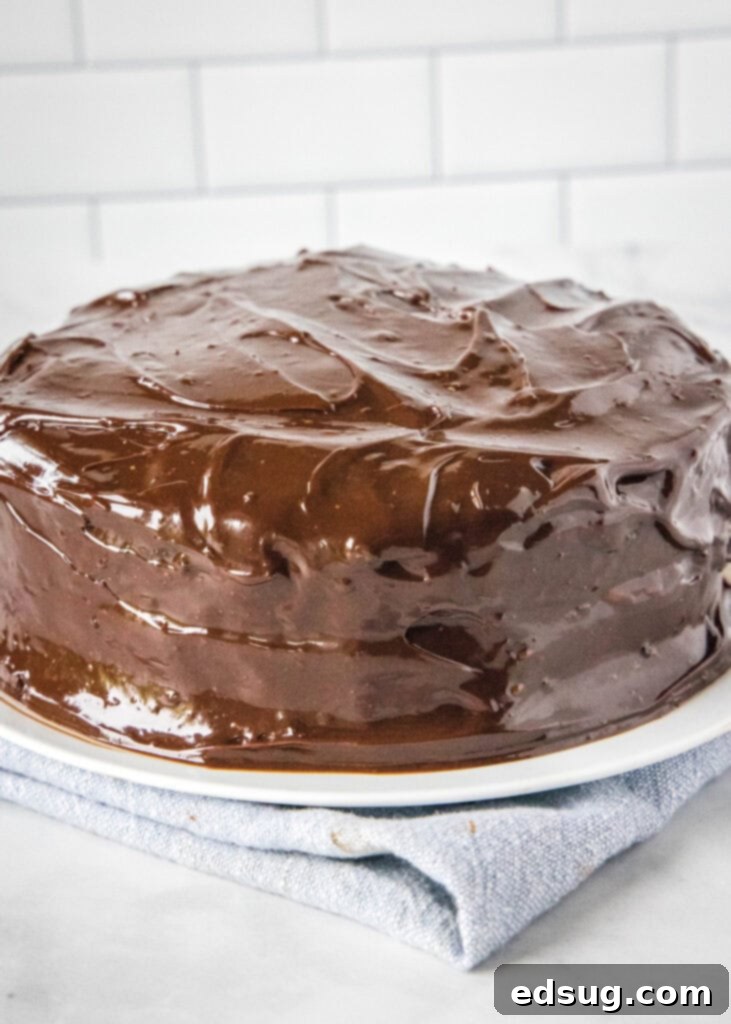
Get ready to indulge in pure chocolate bliss with this incredible homemade Ding Dong Cake recipe! Often known affectionately as a Ho Ho Cake, this decadent dessert is our elevated take on the iconic Hostess Cupcake. It offers a far richer flavor and a truly satisfying texture that store-bought versions simply can’t match. Imagine a moist, intensely chocolatey cake, generously filled with a velvety, sweet cream, and crowned with a luscious, glossy chocolate ganache. It’s an unforgettable treat that will transport you back to cherished childhood memories while delighting your adult palate with its sophisticated taste.
Growing up, certain desserts defined family gatherings, and for me, it was always my aunt’s legendary Ho Ho Cake or Ding Dong Cake. As a self-proclaimed chocolate aficionado, it quickly became a top favorite. There was something undeniably magical about the combination of the smooth, rich chocolate ganache paired with that perfectly creamy center. It was a dessert that truly stood out, creating lasting memories, and one I’ve cherished recreating and perfecting with this very recipe.
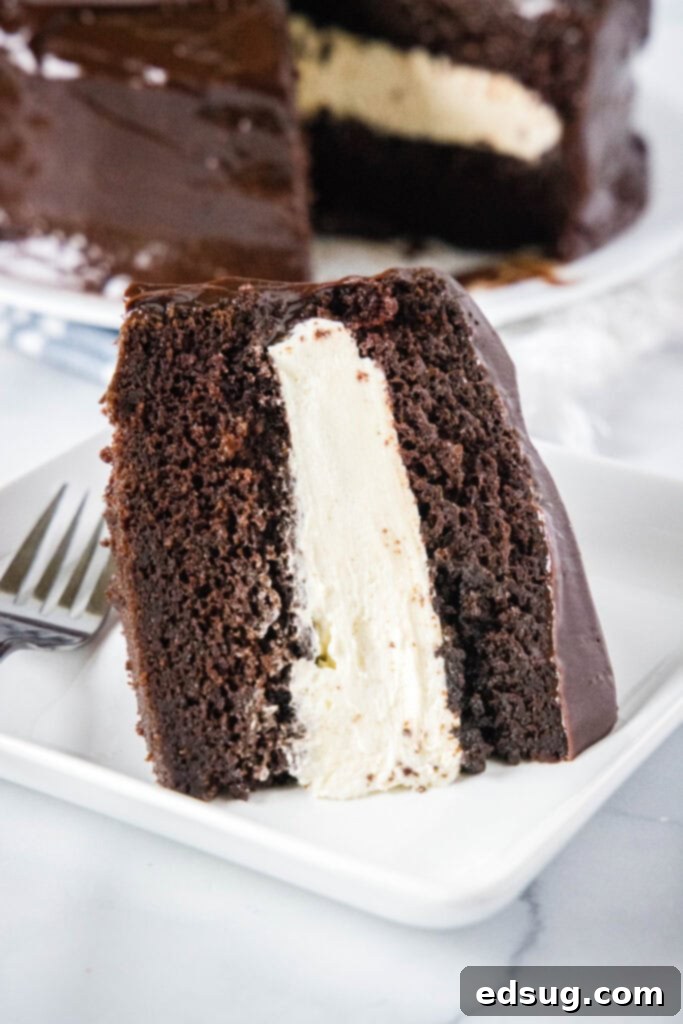
While the classic Hostess Cupcake holds a nostalgic place for many, I confess I was never its biggest fan due to what I found to be a slightly waxy chocolate flavor. This homemade Ding Dong Cake recipe completely eliminates that concern. Instead, you’ll experience an incredibly moist, rich, and deeply chocolatey cake that is light years beyond any mass-produced treat. If you’ve always wished the original had a more authentic, luxurious chocolate taste and a truly tender crumb, prepare to fall head over heels for this homemade version.
In our childhood home, the Little Debbie aisle often won out, making these Cosmic Brownies a perpetual favorite of mine. Yet, the alluring charm of those iconic Hostess cupcakes with their signature swirled frosting always lingered. It was this longing for a truly *good* version that made my aunt’s Ho Ho Cake such a revelation. It wasn’t just a snack cake; it was a proper, moist chocolate cake adorned with real, luscious chocolate ganache. The difference was night and day, solidifying my belief that homemade will always triumph over store-bought when it comes to quality and unforgettable flavor.
Why Bake This Homemade Hostess Copycat?
There are countless compelling reasons to swap out the packaged snack cakes for this spectacular homemade Ding Dong Cake. Not only does it offer an unparalleled depth of flavor, but you also gain complete control over the ingredients, ensuring a fresher, more wholesome dessert for your family and friends. Here’s why this recipe is an absolute must-try:
- Superior Flavor: Say goodbye to artificial flavors and waxy chocolate. Our recipe utilizes high-quality unsweetened cocoa powder for an intensely rich chocolate cake and real butter for a creamy, delightful filling that tastes genuinely homemade.
- Moist & Fudgy Texture: Forget dry, crumbly cakes. The chocolate cake base used in this recipe is renowned for its exceptional moisture and almost fudgy consistency, making every bite a pure pleasure.
- Customizable Potential: While this recipe flawlessly nails the classic flavor profile, homemade allows for subtle tweaks. Want a hint of mint in your filling? A touch of espresso powder to deepen the chocolate? The possibilities for personalization are endless.
- Impressive Presentation: Whether it’s for a special birthday, a casual family gathering, a potluck, or simply a luxurious weekend treat, a homemade Ding Dong Cake looks and tastes incredibly impressive, far exceeding the visual appeal and quality of its store-bought inspiration.
- Nostalgia Factor Amplified: Recreate cherished childhood memories with a dessert that tastes even better, richer, and more authentic than you remember. It’s a taste of the past, perfected for the present.
Essential Ingredients for Your Decadent Ding Dong Cake
Crafting this magnificent Ding Dong Cake requires a thoughtfully selected array of ingredients, with each component contributing significantly to its iconic flavor and texture. While the ingredient list might appear a little extensive at first glance, remember we’re simultaneously crafting three distinct layers of deliciousness: the rich chocolate cake, the luscious cream filling, and the shiny chocolate ganache. Every item plays a vital role in achieving that perfect balance of sweet, intensely chocolatey, and wonderfully creamy.
For exact measurements and a detailed, printable recipe card, please scroll down to the bottom of this post!
For the Moist Chocolate Cake:
- All-Purpose Flour: The fundamental building block for our cake’s structure, ensuring a tender yet stable crumb.
- Granulated Sugar: Provides essential sweetness and helps retain moisture, contributing to the cake’s tender texture.
- Unsweetened Cocoa Powder: The absolute key to achieving that deep, rich, authentic chocolate flavor. Opt for a good quality brand for the most impactful results.
- Baking Soda & Baking Powder: Our dual leavening agents, working synergistically to give the cake its desirable lift and light, tender crumb.
- Salt: A crucial ingredient that balances and significantly enhances all the other flavors, making the chocolate truly sing.
- Buttermilk: Adds incredible moisture and a subtle tang that interacts beautifully with the cocoa and baking soda, resulting in an exceptionally tender and moist cake. No buttermilk on hand? Don’t fret! You can easily make your own simple Homemade Buttermilk substitute.
- Large Eggs: Serve as binders for the ingredients, impart richness, and contribute significantly to the cake’s overall structure and texture.
- Vegetable Oil: Helps achieve a super moist and tender cake texture, often preferred over solid fats like butter for certain chocolate cake recipes.
- Vanilla Extract: A classic enhancer that rounds out and deepens the overall flavor profile, particularly complementing the chocolate.
- Hot Water: This often-overlooked secret ingredient “blooms” the cocoa powder, intensifying the chocolate flavor dramatically and further contributing to the cake’s moistness and velvety texture.
For the Classic Creamy Filling:
- Whole Milk: Forms the rich base for our cooked pudding-like mixture, which is the foundation of the filling.
- All-Purpose Flour: Acts as a thickening agent for the milk, creating a stable, smooth, and creamy base without the need for cornstarch.
- Vanilla Extract: Imparts that signature sweet, comforting, and aromatic flavor to the filling.
- Softened Butter: Whipped vigorously with sugar, it creates the light, airy, and fluffy texture characteristic of the final frosting.
- Granulated Sugar: Sweetens the filling to perfection, balancing the richness of the butter and milk.
For the Decadent Chocolate Ganache:
- Semi-Sweet Chocolate Chips: The undeniable star of our glossy, rich chocolate topping. Using quality chocolate makes a noticeable difference in the final taste and shine.
- Heavy Cream: Melds exquisitely with the chocolate to create a smooth, pourable, and ultimately luscious ganache that drapes beautifully over the cake.
Yes, the ingredient list is comprehensive, but each element is meticulously chosen and crucial for achieving the authentic and utterly delicious Ding Dong Cake experience. The beauty of this recipe also lies in its ability to be prepared in stages. You can easily bake the chocolate cake layers one day, allowing them to cool completely, and then proceed with preparing the filling, ganache, and assembling the cake the following day. This thoughtful approach makes the entire process much more manageable and enjoyable, preventing any rushed steps.
The foundation of this dessert is a truly spectacular chocolate cake – it’s actually my cherished go-to chocolate cake recipe, renowned for its super chocolatey, rich, and almost fudgy texture. It’s a versatile base I frequently use in favorites like my Chocolate Cream Cake and Chocolate Drip Cake, proving its reliability and consistent deliciousness for any basic chocolate cake need.
Baking Your Ding Dong Cake: A Step-by-Step Guide
Crafting this Ding Dong Cake from scratch is an incredibly rewarding culinary experience. Follow these detailed steps meticulously to ensure each component – the cake layers, the creamy filling, and the luscious ganache – comes out perfectly, leading to a spectacular and uniformly delicious final dessert.
Step 1: The Chocolate Cake
- Prepare Your Pans: Begin by preheating your oven to 350°F (175°C). Prepare two 8-inch round cake pans. For foolproof non-stick results, I highly recommend using parchment paper rounds on the bottom and then thoroughly greasing and lightly flouring the sides of the pans. (You’ll find more detailed instructions on this below in our “Foolproof Method to Prevent Cake from Sticking” section!)
- Combine Dry Ingredients: In a large mixing bowl, thoroughly whisk together the all-purpose flour, granulated sugar, unsweetened cocoa powder, baking soda, baking powder, and salt. It’s important to ensure there are no lumps and that all ingredients are evenly distributed for consistent baking.
- Mix Wet Ingredients: In a separate, medium-sized bowl, whisk together the buttermilk, large eggs, vegetable oil, and vanilla extract until they are well combined and uniform.
- Combine Wet and Dry: Gradually pour the wet ingredient mixture into the bowl of dry ingredients. Mix on low speed with an electric mixer, or by hand with a whisk, until the ingredients are just combined. Be careful not to overmix, as this can lead to a tough cake.
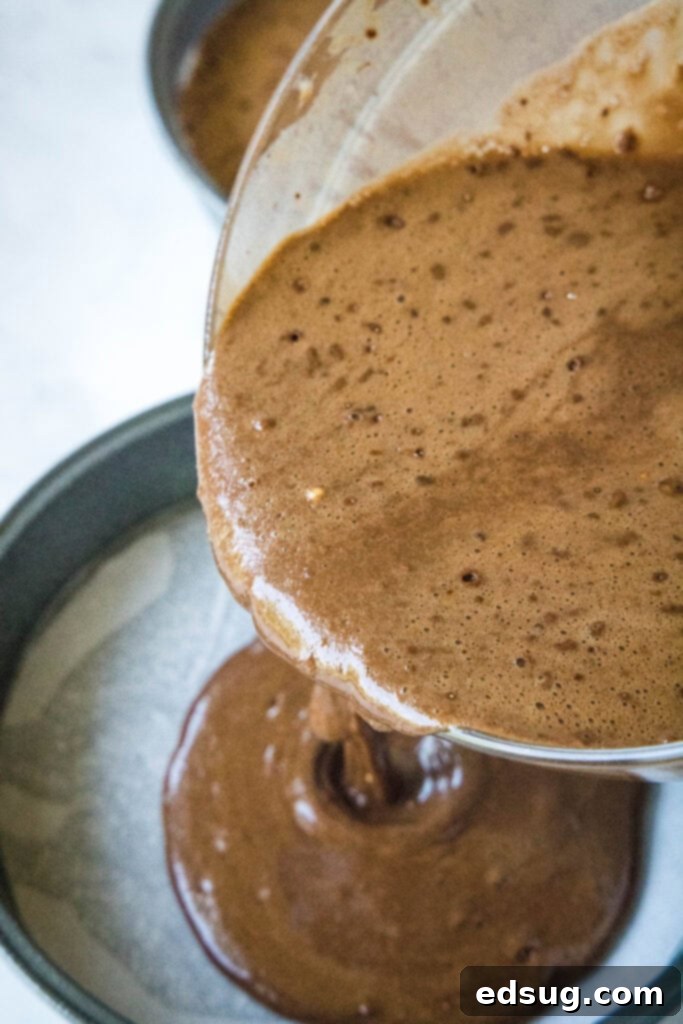
- Add Hot Water: This step is critical for deepening the chocolate flavor and contributing to a wonderfully tender crumb. Carefully stir in the hot water until the batter is smooth. Don’t be alarmed if the batter appears quite thin at this stage – this is exactly the consistency you want for a super moist cake.
- Bake to Perfection: Divide the batter evenly between your two prepared 8-inch cake pans. Bake for approximately 25-27 minutes, or until a wooden skewer or toothpick inserted into the very center of the cakes comes out clean, indicating they are fully cooked.
- Cool Completely: Once baked, remove the cakes from the oven and allow them to cool in their pans on a wire rack for about 10 minutes. After this initial cooling, carefully invert them onto the wire rack to cool completely. This step is absolutely vital – the cake layers must be entirely cool to the touch before you proceed to the filling, otherwise, any lingering warmth will melt the delicate creamy filling.
Step 2: The Creamy Center Filling (Boiled Milk Frosting)
This unique and delightful filling, sometimes referred to as “Boiled Milk Frosting,” is what truly sets this Ding Dong Cake apart. It starts as a simple cooked flour and milk paste that, once perfectly cooled, is whipped into butter and sugar to create a light, fluffy, yet stable, frosting with an irresistible texture.
- Create the Pudding Base: In a medium saucepan, whisk together the whole milk and the 5 tablespoons of all-purpose flour until the mixture is completely smooth and absolutely lump-free.
- Thicken on Heat: Place the saucepan over medium heat and cook, stirring continuously with a whisk or spatula. This constant stirring is absolutely key to preventing lumps from forming and to keep the mixture from scorching on the bottom. Continue to cook until the mixture thickens significantly, reaching a consistency similar to a thick pudding. This might take several patient minutes, so don’t rush the process!
- Cool the Base: Once the mixture is thick and pudding-like, remove the saucepan from the heat and stir in the vanilla extract. Now, transfer it to a bowl and let this milk mixture cool *completely* to room temperature. This is a critical step; if the mixture is even slightly warm, it will cause your butter to melt when combined, and the filling will not achieve the desired whipped and fluffy consistency.
- Whip Butter and Sugar: While the milk mixture cools, in a separate large mixing bowl, cream together the softened butter and granulated sugar using an electric mixer. Beat for a full 4-5 minutes on medium-high speed until the mixture is incredibly light, pale in color, and wonderfully fluffy. This aeration process is very important for the final texture of the filling.
- Combine for Frosting: Slowly and gradually add the completely cooled milk mixture to the whipped butter and sugar, continuing to mix on medium speed. At first, the mixture might look a little separated or even appear slightly curdled – don’t panic or stop! Just keep mixing! After a few more minutes, it will magically come together beautifully, transforming into a smooth, uniformly whipped, and delightfully fluffy frosting consistency.
Step 3: The Decadent Chocolate Ganache
Our quick and incredibly easy ganache provides the perfect glossy, rich chocolate topping for the cake, adding that signature finishing touch that makes it truly a Ding Dong Cake.
- Combine Ingredients: Pour the semi-sweet chocolate chips and heavy cream into a microwave-safe bowl.
- Microwave & Stir: Heat the mixture in the microwave for 60 seconds. Remove the bowl and stir thoroughly until the chocolate chips are completely melted and the ganache is smooth, shiny, and lump-free. If necessary, microwave for an additional 15-30 seconds (or in 15-second increments), stirring well in between each interval, until fully melted and smooth.
Step 4: Assembling Your Masterpiece
With all your delicious components ready – the moist cake layers, the creamy filling, and the rich ganache – it’s time to bring your homemade Ding Dong Cake to life!
- First Cake Layer: Carefully place one of the completely cooled chocolate cake layers onto your chosen serving plate or cake stand.
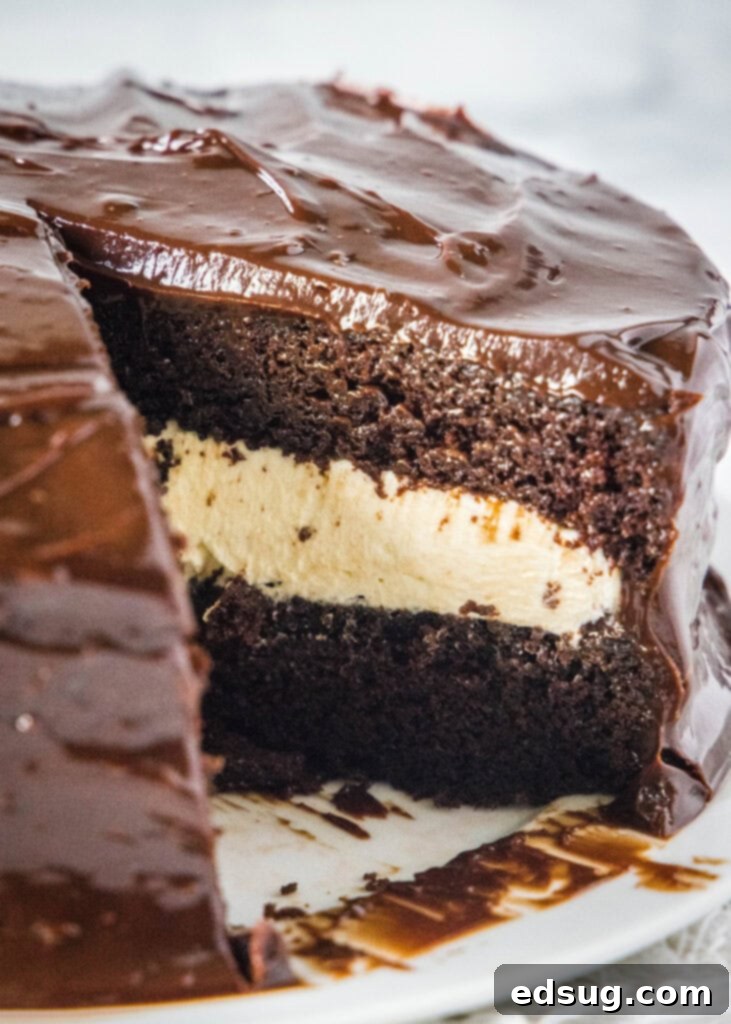
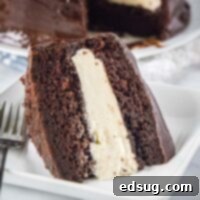
- Spread the Filling: Generously spread the prepared creamy filling evenly over the entire top surface of the first cake layer. Ensure it reaches close to the edges for a beautiful presentation and balanced bite.
- Second Cake Layer: Gently place the second cooled chocolate cake layer directly on top of the cream filling, aligning it as best as possible.
- Pour the Ganache: Slowly pour the warm (but not piping hot!) chocolate ganache over the top center of the cake. Allow it to naturally flow and drip down the sides of the cake, creating that characteristic, rustic, yet elegant Ding Dong look.
- Set & Serve: Let the ganache set for at least an hour at room temperature before attempting to slice and serve. This setting time allows the ganache to firm up slightly, which not only looks better but also makes for much cleaner cuts.
Expert Tips for a Perfect Ding Dong Cake
Achieving bakery-quality results with your homemade Ding Dong Cake is easier than you think with these helpful tips and insights.
Understanding the Cream Filling (Boiled Milk Frosting)
The cream filling is a unique and essential component of this Ding Dong Cake, truly distinguishing it from other chocolate cakes. It’s a cooked flour and milk paste that, once thoroughly cooled, is vigorously whipped into a mixture of butter and sugar to create a fluffy, yet surprisingly stable, frosting. A common question often arises regarding its preparation timing.
Timing is Key: While the cake layers themselves can be baked a day in advance, it’s generally best to prepare the cream filling immediately before you plan to assemble the cake. If made too far ahead and then refrigerated, the filling can set up quite firmly, making it challenging to spread smoothly. If you absolutely must prepare it in advance, ensure it comes to full room temperature and give it a brief re-whip with an electric mixer to restore its creamy, spreadable consistency before using.
This delightful filling, affectionately known as “Boiled Milk Frosting” in my family (a cherished recipe handed down directly from my grandma!), is incredibly versatile. It’s so delicious and stable that you can absolutely use it as a standalone frosting for other cakes or cupcakes. Just imagine its light and creamy texture on a classic vanilla or additional chocolate cupcakes!
Foolproof Method to Prevent Cake from Sticking to Pans
There’s nothing quite as frustrating for a baker as a beautifully baked cake sticking stubbornly to the pan, ruining its perfect shape. My absolute number one tip for ensuring your delicate chocolate cake layers release perfectly and effortlessly every single time is the strategic use of parchment paper. While pre-cut parchment rounds are readily available, I find them often unnecessary for occasional home bakers and can feel a bit wasteful.
Here’s my simple, economical, and foolproof method: Take a sheet of parchment paper, place your cake pan on top, and trace the precise outline of the pan’s bottom with a pencil. Then, using a pair of sharp kitchen scissors, cut just *inside* that traced line. This creates a perfectly sized parchment round. Place this custom-cut parchment round at the bottom of your cake pan. Then, generously grease the entire pan – including the parchment paper and up the sides – with butter, shortening, or your preferred baking spray, and dust it lightly with flour. This creates an impenetrable non-stick barrier that guarantees your cakes will slide out effortlessly, preserving their beautiful, perfect shape. No more ruined cakes!
Storage and Make-Ahead Options
One of the many wonderful things about this Ding Dong Cake is how exceptionally well it stores, making it a fantastic make-ahead dessert for parties, special occasions, or simply to enjoy throughout the week whenever a chocolate craving strikes.
Refrigeration:
I personally find that storing the assembled Ding Dong Cake in the refrigerator yields the best results. The chilling helps the layers set firmly, especially the delicate cream filling and the glossy ganache, making for much cleaner and more elegant slices. While refrigeration isn’t strictly necessary for food safety if consuming within a day or two at room temperature, it definitely contributes to a more stable cake and extends its freshness. If you do store it in the fridge, remember to let individual slices come to room temperature for about 15-30 minutes before serving. This allows the cake and filling to soften slightly and the flavors to fully bloom, offering the optimal taste and texture experience.
Freezing Options:
Yes, this glorious Ding Dong Cake freezes beautifully! For the best results and ultimate convenience, freezing individual slices is highly recommended. To do this, wrap each slice tightly in plastic wrap, then place them in an airtight freezer-safe container or a heavy-duty freezer bag. When you’re ready for a delightful treat, simply thaw a slice in the refrigerator overnight, or for a few hours at room temperature, before indulging.
Alternatively, you can also freeze just the baked (and completely cooled) cake layers *before* you assemble the entire cake. To do this, wrap each cake layer tightly in several layers of plastic wrap, followed by a layer of aluminum foil for extra protection against freezer burn. Store them in the freezer for up to 2-3 months. When you’re ready to assemble, simply thaw the cake layers in the refrigerator overnight, and ensure they come to full room temperature before proceeding with preparing the filling and ganache and assembling the cake.
Frequently Asked Questions (FAQ)
Here are some common questions you might have when making your homemade Ding Dong Cake:
Can I use a different size cake pan?
This particular recipe is meticulously optimized for two 8-inch round cake pans, which yield beautifully thick and impressive layers. If you opt to use 9-inch pans, the cake layers will naturally be thinner, and consequently, the baking time might be slightly reduced (start checking for doneness a few minutes earlier). For those contemplating cupcakes, you would need to adjust baking time significantly, usually around 18-22 minutes, and the recipe would typically yield about 24 standard-sized cupcakes. You would also need to core the cupcakes before adding the creamy filling.
What kind of cocoa powder should I use?
Unsweetened natural cocoa powder (such as common brands like Hershey’s or Ghirardelli) works wonderfully in this recipe, delivering a classic, rich chocolate flavor that’s both deep and satisfying. If you prefer a darker cake and a slightly milder chocolate flavor profile, you could certainly try Dutch-processed cocoa powder. However, always be mindful that Dutch-processed cocoa reacts differently with leavening agents; this recipe uses both baking soda and baking powder, which is a versatile combination that works well with natural cocoa.
My filling looks curdled, what went wrong?
Don’t panic! This is an incredibly common occurrence with this specific type of boiled milk frosting, and it’s perfectly normal. As explained in the detailed instructions, when you first combine the completely cooled milk paste with the creamed butter and sugar, it often initially looks separated or even slightly curdled. The key is to simply keep mixing! Give it a few more minutes on medium-high speed with your electric mixer, and you’ll witness it magically come together into a beautifully smooth, uniformly whipped consistency. For optimal emulsification, ensure all ingredients (except the specifically cooled milk paste) are at proper room temperature.
How can I make this cake even more decadent?
For an extra touch of indulgence and to truly elevate your Ding Dong Cake experience, consider these delightful enhancements: add a tablespoon of instant espresso powder to the chocolate cake batter – it profoundly enhances the chocolate flavor without making the cake taste overtly coffee-like. You could also infuse a delicate hint of peppermint extract into the cream filling for a refreshing mint-chocolate variation, or, for textural contrast and visual appeal, sprinkle some mini chocolate chips or finely chopped nuts over the ganache before it fully sets.
This homemade Ding Dong Cake is truly more than just a dessert; it’s a labor of love that culminates in an absolutely unforgettable treat. The harmonious combination of its moist, intensely chocolatey layers, the unique creamy filling, and the rich, glossy chocolate ganache makes it a guaranteed showstopper at any occasion. We sincerely hope you enjoy baking and savoring every delicious bite as much as we do!
More Tasty Chocolate Dessert Recipes
- Air Fryer Cake
- Texas Sheet Cake Cookies
- Death By Chocolate Pie
- Nutella Cupcakes
- French Silk Pie
- Flourless Chocolate Cake
Ding Dong Cake
Pin Recipe
Rate Recipe
Print Recipe
Ingredients
Cake
- 1 3/4 cups all-purpose flour
- 2 cups granulated sugar
- 3/4 cup unsweetened cocoa powder
- 2 teaspoons baking soda
- 2 teaspoons baking powder
- 1 teaspoon salt
- 1 cup buttermilk
- 2 whole large eggs
- 1/2 cup vegetable oil
- 1 teaspoon vanilla extract
- 1 cup hot water
Filling
- 5 Tablespoons all-purpose flour
- 1 cup whole milk
- 1 teaspoon vanilla extrat
- 1 cup butter, softened
- 1 cup granulated sugar
Ganache
- 12 oz semi-sweet chocolate chips
- 1 1/4 cup heavy cream
Instructions
To Make The Cake
-
Preheat oven to 350°F. Prepare 2 8-inch, round cake pans with parchment rounds (instructions in post above) or by greasing well and coating with flour. Set aside.
-
Whisk together the flour, sugar, cocoa powder, baking soda, baking powder, and salt until well blended.1 3/4 cups all-purpose flour, 2 cups granulated sugar, 3/4 cup unsweetened cocoa powder, 2 teaspoons baking soda, 2 teaspoons baking powder, 1 teaspoon salt
-
In a separate bowl whisk together buttermilk, eggs, vegetable oil and vanilla until well combined.1 cup buttermilk, 2 whole large eggs, 1/2 cup vegetable oil, 1 teaspoon vanilla extract
-
Pour the milk mixture into the flour mixture and stir until mixed.
-
Pour in hot water and mix until well combined.1 cup hot water
-
Divide the batter evenly among the prepared baking pans.
-
Bake for 25-27 minutes until a tester comes out clean.
-
Remove from oven and let cool in pans for 10 minutes, before turning onto a wire rack to cool completely.
To Make Cream Filling
-
Whisk together milk and flour until there are no lumps and it is completely smooth.5 Tablespoons all-purpose flour, 1 cup whole milk
-
Pour into a saucepan and heat over medium heat until it is thick like pudding, stirring frequently.
-
Be patient, this will take a few minutes. But you want it to be the consistency of pudding.
-
Once the filling is thick remove it from the heat and stir in the vanilla extract. Then let it COOL completely.1 teaspoon vanilla extrat
-
Once it is cool cream butter and sugar together for 4-5 minutes until it is light and fluffy.1 cup butter, 1 cup granulated sugar
-
Slowly pour in the milk mixture and keep mixing until it is the consistency of a whipped cream frosting. Don’t worry if it separates at first and appears to curdle, keep going! Once you get past that stage it comes together and forms a whipped frosting.
To Make Ganache
-
Pour heavy cream and chocolate chips into a microwave safe bowl.12 oz semi-sweet chocolate chips, 1 1/4 cup heavy cream
-
Heat for 60 seconds.
-
Remove and stir until completely melted and smooth.
To Assemble Cake
-
Place on cake on a plate or serving platter. Spread the cream filling evenly over the cake.
-
Place the second cake over the filling.
-
Pour the chocolate ganache over the cake and spread evenly over the top and down the sides.
-
Let the ganache set for about an hour before serving.
Notes
Nutrition
Nutrition information is automatically calculated, so should only be used as an approximation.
Additional Info
Like this recipe? Leave a comment below!
I created a fun group on Facebook, and I would love for you to join us! It’s a welcoming place where you can share YOUR favorite recipes, ask questions, and stay updated on what’s new at Dinners, Dishes and Desserts (so that you never miss a new, delicious recipe)!
Be sure to follow me on Instagram and tag #dinnersdishes so I can see all the wonderful DINNERS, DISHES, AND DESSERTS recipes YOU make!
Be sure to follow me on my social media, so you never miss a post!
Facebook | Twitter | Pinterest | Instagram
