Irresistible No-Bake Oreo Cheesecake: Your Easiest Path to a Decadent Dessert
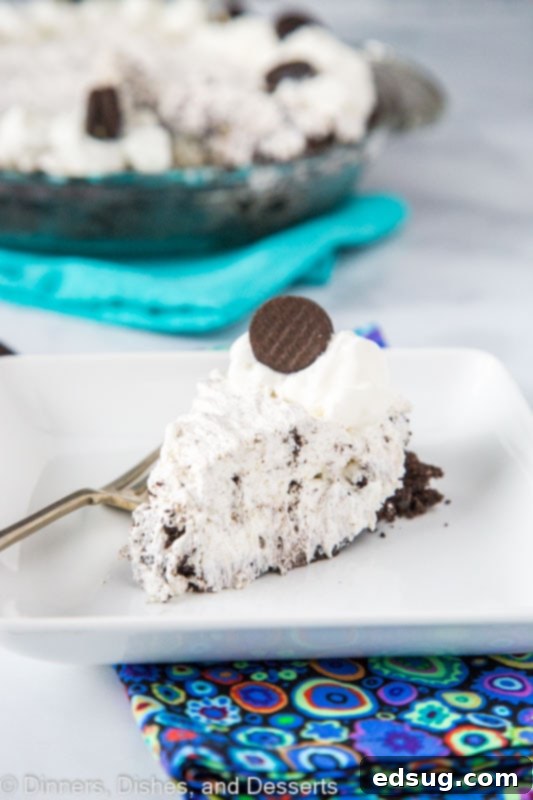
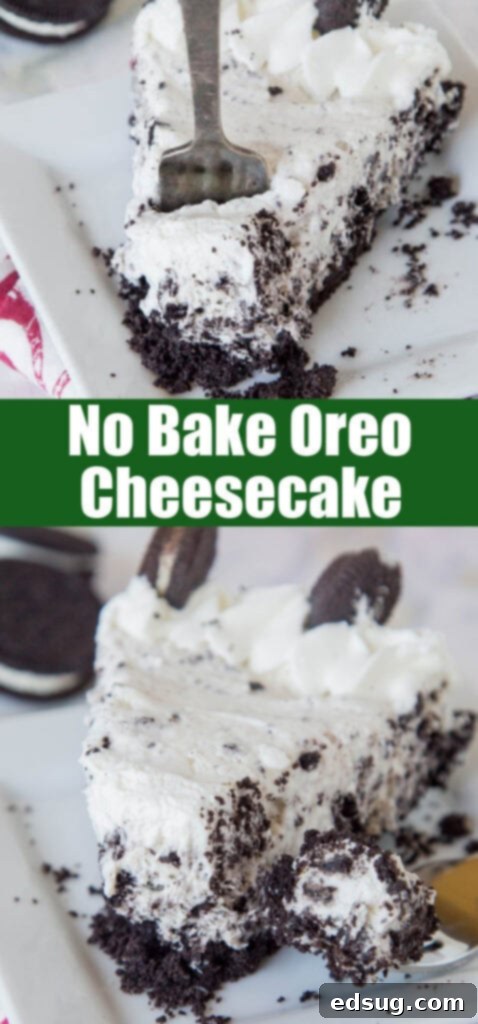
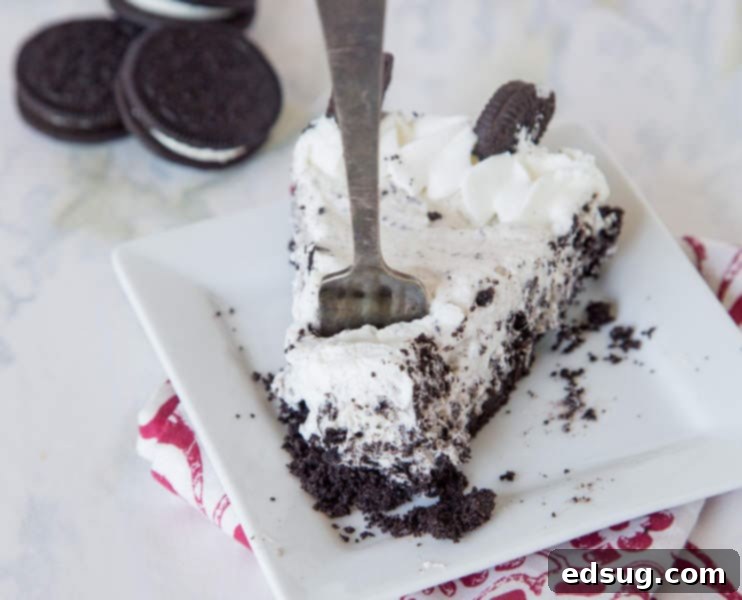
Indulge in the ultimate dessert experience with this super creamy, effortlessly made no-bake Oreo cheesecake. It’s bursting with cookies n’ cream flavor and comes together in mere minutes, making it the perfect treat for any occasion!
There’s a special kind of magic in no-bake cheesecakes. They promise all the luscious, creamy delight of a traditional cheesecake without the fuss of an oven or the worry of cracks. And when you infuse that simple elegance with the universally adored flavor of Oreo cookies, you get something truly extraordinary. This recipe for No-Bake Oreo Cheesecake is not just a dessert; it’s a revelation – quick to prepare, impressive to serve, and absolutely heavenly to eat.
Whether you’re a seasoned baker or a kitchen novice, the charm of a no-bake dessert is undeniable. The minimal effort involved means more time to enjoy, and the versatility of flavors is endless. While fruit-based cheesecakes like No Bake Lemon Cheesecake or No Bake Blueberry Cheesecake are undeniably refreshing, sometimes only a rich, chocolatey indulgence will do. As a devoted chocolate enthusiast, I find myself continually drawn back to this classic Oreo rendition, featuring a crunchy Oreo crust and generously studded with crushed Oreo cookies throughout the creamy filling. It’s cookies n’ cream perfection in every bite!
Why This No-Bake Oreo Cheesecake is a Must-Try
This No-Bake Oreo Cheesecake isn’t just easy; it’s a celebration of convenience and deliciousness. Everyone adores the iconic cookies n’ cream flavor, and transforming it into a velvety cheesecake without needing an oven is pure genius. The preparation comes together in just a few active minutes, and then the refrigerator does all the heavy lifting, firming up your masterpiece. It’s the ideal make-ahead dessert, allowing you to simply pull it out and serve when the moment is right. Trust me, whether you’re impressing guests at a dinner party or simply treating your family, this cheesecake is a guaranteed showstopper every single time. And if you’re looking for delightful individual portions, these Oreo Cheesecake Bites are also worth exploring.
The beauty of a no-bake cheesecake lies in its simplicity and accessibility. There’s no delicate water bath, no worrying about over-baking, and no fear of unsightly cracks. Instead, you get a consistently smooth, rich, and incredibly satisfying dessert that’s perfect for warm weather or when you just want a hassle-free treat. The combination of creamy cheesecake with crunchy Oreo pieces provides a delightful contrast in texture and a flavor that appeals to all ages. It’s rich without being heavy, and the chocolatey goodness of the Oreos is perfectly balanced by the tangy sweetness of the cream cheese filling.
Essential Ingredients for Your Oreo Cheesecake
Crafting this divine no-bake cheesecake requires a handful of common ingredients, each playing a crucial role in achieving that perfect texture and flavor profile. You likely have most of these on hand already, simplifying your dessert-making adventure:
- **Oreo Cookies:** The star of the show! You’ll need original Oreos for both the crust and the filling. Their distinct chocolatey flavor and crunchy texture are irreplaceable.
- **Butter:** Melted butter acts as the binding agent for your Oreo cookie crust, giving it a firm and flavorful base.
- **Cream Cheese:** Full-fat cream cheese, softened to room temperature, is essential for a smooth, lump-free, and rich cheesecake filling. Don’t skimp on quality here!
- **Granulated Sugar:** Provides the perfect amount of sweetness to balance the tanginess of the cream cheese.
- **Heavy Cream:** Whipped to perfection, heavy cream (also known as heavy whipping cream) lightens the filling, making it airy and luxurious. Ensure it’s very cold for optimal whipping.
- **Powdered Sugar:** Added to the heavy cream, powdered sugar helps stabilize the whipped cream and adds a finer sweetness.
- **Vanilla Extract:** A touch of pure vanilla extract enhances all the other flavors, bringing a warm, aromatic note to the cheesecake.
Step-by-Step: Crafting Your Perfect No-Bake Oreo Cheesecake
For the complete, detailed recipe and printable card, please refer to the bottom of this post.
- **Prepare the Oreo Crust:** Start by finely grinding two rows of original Oreo cookies into crumbs. A food processor works wonders for this, but you can also place them in a Ziploc bag and crush them with a rolling pin. Mix these fine crumbs thoroughly with melted butter until well combined. Press this mixture firmly into the bottom of a 9-inch pie plate or springform pan. This creates a sturdy, flavorful base. Once pressed, transfer the crust to the freezer while you prepare the filling; this helps it set quickly and prevents crumbling.
- **Whip the Heavy Cream:** In a chilled stand mixer bowl (or a large bowl with a hand mixer), whip the very cold heavy cream until soft peaks begin to form. Gradually add the powdered sugar and vanilla extract, continuing to whisk until stiff peaks are achieved. Be careful not to over-whip, as it can turn grainy. Once ready, gently transfer the homemade whipped cream to a separate bowl and set it aside. As an alternative, you can use an 8-ounce container of thawed whipped topping (like Cool Whip) for convenience, and it will be equally delicious!
- **Create the Cream Cheese Base:** In the same stand mixer bowl (no need to wash it after the whipped cream), using a paddle attachment, beat the softened cream cheese and granulated sugar together until the mixture is completely smooth and free of any lumps. It should be light and fluffy, ensuring a silky cheesecake filling.
- **Fold in the Whipped Cream and Oreos:** Once your cream cheese mixture is perfectly smooth, gently fold in the prepared whipped cream (or thawed whipped topping) using a spatula. Use a light hand to maintain the airiness of the whipped cream. Then, take one row of Oreo cookies, crush them into small pieces (you can opt for chunky or finer crumbs, depending on your preference), and gently fold these into the creamy mixture. This ensures every bite has delightful pockets of Oreo goodness.
- **Assemble and Chill:** Carefully pour the prepared cheesecake filling over your chilled Oreo crust in the pie plate or springform pan. Use a spatula to spread it evenly and smooth the top. Now comes the hardest part: patience! Place the assembled cheesecake into the refrigerator to set for at least one hour. For an even firmer cheesecake or if you’re in a hurry, you can place it in the freezer for about 30-45 minutes. The chilling time is crucial for the cheesecake to firm up, making it easier to slice and serve perfectly.

Expert Tips & Variations for Your No-Bake Oreo Cheesecake
- **Oreo Allocation:** A standard-sized package of Oreo cookies (approximately 14.3 ounces or 36 cookies) is usually perfect for this recipe. Two rows are dedicated to creating that robust crust, while the remaining one row is generously mixed into the luscious filling, ensuring a delightful cookies n’ cream experience in every bite.
- **Crust Convenience:** While making your own Oreo crust is simple and rewarding, feel free to use a premade Oreo crust if you’re short on time. If you do, you might find a little extra filling, but don’t worry – simply pile it high! Everyone loves a thick, decadent cheesecake.
- **Chilling is Key:** Allowing the cheesecake to set in the refrigerator for at least an hour (or even better, 2-3 hours) is crucial for an easily sliceable and beautifully presented dessert. A well-chilled cheesecake will hold its shape perfectly. If you’re really pressed for time, a quick stint in the freezer (about 30 minutes) can accelerate the setting process.
- **Whipped Cream Alternatives:** For ultimate convenience, you can absolutely substitute homemade whipped cream with an 8-ounce container of thawed Cool Whip. Notes on when to incorporate this into the recipe are often provided in the full recipe card.
- **Storage:** Store any leftover cheesecake tightly covered in the refrigerator. It will maintain its delicious freshness for 4-5 days. For longer storage, slices can be individually wrapped and frozen for up to a month. Thaw in the refrigerator before serving.
- **Serving Perfection:** For clean, professional-looking slices, use a sharp knife that has been run under hot water and wiped dry between each cut. This creates smooth, neat edges.
- **Flavor Boosters:** Want to elevate your Oreo cheesecake? Consider folding in mini chocolate chips, a swirl of melted chocolate, a few drops of mint extract for a mint Oreo twist, or even a teaspoon of espresso powder to deepen the chocolate flavor.
- **Garnishing Ideas:** Don’t forget the finishing touches! Top your cheesecake with extra whipped cream, whole Oreo cookies, crushed Oreo crumbs, or a drizzle of chocolate syrup for an extra touch of elegance and flavor.
The next time you’re at the store, make sure to pick up some Oreos, because this creamy no-bake cheesecake is practically begging to be made. It’s the perfect dessert to bring to parties, potlucks, or simply to make for your family. Or, if you prefer, indulge yourself – no judgment here whatsoever! Its ease of preparation combined with its universally loved flavor profile makes it a consistently winning dessert for any occasion, proving that sometimes, the simplest recipes yield the most spectacular results.
Discover More Easy No-Bake Desserts
If you’ve fallen in love with the simplicity and deliciousness of this no-bake cheesecake, you’ll be thrilled to explore other effortless no-bake treats. These recipes are perfect for satisfying your sweet tooth without turning on the oven, making them ideal for any time of year.
- Refreshing Kool-Aid Pie
- Creamy No-Bake Peanut Butter Cheesecake
- Classic Jello Pie
- Fun Monster Cookie No-Bake Bars
- Quick Avalanche Cookies
- Addictive Puppy Chow Bars
- Nostalgic Homemade Star Crunch
- Rich Reese’s Fudge


No Bake Oreo Cheesecake
Pin Recipe
Rate Recipe
Print Recipe
Video
Equipment
-
Food Processor or Blender
-
9-inch Pie Plate or Springform Pan
-
Electric Mixer (Stand or Handheld)
-
Mixing Bowls
-
Spatula
Ingredients
For the Oreo Crust
- 2 rows original Oreo’s (approximately 24 cookies)
- 5 Tablespoons unsalted butter, melted
For the Creamy Filling
- 1/2 cup granulated sugar
- 1 8oz package cream cheese, softened
- 1 1/4 cup heavy cream
- 1/4 cup powdered sugar
- 1 teaspoon vanilla extract
- 1 row Oreo cookies, crushed (about 12 cookies)
Instructions
-
To make the crust, use a food processor to grind 2 rows of Oreo cookies into fine crumbs. Alternatively, place them in a resealable plastic bag and crush them with a rolling pin. Combine the crumbs with the 5 tablespoons of melted butter until fully mixed. Press this mixture firmly into the bottom of a 9-inch springform pan or pie plate. Place the crust in the freezer to set while you prepare the filling.
-
In a stand mixer with a whisk attachment (or using a hand mixer), whisk the cold heavy cream until soft peaks form. Gradually add the powdered sugar and vanilla extract, then continue mixing until stiff peaks are achieved. Transfer this homemade whipped cream to a separate bowl and set aside. (Alternatively, you can use 8 oz of thawed Cool Whip in place of this homemade whipped cream if desired – simply fold it in later as instructed).
-
In the same stand mixer bowl (no need to wash), attach the paddle attachment. Beat the softened cream cheese and granulated sugar together until the mixture is completely smooth and creamy, with no lumps.
-
Using a spatula, gently fold the prepared whipped cream (or Cool Whip) into the cream cheese mixture until just combined. Then, fold in 1 row of crushed Oreo cookies. Pour the creamy filling into your prepared Oreo crust, spreading it evenly. Place the cheesecake in the refrigerator to chill and set for at least 1 hour, or preferably 2-3 hours.
-
Before serving, you may top with additional whipped cream and more crushed or whole Oreo cookies for decoration. Slice, serve, and enjoy!
Nutrition Information
Nutrition information is automatically calculated, so should only be used as an approximation.
Additional Info
Loved this recipe? Share your thoughts below!Your feedback helps others discover delicious desserts too!
I’ve created a fantastic community group on Facebook, and I’d be absolutely thrilled for you to join us! It’s a wonderful space where you can share your own favorite recipes, ask questions, get inspiration, and stay updated on all the new recipes from Dinners, Dishes and Desserts (so you never miss a delicious post!).
Be sure to follow me on Instagram and tag #dinnersdishes so I can see all the wonderful DINNERS, DISHES, AND DESSERTS recipes YOU create!
Don’t miss out on any culinary inspiration! Be sure to follow me on my social media channels to stay connected and never miss a new recipe or update!
Facebook | Twitter | Pinterest | Instagram
