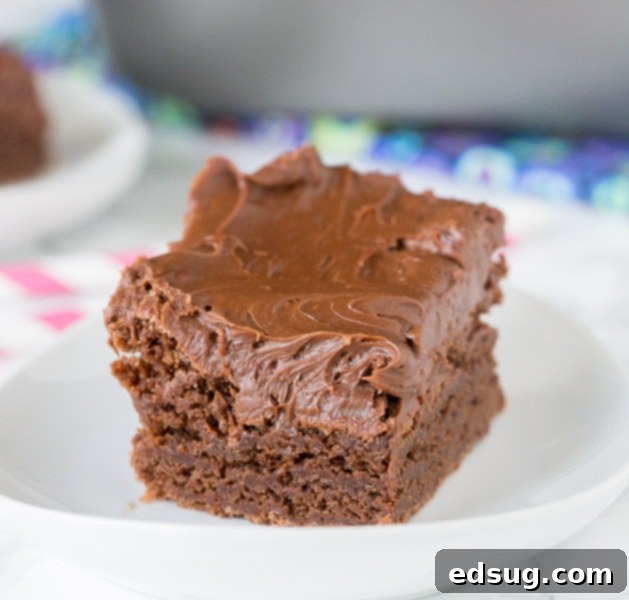
The Ultimate Fudgy Homemade Brownies: An Easy One-Bowl Recipe
Some recipes are more than just food; they are woven into the fabric of our memories, defining childhood comfort and joy. For me, alongside timeless chocolate chip cookies, these homemade brownies stand out. This isn’t just a dessert; it’s a nostalgic journey back to simpler times, a recipe I’ve had memorized since I was barely ten years old. They were a constant fixture in our home, a testament to how effortless and infinitely superior scratch-made can be.
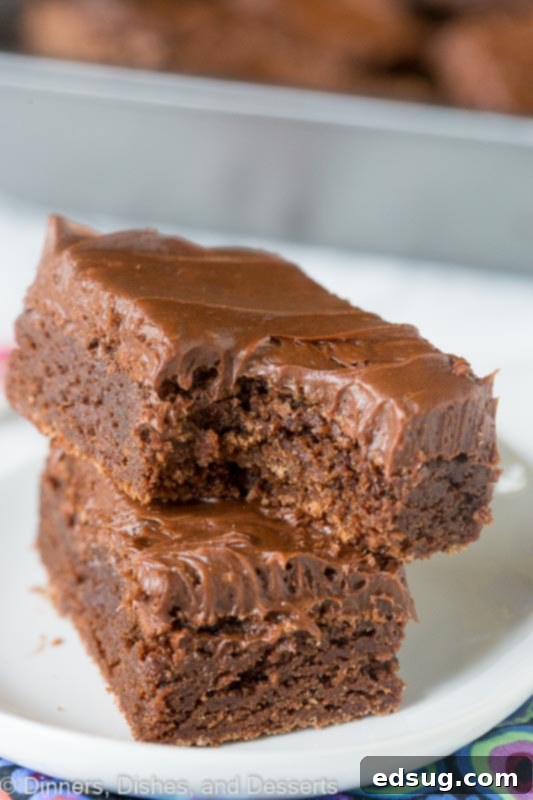
Homemade Brownies: Why Baking From Scratch is Best
Growing up, the concept of a brownie box mix was entirely foreign to me. Our kitchen always smelled of rich, melting chocolate and warm baking, courtesy of these incredibly simple homemade brownies. It wasn’t until I ventured into college and started doing my own grocery shopping that I realized pre-packaged brownie mixes even existed. The truth is, when a recipe is this straightforward and yields such phenomenal results, there’s simply no reason to turn to a box. These brownies prove that truly irresistible desserts don’t require complicated steps or fancy equipment; just a few basic ingredients and a love for baking.
Brownies are, without a doubt, my ultimate sweet indulgence. My blog boasts over 40 distinct brownie variations, and nearly all of them trace their lineage back to this very foundational recipe. It’s a testament to its perfection – why tamper with a tried-and-true classic? This core recipe delivers consistent fudginess, deep chocolate flavor, and that quintessential chewy edge that makes homemade brownies utterly irresistible. It’s the perfect canvas for endless customization, ensuring you can enjoy a different brownie experience every time, all starting from this beloved base.
What You’ll Need: Just 6 Essential Ingredients
One of the most appealing aspects of this brownie recipe is its minimalist ingredient list. You don’t need a pantry full of obscure items; just six common staples are all it takes to create a batch of incredibly rich and fudgy brownies. This simplicity not only makes the process quick but also highlights the quality of each ingredient, allowing the deep chocolate flavor to truly shine through.
- Unsweetened Chocolate: The foundation of intense chocolate flavor. Using unsweetened chocolate allows you to control the sweetness perfectly.
- Oil: Crucial for that signature fudgy texture. (See our recipe tips section for a detailed comparison of oil vs. butter.)
- Eggs: Provide structure and richness, contributing to the brownies’ chewiness and binding everything together.
- Granulated Sugar: Sweetens the brownies and helps create a moist, tender crumb.
- All-Purpose Flour: Just enough to give structure without making the brownies cakey. We aim for fudgy, not fluffy!
- Salt: A pinch of salt enhances all the other flavors, particularly the chocolate, and balances the sweetness.
Yes, that’s right – only six ingredients! It’s astonishing how such a short list can produce a dessert far superior to any box mix, with virtually the same level of effort. This recipe truly champions the beauty of simplicity in baking.
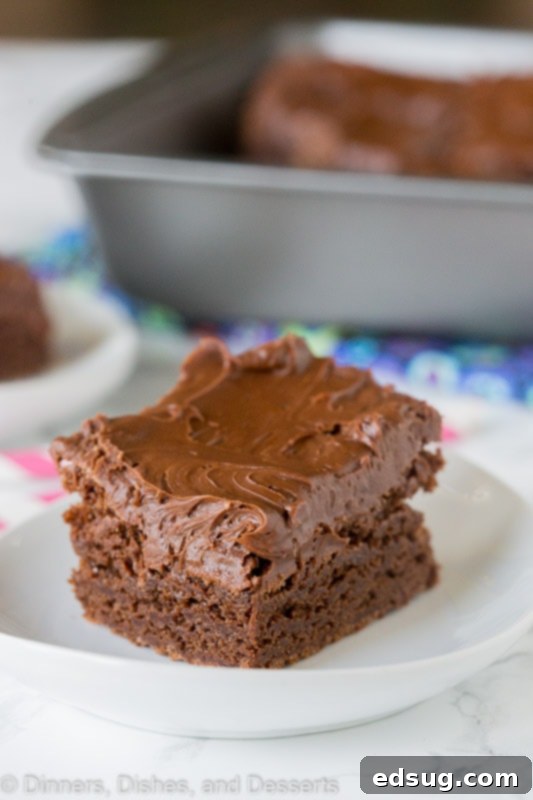
How To Make Brownies From Scratch: The Easy Way
For the FULL PRINTABLE recipe card with exact measurements, please scroll to the bottom of the post.
Making brownies from scratch might sound intimidating, but with this one-bowl method, it’s as easy as pie – or, rather, as easy as brownies! The key is minimal mixing and careful baking to achieve that coveted fudgy interior.
- Prepare Your Pan and Preheat Oven: Start by preheating your oven to 350º F (175º C). Grease and lightly flour an 8×8 inch (or similar) baking dish. Alternatively, line it with parchment paper or foil, leaving an overhang on the sides, which makes lifting the cooled brownies out incredibly easy.
- Combine Chocolate and Oil: In a single mixing bowl, combine the melted unsweetened chocolate with the canola or vegetable oil. Stir gently until the mixture is completely smooth and well combined. This forms the rich, chocolatey base for your brownies.
- Whisk in Eggs and Sugar: Add the granulated sugar and eggs to the chocolate-oil mixture. Beat these ingredients together until they are thoroughly blended. Continue mixing until the sugar is largely dissolved and the eggs are fully incorporated, creating a glossy, smooth batter.
- Gently Fold in Dry Ingredients: Sift in the all-purpose flour and salt. With a spatula, gently fold these dry ingredients into the wet mixture. It’s crucial not to overmix here; stop as soon as there are no more visible streaks of white flour. Overmixing develops the gluten in the flour, leading to tough, cakey brownies instead of the desired fudgy texture.
- Customize (Optional): This is where you can get creative! Feel free to mix in your favorite additions now. Popular choices include chocolate chips (milk, dark, or white), M&M’s, peanut butter chips, chopped nuts (if you’re a nut-lover!), or even a swirl of caramel or cream cheese.
- Bake to Perfection: Pour the luscious batter into your prepared baking dish, spreading it evenly. Bake for approximately 20-25 minutes. The secret to super fudgy brownies is not to overbake them. You’ll know they’re ready when a toothpick inserted into the center comes out with moist crumbs attached, but no wet batter. A slightly underbaked center ensures maximum fudginess.
- Cool Completely: Once out of the oven, allow the brownies to cool completely in the pan on a wire rack. This step is vital! Brownies continue to set and firm up as they cool, further developing their dense, fudgy texture. Rushing this can result in crumbly brownies. Once cool, you can frost them with your favorite chocolate frosting or enjoy them plain.
Remember, the golden rule for incredible brownies is to avoid overbaking. Keep a close eye on them towards the end of the baking time. They will continue to cook slightly in the hot pan after being removed from the oven, so it’s always better to err on the side of slightly underdone than overdone for that ultimate fudgy goodness.
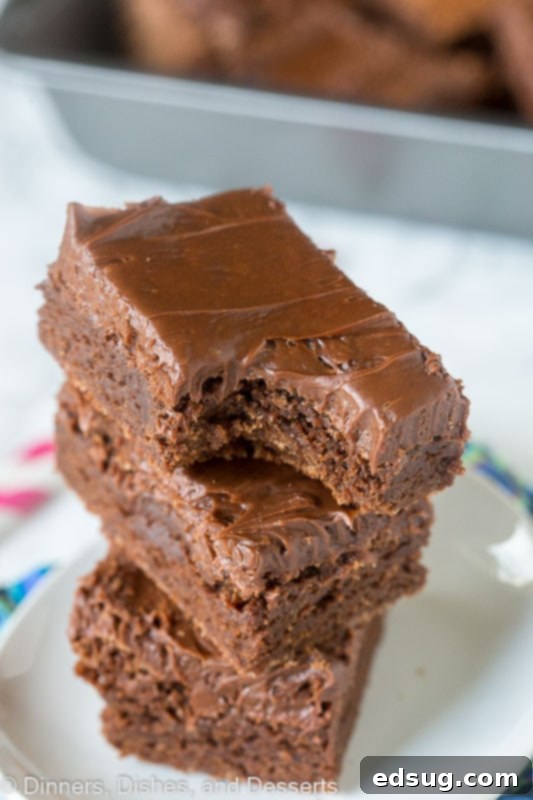
Brownie Variations and Toppings
Once you have this perfect base recipe mastered, the possibilities for customization are endless. For instance, my Peanut Butter Crunch Brownies use this very same foundation. While I enjoyed simple plain chocolate frosting as a kid, you can elevate your brownies with a myriad of additions and toppings:
- Mix-ins: Beyond chocolate chips and M&M’s, consider chopped Reese’s Peanut Butter Cups, chopped Oreos, pretzels for a salty crunch, or even mini marshmallows.
- Nuts: While I’m personally not a fan of nuts in my chocolate desserts (I prefer them on their own!), if you are a “nut person,” feel free to add chopped walnuts, pecans, or almonds. My mom often added them to half the pan to satisfy her own preference!
- Swirls: Before baking, swirl in a dollop of cream cheese mixture, peanut butter, or caramel for an extra layer of flavor and visual appeal.
- Frostings: Experiment with different frostings – peppermint for holidays, cream cheese frosting, caramel frosting, or even a simple ganache.
- Serving Suggestions: Serve warm brownies with a scoop of vanilla bean ice cream and a drizzle of chocolate sauce for an ultimate indulgence.
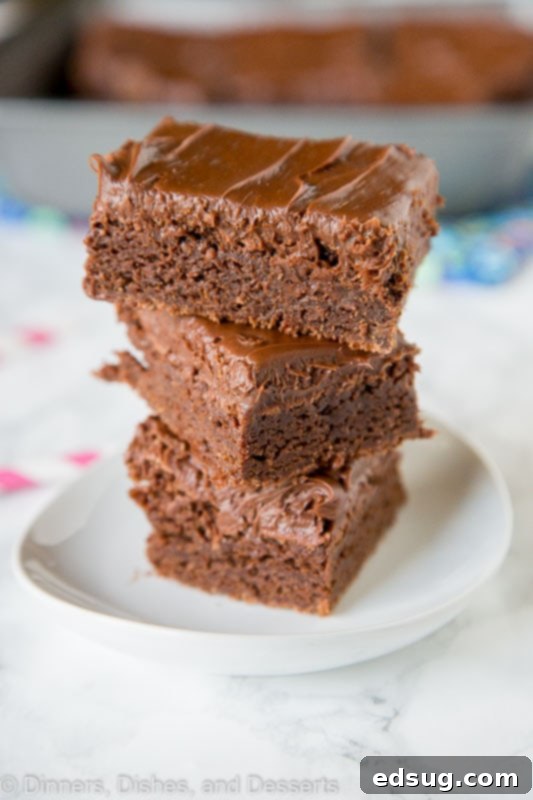
TIPS FOR THE BEST BROWNIES EVER
Crafting the perfect brownie is an art, but these tried-and-true tips will guide you to consistent success, ensuring every batch is wonderfully fudgy and perfectly baked.
- Butter vs. Vegetable Oil: Both can work, but they yield slightly different results. Oil (like canola or vegetable oil) tends to produce a chewier, fudgier brownie because it remains liquid at room temperature, contributing to a denser crumb. Butter, on the other hand, adds a richer, dairy-forward flavor and can result in a slightly more cake-like texture as it solidifies when cooled. If using butter, ensure it’s melted, but avoid overheating it. This recipe specifically calls for oil for optimal fudginess, but don’t hesitate to experiment once you’ve mastered the base.
- Cocoa Powder vs. Melted Chocolate: Again, both are viable options, and many recipes call for one or the other (or a combination). Melted unsweetened chocolate, as used in this recipe, typically delivers a deeper, more intense chocolate flavor and contributes to a richer, denser texture. Cocoa powder, while still chocolatey, can sometimes yield a slightly lighter crumb. If you’re ever in a pinch, check your cocoa powder container for substitution ratios for melted chocolate. However, for true decadence, melted chocolate is often preferred.
- No Electric Mixer Needed: Resist the urge to pull out your stand mixer! Brownies thrive on minimal mixing. An electric mixer can easily overdevelop the gluten in the flour, leading to a tough, dry, and cakey brownie. A simple bowl and a sturdy spatula are all you need to gently combine ingredients and achieve that ideal fudgy consistency. Less mixing equals better brownies.
- Choosing the Right Pan: Your choice of baking pan can impact the final texture of your brownies. Metal baking pans are generally recommended for brownies because they conduct heat more efficiently and evenly, leading to crispier edges and a consistently baked interior. Glass pans retain heat longer, which can sometimes result in overbaked edges and a softer, less defined texture. If you’re an “edge person,” a metal pan is definitely your best bet for those delightful chewy crusts.
- The Art of Not Overbaking: This is arguably the most critical tip for fudgy brownies. Brownies continue to cook and set after they are removed from the oven, especially in a hot pan. When testing for doneness with a toothpick, you want it to come out with moist crumbs attached – not entirely clean (which indicates overbaked and dry) and certainly not with wet batter. Start checking a few minutes before the recipe suggests. It’s always better to take them out slightly early and let them finish setting as they cool than to risk baking them for too long.
- Cool Completely: Patience is a virtue when it comes to brownies. Allowing them to cool completely in the pan is essential for them to fully set and achieve their ultimate fudgy, dense texture. Cutting into warm brownies can lead to a crumbly mess. For clean cuts, chill your brownies for a short period before slicing.
- Cutting Perfect Squares: For neat, professional-looking squares, line your pan with parchment paper, leaving an overhang on two sides. Once cooled, use the overhang to lift the entire slab of brownies out of the pan. Place on a cutting board, and use a sharp knife. For extra clean cuts, wipe the knife clean with a damp cloth between each slice.
So, ditch those pre-made box mixes and embrace the simple joy of baking homemade brownies. With just a handful of ingredients and minimal extra effort – perhaps only 3-5 minutes more than a mix – you’ll create a dessert that is incomparably rich, fudgy, and utterly worth every second.
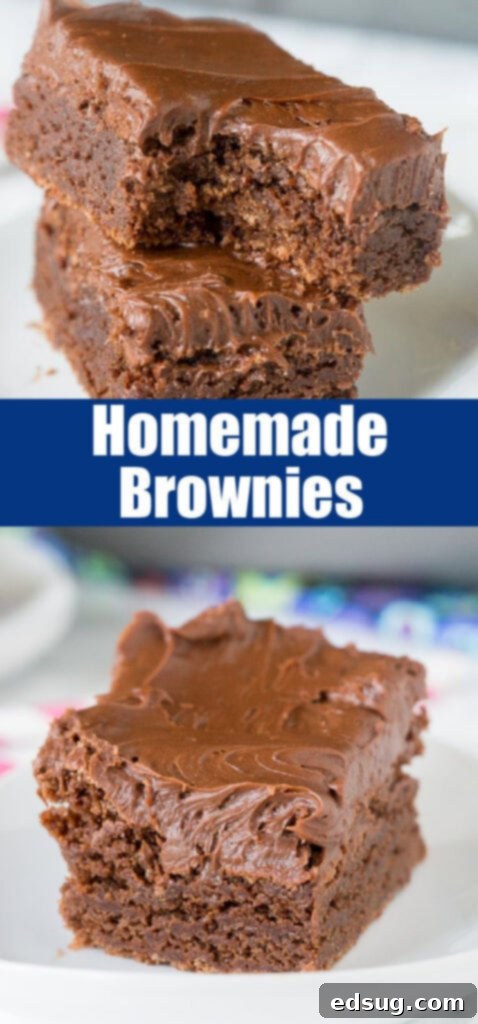
Serving and Storing Your Fudgy Brownies
Once your brownies have cooled to perfection, they are ready to be devoured! You can enjoy them as is for a pure chocolate experience, or elevate them with various toppings:
- Classic: A dollop of whipped cream or a scoop of vanilla ice cream.
- Decadent: Drizzle with chocolate sauce, caramel, or a sprinkle of sea salt.
- Frosted: Top with your favorite chocolate frosting, cream cheese frosting, or a simple ganache.
To store your homemade brownies, place them in an airtight container at room temperature for up to 3-4 days. For longer storage, you can freeze them for up to 3 months. Wrap individual brownies tightly in plastic wrap, then place them in a freezer-safe bag or container. Thaw at room temperature or gently warm in the microwave for a fresh-baked taste.
More Irresistible Brownie Recipes To Try
Once you fall in love with this basic recipe, you’ll be eager to explore more creative brownie concoctions. Here are some of my other favorite variations to inspire your next baking adventure:
- Peanut Butter Stuffed Brownies
- Grasshopper Brownies
- Peanut Butter Brownie Pizza
- French Silk Pie Brownies
- Cosmic Brownies
- Gooey Brownie Pie
- S’mores Brownies
Homemade Brownies Recipe
5 mins
20 mins
25 mins
12
Rate Recipe
Print Recipe
Video
Watch the video tutorial for these homemade brownies!
Play Video
Ingredients
- 2 oz unsweetened chocolate, melted
- 1/3 cup canola or vegetable oil
- 2 whole large eggs
- 1 cup granulated sugar
- 3/4 cup all-purpose flour
- 1/2 teaspoon salt
Instructions
-
Preheat oven to 350º F (175ºC). Grease and flour an 8-inch baking dish, or line with foil or parchment paper with an overhang.
-
In a large bowl, combine the melted unsweetened chocolate with canola or vegetable oil. Mix until completely smooth.
-
Add granulated sugar and eggs to the chocolate mixture. Beat until well combined and the eggs are fully incorporated, creating a glossy batter.
-
Stir in the all-purpose flour and salt. Mix gently with a spatula until the white streaks of flour just disappear. Be careful not to overmix.
-
Pour the batter into the prepared pan and spread evenly. Bake for 20-25 minutes, or until a toothpick inserted into the center comes out with moist crumbs attached (not wet batter).
-
Remove from the oven and allow the brownies to cool completely in the pan on a wire rack before cutting. Once cooled, you can top with your favorite chocolate frosting if desired.
Notes
Nutrition (Approximate)
Serving: 1g
|
Calories: 188kcal
|
Carbohydrates: 24g
|
Protein: 3g
|
Fat: 9g
|
Saturated Fat: 2g
|
Polyunsaturated Fat: 7g
|
Cholesterol: 31mg
|
Sodium: 110mg
|
Fiber: 1g
|
Sugar: 17g
Nutrition information is automatically calculated, so should only be used as an approximation.
Additional Info
Erin Sellin
5 minutes
20 minutes
25 minutes
Dessert Recipes
American
12
188
Homemade Brownies, Fudgy Brownies, Easy Brownie Recipe
Like this recipe? Leave a comment below!
I created a fun group on Facebook, and I would love for you to join us! It’s a vibrant community where you can share YOUR favorite recipes, ask questions, and stay updated on all that’s new at Dinners, Dishes, and Desserts (so you never miss a delicious new recipe)!
Be sure to follow me on Instagram and tag #dinnersdishes so I can see all the wonderful DINNERS, DISHES, AND DESSERTS recipes YOU make!
Stay connected and make sure you never miss a post!
Facebook |
Twitter |
Pinterest |
Instagram
