Easy No-Bake Ice Cream Sandwich Icebox Cake: Your Ultimate Summer Dessert Guide
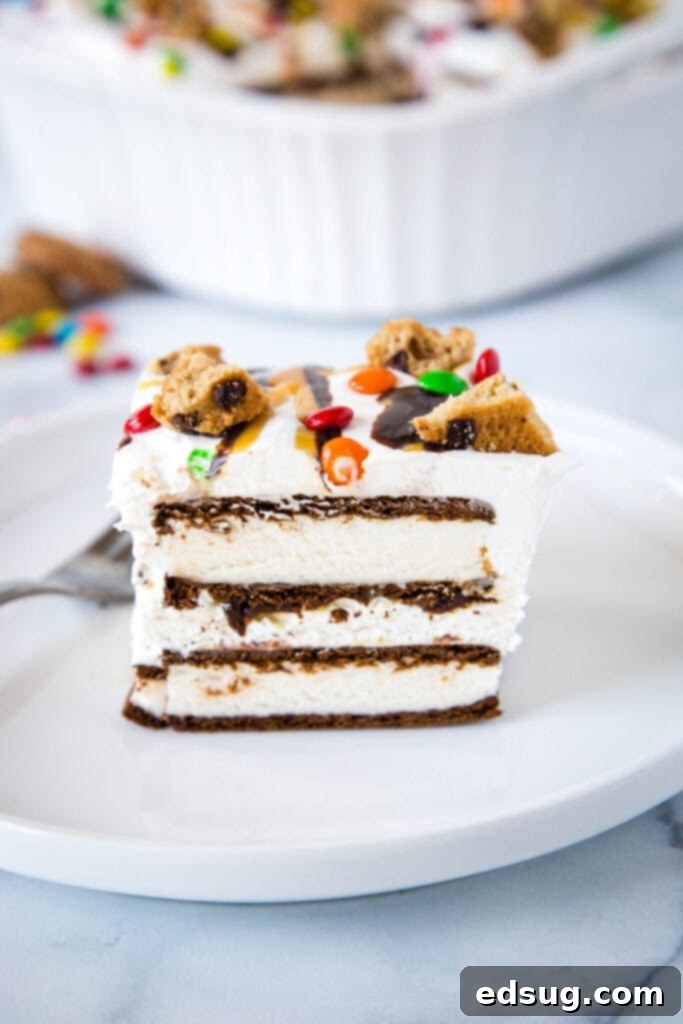
Beat the summer heat with this incredibly simple, cool, and creamy Ice Cream Sandwich Icebox Cake. Crafted with just a few essential ingredients, this dessert is a canvas for your creativity, allowing you to dress it up any way you like for an unforgettable, over-the-top summer treat!
When the sun is blazing and the temperatures soar, there’s nothing quite as satisfying as a cool, refreshing dessert. Forget turning on your oven and heating up the kitchen; summer calls for easy, no-bake recipes that deliver maximum flavor with minimal effort. That’s precisely where this delightful Ice Cream Sandwich Icebox Cake shines. Much like our popular Strawberry Cheesecake Lasagna, this recipe is a lifesaver during those sweltering months, offering a quick and effortless way to enjoy a truly decadent treat any day of the week.
A cool and creamy dessert has a magical way of making even the hottest summer days feel bearable. What makes an icebox cake particularly appealing is its inherent simplicity. It’s a classic for a reason: combining layers of cookies or wafers with a creamy filling, then letting time in the refrigerator (or freezer, in this case!) do all the hard work. The result is a dessert that tastes far more complex and impressive than its preparation suggests. This particular rendition, using humble ice cream sandwiches, elevates the concept to a new level of nostalgic delight and convenience.

Why You’ll Love This Ice Cream Sandwich Icebox Cake
There’s a special charm in a dessert that requires only a handful of ingredients but leaves a lasting impression. This Ice Cream Sandwich Cake effortlessly achieves that balance, much like our beloved Swiss Roll Ice Cream Cake. Its appeal lies in several key factors:
- Effortless Preparation: No baking required means less time in the kitchen and more time enjoying summer activities. It’s truly a dump-and-layer kind of dessert!
- Minimal Ingredients: You only need a few staple items to create this masterpiece, many of which you might already have on hand.
- Incredible Customization: The fun part about this icebox cake is its versatility. You can tailor the flavors to your exact preferences. Imagine starting with mint chocolate ice cream sandwiches, classic vanilla, rich chocolate, or even cookies and cream! The possibilities extend to the toppings too – think Andes mints for mint, crushed Oreos for cookies and cream, or a medley of your favorite candies and sauces.
- Crowd-Pleaser: This dessert is universally loved by both kids and adults. It’s perfect for barbecues, potlucks, birthday parties, or just a simple family gathering.
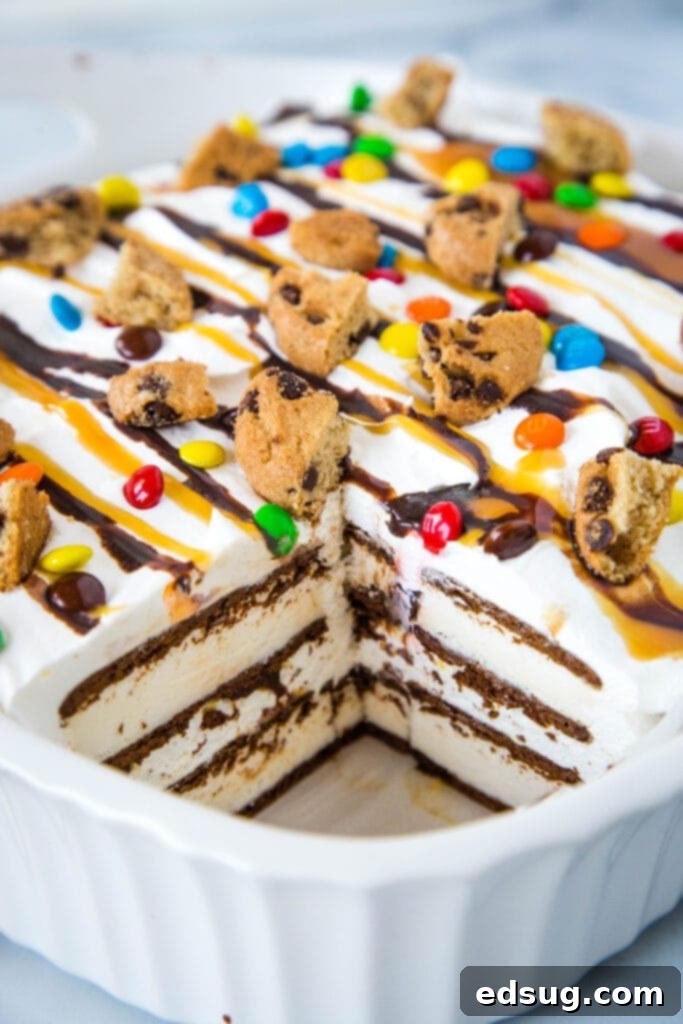
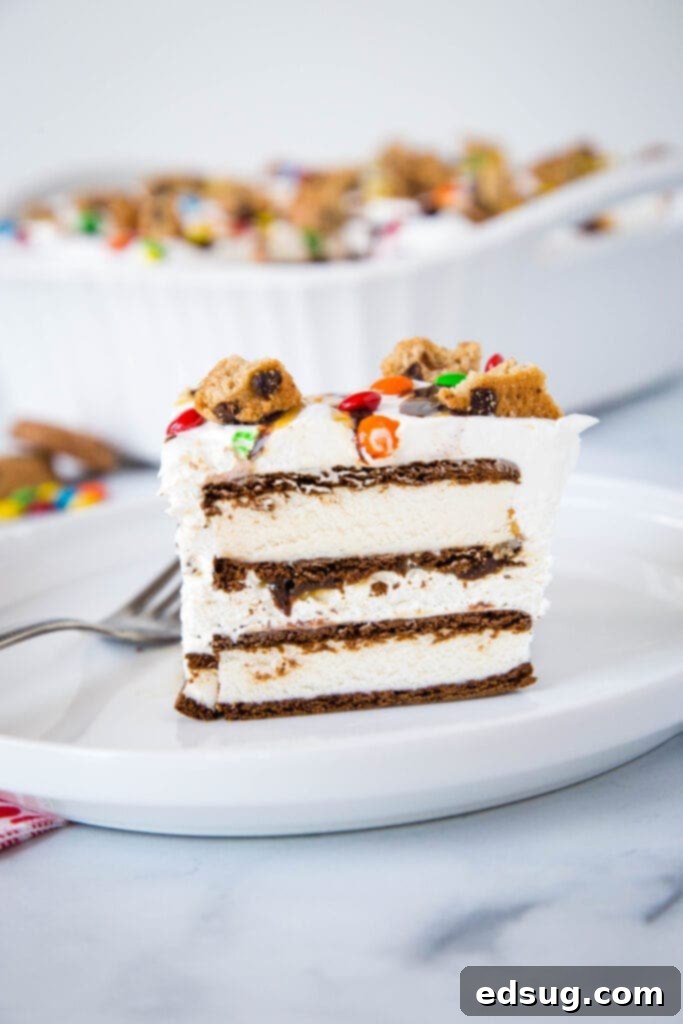
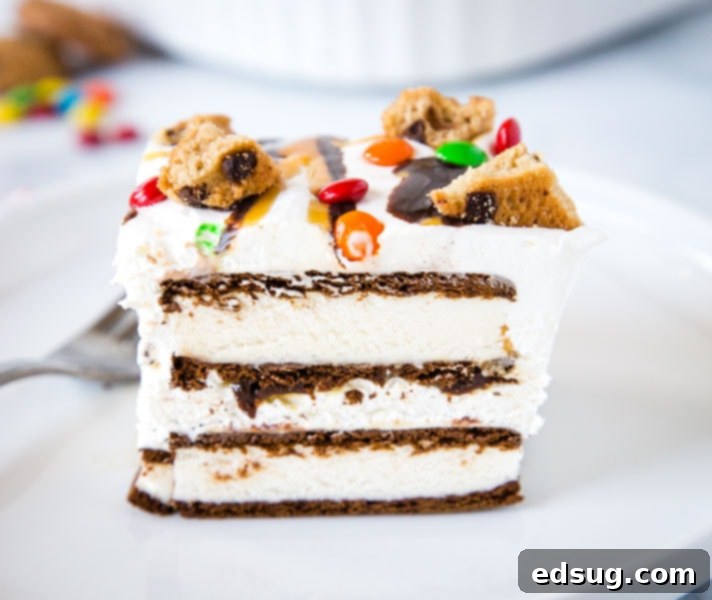
- Visually Stunning: Just look at those beautiful layers! Despite its simplicity, this cake always looks impressive when sliced, revealing distinct stripes of ice cream sandwich, creamy whipped topping, and generous drizzles.
Unveiling the Simple Secrets: Essential Ingredients for Your Ice Cream Sandwich Icebox Cake
For detailed measurements and full instructions, please be sure to scroll to the bottom of the post for the COMPLETE PRINTABLE recipe card.
One of the true beauties of this Ice Cream Sandwich Icebox Cake lies in its humble list of ingredients. You don’t need exotic items or a trip to a specialty store; everything you need is readily available at your local supermarket. Here’s a closer look at the stars of this show:
- Ice Cream Sandwiches: The foundation of our cake! You’ll need about 12 standard-sized ice cream sandwiches for an 8×8 inch pan. Don’t be afraid to experiment with different flavors! While classic vanilla is always a hit, many stores offer mint chocolate chip, cookies and cream, strawberry, or even chocolate fudge varieties. Choosing a different flavor can completely transform the character of your icebox cake.
- Heavy Cream: This is the base for our luxurious homemade whipped cream. Make sure it’s well-chilled for best whipping results. Homemade whipped cream provides an unmatched fresh flavor and lighter texture compared to store-bought alternatives, truly elevating this dessert from good to extraordinary.
- Powdered Sugar: Also known as confectioners’ sugar, this finely ground sugar is essential for sweetening our whipped cream and giving it a silky-smooth texture. It dissolves easily, preventing a grainy consistency.
- Vanilla Extract: A splash of good quality vanilla extract enhances the overall flavor of the whipped cream, adding a warm, aromatic depth that complements the ice cream sandwiches perfectly.
- Caramel Sauce: A sweet and sticky drizzle that adds a wonderful contrast to the cool creaminess. You can use your favorite store-bought brand for convenience or try making our homemade caramel sauce for an extra touch of gourmet.
- Chocolate Sauce: Another classic topping that pairs beautifully with ice cream. Whether it’s a rich fudge sauce or a thinner chocolate syrup, it adds a decadent layer of flavor. Consider our Homemade Hot Fudge if you’re feeling ambitious!
- Mini M&M’s: These colorful, crunchy candies provide a fun texture and a pop of chocolate in every bite. They’re great for visual appeal and a bit of playful sweetness.
- Mini Chocolate Chip Cookies: Crushed or chopped, these cookies add another layer of texture and a comforting, familiar flavor. They contribute to the “ice cream sundae” vibe we’re aiming for.
The beauty of this recipe truly lies in its flexibility. You can make it as simple or as involved as you desire. While our recipe calls for homemade whipped cream, you can easily opt for a tub of store-bought whipped topping for even faster assembly. Similarly, store-bought chocolate and caramel sauces are perfectly acceptable, but if you have the time and inclination, homemade versions will always add a gourmet touch. And when it comes to decorating, your imagination is the only limit!

Step-by-Step Guide: How to Make Ice Cream Sandwich Cake
Creating this stunning Ice Cream Sandwich Icebox Cake couldn’t be easier. It’s a process so straightforward, even novice bakers (or non-bakers!) can achieve perfect results. Follow these simple steps to assemble your new favorite summer dessert:
- Prepare Your Whipped Cream: This is a crucial step that truly elevates the cake. In the bowl of an electric mixer fitted with a whisk attachment, pour in your well-chilled heavy cream. Beat on high speed for a couple of minutes until the cream begins to thicken and forms soft peaks. At this stage, gradually add the powdered sugar and vanilla extract. Continue whipping until stiff peaks form – this means when you lift the whisk, the peaks of cream stand tall and hold their shape. Nothing beats the freshness and airy texture of homemade whipped cream, trust us!
- Arrange the First Layer: Start by lining the bottom of an 8×8-inch pan (or a 9×13-inch pan for a larger crowd, doubling the recipe accordingly) with a single layer of your favorite store-bought ice cream sandwiches. Depending on the size of your sandwiches and pan, you may need to cut some of them in half or into smaller pieces to create a snug, even layer that covers the entire base. This forms the solid foundation of your cake.
- First Layer of Cream and Drizzle: Once your ice cream sandwiches are in place, gently spread half of your freshly whipped cream evenly over them. Aim for a smooth, consistent layer from edge to edge. Following this, generously drizzle half of your chosen caramel sauce and chocolate sauce over the whipped cream. These sauces will seep slightly into the layers, adding moisture and bursts of flavor.
- Repeat the Layers: Now, it’s time to repeat the process. Add another layer of ice cream sandwiches on top of the cream and sauces. Again, ensure they fit snugly. Then, spread the remaining half of the whipped cream over this new layer of sandwiches, and finish with the remaining caramel and chocolate sauces. The visual appeal of these distinct layers is part of what makes this dessert so appealing.
- Time to Decorate: Before chilling, if you’re feeling extra creative, you can add some initial decorative elements. For a classic ice cream sundae cake look, sprinkle generously with mini M&M’s and some crushed or chopped mini chocolate chip cookies. However, this is where your imagination can truly run wild! Think sprinkles, chopped nuts, fresh berries, shredded coconut, or even a different type of crushed candy.
- Chill to Perfection: This is arguably the most important step! Once assembled and decorated, place your icebox cake in the freezer for a minimum of 3 hours. This extended chill time is crucial for the whipped cream to fully set and for all the layers to meld together beautifully. A well-chilled cake will be firm, easy to slice, and less prone to becoming a messy puddle. For the best results, an overnight freeze is even better.
- Serve and Enjoy: Once thoroughly frozen, remove the cake from the freezer. For cleaner slices, you can run a sharp knife under hot water, dry it, and then slice. This helps the knife glide through the frozen layers more smoothly. Serve immediately and watch it disappear!

Recipe Tips & Tricks for a Flawless Ice Cream Sandwich Cake
While this recipe is incredibly straightforward, a few expert tips can help ensure your Ice Cream Sandwich Icebox Cake turns out absolutely perfect every time. From prep to presentation, these insights will guide you to a truly show-stopping dessert.
- Get Creative with Toppings & Flavors: This is where you can truly make the cake your own! Don’t limit yourself to the suggested toppings. Consider an array of options:
- Candy: Crushed candy bars (Snickers, Heath), chopped peanut butter cups, colorful sprinkles, gummy bears.
- Fruits: Fresh sliced strawberries, blueberries, raspberries, banana slices (add just before serving to prevent browning).
- Nuts: Chopped peanuts, pecans, walnuts, toasted almonds.
- Sauces: Butterscotch sauce, strawberry syrup, white chocolate drizzle, lemon curd.
- Crushed Cookies/Wafers: Crushed Oreos, Graham crackers, Nilla wafers, shortbread cookies.
- Coconut: Toasted shredded coconut adds a delightful texture and tropical flair.
You can also play with the base ice cream sandwiches. Mint chocolate chip sandwiches with crushed Andes mints, or cookies and cream sandwiches with extra crushed Oreos are fantastic combinations!
- Make It Ahead of Time: This icebox cake is an ideal make-ahead dessert. You can assemble it fully (without the final decorative toppings) a day or even two days in advance. This gives it ample time to freeze solid and allows all the flavors to meld beautifully. Just make sure it’s well-wrapped to prevent freezer burn.
- Decorate Just Before Serving: While the cake itself can be made ahead, it’s best to add any delicate or meltable decorative toppings (like fresh fruit, extra drizzles of sauce, or colorful sprinkles) right before you plan to serve it. This ensures everything looks fresh, colors don’t bleed, and nothing melts or spreads unattractively.
- Ensure Complete Setting: Patience is a virtue, especially with icebox cakes! The whipped cream needs sufficient time in the freezer to solidify completely. If it’s not fully set, your cake will be a soft, messy challenge to slice. Aim for at least 3 hours of freezing, but 4-6 hours or even overnight is truly ideal for a firm, clean slice.
- Slicing Perfection: For clean, professional-looking slices, use a long, sharp knife. For best results, run the knife under hot water for a few seconds, wipe it dry, and then make your cut. Repeat this process for each slice. The warm blade will glide through the frozen layers without tearing them.
- Adjusting for Pan Size & Crowd: The recipe provided is perfect for an 8-inch square pan, yielding around 12 servings. If you’re feeding a larger crowd (think a big party or family gathering), you can easily double all the ingredients and assemble it in a 13×9 inch baking pan. This will result in a slightly thinner but equally delicious cake, serving around 18-24 people.
- Homemade vs. Store-Bought Whipped Topping: While homemade whipped cream is always recommended for its superior flavor and texture, don’t hesitate to use a store-bought whipped topping (like Cool Whip) if you’re pressed for time or prefer its stability. Just be aware that the taste and texture will be slightly different.
- Experiment with Sauce Temperatures: While we suggest drizzling sauces, consider slightly warming your caramel or chocolate sauce just before drizzling. A slightly warm sauce will flow more easily and create a beautiful, smooth finish over the cold whipped cream.
Trust us, once you bring this incredibly easy and delicious ice cream sandwich cake to any gathering, you’re going to be constantly asked for the recipe. It’s a guaranteed hit every single time, proving that sometimes the simplest desserts are the most memorable!

Ice Cream Sandwich Ice Box Cake
Pin Recipe
Rate Recipe
Print Recipe
Ingredients
- 12 ice cream sandwiches
- 1 cup heavy cream
- 1/4 cup powdered sugar
- 1/2 teaspoon vanilla extract
- 3 tablespoons caramel sauce
- 3 tablespoons chocolate sauce
- 2 tablespoons mini M&M’s
- 6 mini chocolate chip cookies, chopped
Instructions
-
In an electric mixer fitted with the whisk attachment, beat heavy cream on high for a couple minutes until you get soft peaks. Add in powdered sugar and vanilla extract and whip until stiff peaks.
-
Arrange 6 ice cream sandwiches along the bottom of an 8X8-inch pan. You can cut them in half to make them fit.
-
Spread half of whipped cream over ice cream sandwiches. Drizzle half of caramel and chocolate sauce over whipped cream.
-
Repeat with remaining ingredients.
-
To decorate, sprinkle with M&M’s and chocolate chip cookies.
-
Freeze for 3 hours to let it set, and then slice to serve.
Nutrition
Nutrition information is automatically calculated, so should only be used as an approximation.
Storage and Make-Ahead Instructions
One of the many benefits of this Ice Cream Sandwich Icebox Cake is its fantastic make-ahead potential and ease of storage. It’s designed to be prepared in advance, making it the perfect stress-free dessert for any occasion.
- Making Ahead: You can assemble this cake completely, up to the point of adding the final decorative toppings, 1-2 days before you plan to serve it. This allows ample time for the cake to firm up beautifully in the freezer and for all the flavors to meld together, resulting in an even more delicious treat. Simply cover it tightly with plastic wrap or aluminum foil once assembled, and place it in the freezer.
- Storage: Any leftover slices or the remainder of the cake should be stored in the freezer. To prevent freezer burn and keep the cake fresh, wrap it tightly in plastic wrap, then an additional layer of aluminum foil. Alternatively, store slices in an airtight container designed for freezer use.
- Shelf Life: When properly stored, this ice cream sandwich cake will keep well in the freezer for up to 1-2 weeks. Beyond that, while it will still be safe to eat, the quality and texture might begin to diminish slightly.
- Serving Leftovers: There’s no special preparation needed for leftovers. Simply take a slice out of the freezer a few minutes before you want to enjoy it, allowing it to soften slightly for easier eating.
Frequently Asked Questions (FAQ)
You’ve got questions, and we’ve got answers! Here are some common queries about making the perfect Ice Cream Sandwich Icebox Cake:
- Q: Can I use store-bought whipped topping instead of making my own whipped cream?
A: Absolutely! While homemade whipped cream offers a superior fresh taste and lighter texture, store-bought whipped topping (like Cool Whip) is a perfectly acceptable and convenient alternative. It will make the assembly even quicker, and the cake will still be delicious. Just be aware of the slight difference in flavor and consistency. - Q: How long does the cake need to freeze?
A: For best results and clean slices, the cake needs to freeze for a minimum of 3 hours. However, for maximum firmness and flavor melding, we highly recommend freezing it for 4-6 hours, or even overnight. The longer it freezes, the more stable it will be. - Q: Can I make this cake in a different size pan?
A: Yes! This recipe is written for an 8×8-inch square pan, which yields about 12 servings. If you need to feed a larger crowd, you can easily double the recipe and use a 13×9-inch baking pan. The layering process remains the same, but you will use more ice cream sandwiches and whipped cream. - Q: How do I get clean slices?
A: The key to clean slices is a very cold cake and a warm, sharp knife. Before each cut, run your knife under hot water for about 10-15 seconds, then quickly wipe it dry. The warm blade will effortlessly cut through the frozen layers without sticking or tearing. Repeat this warming process for every slice. - Q: Can I add fresh fruit?
A: Yes, fresh fruit can be a wonderful addition! Sliced strawberries, raspberries, or blueberries add a burst of freshness and color. We recommend adding fresh fruit as a topping just before serving, rather than layering it within the cake, as some fruits can become watery or overly firm when frozen for extended periods. - Q: How can I prevent freezer burn if making ahead?
A: To prevent freezer burn, ensure your cake is very well wrapped. After the initial chill, cover the pan tightly with at least two layers of plastic wrap, pressing it directly onto the surface of the cake to remove any air. Then, add a final layer of aluminum foil. This multi-layer protection is crucial for long-term storage.
Additional Info
Like this recipe? Leave a comment below!
