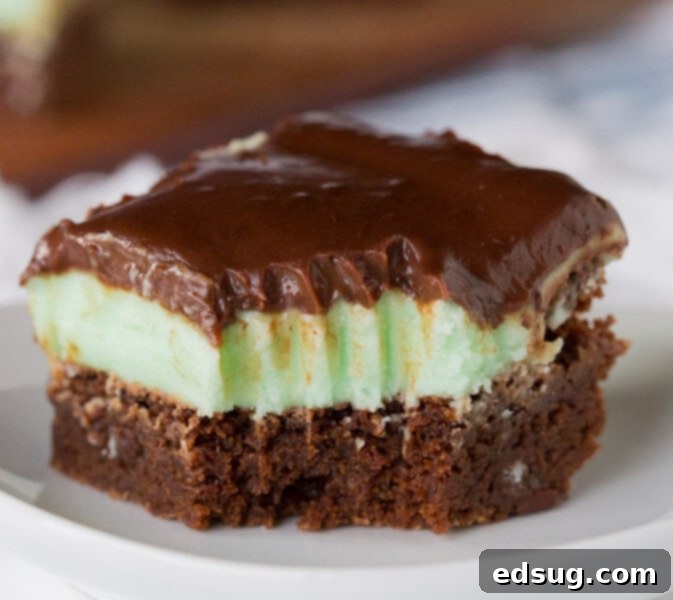
Decadent Grasshopper Brownies: The Ultimate Mint Chocolate Treat
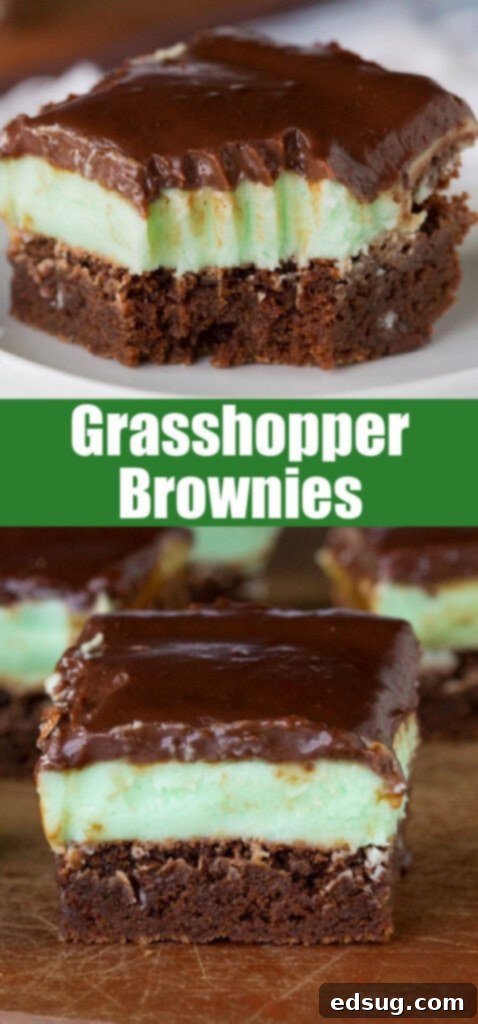
Experience pure bliss with these Grasshopper Brownies – incredibly fudgy brownies topped with a vibrant, refreshing mint buttercream frosting and finished with a rich chocolate ganache.
There’s something universally comforting and undeniably delicious about a perfectly baked brownie. For me, brownies aren’t just a dessert; they’re a childhood memory, a go-to comfort food, and an absolute obsession. My blog is practically a shrine to them, boasting almost 40 homemade brownie recipes, and if you’ve been here before, that probably comes as no surprise! And when it comes to brownies, the fudgier, the better – a non-negotiable standard in my kitchen.
Often, people tend to categorize the delightful combination of chocolate and mint as seasonal, reserving it for festive occasions like Christmas or St. Patrick’s Day. But I’m here to tell you that’s a misconception! This refreshing duo deserves to be savored all year round. Imagine a warm summer day, and you’re craving something cool and chocolatey; a slice of No Bake Mint Chocolate Chip Pie would be absolutely perfect, offering that same invigorating mint-chocolate kick without ever needing to turn on your oven. Similarly, these Grasshopper Brownies, with their cool mint and rich chocolate, are a welcome treat in any season.
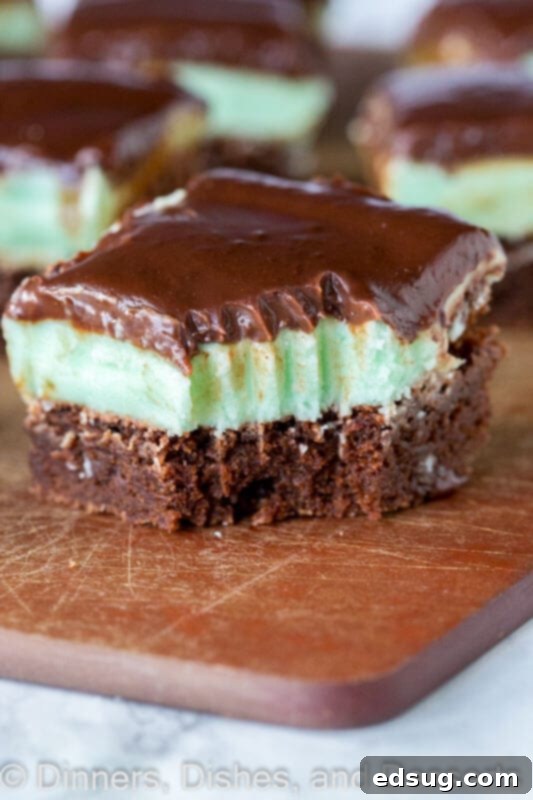
My journey with brownies began at a young age. I’ve been perfecting this easy homemade brownie recipe since I was a little girl, a tradition passed down through my family. The only person who might rival my dedication to fudgy brownies is my dad – and even then, it’s a close call; we’re practically neck and neck in our shared obsession. Growing up, almost every weekend involved whipping up a batch of these same incredibly fudgy brownies. We’d top them with various delicious additions, often just a simple, decadent chocolate frosting, but this Grasshopper Brownie version takes them to an entirely new level of indulgence.
Why You’ll Adore These Grasshopper Brownies
These isn’t just any brownie recipe; it’s a three-layered masterpiece designed to delight your taste buds. Each component plays a crucial role in creating a dessert that’s rich, refreshing, and utterly irresistible. Here’s why you’ll fall in love:
- The Ultimate Fudgy Brownie Base: We start with a tried-and-true recipe that guarantees a dense, moist, and intensely chocolatey brownie. It’s the perfect canvas for our minty creation, offering a deep cocoa flavor that complements the cool mint.
- Cool & Creamy Mint Buttercream: This isn’t just any frosting. It’s a light, airy, and wonderfully smooth buttercream infused with just the right amount of mint extract. The hint of green food coloring gives it that signature “grasshopper” look, making it as visually appealing as it is delicious.
- Glossy Dark Chocolate Ganache: The final touch is a luxurious, glistening layer of chocolate ganache. Made with heavy cream and semi-sweet chocolate chips, it adds another dimension of chocolate richness and a beautiful, set finish that cracks ever so satisfyingly when you slice into it.
- Perfect for Any Occasion: While the mint might evoke certain holidays, these brownies are truly a year-round delight. They’re fantastic for parties, potlucks, or simply as an indulgent treat after a long week.
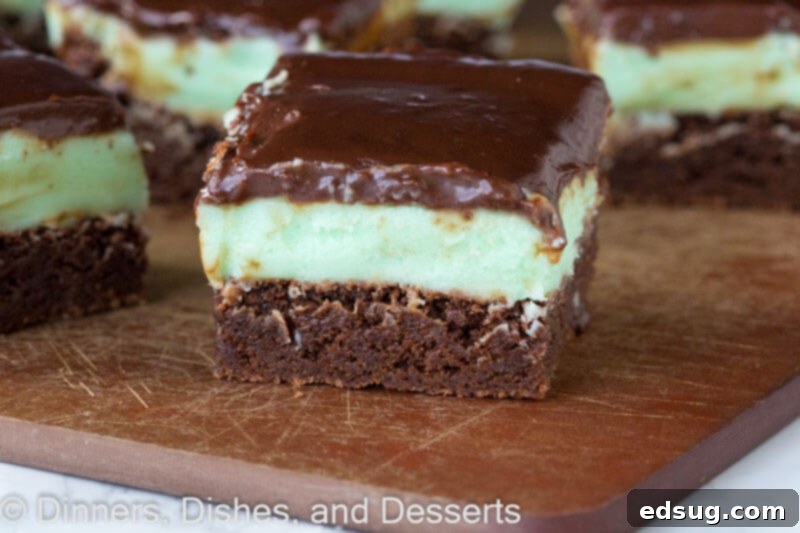
Essential Ingredients for Grasshopper Brownies
Creating these sensational Grasshopper Brownies involves three distinct yet harmonious layers, each requiring specific ingredients to achieve perfection. Here’s a breakdown of what you’ll need for this decadent, over-the-top dessert:
- For the Fudgy Brownie Base:
- Unsweetened Chocolate: This is key for a deep chocolate flavor without excessive sweetness in the base.
- Vegetable Oil: Contributes to the fudgy texture, as opposed to a cakey one.
- Granulated Sugar: For sweetness and moisture in the brownies.
- Eggs: Provide structure and richness, binding the ingredients together.
- All-Purpose Flour: Just enough to hold it all together without making them tough.
- Baking Powder: A small amount to give a slight lift, keeping them dense but not heavy.
- Salt: Essential for balancing the sweetness and enhancing the chocolate flavor.
- For the Mint Buttercream Frosting:
- Butter: Softened to room temperature for a smooth, creamy frosting base.
- Powdered Sugar: Gives the frosting its classic smooth texture and sweetness.
- Mint Extract: The star of this layer, providing that signature refreshing flavor. Adjust to your taste!
- Skim Milk: Helps achieve the perfect spreadable consistency. Whole milk or cream can also be used for a richer frosting.
- Green Food Coloring: Optional, but gives the frosting its vibrant grasshopper hue.
- For the Luxurious Chocolate Ganache:
- Chocolate Chips (Semi-Sweet): The foundation of our rich ganache. Good quality chips will make a difference.
- Heavy Cream: When heated and combined with chocolate, it creates a smooth, glossy, and decadent topping.
Crafting Your Grasshopper Brownies: A Step-by-Step Guide
For your convenience, be sure to scroll to the bottom of the post for the FULL PRINTABLE recipe card with exact measurements and detailed steps.
Making these multi-layered Grasshopper Brownies is a rewarding process, and breaking it down into its three main components makes it surprisingly straightforward. Let’s walk through each step to ensure your brownies are nothing short of spectacular:
- Prepare Your Brownie Base: Begin by preheating your oven to 350º F (175º C). Line an 8×8 inch baking dish with foil or parchment paper, leaving an overhang on the sides to easily lift the cooled brownies out later. Lightly grease the foil/parchment.
- Melt Chocolate and Oil: In a medium microwave-safe bowl, combine the unsweetened chocolate and vegetable oil. Microwave in 30-second intervals, stirring after each, until the chocolate is fully melted and the mixture is smooth. This initial step is crucial for achieving that characteristic fudgy texture.
- Combine Wet Ingredients: Add the granulated sugar and eggs to the melted chocolate mixture. Whisk vigorously until they are very well combined and the eggs are fully incorporated, and the mixture looks smooth and glossy. This helps create a dense, chewy brownie.
- Gently Fold in Dry Ingredients: Sift the all-purpose flour, baking powder, and salt into the wet ingredients. Using a spatula, gently fold them in until just combined. The key here is to avoid overmixing, as this can develop the gluten in the flour too much, leading to cakey rather than fudgy brownies. A few tiny white streaks are fine; they’ll disappear during baking.
- Bake the Brownies: Pour the brownie batter into your prepared baking dish, spreading it evenly. Bake for 20-25 minutes. To check for doneness, insert a toothpick into the center; it should come out with moist crumbs attached, but not wet batter. Overbaking will result in dry brownies.
- Cool Completely: Once baked, remove the brownies from the oven and place the pan on a wire rack to cool completely. This step is non-negotiable! Attempting to frost warm brownies will lead to a melty mess. Patience is a virtue here.
- Whip Up the Mint Buttercream: While the brownies are cooling, prepare your mint layer. In a large mixing bowl, beat the softened butter until light and fluffy. Gradually add the powdered sugar, mint extract, and skim milk. Beat on medium-high speed until you achieve a wonderfully creamy and spreadable consistency. If it’s too thick, add a tiny bit more milk; if too thin, add a little more powdered sugar. Stir in a few drops of green food coloring until you reach your desired “grasshopper” shade.
- Frost the Cooled Brownies: Once the brownies are completely cool, spread the mint buttercream evenly over the top. Use an offset spatula or the back of a spoon to create a smooth, beautiful layer.
- Prepare the Chocolate Ganache: For the final, luxurious layer, combine the semi-sweet chocolate chips and heavy cream in a microwave-safe bowl or liquid measuring cup. Microwave for about 45 seconds, or until the cream is hot and simmering around the edges (but not boiling). Let the mixture sit undisturbed for 1 minute to allow the chocolate chips to soften.
- Create a Smooth Ganache: After a minute, stir the chocolate and cream mixture vigorously until it is completely melted, smooth, and glossy. It should have a beautiful, pourable consistency.
- Top and Chill: Carefully pour the warm chocolate ganache over the mint-frosted brownies, tilting the pan gently to ensure it spreads evenly to all edges. Place the brownies in the refrigerator for at least 2 hours, or until the chocolate ganache is completely set. This firming-up period is essential for clean slices and prevents the layers from melding together prematurely.
- Slice and Serve: Once the ganache is set, lift the brownies out of the pan using the foil or parchment overhang. Place them on a cutting board and use a sharp, warm knife (run under hot water and wipe clean) to slice them into squares. Serve slightly chilled for the best texture and flavor. Enjoy your homemade Grasshopper Brownies!
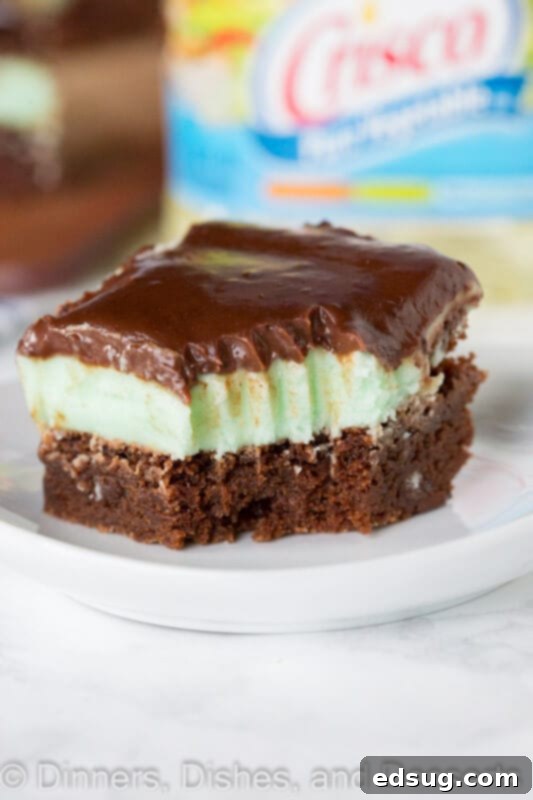
To make these brownies truly special and give them that holiday or celebration-ready look, I’ve opted for a lush mint buttercream, similar to what you’d find in these festive Mint Chocolate Chip Brownies. The combination of classic fudginess with a burst of cool mint is simply irresistible.
Expert Tips & Tricks for Perfect Grasshopper Brownies
Achieving bakery-quality Grasshopper Brownies is easier than you think with these simple tips:
- Mastering the Ganache Consistency: I prefer my ganache to remain slightly gooey, creating a pleasant contrast with the frosting and brownie, rather than becoming rock-hard and separating. To achieve this, I use equal parts heavy cream to chocolate chips. If you prefer a firmer ganache that sets more solidly, you can slightly increase the amount of chocolate chips (e.g., use 1 cup chocolate chips to 3/4 cup heavy cream).
- Optimal Serving Temperature: These brownies are truly best served slightly chilled. Storing them in the fridge is essential to keep the ganache firm and prevent the frosting from melting. However, for the best flavor and texture, let them sit out at room temperature for about 10-15 minutes before serving. This allows the ganache to soften slightly and the flavors to truly shine.
- The Golden Rule: Don’t Overmix the Batter! This is perhaps the most crucial tip for fudgy brownies. Once you add the flour and other dry ingredients to the wet mixture, mix only until the white streaks of flour have *just* disappeared. Overmixing develops the gluten in the flour, resulting in a tougher, cakey brownie texture, which is the opposite of what we want for these fudgy delights.
- Scaling Up Your Batch: This recipe is designed for an 8×8 inch pan. If you’re feeding a crowd or simply want more delicious brownies, you can easily double the recipe and bake it in a larger 13×9 inch pan. Adjust baking time slightly (it might take a few minutes longer) and continue to check for doneness with a toothpick.
- Quality Ingredients Matter: While not strictly necessary, using good quality unsweetened chocolate and semi-sweet chocolate chips can significantly enhance the overall flavor of your brownies. Fresh mint extract also makes a big difference in the vibrancy of the mint buttercream.
- Storage: Store leftover Grasshopper Brownies in an airtight container in the refrigerator for up to 3-4 days. For longer storage, you can freeze individual slices (wrapped tightly in plastic wrap and then foil) for up to 2-3 months. Thaw in the refrigerator or at room temperature before serving.
More Irresistible Chocolate Dessert Recipes
If you’re a chocolate lover, then you’re in the right place! After mastering these Grasshopper Brownies, be sure to explore more of our decadent chocolate creations:
- Peanut Butter Stuffed Brownies: The ultimate combo of chocolate and peanut butter.
- Flourless Chocolate Cake: Rich, dense, and naturally gluten-free.
- Loaded Cookie Pizza: A fun, shareable dessert for any gathering.
- Chocolate Hazelnut Cake: A nutty and chocolatey dream.
- Chocolate Pavlova: Light, airy, and elegant.
- Chocolate Mousse Brownies: Two incredible desserts in one.
- Cosmic Brownie Cookies: A nostalgic twist on a childhood favorite.
- Ding Dong Cake: Recreate this iconic snack cake at home.
Grasshopper Brownies
Video
Ingredients
Brownies
- 2 oz unsweetened chocolate, melted
- 1/3 cup vegetable Oil
- 1 cup granulated sugar
- 2 whole large eggs
- 3/4 cup all-purpose flour
- 1/2 teaspoon baking powder
- 1/2 teaspoon salt
Mint Buttercream
- 1/2 cup butter, softened
- 2 cups powdered sugar
- 1/2 teaspoon mint extract
- 3 Tablespoons skim milk
- green food coloring
Chocolate Ganache
- 3/4 cup semi-sweet chocolate chips
- 3/4 cup heavy cream
Instructions
- Preheat oven to 350º F (175° C). Line an 8×8 inch baking dish with foil or parchment paper, leaving an overhang for easy removal. Lightly grease the lining.
- In a medium microwave-safe bowl, combine melted unsweetened chocolate and vegetable oil. Microwave in 30-second intervals, stirring after each, until smooth.
- Add granulated sugar and eggs to the chocolate mixture. Whisk thoroughly until well combined and the eggs are fully incorporated, creating a smooth mixture.
- Gently fold in the all-purpose flour, baking powder, and salt until the white streaks of flour just disappear. Be careful not to overmix.
- Pour the batter into the prepared baking dish and spread evenly. Bake for 20-25 minutes, or until a toothpick inserted into the center comes out with moist crumbs, not wet batter.
- Remove from the oven and let cool completely on a wire rack before proceeding to the next steps.
- Meanwhile, prepare the mint buttercream. In a bowl, beat softened butter until light. Gradually add powdered sugar, mint extract, and skim milk. Mix until creamy and spreadable. Adjust milk/sugar for desired consistency. Add a few drops of green food coloring for the iconic “grasshopper” color.
- Once the brownies are completely cooled, spread the mint buttercream evenly over the top.
- For the ganache, heat chocolate chips and heavy cream in a microwave-safe bowl for 45 seconds (until hot, but not boiling). Let sit for 1 minute, then stir until smooth and well combined.
- Pour the warm ganache over the mint frosting, tilting the pan to spread evenly. Chill the brownies in the fridge for at least 2 hours, or until the chocolate ganache is completely set before slicing and serving.
Nutrition
Nutrition information is automatically calculated, so should only be used as an approximation.
Additional Info
I created a fun group on Facebook, and I would love for you to join us! It’s a fantastic place where you can share YOUR favorite recipes, ask questions, and stay updated on what’s new at Dinners, Dishes and Desserts, ensuring you never miss a delicious new recipe!
Be sure to follow me on Instagram and tag #dinnersdishes so I can see all the wonderful DINNERS, DISHES, AND DESSERTS recipes YOU make!
Don’t forget to connect with me on my social media channels, so you never miss a post!
Facebook | Twitter | Pinterest | Instagram
.
**I am a Crisco Preferred Partner and was compensated for my time to create this recipe. All thoughts and opinions are 100% my own.
