Easy No-Bake Love Bug Oreo Cookies: The Ultimate Valentine’s Day Treat Recipe
Get ready to spread some love this Valentine’s Day with these absolutely adorable and incredibly easy Love Bug Oreo Cookies! This no-bake recipe is a fantastic way to create a fun, festive treat that will delight both kids and adults. Whether you’re planning a Valentine’s Day party, looking for a simple classroom snack, or just want to add a touch of sweetness to your day, these chocolate-dipped Oreos, decorated to look like cute love bugs, are the perfect solution. They are quick to prepare, require minimal ingredients, and offer endless possibilities for customization, making them a true joy to create.
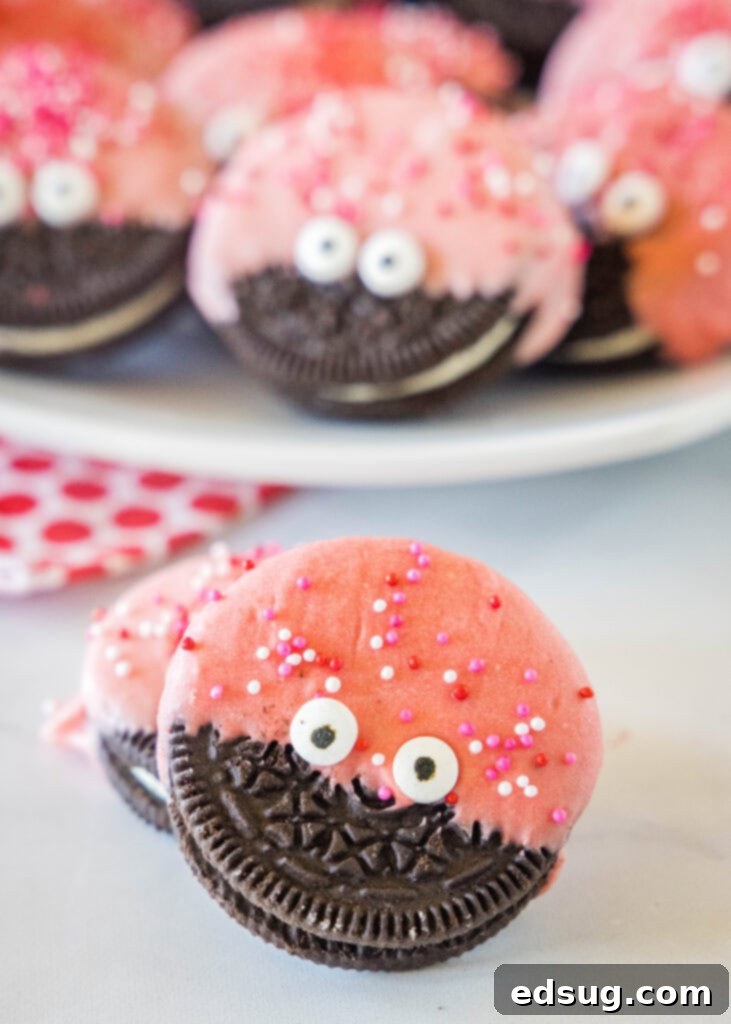
Valentine’s Day is all about showing affection, and what better way than with a homemade treat? These charming Love Bug Cookies capture the spirit of the holiday perfectly. Their vibrant red coating, sweet candy eyes, and playful sprinkles make them an irresistible centerpiece for any Valentine’s celebration. Plus, since there’s no baking involved, they are a fantastic project to do with children, allowing them to get creative in the kitchen without the heat of an oven. You can truly personalize each love bug, making them as unique as your loved ones!
Why These Love Bug Cookies Are a Must-Make
- Effortlessly Easy – Forget complicated recipes and lengthy ingredient lists. The most challenging part of this recipe is melting chocolate, and we’ll guide you through that with ease. Even novice bakers (or non-bakers!) will find these a breeze to whip up. It’s a fantastic entry-level dessert that yields impressive results.
- Festive & Fun – These cookies are not just delicious; they’re a visual delight! Their bright red hue, playful candy eyes, and colorful sprinkles instantly evoke the festive spirit of Valentine’s Day. They’re perfect for decorating a dessert table, packaging as sweet party favors, or gifting to friends and family. Making them with kids turns into a fun, memorable activity.
- No Baking Required – That’s right, keep your oven off! This is a true no-bake wonder. All you need is a microwave (or a double boiler) for melting chocolate, a gentle hand for dipping, and a little patience for them to set. No measuring flour, no precise oven temperatures – just pure, simple cookie magic. This makes them ideal for busy schedules or when you simply want a quick, delightful treat.
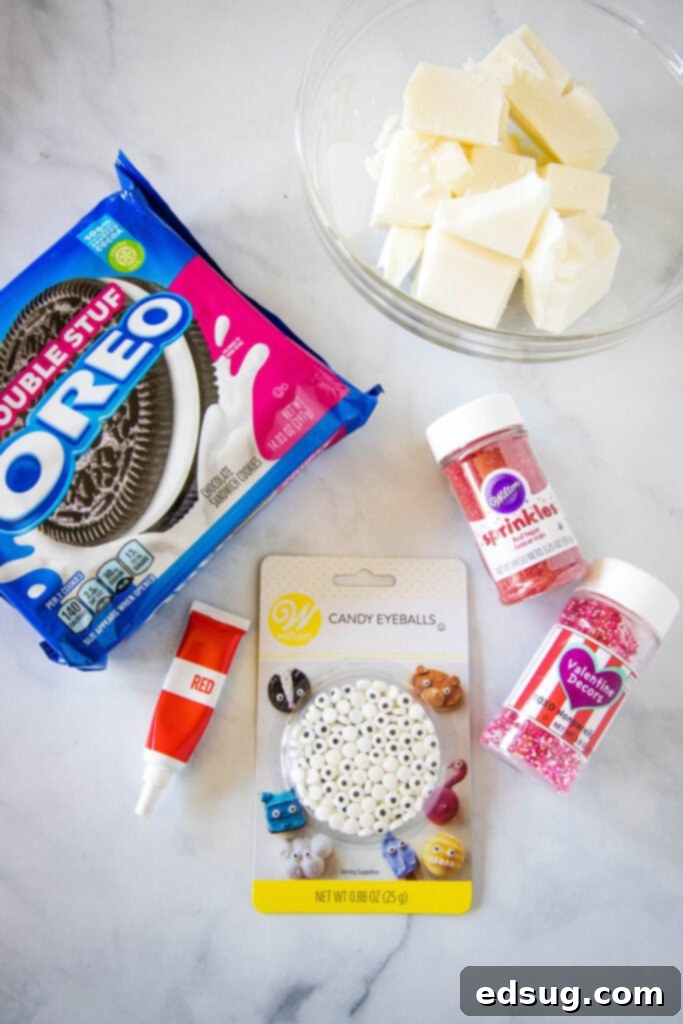
Gather Your Ingredients for Adorable Love Bugs
For the exact measurements, be sure to scroll to the bottom of the post for the FULL PRINTABLE recipe card.
- Oreo Cookies – The classic chocolate sandwich cookie provides the perfect base. Their round shape is ideal for transforming into a “bug” body. While Oreos are excellent, you can experiment with other round cookies like Nutter Butters or even shortbread if you prefer.
- White Chocolate or Almond Bark – This will be your vibrant red coating. White chocolate chips, melting wafers, or almond bark all work well. Almond bark is often preferred for its smooth melting consistency and quick setting time, making it very beginner-friendly.
- Oil-Based or Gel Food Coloring – This is crucial for achieving that brilliant red color without compromising the chocolate’s texture. Unlike liquid food colorings, oil-based gels won’t cause the chocolate to seize or clump, ensuring a smooth, dippable consistency. Red is classic for Valentine’s, but pink or even purple could be fun!
- Candy Eyes – These are what give your love bugs their irresistible charm! You can find them in most craft stores, baking sections of supermarkets, or online. They instantly bring your cookies to life.
- Valentine’s Day Sprinkles – A mix of red, pink, and white sprinkles in various shapes (hearts, nonpareils, jimmies) adds texture, sparkle, and extra festive flair. Choose your favorites to make each bug unique!

Step-by-Step Guide to Crafting Your Love Bug Oreos
Making these love bug cookies is a straightforward process. Just follow these simple steps for perfectly decorated treats:
- Prepare the Chocolate – In a large, microwave-safe bowl, heat your white chocolate or almond bark. Begin with 1 minute, then stir thoroughly. Continue heating in 20-second intervals, stirring well after each, until the chocolate is completely melted and smooth. This gradual heating prevents burning. Once smooth, add your oil-based red food coloring a few drops at a time, stirring until you achieve your desired vibrant red or pretty pink shade.
- Dip the Cookies – Hold an Oreo cookie gently near the top (about 1/3 of the way up) and dip the remaining 2/3rds into the melted chocolate. Allow any excess chocolate to drip off by gently shaking the cookie or lightly tapping it against the edge of the bowl. This ensures a clean, even coating. Place the dipped cookie onto a baking sheet lined with parchment paper or wax paper.
- Decorate Instantly – While the chocolate is still wet, quickly add the candy eyes and sprinkles. The warm chocolate will act as an adhesive for the eyes. Place two candy eyes near the top edge of the dipped chocolate part, positioning them like a bug’s eyes. Then, generously sprinkle your Valentine’s Day sprinkles over the wet chocolate.
- Allow to Set – Once decorated, let the cookies set completely. This usually takes 1 to 2 hours at room temperature, or you can speed up the process by placing the baking sheet in the refrigerator for about 15-30 minutes. Ensure the chocolate is fully solid before handling or storing them.

Pro Tips for Perfect Love Bug Oreo Cookies
- Choosing Your Chocolate – While white chocolate or almond bark is ideal for coloring, you can also use pre-colored red or pink candy melts, which are readily available at craft stores or online (Wilton offers many options). Almond bark is often a favorite because it melts incredibly smoothly, dips beautifully, and sets up quickly, giving you a professional finish. If using white chocolate chips, sometimes adding a teaspoon of coconut oil or vegetable shortening can help thin it slightly for easier dipping and a smoother coat.
- The Right Food Coloring is Key – This cannot be stressed enough: **always use oil-based or gel food coloring** when working with chocolate. Water-based food colorings (the small liquid bottles often found in grocery stores) will cause your chocolate to “seize” immediately, turning it into a thick, crumbly mess that is unusable for dipping. Gel colors are highly concentrated, so start with a tiny amount and add more until you achieve your desired shade.
- Cookie Variations – While Oreo cookies are fantastic for their classic taste and perfect round shape, don’t limit yourself! Feel free to use other round cookies like Nutter Butters for a peanut butter twist, or even shortbread cookies. The main goal is a sturdy, round base that can hold the chocolate and decorations. For those with dietary restrictions, many brands now offer gluten-free sandwich cookies that would work wonderfully.
- Where to Find Candy Eyes – These expressive little edible eyes are essential for bringing your love bugs to life! You can typically find them in the baking or craft section of major supermarkets, at craft stores like Michael’s or Hobby Lobby, or easily purchase them online from retailers like Amazon. Stock up, as they are fun for many holiday treats!
- Sprinkle Application – To ensure your sprinkles adhere well and cover the chocolate evenly, apply them immediately after dipping each cookie, while the chocolate is still very wet. You can either gently drop them over the cookie or roll the dipped edge of the cookie in a shallow bowl of sprinkles for full coverage. For a neater look, use a small spoon to carefully place sprinkles where you want them.
- Troubleshooting Seized Chocolate – If, despite precautions, your chocolate seizes (becomes thick and clumpy), don’t panic! You can sometimes rescue it by stirring in a teaspoon of vegetable shortening or coconut oil, heating gently, and stirring constantly until it smooths out. If it’s too far gone, it might be best to start with a fresh batch.

Storage Solutions for Your Valentine’s Day Treats
Once your delightful Love Bug Cookies have fully set, proper storage will keep them fresh and delicious for an extended period.
- Room Temperature Storage: Store your Love Bug Cookies in an airtight container at room temperature. They will remain fresh and tasty for up to two weeks, making them perfect for preparing a few days in advance of your Valentine’s Day celebrations.
- Freezing for Make-Ahead: These cookies are excellent for making ahead and freezing, allowing you to prepare them well in advance. Arrange the set cookies in a single layer in an airtight freezer-safe container, separating layers with parchment paper to prevent sticking. They can be stored in the freezer for up to 3 months. When you’re ready to serve, simply let them thaw on the counter at room temperature for an hour or two until fully defrosted. They will taste just as fresh and delicious!
Frequently Asked Questions (FAQ)
Here are some common questions you might have about making these charming Love Bug Oreo Cookies:
- Can I use dark or milk chocolate instead of white chocolate?
Yes, you can! While white chocolate is ideal for coloring vibrant red or pink, milk or dark chocolate can also be used. Your “love bugs” would simply be brown or black with colorful eyes and sprinkles, which can still be very cute. Just ensure the chocolate is melted smoothly for dipping. - How can I make the chocolate smoother for dipping?
If your melted chocolate seems a bit thick, try stirring in a teaspoon of vegetable shortening or coconut oil. This can help thin it out and make it easier to achieve a smooth, even coating on your cookies. Ensure you heat gradually and stir frequently. - What if I don’t have candy eyes?
No problem! You can get creative. Use small dots of melted white chocolate (or icing) and then place tiny chocolate chips (pointy side down) on top for eyes. Alternatively, you can draw eyes using an edible food marker. - Can kids help make these?
Absolutely! This is a fantastic kid-friendly recipe. Children can assist with dipping (with adult supervision for hot chocolate), placing candy eyes, and adding sprinkles. It’s a fun and safe way to involve them in holiday treat making. - How can I make these for other holidays?
These cookies are incredibly versatile! Change the food coloring and sprinkles to match any occasion. Use green for St. Patrick’s Day, orange for Halloween, blue for baby showers, or multi-colors for birthdays. The “love bug” can transform into any festive creature or character! - Do I have to use Oreos?
While Oreos are recommended for their ideal size and texture, you can experiment with other round cookies like vanilla wafers, shortbread, or even graham crackers for a different flavor profile and look.
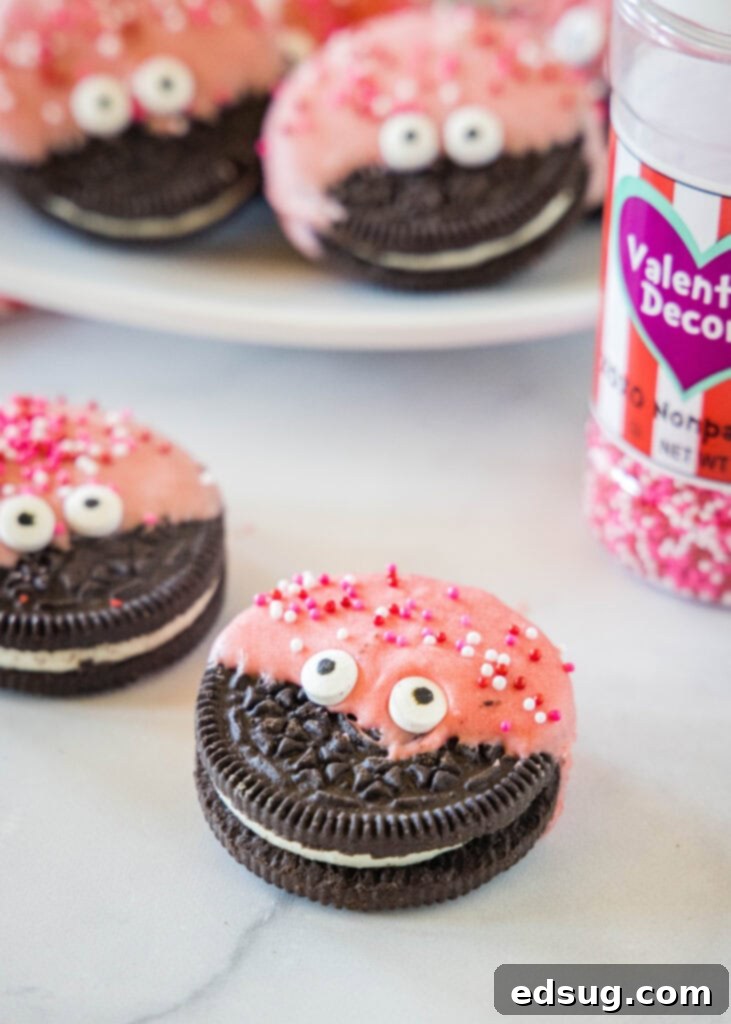
More Fun Valentine’s Day Treats
If you’re looking for more delicious ways to celebrate Valentine’s Day, be sure to check out these other fantastic recipes:
- Valentine’s Day Chocolate Bark
- Red Velvet Muffins
- Valentine’s Day Cupid Mix
- Deep Dish Cookies For Two
- Red Velvet Brownies
- Maraschino Cherry Chip Cookies

Love Bug Oreo Cookies
Pin Recipe
Rate Recipe
Print Recipe
Ingredients
- 24 Oreo cookies
- 8 oz white chocolate, almond bark or candy melts
- Red Food Coloring, oil-based gel color (essential for chocolate)
- 48 candy eyes
- Valentine’s Day Sprinkles
Instructions
-
In a large microwave-safe bowl, heat your almond bark or white chocolate for 1 minute. Stir thoroughly. Continue heating in 20-second intervals, stirring after each, until completely melted and smooth. Add in your oil-based red food coloring a few drops at a time, stirring until you get your desired vibrant color.
-
Hold each Oreo cookie near the top edge and dip 2/3rds of the way into the melted red chocolate. Gently shake off any excess chocolate and place the dipped cookie onto a baking sheet lined with parchment paper or wax paper.
-
While the chocolate is still wet, immediately add two candy eyes to the top edge of the dipped chocolate part to “glue” them into place. Then, sprinkle your Valentine’s Day sprinkles generously over the wet chocolate.
-
Allow the decorated cookies to set up for 1-2 hours at room temperature, or place the baking sheet in the refrigerator for 15-30 minutes, until the chocolate is completely solid and firm to the touch.
Notes
Nutrition
Nutrition information is automatically calculated, so should only be used as an approximation.
Additional Info
Like this recipe? Leave a comment below!
I created a fun group on Facebook, and I would love for you to join us! It’s a vibrant community where you can
share YOUR favorite recipes, ask questions, get inspiration, and stay updated on what’s new at Dinners, Dishes and Desserts (so that you never miss a new recipe)! We’d love to see your Love Bug Oreo creations!
Be sure to follow me on Instagram and
tag #dinnersdishes so I can see all the wonderful DINNERS, DISHES, AND DESSERTS
recipes YOU make! Your creativity inspires us all!
Don’t miss out on any delicious updates! Be sure to follow me on my social media channels:
Facebook | Twitter | Pinterest | Instagram
