Homemade Chipwich: Crafting the Ultimate Cookie Ice Cream Sandwiches
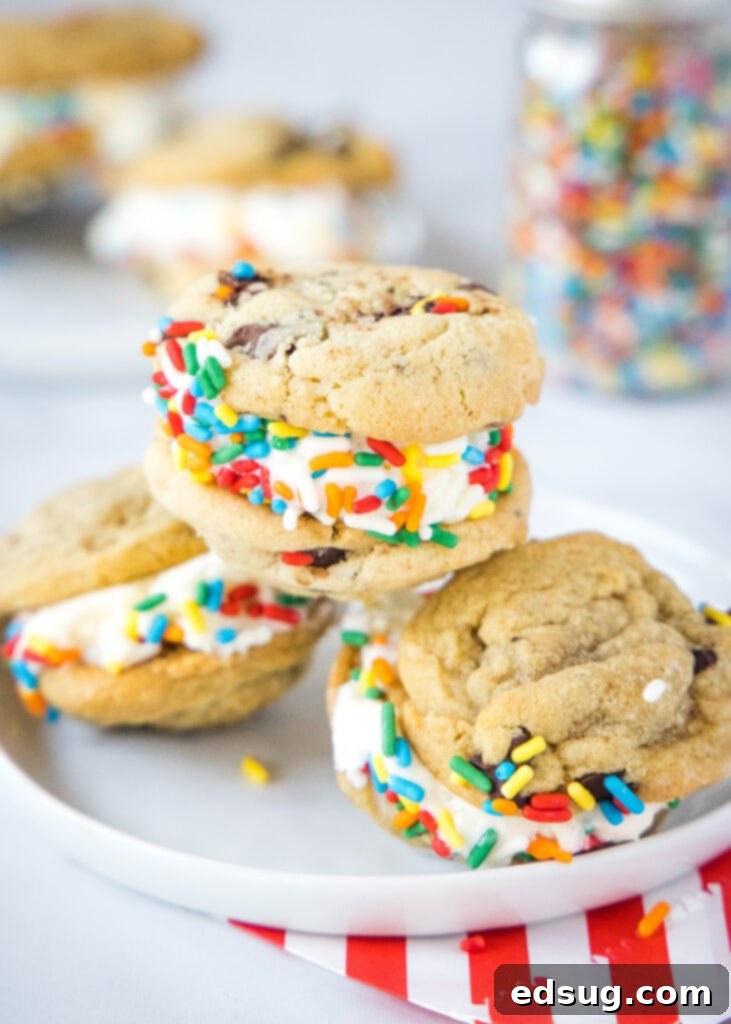
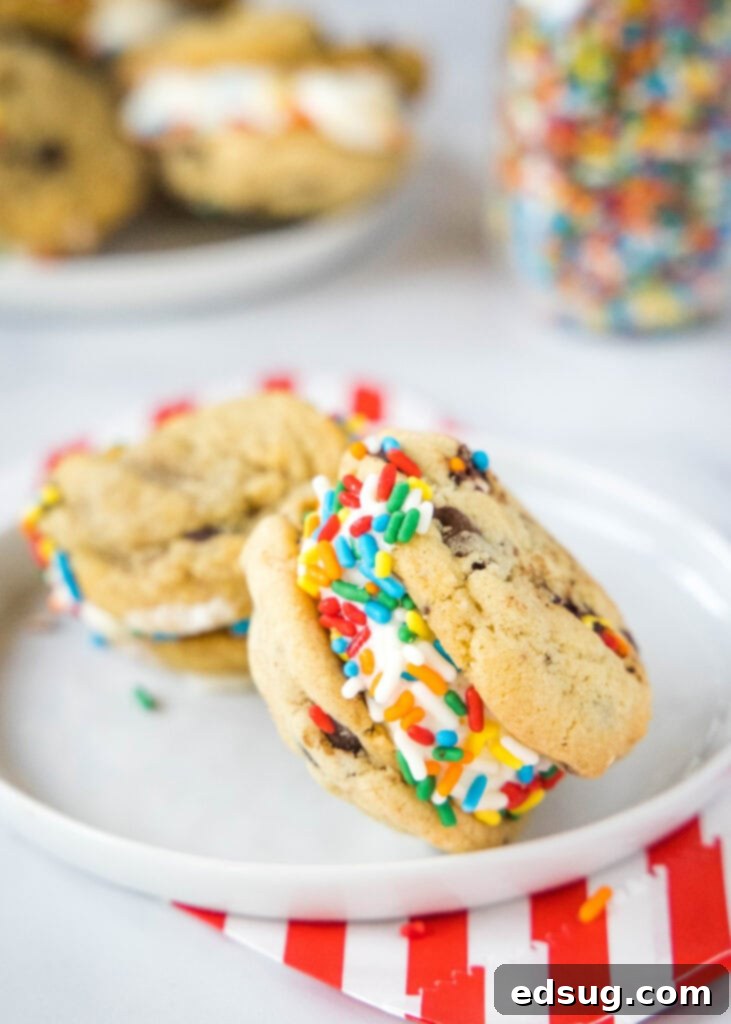
Indulge in the nostalgic delight of a homemade Cookie Ice Cream Sandwich – soft, chewy chocolate chip cookies lovingly cradling creamy vanilla ice cream, all playfully coated in vibrant sprinkles! This classic frozen treat, often affectionately known as a Chipwich, is the quintessential fun and easy dessert everyone will adore this summer.
There’s something truly magical about a perfectly crafted ice cream sandwich. Whether you call it a Chipwich, a cookie ice cream sandwich, or simply a delightful frozen treat, the concept remains universally appealing: two irresistible cookies embracing a generous scoop of smooth, cold ice cream. This timeless dessert evokes childhood memories of sunny afternoons and joyful moments, often associated with the familiar jingle of the ice cream truck. While those days are fond, the good news is you can easily recreate this beloved classic right in your own kitchen, ensuring a supply of pure deliciousness always awaits you in the freezer.
Making your own cookie ice cream sandwiches allows for endless customization and offers a freshness that store-bought versions often can’t match. Imagine biting into a soft, slightly yielding cookie that gives way to rich, creamy ice cream, with a fun crunch from sprinkles or mini chocolate chips. It’s a sensory experience that defines summer indulgence, and with this comprehensive guide, you’re just a few steps away from mastering this iconic treat.

Understanding the Classic: What Exactly is a Chipwich?
At its heart, a Chipwich is a simple yet genius dessert. It typically features two soft chocolate chip cookies with a thick layer of ice cream—most commonly vanilla—sandwiched firmly between them. The edges of the ice cream filling are then often rolled in a coating, usually mini chocolate chips or colorful sprinkles, adding both visual appeal and a delightful textural contrast. The name “Chipwich” itself is a trademarked term coined by Crave Better Foods LLC, who popularized this specific style of cookie ice cream sandwich, making it a household name and a cherished frozen delight.
While the original Chipwich is iconic with its chocolate chip cookies, the beauty of making them at home is the freedom to experiment. The fundamental concept remains the same: a perfect balance of chewy cookie and creamy ice cream, often enhanced by a fun, crunchy exterior. This combination has cemented its place as a perennial favorite, especially during warmer months when a cool, sweet treat is most welcome.

Choosing the Perfect Cookies for Your Ice Cream Sandwiches
The foundation of an outstanding ice cream sandwich lies in its cookies. While chocolate chip cookies are the quintessential choice for a Chipwich, the possibilities are virtually endless. The key is to select cookies that are soft and chewy enough to bite through without crumbling or shattering when frozen. A cookie that’s too crispy will crack, making for a messy and less enjoyable experience, while one that’s too delicate might not hold up to the ice cream. Here are some fantastic cookie options that pair wonderfully with various ice cream flavors:
- **Brownie Cookies:** Imagine rich, fudgy brownie-like cookies hugging mint chip or coffee ice cream. Pure decadence!
- **Perfect Chocolate Chip Cookies:** For the traditionalist, a classic, perfectly baked chocolate chip cookie is unbeatable. Ensure they’re soft and chewy for the best results.
- **Chocolate Crinkle Cookies:** These bring a lovely cocoa flavor and a slightly fudgy texture, great with vanilla bean or raspberry swirl ice cream.
- **Soft Sugar Cookies:** Their buttery sweetness makes them incredibly versatile. Pair with cake batter ice cream, strawberry, or even a lemon curd ice cream for a summery twist.
- **Butterscotch Pudding Cookies:** These offer a unique, comforting flavor that would be incredible with pecan praline or classic vanilla ice cream.
Beyond the cookie type, consider their size. Aim for cookies that are roughly the same diameter to ensure your sandwiches are uniform and easy to assemble. If baking your own, allow them to cool completely before attempting assembly. Warm cookies will instantly melt your ice cream, leading to a sticky situation!
Picking the Perfect Ice Cream and Other Creative Fillings
While classic vanilla ice cream is a go-to for its universal appeal and ability to complement any cookie, don’t shy away from exploring other flavors. The quality of your ice cream truly makes a difference here; a rich, creamy ice cream will hold its texture better in the freezer and provide a more luxurious mouthfeel than cheaper, often icier alternatives. Look for brands with fewer artificial ingredients and a higher fat content for the best results.
Think about exciting flavor combinations: * **Chocolate Crinkle Cookies** with Mint Chip Ice Cream for a refreshing twist. * **Peanut Butter Cookies** with Chocolate Ice Cream for a classic combo. * **Oatmeal Raisin Cookies** (if you dare!) with Cinnamon or Butter Pecan Ice Cream. * **Red Velvet Cookies** with Cream Cheese Swirl Ice Cream.
When preparing your ice cream for assembly, it’s crucial to let it soften slightly. This doesn’t mean letting it turn into a soupy mess, but rather allowing it to become pliable enough to scoop and spread easily without tearing your cookies. About 10-15 minutes at room temperature should do the trick, depending on the ambient temperature.

The Art of Assembly: How to Make Ice Cream Sandwich Cookies
Making homemade cookie ice cream sandwiches is surprisingly simple, yet yields incredibly rewarding results. Follow these detailed steps for perfect frozen treats every time:
Prepping Your Ingredients
- **Prepare Your Cookies:** Start by ensuring your cookies are completely baked and cooled. Whether you’re using homemade or store-bought, chilling them slightly can help them hold their shape better during assembly. It’s helpful to match them up by size beforehand, pairing similar-sized cookies together to create even sandwiches.
- **Soften the Ice Cream:** Take your ice cream out of the freezer about 10-15 minutes before you plan to assemble. This allows it to soften just enough to be easily scoopable and spreadable, but not so much that it becomes liquid. A slightly soft ice cream will adhere better to the cookies and prevent them from breaking.
Assembling the Layers
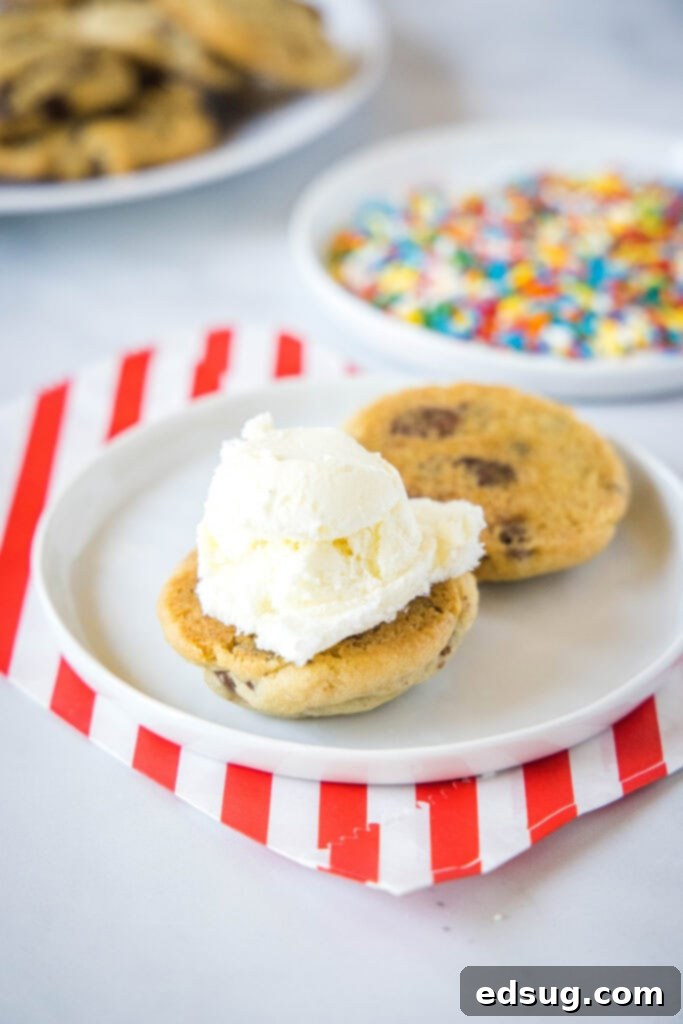
- **Scoop and Spread:** Line up your cookie pairs on a baking sheet lined with parchment paper. Scoop a generous amount of ice cream (about a 1/4 cup or enough to form a disc roughly 1 inch thick) onto the flat side of one cookie. Use the back of a spoon or a small offset spatula to spread the ice cream evenly to the edges. Don’t be shy with the ice cream; a thick layer makes for a more satisfying sandwich.
- **Top with Matching Cookie:** Gently place the second cookie on top of the ice cream, pressing down lightly until the ice cream spreads nearly to the edges. Be careful not to press too hard, or the cookies might crack. Aim for a symmetrical sandwich.
- **Initial Freeze:** Once assembled, place the sandwiches on the baking tray and immediately transfer them to the freezer. Let them set for at least 20-30 minutes, or until the ice cream is pretty solid again. This crucial step helps the sandwiches firm up before coating, preventing a sticky mess.

The Freeze and Coat
- **Coat with Toppings:** While the sandwiches are firming up, prepare your chosen toppings. Pour sprinkles, mini chocolate chips, or other coatings onto a shallow plate or into a bowl. Once the ice cream sandwiches are firm, take one at a time and gently roll the exposed ice cream edges through the toppings until coated to your liking. The slightly sticky surface of the ice cream will help the toppings adhere.
- **Final Freeze:** After coating, place the finished ice cream sandwiches back on the baking tray (or into an airtight container) and return them to the freezer for at least an hour. This final chill is essential to ensure they are completely frozen and ready to enjoy without melting too quickly. The longer they freeze, the firmer and more stable they will be.
Creative Topping Ideas for Your Cookie Ice Cream Sandwiches
While sprinkles and mini chocolate chips are classic, don’t limit your imagination when it comes to coatings. The outer layer adds both texture and another dimension of flavor. Here are some ideas to inspire your creativity:
- **Chopped Nuts:** Finely chopped peanuts, pecans, walnuts, or almonds add a sophisticated crunch.
- **Toasted Coconut Flakes:** For a tropical twist, especially good with a sugar cookie and pineapple or mango ice cream.
- **Crushed Candies:** Think crushed Heath bars, Oreos, M&M’s, or peppermint candies (seasonal!).
- **Chocolate Shavings/Curls:** Elegant and delicious, perfect for a gourmet touch.
- **Cereal Crumbs:** Crushed cornflakes, Rice Krispies, or even fruity pebbles can add a fun, unexpected texture and flavor.
- **Drizzled Chocolate/Caramel:** A simple drizzle after the final freeze can also be a beautiful and tasty addition.
How To Store Homemade Ice Cream Sandwiches
Proper storage is crucial to keep your homemade ice cream sandwiches fresh and free from freezer burn. The goal is to minimize air exposure and maintain their perfect texture. Here are the best ways to store them:
- **Individual Wrapping:** For best results and easy access, wrap each individual ice cream sandwich tightly in plastic wrap. This acts as a protective barrier against ice crystals and freezer odors.
- **Airtight Container:** Once individually wrapped, place the sandwiches in a single layer (or stack with parchment paper between layers) inside a large, freezer-safe airtight container. This provides an additional layer of protection and helps maintain their shape.
- **Baking Tray Method:** If you’ve just made a batch and don’t have individual wrappers, you can initially place them in a single layer on a baking tray or a large plastic container. Cover the tray tightly with plastic wrap before putting it in the freezer. Once they are rock solid (after a few hours), you can transfer them to a freezer bag or another container, potentially stacking them.
Stored correctly, your delicious homemade cookie ice cream sandwiches will last for up to 2 months in the freezer. This means you can enjoy these delightful treats long after you’ve made them, making them perfect for meal prepping desserts or having on hand for impromptu cravings.
Troubleshooting Common Ice Cream Sandwich Issues
Even with careful planning, sometimes things don’t go perfectly. Here are a few common issues and how to troubleshoot them:
- **Cookies are too hard/crumbly:** This usually means your cookies were too crisp to begin with. Next time, use a recipe specifically for soft and chewy cookies, or slightly underbake them (just until set) to ensure they remain pliable when frozen.
- **Ice cream melts too fast during assembly:** Your ice cream might have softened too much. Reduce the time it spends out of the freezer, or work in smaller batches. Having your baking sheet ready in the freezer to chill before assembly can also help.
- **Sandwiches are messy/uneven:** Ensure your cookies are matched by size. For perfect ice cream discs, spread your slightly softened ice cream about 1 inch thick onto a baking sheet lined with parchment paper, press firmly to smooth, and freeze until solid. Then, use a cookie cutter (or a plastic cup) roughly the same size as your cookies to cut out perfect ice cream discs. This makes assembly much cleaner and more uniform.
- **Toppings won’t stick:** The ice cream edges might be too hard. Take the sandwiches out of the freezer for just a minute or two to allow the surface to become slightly tacky, then roll in toppings.
Why Homemade Reigns Supreme
While store-bought ice cream sandwiches offer convenience, making them at home unlocks a world of flavor combinations and a superior quality that’s hard to beat. You control the ingredients, from the type of cookie to the quality of ice cream, and even the amount of sugar. The satisfaction of crafting these treats yourself, tailored exactly to your preferences, adds an extra layer of enjoyment. Plus, it’s a wonderfully fun activity to do with family and friends, creating not just delicious desserts but also lasting memories.
More Fun Summer Dessert Recipes
- Chocolate Milkshakes
- No Bake Mint Chocolate Chip Pie
- Ice Cream Sandwich Icebox Cake
- No Bake Peanut Butter Cheesecake
- Strawberry Cheesecake Lasagna
- No Bake Peanut Butter Bars
- Double Cookie Dough Ice Cream
- Hot Fudge Sauce

Chocolate Chip Cookie Ice Cream Sandwiches
Ingredients
- 24 soft chocolate chip cookies
- 3 cups good quality Vanilla Ice cream
- Sprinkles or mini chocolate chips for coating
Instructions
- Match up cookies of similar sizes. Arrange them on the counter, ready for filling.
- Allow ice cream to soften for about 10-15 minutes at room temperature, making it easier to spread.
- Using a generous 1/4 cup of softened ice cream, spread it evenly onto the flat side of one cookie. Aim for a filling that is about 1 inch thick.

- Gently place the matching cookie on top, pressing down slightly to form a sandwich. Place the assembled sandwiches on a baking tray lined with parchment paper and freeze for 20-30 minutes, or until firm.
- Pour sprinkles or mini chocolate chips onto a small plate. Take one firm ice cream sandwich at a time and roll the exposed ice cream edges through the chosen toppings until coated.

- Return the coated ice cream sandwiches to the freezer for at least an hour (or until completely hardened) before serving. For best storage, wrap individually in plastic wrap and store in an airtight container.
Notes
Nutrition
Nutrition information is automatically calculated, so should only be used as an approximation.
Additional Info
There’s no doubt that homemade cookie ice cream sandwiches are a delightful way to beat the heat and satisfy any sweet craving. With endless possibilities for customization and the joy of creating them yourself, they’re more than just a dessert – they’re an experience. So, gather your favorite cookies, pick out some creamy ice cream, and get ready to create some truly unforgettable frozen treats this summer!
I created a fun group on Facebook, and I would love for you to join us! It’s a place where you can share YOUR favorite recipes, ask questions, and see what’s new at Dinners, Dishes and Desserts (so that you never miss a new recipe)!
Be sure to follow me on Instagram and tag #dinnersdishes so I can see all the wonderful DINNERS, DISHES, AND DESSERTS recipes YOU make!
Be sure to follow me on my social media, so you never miss a post!
Facebook | Twitter | Pinterest | Instagram
.


