Irresistibly Easy Homemade Chocolate Peanut Butter Granola Bars: A Wholesome Snack for Busy Days
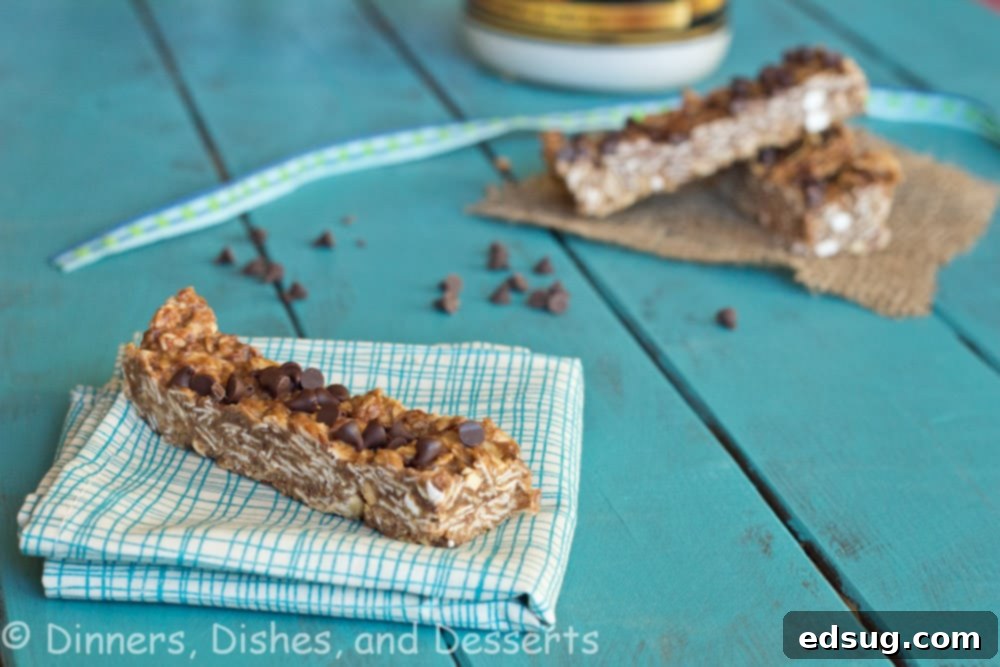
It feels like an age since the last #chocolateparty, though it’s only been a month! Perhaps my excitement for the previous mint and chocolate themed edition, which I prepared early in November, made the time fly. This month, however, presented a unique challenge: the theme was coconut. And, as some of you might know, I’m not a fan of shredded coconut. This presented a creative hurdle, but I’m thrilled to say I’ve overcome it with these absolutely fantastic Chocolate Peanut Butter Granola Bars!
While shredded coconut isn’t my thing, I’m a big proponent of using coconut oil in my recipes. There’s just something about the texture of shredded coconut that I can’t quite get past. However, coconut oil is a different story; it adds a wonderful depth and healthy fats without the textural issue. I’ve dabbled in making homemade granola bars with coconut oil before, but I felt it was time for an update—a version that was both healthier and even more delicious. This recipe truly hits the mark, offering a perfect blend of rich flavors and satisfying textures.
These homemade granola bars are not just a treat for your taste buds, but also a smart choice for your well-being. By making your own snacks, you gain full control over the ingredients, avoiding unnecessary preservatives, artificial flavors, and excessive sugars often found in store-bought alternatives. They are a fantastic way to incorporate wholesome ingredients like oats, flax meal, and wheat germ into your diet, providing sustained energy and essential nutrients that keep you feeling full and focused throughout your day. Plus, the ease of preparation means you can whip up a batch in no time, ensuring you always have a healthy, grab-and-go option ready for those busy mornings or afternoon slumps. Whether you’re packing lunches for the kids, needing a quick breakfast boost, or a post-workout refuel, these granola bars are designed to fit seamlessly into a healthy, active lifestyle.
Customizing Your Granola Bars: Endless Possibilities
If you’re one of the many who adore coconut, feel free to add shredded coconut to these bars—it would be a fantastic addition for that tropical flavor! Alternatively, if you prefer a different crunch, chopped nuts like almonds, walnuts, or pecans would also be excellent. My pantry had some mini marshmallow bites that needed a purpose, so I decided to incorporate a quarter cup of those. Despite this indulgent touch, I still consider these bars a healthy option, given the wholesome base ingredients. My son is already a huge fan, having devoured two today! The beauty of homemade granola bars lies in their versatility. You can truly make them your own.
The Power of Wholesome Ingredients
Let’s take a closer look at what makes these chocolate peanut butter granola bars so good for you, beyond just tasting amazing:
- Old-Fashioned Rolled Oats: These are the backbone of our granola bars, providing complex carbohydrates that offer sustained energy. Oats are a fantastic source of soluble fiber, which is known to help lower cholesterol and promote digestive health. They keep you full longer, preventing those mid-day hunger pangs.
- Creamy Peanut Butter: A delicious source of plant-based protein and healthy fats, peanut butter not only provides incredible flavor but also helps bind the bars together. Opt for natural peanut butter with minimal added sugar and oils for the healthiest choice.
- Honey: As a natural sweetener, honey not only adds a lovely sweetness but also contributes to the binding properties of the bars. It’s a natural energy booster and contains antioxidants. For a vegan option, maple syrup can be a great substitute.
- Coconut Oil: While I avoid shredded coconut, coconut oil is a staple in my kitchen. It’s a healthy fat that helps create the perfect texture in these no-bake bars, allowing them to firm up nicely when chilled. It also provides medium-chain triglycerides (MCTs), which are easily metabolized for energy.
- Flax Meal: This tiny powerhouse is packed with omega-3 fatty acids, which are crucial for heart health and brain function. It’s also an excellent source of dietary fiber, further enhancing the nutritional profile of these bars.
- Wheat Germ: Often overlooked, wheat germ is the embryo of the wheat kernel and is loaded with essential nutrients. It’s rich in vitamin E, folic acid, phosphorus, thiamine, zinc, and magnesium, making it a wonderful addition for an extra nutritional boost.
- Mini Marshmallow Bites & Mini Chocolate Chips: While these are the “treat” elements, using them in moderation adds just enough sweetness and indulgence without overwhelming the healthy aspects. They make the bars more appealing, especially for kids (and adults who are kids at heart!).
Combining these ingredients ensures that each bite of your homemade granola bar is not just satisfying but also contributing positively to your diet. It’s all about balance!

Chocolate Peanut Butter Granola Bars
Pin Recipe
Rate Recipe
Print Recipe
Ingredients
- 1/2 cup creamy peanut butter
- 1/3 cup honey
- 1/4 cup coconut oil
- 1 1/2 cup old fashioned rolled oats
- 2 Tablespoons wheat germ
- 1/2 cup flax meal
- 1/4 cup mini marshmallow bites
- 1/4 cup mini chocolate chips
Instructions
-
First, prepare an 8-inch baking dish by lining it completely with foil, ensuring enough overhang on the sides to easily lift the bars out later. This makes removal and cleanup incredibly simple. Set this prepared dish aside.
-
In a small saucepan, combine the creamy peanut butter, honey, and coconut oil. Heat this mixture over low to medium heat, stirring frequently with a spatula or spoon, until all the ingredients are fully melted and smoothly combined. Be careful not to let it boil. This liquid base will act as the binder for your granola bars.
-
While the wet ingredients are melting, grab a large mixing bowl. Add the old-fashioned rolled oats, wheat germ, flax meal, and mini marshmallow bites. Give these dry ingredients a good stir to ensure they are evenly distributed.
-
Once the peanut butter mixture is smooth and melted, carefully pour it over the combined dry ingredients in the large bowl. Stir thoroughly with a sturdy spoon or spatula until all the oats and other dry components are completely coated and moistened by the liquid mixture. This step is crucial for the bars to hold together.
-
Transfer the entire mixture into the foil-lined baking dish you prepared earlier. To get a nice, compact bar, lightly spray a spatula or the back of a spoon with non-stick spray. Use this to firmly and evenly press the granola mixture down into the dish. Pressing it down well helps ensure your bars don’t crumble when cut.
-
Evenly sprinkle the mini chocolate chips over the top of the pressed granola mixture. Then, using the non-stick sprayed spatula or your hand, gently press the chocolate chips into the surface of the bars. This prevents them from falling off later.
-
Place the baking dish into the refrigerator and let it set for at least 30 minutes. Chilling is essential as it allows the coconut oil and peanut butter to firm up, creating perfectly sliceable bars. For best results, you can even chill them for an hour or two.
-
Once firm, use the foil overhang to lift the entire slab of granola bars out of the dish. Peel back the foil and cut the slab into 12 evenly sized bars. Store the finished chocolate peanut butter granola bars in an airtight container in the refrigerator to maintain their freshness and firm texture. They’ll be ready for a quick snack whenever you need one!
Nutrition
Nutrition information is automatically calculated, so should only be used as an approximation.
Additional Info
Like this recipe? Leave a comment below!
Storage Tips for Optimal Freshness
To ensure your homemade Chocolate Peanut Butter Granola Bars stay fresh and firm, proper storage is key. After cutting them into individual bars, place them in an airtight container. Keep this container in the refrigerator. This not only maintains their shape and chewy texture but also prevents the peanut butter and chocolate from becoming too soft. Stored this way, the granola bars will remain delicious for up to one week. For longer storage, you can individually wrap the bars in parchment paper or plastic wrap and then place them in a freezer-safe bag or container. They can be frozen for up to 2-3 months. When you’re ready to enjoy a frozen bar, simply pull one out and let it thaw at room temperature for a few minutes, or enjoy it chilled for a firmer bite. This makes them an excellent option for meal prepping healthy snacks in advance!
Why Choose Homemade Over Store-Bought?
Making your own granola bars might seem like an extra step in your busy schedule, but the benefits far outweigh the minimal effort. Beyond the delicious taste, there are several compelling reasons to opt for homemade:
- Ingredient Control: You dictate what goes into your bars. This means you can choose high-quality, organic ingredients, control the amount of sugar, and avoid any artificial preservatives, colors, or flavors often found in commercial brands.
- Nutritional Value: Many store-bought granola bars are essentially glorified candy bars, high in sugar and unhealthy fats. Our recipe focuses on wholesome components like oats, flax meal, and wheat germ, delivering fiber, healthy fats, and sustained energy without the sugar crash.
- Cost-Effective: Buying individual ingredients to make a large batch of granola bars is often more economical than repeatedly purchasing pre-packaged ones.
- Customization: As discussed, you can easily adapt this recipe to your family’s preferences or dietary needs. Add different nuts, seeds, dried fruits, or even vary the type of chocolate. This flexibility is something you simply can’t get with pre-made options.
- Freshness: There’s nothing quite like a freshly made snack. Homemade granola bars taste better and have a more satisfying texture than those that have been sitting on a shelf for weeks or months.
These Chocolate Peanut Butter Granola Bars are more than just a sweet treat; they’re a smart, healthy choice for anyone looking for a convenient and nutritious snack. Whether you’re a busy parent, an active individual, or simply someone who appreciates good food, this recipe is sure to become a staple in your kitchen. Give them a try, and taste the difference that homemade quality makes!
Don’t forget to share your experience and any creative twists you add in the comments below! We love hearing from our community and seeing how you make these recipes your own. Happy snacking!
