Delicious Fluffy Chocolate Chip Pumpkin Pancakes: The Perfect Fall Breakfast Recipe
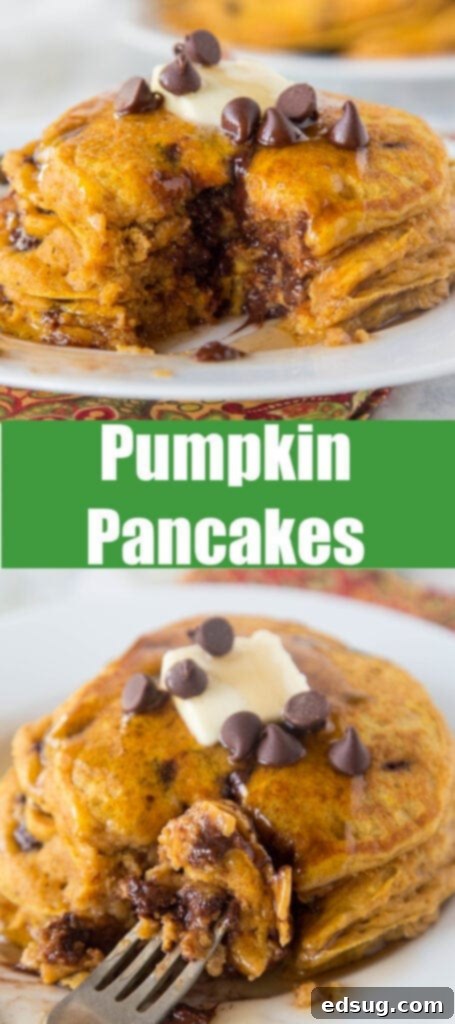
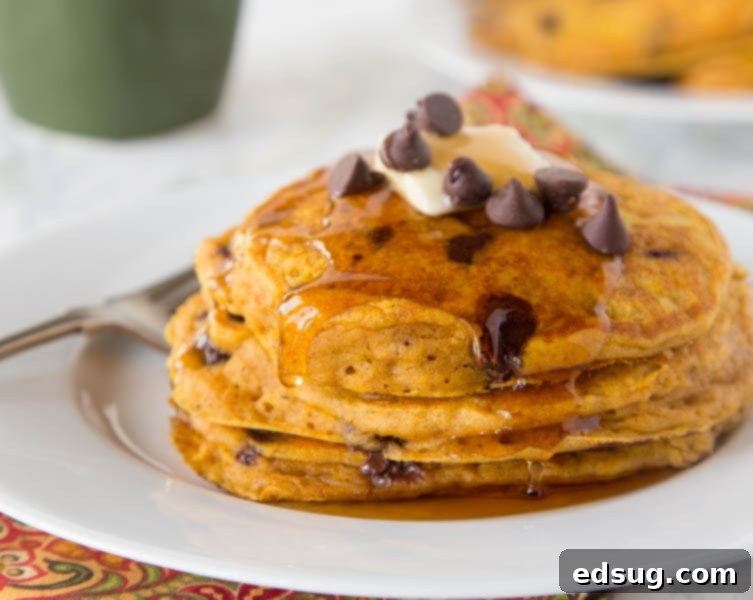
As the leaves begin to turn vibrant shades of red and gold, and a crisp coolness fills the air, there’s nothing quite like the comforting aroma of fall flavors wafting from your kitchen. And when it comes to fall breakfasts, pumpkin is an absolute must-have. Forget plain old pancakes; these Chocolate Chip Pumpkin Pancakes are a delightful revelation. They are incredibly light, wonderfully fluffy, and packed with sweet chocolate chips, all culminating in a stack of pure autumnal joy.
While many families cherish traditions like homemade cinnamon rolls during the holidays, these pumpkin chocolate chip pancakes are quickly becoming a cherished weekend favorite in our home, and they are perfect for stocking the freezer for busy weekday mornings. Imagine waking up to the rich, warm flavors of cinnamon and allspice mingling with melting chocolate, all infused into tender pumpkin pancakes. It’s a breakfast that truly captures the essence of the season and will win over everyone at your table.
Why Homemade Pumpkin Pancakes Are a Must
You might think making homemade pancakes from scratch is a complicated affair, but these pumpkin pancakes are surprisingly easy and quick to prepare. With just a few minutes of mixing, using mostly pantry staples, you can whip up a batch any day of the week. The key ingredient, of course, is a can of pumpkin puree, so always make sure you have one stashed away for those spontaneous pancake cravings!
While I adore Banana Pancakes, they often require waiting for bananas to reach that perfect overripe stage. The beauty of this pumpkin pancake recipe is its immediate availability. As long as you have pumpkin puree, you’re good to go! And let’s be honest, any opportunity to add chocolate chips to a dish is one I’m going to take. The melty pockets of chocolate add an extra layer of indulgence that complements the pumpkin spice beautifully. However, if you prefer a classic approach, you can certainly omit the chocolate chips for a pure pumpkin pancake experience.
Essential Ingredients for Your Pumpkin Pancakes
Creating these delightful pancakes requires a simple list of ingredients, most of which you likely already have in your kitchen. Each component plays a crucial role in achieving the perfect flavor and texture. Here’s what you’ll need:
- All-purpose Flour
- Baking Powder
- Baking Soda
- Ground Cinnamon
- Ground Allspice
- Brown Sugar
- Large Egg
- Vanilla Extract
- Pumpkin Puree (not pumpkin pie filling!)
- Canola Oil (or another neutral oil)
- Buttermilk
- Semi-sweet Chocolate Chips
Mastering the Art of Adding Chocolate Chips to Pancakes
One of the most frequent questions I receive is about the best way to incorporate chocolate chips into pancakes to ensure they are evenly distributed and don’t all sink to the bottom. I’ve discovered two effective methods, and your choice depends on whether you want chocolate chips in every pancake or just a select few.
- Mix into Dry Ingredients: The first method involves mixing the chocolate chips directly into the flour and other dry ingredients. By coating the chocolate chips in flour, you prevent them from sinking to the bottom of the batter once the wet ingredients are added. This ensures they are perfectly distributed throughout each pancake, creating pockets of melty chocolate in every bite. This is my preferred method when I’m making a full batch of chocolate chip pancakes for everyone to enjoy.
- Sprinkle on the Griddle: For those times when only a few pancakes need chocolate, or if you have varying preferences at your table, this method is ideal. After you pour the pancake batter onto the hot griddle or skillet, simply sprinkle a few chocolate chips directly onto the uncooked surface of each pancake. While this method might result in the chocolate chips sitting more on the surface or bottom of the pancake, it still works beautifully and offers great control over the quantity in each individual pancake.
Secrets to Achieving Perfectly Fluffy Pancakes
Over my years of pancake making, I’ve gathered a few simple yet crucial tricks that guarantee light, airy, and fluffy pancakes every single time. These aren’t complicated culinary techniques; they are straightforward rules that anyone can follow to elevate their pancake game. Forget dense, flat pancakes – embrace the fluff!
- Do Not Overmix the Batter: This is arguably the most important rule for fluffy pancakes. When you combine your wet and dry ingredients, mix them only until they are just combined. A few lumps in the batter are perfectly fine, even desirable. Overmixing develops the gluten in the flour, leading to a tough, chewy pancake rather than a tender, fluffy one. Resist the urge to create a perfectly smooth batter.
- Embrace Buttermilk: Buttermilk is a secret weapon for tender, flavorful, and incredibly fluffy pancakes. Its acidity reacts with the baking soda and baking powder, creating more air bubbles, which results in a lighter texture. If you don’t have buttermilk on hand, don’t despair! You can easily make a homemade version by mixing 1 teaspoon of white vinegar or lemon juice into a regular cup of milk and letting it sit for 5-10 minutes until it slightly curdles.
- Resist Pressing Down When Flipping: This is a common mistake! After you flip your pancakes, many people instinctively use the spatula to press down on them. Please, resist this urge! That gentle puffing you see as the pancake cooks is air bubbles forming and expanding – these are what make your pancakes wonderfully fluffy. Pressing them down deflates these precious air pockets, resulting in a flatter, denser pancake. Let them rise naturally.
- Cook on High Heat: Pancakes cook relatively quickly due to their thinness. Cooking them on a medium-high heat is essential. Too low, and they’ll dry out before they get that beautiful golden-brown crust. Too high, and they’ll burn on the outside while remaining raw in the middle. Aim for a griddle temperature of around 350°F (175°C) or medium-high heat on a skillet, ensuring a perfect golden finish and thorough cooking.
Step-by-Step Guide to Making Pumpkin Pancakes
Now that you know the secrets to fluffiness and chocolate chip distribution, let’s walk through the simple steps to create these perfect fall pancakes:
- **Prepare the Griddle:** Begin by heating your griddle to 350°F (175°C) or a large skillet to medium-high heat. A well-heated surface is key for even cooking.
- **Combine Dry Ingredients:** In a large mixing bowl, whisk together the flour, baking powder, baking soda, cinnamon, and allspice. If you’re adding chocolate chips using the “mix in” method, now is the time to add them to these dry ingredients, ensuring they’re well coated.
- **Combine Wet Ingredients:** In a separate medium bowl, whisk together the brown sugar, egg, vanilla extract, pumpkin puree, and canola oil until they are well blended and smooth.
- **Combine Wet and Dry:** Pour the wet ingredient mixture into the dry ingredients. Slowly add the buttermilk, mixing gently with a spatula or spoon until just combined. Remember, a few lumps are okay – do not overmix!
- **Cook the Pancakes:** Pour about 1/4 cup of batter per pancake onto the heated griddle or skillet. Cook for approximately 3-4 minutes on the first side, or until you see tiny bubbles forming on the surface and the edges look set. Carefully flip the pancakes and cook for an additional 2-3 minutes on the other side until golden brown and cooked through.
- **Serve Immediately:** Transfer the cooked pancakes to plates and serve them warm, generously topped with your favorite maple syrup.
PRO TIP: For perfectly uniform pancakes that cook evenly, I highly recommend using an ice cream scoop to portion the batter onto the hot griddle. This simple trick ensures all your pancakes are roughly the same size and thickness, making for a beautiful and consistent stack!
Pumpkin Pancakes truly embody the spirit of autumn in a delicious breakfast. Don’t let any go to waste! I often make a double batch and freeze the leftovers. This makes weekday mornings quick and easy – just pop them in the toaster or microwave for a fresh-tasting breakfast in minutes. And always, always remember to top them with real maple syrup for the best flavor experience!

Serving Suggestions and Creative Variations
While these Chocolate Chip Pumpkin Pancakes are divine on their own with a drizzle of maple syrup, don’t hesitate to get creative with your toppings and add-ins to elevate your breakfast experience. For a decadent treat, a dollop of whipped cream and a sprinkle of extra cinnamon or nutmeg can make them feel extra special. Candied pecans or walnuts add a delightful crunch, while a side of fresh fruit like sliced apples or pears can brighten up the plate.
Looking to switch things up a bit? Consider these delicious variations:
- **Spice it Up:** Enhance the fall spice profile by adding a pinch of ground ginger or cloves to the dry ingredients. For an even more intense flavor, a teaspoon of pumpkin pie spice blend can replace the individual cinnamon and allspice.
- **Different Chocolate:** Experiment with different types of chocolate chips! White chocolate chips offer a creamy sweetness, dark chocolate chips provide a richer, more intense flavor, and even butterscotch chips could be an exciting autumnal twist.
- **Nutty Additions:** Fold in chopped pecans, walnuts, or even toasted pumpkin seeds into the batter for added texture and nutty flavor.
- **Fruit Boost:** For a touch of natural sweetness and chewiness, a handful of dried cranberries or chopped dried apricots can be a delightful addition to the batter.
Storing and Freezing Pumpkin Pancakes
These pancakes are so good, you’ll want to make a big batch! Luckily, they store beautifully, making them perfect for meal prep or enjoying throughout the week.
Refrigerator Storage:
Allow any leftover pancakes to cool completely to room temperature. Stack them with a piece of parchment paper between each pancake to prevent sticking. Place the stack in an airtight container or a resealable plastic bag. They will stay fresh in the refrigerator for up to 3-4 days.
Freezer Storage:
Freezing is an excellent option for longer storage. Once again, ensure the pancakes are completely cool. Arrange them in a single layer on a baking sheet and flash freeze for about 15-30 minutes until solid. This step prevents them from sticking together when stored in a stack. Once firm, transfer the frozen pancakes to a freezer-safe bag or airtight container, again separating layers with parchment paper if desired. They will keep well in the freezer for up to 2-3 months.
Reheating Instructions:
- **From the Refrigerator:** Reheat in a toaster, toaster oven, microwave, or on a lightly greased skillet over medium heat until warmed through.
- **From the Freezer:** For best results, reheat frozen pancakes in a toaster or toaster oven until crisp and warm. You can also microwave them for 30-60 seconds per pancake, or bake them in a preheated oven at 350°F (175°C) for about 8-10 minutes.
Frequently Asked Questions About Pumpkin Pancakes
Here are answers to some common questions you might have when making these delicious pumpkin pancakes:
Can I use fresh pumpkin instead of canned pumpkin puree?
Yes, you can! If you have fresh pumpkin, you’ll need to cook and puree it first. Ensure it’s plain pumpkin puree, not pumpkin pie filling, which contains added spices and sugar that would alter the recipe. The consistency should be similar to canned puree. Keep in mind that fresh pumpkin puree can sometimes be a bit more watery, so you might need to adjust the buttermilk slightly.
What if I don’t have buttermilk?
No problem! As mentioned in our “Fluffy Pancakes” section, you can easily make a homemade buttermilk substitute. For every cup of milk (dairy or non-dairy), stir in 1 tablespoon of white vinegar or lemon juice. Let it sit for 5-10 minutes until it slightly curdles. This acidity is what reacts with the leavening agents to give your pancakes that signature fluffiness.
Can I make these pancakes gluten-free?
Absolutely! You can substitute the all-purpose flour with a 1:1 gluten-free baking flour blend that contains xanthan gum. The rest of the ingredients and instructions should remain the same. Always double-check your gluten-free flour blend for specific usage instructions, as some may vary slightly.
Are there any dairy-free substitution options?
Yes, to make these pancakes dairy-free, you can use a plant-based milk (like almond, soy, or oat milk) to create a homemade “buttermilk” substitute by adding vinegar or lemon juice. Ensure your chocolate chips are also dairy-free, as many brands contain milk solids. The rest of the ingredients are typically dairy-free.
How can I tell when my pancakes are ready to flip?
Look for several key indicators: the edges of the pancake should appear set and slightly dry, and small bubbles should form on the surface, with some of them bursting. The underside should be golden brown. Don’t rush the flip! Waiting for these signs ensures even cooking and prevents a soggy middle.
More Delicious Breakfast Recipes
If you loved these pumpkin pancakes, be sure to check out some of our other fantastic breakfast and brunch ideas to kickstart your day:
- Apple Cinnamon Muffins
- Sous Vide Egg Bites
- Baked Oatmeal Cups
- Sausage Quiche
- Pancake Muffins
- Chocolate Peanut Butter Smoothie

Pumpkin Chocolate Chip Pancakes
Video
Ingredients
- 2 cups all-purpose flour
- 2 teaspoons baking powder
- 1 teaspoon baking soda
- 2 teaspoons cinnamon
- 1/2 teaspoons allspice
- 1 cup semi-sweet chocolate chips
- 1/4 cup brown sugar
- 1 whole large egg
- 1 teaspoon vanilla extract
- 1 cup pumpkin puree
- 3 Tablespoon canola oil
- 1 1/2 cup buttermilk
Instructions
- Heat a grddle to 350º F, or a large skillet to medium high heat.
- In a bowl mix together flour, baking powder, baking soda, cinnamon, all spice and chocolate chips.
- In a separate bowl mix together brown sugar, egg, vanilla, pumpkin, and canola oil.
- Once the wet ingredients are well mixed, add flour mixture and slowly mix in buttermilk until just combined.
- Pour batter onto heated griddle or skillet. Cook for about 3-4 minutes, until tiny bubbles are forming on the surface. Flip and cook for an additional 2-3 minutes on the other side.
- Serve immediately topped with maple syrup.
Notes
Nutrition
Nutrition information is automatically calculated, so should only be used as an approximation.
Additional Info
I created a fun group on Facebook,and I would love for you to join us! It’s a place where you can share YOUR favorite recipes, ask questions, and see what’s new at Dinners, Dishes and Desserts (so that you never miss a new recipe)!
Be sure to follow me on Instagram and tag #dinnersdishes so I can see all the wonderful DINNERS, DISHES, AND DESSERTS recipes YOU make!
Be sure to follow me on my social media, so you never miss a post!
Facebook | Twitter | Pinterest | Instagram
.
