Irresistible Christmas Magic Cookie Bars: Your Go-To Festive Dessert Recipe
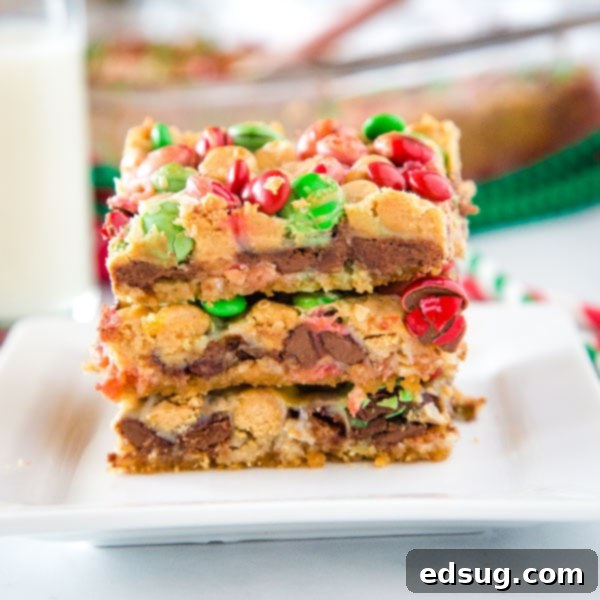
Capture the essence of holiday cheer with our delightful Christmas Magic Cookie Bars – a festive twist on the beloved classic. These layered treats combine a buttery graham cracker crust with chocolate, peanut butter chips, shredded coconut, vibrant M&M’s, and a decadent blanket of sweetened condensed milk, creating a dessert that’s truly magical.
There’s something truly special about holiday baking, and for many, certain treats evoke a strong sense of nostalgia. The classic Magic Cookie Bars, also known by endearing names like Seven Layer Bars or Hello Dolly Bars, have been a cherished staple in countless homes during festive seasons for generations. Their simple yet irresistible combination of textures and flavors makes them a universal crowd-pleaser, symbolizing comfort and celebration.
Our Christmas Magic Cookie Bars take this cherished recipe and infuse it with an extra dose of holiday spirit. While retaining the comforting familiarity of the original, we’ve introduced a few thoughtful changes to make them even more celebratory and, dare we say, even better! Imagine the joy of a traditional favorite, now twinkling with the vibrant colors and delightful flavors of Christmas. These bars are not just a dessert; they are an experience, a memory in the making, and a perfect addition to your holiday dessert table or cookie exchange.
The Enduring Charm of Magic Cookie Bars: A Trip Down Memory Lane
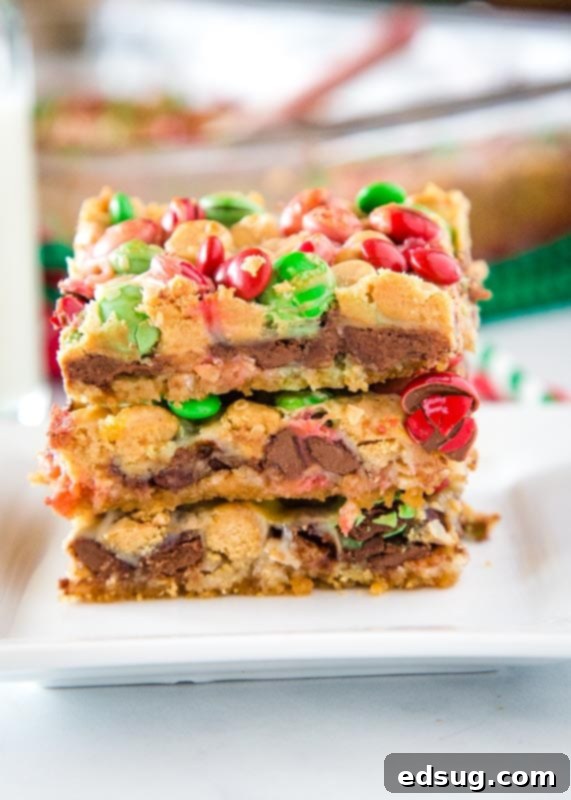
Before diving into our festive version, let’s appreciate the timeless appeal of the original Magic Cookie Bar. Born from the sheer genius of combining simple pantry staples into a gooey, chewy, and utterly satisfying dessert, these bars have earned their “magic” moniker for a reason. They require minimal effort, often mixed and baked in a single pan, making them perfect for busy holiday schedules or spontaneous baking sessions. Growing up, these bars were a delightful sign that the holidays had truly arrived, whether they were affectionately called “One Pan Bars” in your family or the more common “Seven Layer Bars” or “Magic Bars.”
The enduring popularity of Magic Bars stems from their perfect balance of ingredients. A crunchy graham cracker base, followed by layers of rich chocolate chips, sometimes nuts, tender coconut, and a luscious pour of sweetened condensed milk that miraculously binds everything together into a golden, caramelized dream. It’s a recipe that has been passed down through generations, creating delicious memories and bringing smiles to countless faces along the way. Our Christmas rendition aims to continue this tradition, adding a joyful, seasonal flair that will surely become a new family favorite.
What Makes Our Christmas Magic Bars the Ultimate Holiday Treat?
While the traditional recipe is undoubtedly fantastic, our Christmas version brings an exciting, festive twist that makes them perfectly suited for holiday gatherings, cookie exchanges, or simply enjoying by the fireplace with a warm mug of cocoa. We’ve enhanced the classic profile with ingredients that truly sing of Christmas cheer and flavor.
For these special holiday treats, you will need a selection of simple yet impactful ingredients:
- Graham cracker crumbs: The indispensable foundation, providing a satisfyingly crunchy and buttery base.
- Melted butter: Crucial for binding the graham cracker crumbs into a cohesive and flavorful crust.
- Semi-sweet chocolate chips: A classic choice, offering a rich chocolatey goodness that balances the sweetness.
- Peanut butter chips: A delightful creamy, nutty flavor addition that truly elevates these bars, distinguishing them from the classic butterscotch. This provides a wonderfully comforting and unique taste profile.
- Shredded coconut: Adds wonderful texture, a delicate chewiness, and a hint of tropical sweetness that complements the other layers beautifully.
- Sweetened condensed milk: The true “magic” component! This thick, sweet milk coats all the layers, caramelizes during baking, and binds everything into that signature gooey, chewy consistency.
- M&M’s: Specifically red and green M&M’s! These are crucial for infusing instant Christmas cheer with their vibrant colors and adding a fun, candy-coated crunch that kids and adults alike will adore. They replace the traditional nuts, making the bars more accessible to those with nut allergies (though peanut butter chips are present).
You’ll notice we’ve made a couple of strategic substitutions from the original recipe: swapping the classic butterscotch chips for creamy peanut butter chips and replacing the sometimes-used nuts with colorful M&M’s. These small but impactful changes transform the bars into a distinctly festive delight, offering a familiar taste profile with an exciting, holiday-appropriate twist. The vibrant M&M’s not only add a pop of color but also a satisfying candy shell crunch, making each bite an experience that embodies the joy of the season.
How to Make Christmas Magic Cookie Bars: A Simple & Sweet Process
Creating these festive bars is incredibly easy, making them perfect for bakers of all skill levels, even those new to holiday baking. With just a few simple steps, you’ll have a pan full of gooey, delicious holiday magic ready to share with loved ones.
Crafting the Perfect Graham Cracker Base
The foundation of any great Magic Cookie Bar is its crust, providing the necessary crunch and a delightful contrast to the gooey layers above. We begin by combining melted butter with finely crushed graham cracker crumbs. This mixture creates a thin, yet sturdy and wonderfully buttery base. It’s crucial to press it down firmly and evenly into your 13×9 inch baking dish. A flat-bottomed glass or the back of a spoon works perfectly for this. Don’t worry if it looks like a very thin layer; it’s designed to be! This thinness allows the subsequent layers to shine and meld together perfectly without overwhelming the palate.
Layering the Goodness: A Symphony of Flavors and Colors
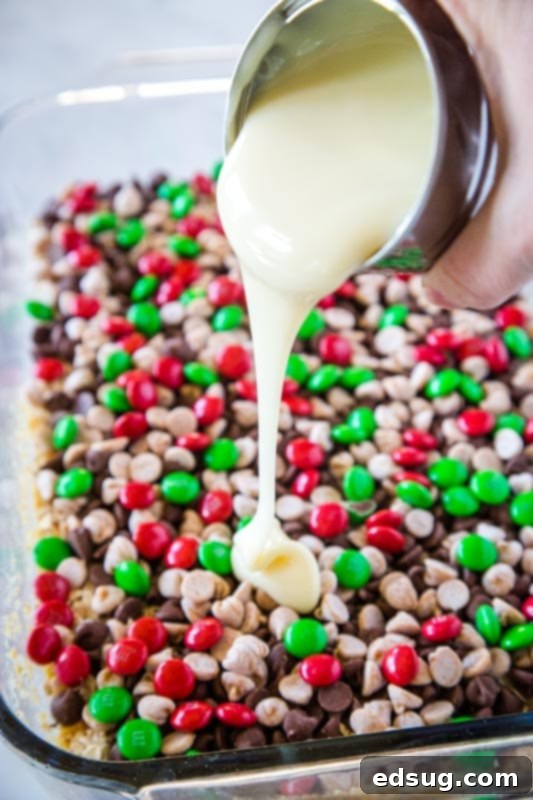
Once your crust is ready and firm, the fun begins with layering. This is where the “magic” truly comes into play as you transform simple ingredients into a visually stunning and delicious dessert. Start by evenly sprinkling the shredded coconut over the graham cracker base. Ensure the coconut is spread from edge to edge for consistent flavor. Next, generously scatter the semi-sweet chocolate chips, followed by the rich peanut butter chips, and finally, the vibrant red and green M&M’s. The goal is an even distribution of each layer to ensure every bite is packed with all the wonderful flavors and textures you’ve assembled. The visual appeal of these distinct layers is part of their charm!
The Golden Bake and Patient Cool Down
The final step before baking is to evenly pour the entire can of sweetened condensed milk over all the layered ingredients. Take your time with this step, drizzling slowly to ensure every part of the bars gets coated. This sweet, sticky liquid will seep down through the layers, coating and binding everything as it bakes, creating that signature gooey, chewy consistency that Magic Bars are famous for. Bake your bars for approximately 25-30 minutes, or until the edges are golden brown and the center is set and slightly bubbly. The sweetened condensed milk will caramelize slightly, adding another layer of complex sweetness. Once baked, the hardest part is waiting for them to cool completely before slicing – but it’s absolutely essential for clean, perfect bars!
For an extra touch of festive appeal and to make your Christmas Magic Cookie Bars truly pop, you can sprinkle a few mini M&M’s over the top immediately *after* they come out of the oven. The residual heat will slightly soften them, allowing them to adhere beautifully while retaining their vibrant colors. Alternatively, if you want the red and green M&M’s to be more prominent and slightly “melted” into the top layer, you can add them before drizzling the sweetened condensed milk.
Creative Variations and Customizations for Every Occasion
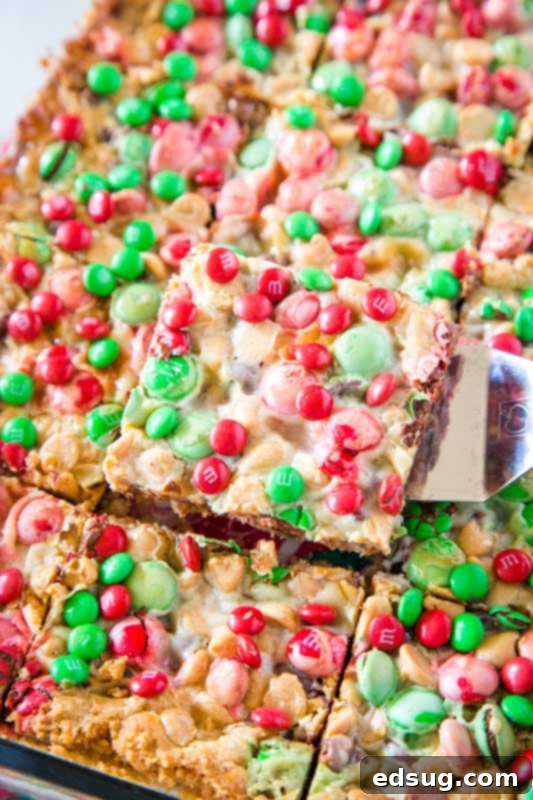
One of the absolute best things about Magic Cookie Bars is how incredibly adaptable they are. While our Christmas version is perfect for the holidays, you can easily tweak this recipe to suit any season, celebration, or even specific dietary preferences. Don’t be afraid to let your creativity shine in the kitchen!
- Seasonal Swaps: Beyond Christmas: The vibrant red and green M&M’s are key to their Christmas appeal, but you can easily adapt them for other holidays! Use pastel M&M’s for Easter, red, white, and blue for patriotic celebrations like the Fourth of July, or fall-themed colors for Thanksgiving. The possibilities are endless. You can even use different varieties of M&M’s like dark chocolate, peanut butter, or caramel for a unique flavor twist that matches your mood.
- Coconut Alternatives: Not a fan of coconut, or perhaps you have an allergy? No problem at all! You can substitute the shredded coconut with quick-cooking oats for a chewier texture and a wholesome flavor, or simply omit it entirely if preferred. Alternatively, if you’re looking for a different kind of crunch, finely chopped pecans or walnuts can add a delightful nutty element, bringing it closer to the original Seven Layer Bar.
- Mix Up the Chips: We used semi-sweet chocolate chips and peanut butter chips for our Christmas version, which is a fantastic and popular combination. However, the world of baking chips is vast! Experiment with white chocolate chips for a sweeter, creamier profile, milk chocolate chips for a classic appeal, or even butterscotch chips if you prefer the traditional Magic Bar flavor. For an even more festive touch during the winter season, consider mint chips paired with crushed candy canes or peppermint M&M’s. Caramel bits or toffee pieces also make excellent and indulgent additions.
- Embrace the Nuts: The original Magic Bar often includes chopped nuts, and for good reason – they add a wonderful depth of flavor and satisfying crunch. If you appreciate these qualities, feel free to incorporate them into your Christmas Magic Bars. Pecans, walnuts, or even a mix of your favorite nuts would be a delicious addition. Just sprinkle them along with your other chosen layers before pouring the condensed milk. This is an easy way to customize texture and flavor.
- Mini vs. Regular: While we suggest mini M&M’s for looks post-bake due to their smaller size and more delicate appearance, regular M&M’s work just as well, whether mixed in with the layers or sprinkled on top. They create a more substantial candy bite and a bolder color impact. Choose based on your preference!
Storing Your Christmas Magic Bars for Lasting Freshness
One of the many benefits of these delectable bars is their excellent shelf life and freezer-friendliness, making them ideal for make-ahead holiday baking and ensuring you always have a sweet treat on hand. Properly stored, they can be enjoyed long after they’re baked, maintaining their delicious texture and flavor.
Refrigeration Tips
Once your Christmas Magic Bars have completely cooled to room temperature, you can store them in an airtight container at room temperature for up to 3-4 days. For extended freshness, especially in warmer climates, or if you simply prefer a firmer, chewier texture, they can be refrigerated for up to a week. When stacking them, it’s a good idea to separate layers with parchment paper or wax paper to prevent them from sticking together. This ensures each bar remains pristine until ready to be devoured.
Freezing for Future Indulgence
Yes, these freeze exceptionally well! This characteristic makes them an absolute lifesaver during the busy holiday season when you want to get a head start on your baking or prepare treats for unexpected guests. Once the bars have cooled completely, you have a couple of convenient options: you can either cover the entire pan tightly with plastic wrap and then a layer of aluminum foil to prevent freezer burn, and freeze the whole slab. Alternatively, you can slice them into individual portions before freezing. My grandma always preferred to slice them into individual squares and then place them in an airtight freezer-safe container, carefully separating layers with parchment paper. This method allowed us to grab a single bar whenever we wanted a sweet fix! Frozen bars will maintain their quality for up to 3 months. When you’re ready to enjoy them, simply thaw them at room temperature for an hour or two, or in the refrigerator overnight. They’ll taste just as fresh and delightful as the day they were baked.
Frequently Asked Questions About Christmas Magic Cookie Bars
Here are answers to some common questions you might have about making and enjoying these delightful holiday treats:
- Can I use a different size pan? While a 13×9 inch pan is ideal for the specified recipe, you can use an 8×8 inch pan for thicker bars. If you choose a smaller pan, you might need to increase the baking time slightly (by about 5-10 minutes) and be aware that the layers will be more compressed. A larger pan might result in very thin bars that could dry out quickly.
- Do I have to use sweetened condensed milk? Yes, sweetened condensed milk is truly the “magic” ingredient that binds all the layers together and creates the signature gooey, chewy texture and caramelized flavor. There isn’t a direct substitute that will yield the exact same delicious results and consistency. Evaporated milk or regular milk will not work as a replacement.
- How do I get clean slices? The key to achieving beautifully clean slices is patience! It’s crucial to let the bars cool *completely* to room temperature, and ideally, chill them in the refrigerator for at least an hour or two before slicing. This allows all the gooey layers to firm up properly. Use a very sharp, thin knife, and clean it with a warm, damp cloth between each cut for the neatest results.
- Can I make these gluten-free? Absolutely! Simply substitute the graham cracker crumbs with a gluten-free graham cracker alternative or your favorite gluten-free cookie crumb crust. Ensure all other ingredients you use are certified gluten-free if strict adherence is necessary.
- Can I prepare these in advance? Yes, these bars are an excellent make-ahead dessert, which makes them perfect for the busy holiday season! They store wonderfully at room temperature, in the refrigerator, or frozen, as detailed in the storage section above. Baking them a day or two before your event works perfectly, allowing flavors to meld beautifully.
More Festive Christmas Cookie Recipes to Explore
If you love these Christmas Magic Cookie Bars and have a passion for holiday baking, you’re in for a treat! Here are some other delightful Christmas cookie recipes from Dinners, Dishes, and Desserts to add to your repertoire. These festive sweets are perfect for sharing with family and friends, gifting to neighbors, or simply enjoying during the most wonderful time of the year.
- Classic Frosted Sugar Cookies
- Chewy Ginger Molasses Cookies
- Sweet & Chewy Coconut Macaroons
- Easy Andes Mint Cake Mix Cookies
- Double Chocolate M&M Cookies
- Refreshing Peppermint Sugar Cookie Bars
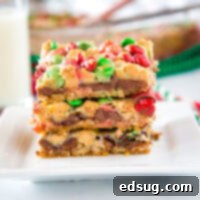
Christmas Magic Cookie Bars Recipe
By Erin Sellin
These Christmas Magic Cookie Bars are a delightful and festive twist on the classic Seven Layer Bars, perfect for holiday baking. Layers of buttery graham cracker crust, sweet shredded coconut, rich semi-sweet chocolate chips, creamy peanut butter chips, and vibrant red and green M&M’s are all bound together with decadent sweetened condensed milk, baked to golden perfection. Easy to make and universally loved, they’re sure to bring holiday cheer!
Prep Time: 5 minutes
Cook Time: 25 minutes
Total Time: 30 minutes
Servings: 24 bars
Rate Recipe
Print Recipe
Ingredients
- 1/2 cup butter, melted
- 1 1/4 cup graham cracker crumbs
- 1/2 cup shredded coconut
- 1 cup peanut butter chips
- 1 1/2 cup semi-sweet chocolate chips
- 1 cup red and green M&M’s
- 14 oz can sweetened condensed milk
Instructions
- Preheat your oven to 350°F (175°C).
- In a 13×9 inch baking dish, combine the melted butter and graham cracker crumbs. Press this mixture firmly and evenly into the bottom of the pan to form a compact crust.
- Evenly sprinkle the shredded coconut over the graham cracker crust.
- Next, layer the semi-sweet chocolate chips, followed by the peanut butter chips, and then scatter the M&M’s evenly over the top of the layers.
- Carefully and evenly drizzle the entire can of sweetened condensed milk over all the layers, ensuring everything is well-coated.
- Bake for 25-30 minutes, or until the edges are golden brown and the center is set and slightly bubbly.
- Remove the pan from the oven and let the bars cool completely on a wire rack before slicing and serving. Cooling fully is essential for clean and perfect cuts.
Notes
For an extra visual flourish, you can sprinkle a few mini M&M’s over the top immediately after baking. The residual heat will slightly soften them, allowing them to adhere beautifully while retaining their vibrant colors. If you want the red and green M&M’s to stand out more clearly and not be as melted, consider adding them after you’ve drizzled the sweetened condensed milk but before baking, or even just sprinkling them on top of the condensed milk before baking for maximum pop.
Nutrition Information
(Approximate values per serving)
- Serving Size: 1 bar (approx. 40g)
- Calories: 264 kcal
- Carbohydrates: 33g
- Protein: 4g
- Fat: 14g
- Saturated Fat: 8g
- Polyunsaturated Fat: 5g
- Cholesterol: 19mg
- Sodium: 108mg
- Fiber: 2g
- Sugar: 28g
Nutrition information is automatically calculated and should only be used as an approximation. Individual results may vary based on exact ingredients and preparation.
Join Our Community of Food Lovers!
We absolutely love connecting with fellow food enthusiasts! I’ve created a fun and supportive group on Facebook, and I would be absolutely thrilled for you to join us! It’s a fantastic space where you can share your favorite recipes, ask questions, get inspiration from other home cooks, and stay updated on all the new delicious creations from Dinners, Dishes, and Desserts. Come share your passion for food and never miss a new recipe again!
Don’t forget to follow me on Instagram and tag #dinnersdishes so I can see all the wonderful DINNERS, DISHES, AND DESSERTS recipes YOU make! Your culinary creations always inspire me and the entire community.
Stay connected and never miss out on new posts, recipe updates, and delicious inspiration. Follow me on all my social media channels:
Facebook |
Twitter |
Pinterest |
Instagram
