Mastering Homemade Ravioli: Delicious Chicken & Artichoke Filling with Roasted Garlic Cream Sauce
Embark on a culinary adventure with this incredible homemade ravioli recipe. Far superior to any store-bought alternative, these tender pasta pockets are filled with a savory chicken and artichoke mixture, all enveloped in a rich, velvety roasted garlic cream sauce. Get ready to impress your taste buds and loved ones!
Ravioli stands as a true masterpiece in the world of pasta – delightful little parcels brimming with flavorful surprises. While many excellent store-bought and semi-homemade options exist, like Easy Baked Ravioli, Creamy Sausage & Tomato Ravioli, or Tomato Balsamic Ravioli, nothing quite compares to the sublime experience of crafting them from scratch. The freshness of homemade pasta, combined with a perfectly seasoned filling, creates a dish that feels both gourmet and deeply comforting.
My culinary journey recently led to an obsession with Homemade Ravioli, offering endless possibilities for creative fillings. The art of making homemade pasta elevates this dish from a simple weeknight meal to a truly special occasion centerpiece. The most rewarding aspect is that it’s surprisingly accessible, yet guarantees to leave a lasting impression on anyone fortunate enough to savor a bite. This guide will walk you through every step, ensuring your success in creating restaurant-quality ravioli right in your own kitchen.
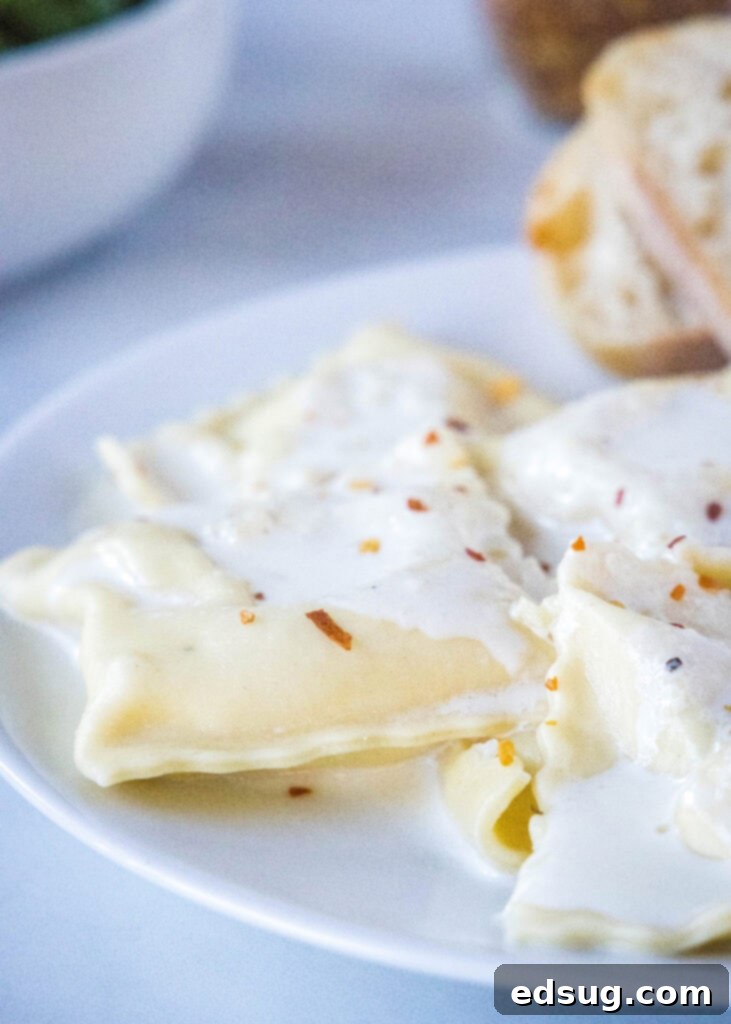
This recipe is perfectly suited for a leisurely weekend project when you have a bit more time to dedicate to the kitchen, or for celebrating a special moment, such as an intimate date night at home. For those who love to plan ahead, consider making a larger batch of Homemade Ravioli to freeze. This way, you can enjoy a gourmet meal even on your busiest weeknights, transforming future dinners into effortless delights. The satisfaction of pulling a homemade meal from your freezer on a hectic day is unparalleled!
Why This Homemade Ravioli Recipe Works Wonders
Crafting fresh pasta and delicious ravioli at home might seem daunting, but this recipe is designed to be approachable and incredibly rewarding. Here’s why it’s a game-changer for your culinary repertoire:
- Simple Ingredients, Exceptional Pasta: You only need three fundamental ingredients to create tender, exquisite homemade pasta dough: flour, water, and eggs. What’s even better is that your food processor takes on the majority of the kneading work, significantly simplifying the process and reducing effort. This minimal ingredient list proves that gourmet quality doesn’t require complexity, and the fresh taste is truly incomparable to dried or store-bought fresh pasta.
- Fresh Pasta Cooks Rapidly: Once your beautiful ravioli are assembled, the cooking time is remarkably short – just a few minutes in boiling water. This means that after the initial preparation, getting dinner on the table is incredibly fast, making fresh ravioli a surprisingly efficient option for a flavorful meal. The delicate texture of fresh pasta also ensures a lighter, more satisfying bite.
- Flexible: Enjoy Fresh or Freeze for Later: This recipe offers fantastic versatility. You can savor your homemade ravioli immediately after preparation, enjoying their peak freshness and delicate texture. Alternatively, you can prepare a batch in advance and freeze the uncooked ravioli. This allows you to “work hard now” and reap the benefits later, having a gourmet, homemade meal ready to cook straight from the freezer on hectic evenings. It’s the ultimate meal prep hack!
- Infinitely Adaptable Fillings: While this particular recipe features a delectable Chicken & Artichoke filling, the possibilities for customization are truly endless. We provide a range of ideas below, but the beauty of homemade ravioli lies in your ability to fill it with any combination of ingredients you adore, from various cheeses and meats to a medley of vegetables. It’s your canvas to create culinary art that perfectly suits your preferences and dietary needs.
Essential Ingredients for Perfect Homemade Ravioli
Gathering the right ingredients is the first step to creating culinary magic. Here’s a detailed look at what you’ll need for both the pasta and the delectable filling, along with tips for selecting the best components:
For the Fresh Pasta Dough
Making fresh pasta dough from scratch is simpler than you might imagine, requiring just three basic ingredients to produce a tender, pliable dough.
- All-Purpose Flour: While specialty Italian “00” flour is often lauded for its fine texture and ability to create silky pasta, standard all-purpose flour works perfectly well and yields wonderfully tender results that are still far superior to dried pasta. If you happen to have “00” flour, feel free to use it for an even silkier texture, but don’t feel obligated to buy it.
- Large Eggs: Eggs are crucial for binding the dough, providing richness, essential moisture, and that characteristic golden hue that signifies fresh, quality pasta. Always use fresh, large eggs for the best texture and flavor.
- Water: A small amount of water is sometimes necessary to help bring the dough together, especially if the humidity in your kitchen is low or your particular brand of flour is quite dry. It’s added gradually, ensuring you achieve the perfect, non-sticky consistency without making the dough too wet.
For The Savory Chicken & Artichoke Filling
This filling is a delightful combination of creamy, savory, and tangy flavors. It’s robust enough to stand up to the pasta and sauce, yet delicate enough not to overpower the dish, creating a balanced and satisfying experience.
- Artichoke Hearts: For ultimate convenience and consistent quality, opt for jarred or canned artichoke hearts. Just remember to drain them very thoroughly and chop them finely to prevent excess moisture in your filling. Too much liquid can make the ravioli difficult to seal and result in a soggy interior.
- Cooked Chicken Breast: Pre-cooked and chopped chicken breast forms the hearty base of our filling. You can easily boil, steam, bake, or roast chicken breast yourself. For a fantastic shortcut that adds incredible flavor and saves time, a rotisserie chicken from your local grocery store is an excellent choice, offering moist and flavorful meat that’s ready to go.
- An Egg: Similar to the pasta dough, an egg acts as a binder for the filling, ensuring all the ingredients hold together beautifully and don’t fall apart when the ravioli is cooked and served.
- Fresh Garlic: Always choose fresh garlic cloves and mince them yourself. The vibrant, pungent flavor of fresh garlic is incomparable to pre-minced, jarred, or tubed varieties, which often lack depth, can taste a bit stale, and sometimes contain unwanted preservatives.
- Ricotta Cheese: For a truly decadent and rich ravioli, use full-fat ricotta cheese. Its creamy texture and mild flavor are perfect for pasta fillings. If you’re looking to lighten the meal slightly without sacrificing too much creaminess, part-skim or low-fat ricotta can also be used. Ensure it’s well-drained to avoid a watery filling.
- Mozzarella Cheese: While pre-shredded mozzarella is convenient, grating a block of mozzarella yourself is always recommended for superior results. Pre-shredded cheeses are often coated with cellulose or starches to prevent clumping, which can hinder an even, smooth melt and affect the overall texture of your filling. Freshly grated mozzarella melts beautifully and incorporates better into the mixture, providing a creamier consistency.
- Salt & Black Pepper: These are essential seasonings used to enhance and balance all the flavors in the filling. Always taste and adjust to your personal preference, ensuring the filling is well-seasoned before assembly.
Get Creative with Your Filling! This is where the magic of homemade ravioli truly shines. While our chicken and artichoke combination is fantastic, don’t hesitate to experiment with other delicious options. Replace the chicken and artichokes with savory Italian sausage, earthy sautéed mushrooms, vibrant fresh spinach (squeezed thoroughly dry), sweet roasted butternut squash, or simply a luxurious blend of various cheeses. The possibilities are truly endless, allowing you to tailor the ravioli to your exact tastes and whatever seasonal or readily available ingredients you have on hand!
Step-by-Step Guide: Crafting Your Own Homemade Ravioli
Making homemade ravioli is a process that’s both enjoyable and incredibly rewarding. Follow these steps carefully, and you’ll be enjoying tender, flavorful pasta in no time. Precision and patience are your best friends here!
Part 1: Preparing the Fresh Pasta Dough
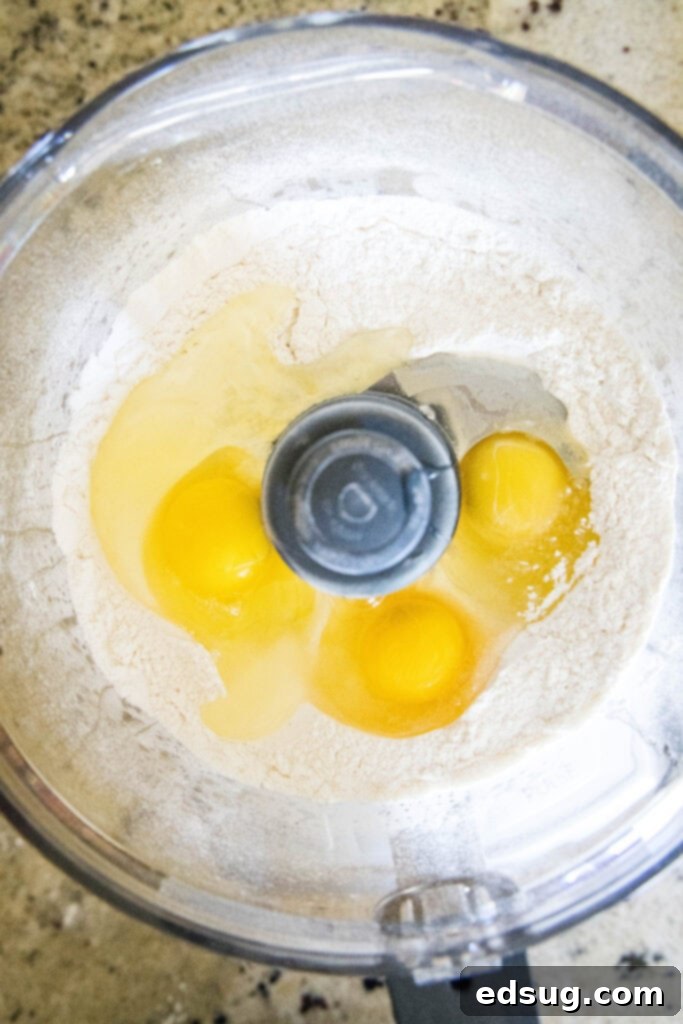
- Process the Flour: Begin by adding your chosen flour (all-purpose or “00”) to the bowl of a food processor. Pulse it a few times to ensure there are no lumps, creating a uniform, airy base for your dough. This helps in even incorporation of other ingredients.
- Incorporate the Eggs: Crack the large eggs directly into the food processor with the flour. Pulse for approximately 30 seconds total. During this time, the mixture will start to resemble coarse crumbs and eventually begin clumping together.
- Form the Dough Ball: The ultimate goal is for the flour and egg mixture to coalesce into a cohesive dough ball. If, after 30 seconds of pulsing, the mixture still appears dry and crumbly, add water, one teaspoon at a time. Pulse again for a few seconds after each addition. Continue this process until the dough successfully comes together into a single, pliable ball that pulls away from the sides of the processor. Be patient; a little water goes a long way, and you want to avoid a sticky dough.
- Knead for Smoothness: Carefully transfer the newly formed dough ball to a clean, dry, and lightly floured countertop. Knead the dough vigorously for 1-2 minutes. This brief but essential kneading period develops the gluten, resulting in a completely smooth, elastic, and even dough texture, which is crucial for rolling and shaping.
- Rest the Dough: Shape the kneaded dough into a flat rectangle, then tightly wrap it in plastic wrap. This step is crucial: allow the dough to rest at room temperature for a minimum of 15 minutes, or up to 2 hours. This resting period relaxes the gluten, making the dough significantly easier to roll out thinly and preventing it from snapping back, ensuring delicate ravioli.
Pro-Tip: The longer you allow the pasta dough to rest (up to 2 hours), the more relaxed the gluten becomes. This results in a dough that is much more pliable and significantly easier to roll out into thin, even sheets without tearing. Don’t rush this step – it truly impacts the final texture of your pasta!
Part 2: Crafting the Filling and Assembling Ravioli
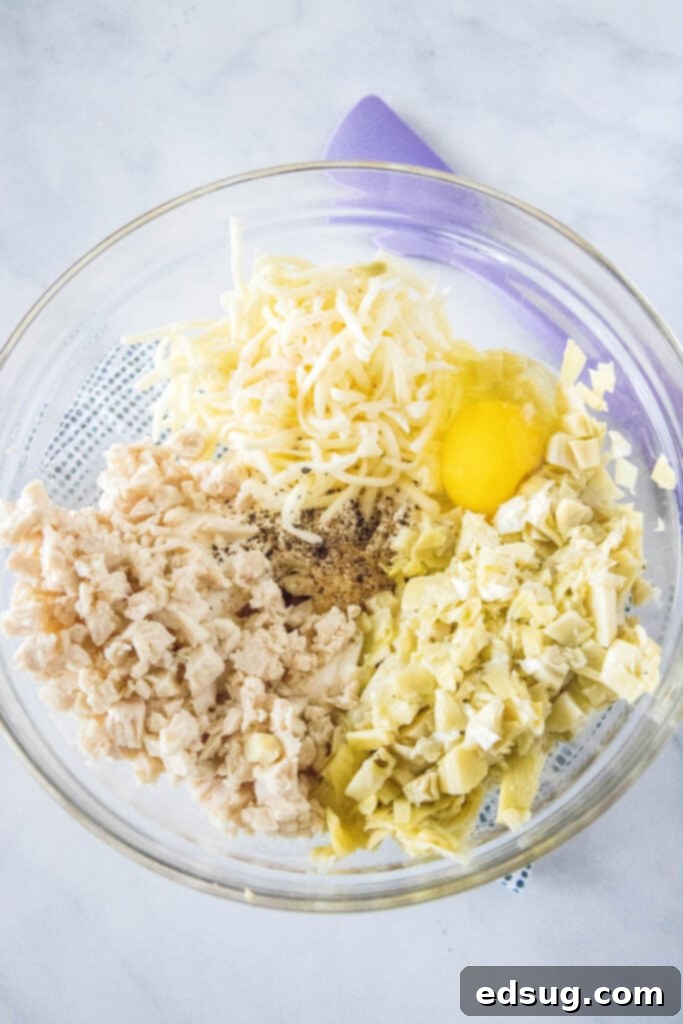
- Prepare the Filling: While your pasta dough is resting, turn your attention to the filling. In a large mixing bowl, combine all the chosen filling ingredients (cooked chicken, drained artichoke hearts, egg, freshly minced garlic, ricotta cheese, shredded mozzarella, salt, and pepper). Mix thoroughly until all components are uniformly combined and the mixture is well-bound and ready for piping or scooping.
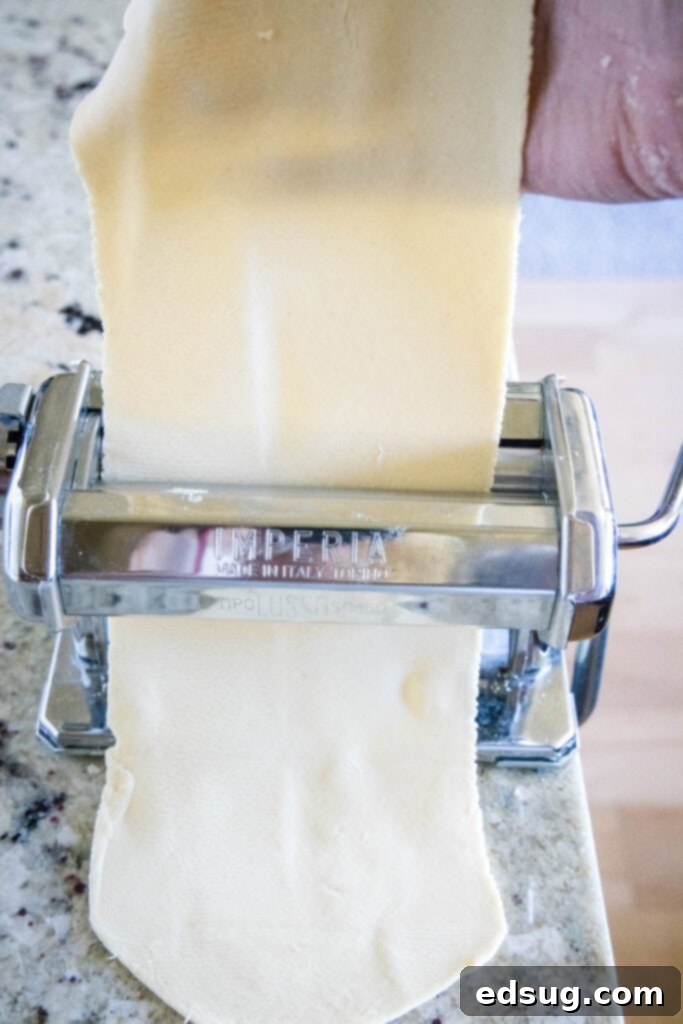
- Initial Pasta Rolling: Once the dough has adequately rested, unwrap it. Set your pasta roller to its largest, widest setting. Pass your dough through the roller once. Then, take the ends of the dough sheet and fold them into the center, creating a neat rectangle (like folding a business letter). Pass this folded dough through the same largest setting two more times. This helps to further knead, shape, and strengthen the dough, preparing it for thinning.
- Gradually Thin the Dough: After the initial passes, progressively adjust your pasta roller to a smaller setting each time you run the dough through. Continue this gradual thinning process, reducing the setting with each pass, until the dough sheet is so thin that you can distinctly see the outline of your hand through it. For many pasta machines, this is often around setting #5 or #6, but always trust your eyes and the feel of the dough!
- Prepare the Work Surface and Dough Sheet: Carefully lay the long, thin sheet of pasta dough onto a lightly floured work surface. To ensure neatly shaped ravioli, trim any uneven ends with a sharp knife or pasta cutter, aiming for a perfectly rectangular sheet of dough. This precision will prevent odd-shaped ravioli and wasted dough when you fold it over.
- Portion the Filling: Using a tablespoon, scoop approximately 1 tablespoon of your prepared filling for each ravioli. Carefully drop these scoops onto one half of the dough sheet, spacing them about 2 inches apart. Crucially, ensure the filling mounds are at least ¾ of an inch away from the edges of the dough to allow for ample space for proper sealing.
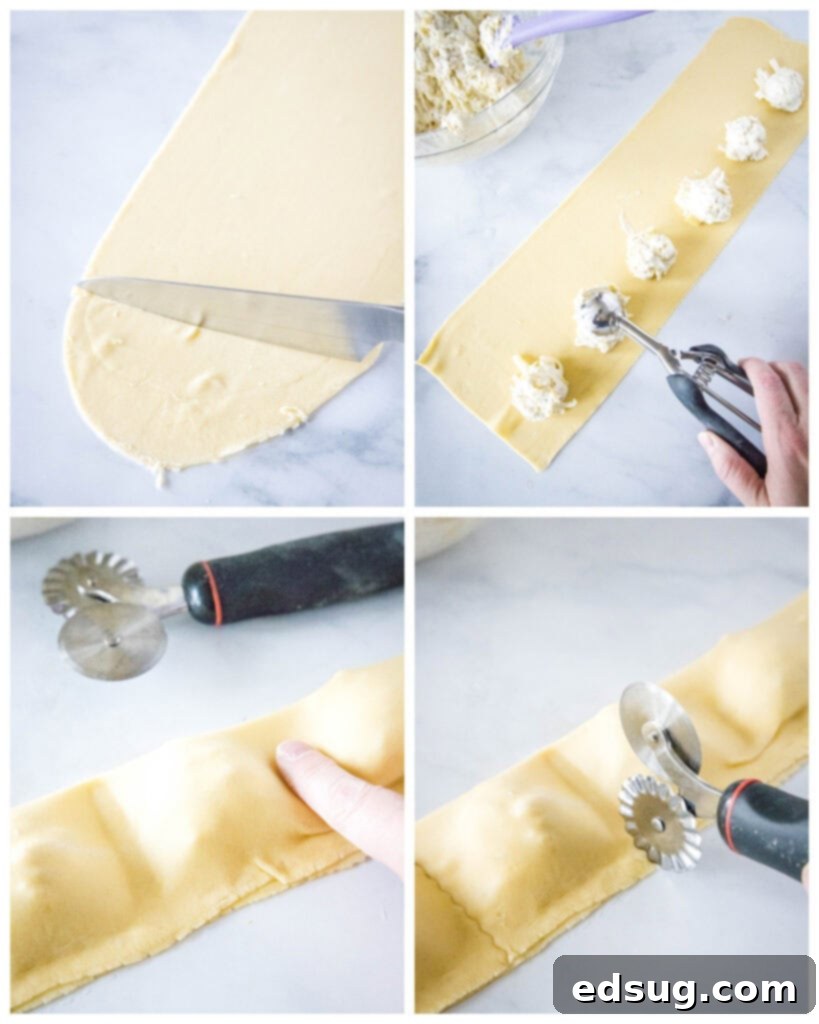
- Fold and Cover: Gently drape the unoccupied half of the pasta dough sheet directly over the mounds of filling. You are essentially folding the dough in half, ensuring the top sheet of dough completely covers the filling pockets and the edges of both sheets meet. Be careful to avoid trapping too much air.
- Cut the Ravioli: Using a pasta cutter, a pizza slicer, or even a sharp knife, carefully cut through both layers of dough around each individual scoop of filling. Remember to leave sufficient space (about ½ inch) around each filling mound to create a robust and reliable seal. This margin is critical to prevent leaks during cooking.
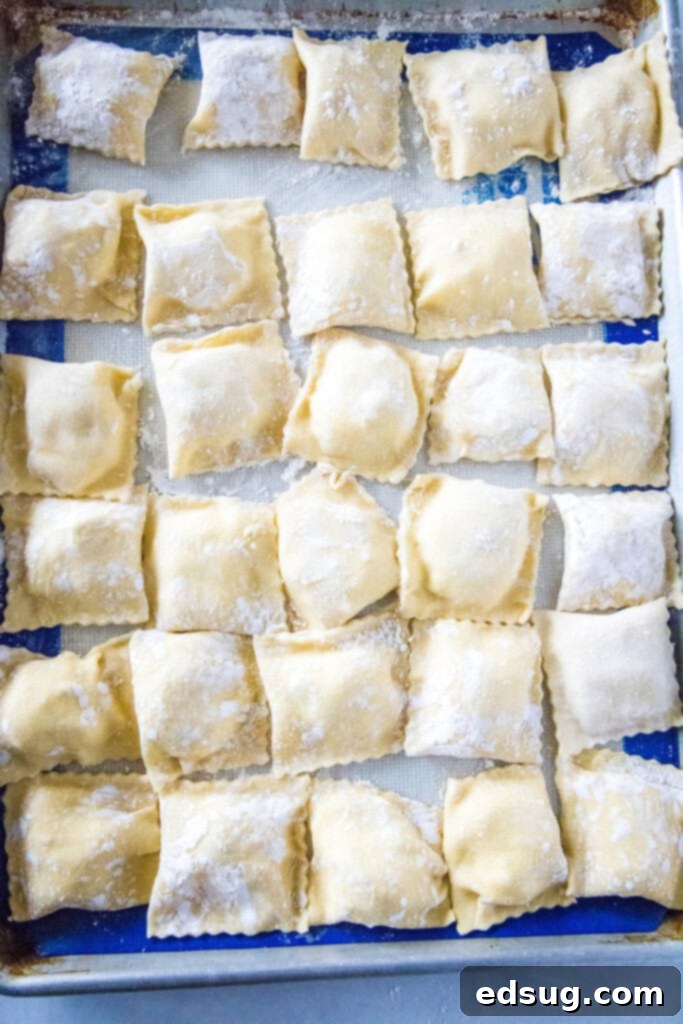
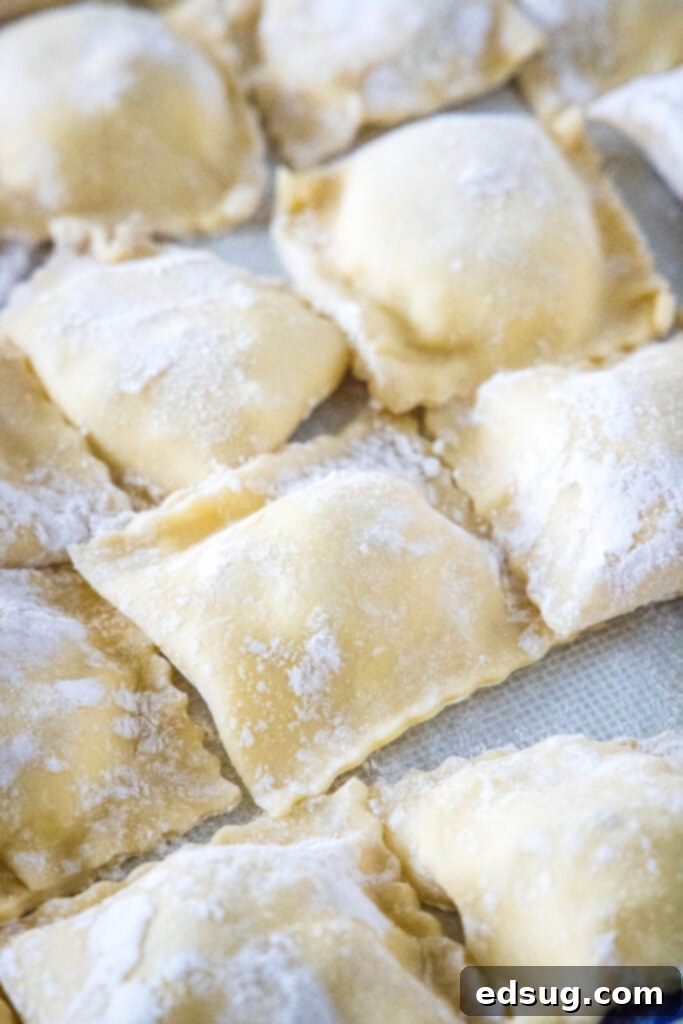
- Seal the Pockets: Before sealing, gently press out any trapped air from each ravioli pocket, working from the center outwards. This prevents them from bursting during cooking. Then, firmly crimp the edges of each ravioli using the tines of a fork or a specialized pasta roller to create a secure, decorative seal. Transfer each finished ravioli to a lightly floured baking sheet to prevent sticking, keeping them ready for cooking or freezing.
- Boil the Fresh Ravioli: Bring a large pot of generously salted water to a rolling boil on your stove. Carefully add the fresh ravioli to the boiling water, making sure not to overcrowd the pot. Fresh pasta cooks very quickly, so they will only need about 4-6 minutes to reach al dente perfection. Overcooking will make them mushy.
Pro-Tip: An excellent visual indicator that your fresh ravioli are fully cooked is when they float to the surface of the boiling water. While they will initially sink to the bottom, once they’re all bobbing at the top, they’re perfectly done and ready to be removed with a slotted spoon or spider.
Expert Tips for Perfect Homemade Ravioli Every Time
Achieving outstanding homemade ravioli is simpler with a few insider tips and tricks that can make all the difference in your culinary journey:
- Manage Moisture in the Filling: This is a critical step for success. If you’re using a filling that contains ingredients prone to releasing liquid, like our artichoke hearts or fresh spinach, it is absolutely crucial to drain them of as much moisture as possible. Excess liquid in the filling will thin its consistency, making it incredibly difficult to scoop and, more importantly, can make your pasta pockets watery and hard to seal properly, potentially leading to burst ravioli. Squeeze ingredients dry if needed, using a clean kitchen towel or paper towels.
- Ensure a Secure Seal: Fresh pasta dough is inherently moist and sticky, which usually allows it to seal beautifully with just a simple crimp. However, if you find that you’ve used too much flour on your work surface (which can dry out the dough surface) or the dough has been sitting out too long and dried slightly, the edges might not adhere as well. In such cases, a tiny bit of water brushed along the edges of the dough before pressing can help create a strong, lasting seal that holds up during boiling.
- Avoid Extra Dough Layers: The key to light, pillowy ravioli with a delicate texture is to ensure that when you fold over the sheets of dough and crimp the edges, you’re working with only a single layer of pasta for the seal. Having extra folds or layers of dough crimped together will result in thick, chewy edges, detracting from the delicate texture of the ravioli. This might sound like common sense, but it’s an easy detail to overlook when you’re in the midst of assembly, so pay close attention to this for perfectly tender bites!
- Unleash Your Creativity with Fillings: Don’t feel confined to one filling! Homemade ravioli is an amazing platform for culinary creativity. Beyond our delicious chicken & artichoke, consider combinations like: classic spinach & ricotta, savory Italian sausage & cheese, earthy roasted mushroom & Parmesan, sweet butternut squash & sage, or a simple, luscious four-cheese blend (ricotta, mozzarella, Parmesan, and a touch of provolone). Think about complementary flavors and textures that you love!
- Achieve Optimal Pasta Thickness: Rolling your pasta dough thin enough is paramount for delicate, non-gummy ravioli. My pasta machine has settings up to #9, and I find setting #5 or #6 ideal for ravioli, offering the perfect balance of tenderness and structural integrity. As a universal guide, you should be able to clearly see the outline of your hand when you hold the sheet of dough up to the light. If it’s too thick, the ravioli will be heavy and doughy; too thin, and it might tear easily during filling or cooking.
- Don’t Fear the Flour (Wisely): Flour is your best friend when working with fresh pasta, especially if your dough is even slightly sticky. Keep a light dusting on your work surface, your hands, and your rolling pin/machine to prevent the dough from sticking, ensuring you can easily fold, cut, and transfer the ravioli without damage. However, be mindful: if there’s excessive dry flour on the edges of the dough where you need to seal, it can prevent a good bond. If this happens, simply brush off the excess flour and lightly dampen the edges with water before pressing them together.
Frequently Asked Questions About Homemade Ravioli
While a pasta roller (either a manual hand-crank machine or an attachment for a stand mixer) makes the process significantly easier and helps achieve consistent, paper-thin pasta sheets, it’s not strictly necessary. You can absolutely use a good old-fashioned rolling pin to roll out your fresh pasta dough. Be prepared for a bit more effort and patience, as achieving machine-like thinness can be quite challenging by hand, but excellent, rustic results are still achievable with perseverance.
Yes, absolutely! Freezing homemade ravioli is a fantastic way to prepare meals in advance and enjoy homemade goodness on demand. To do so, arrange the uncooked ravioli in a single layer on a baking sheet, making sure they don’t touch each other (this prevents them from sticking together). Cover the baking sheet tightly with plastic wrap or foil, then place it in the freezer. Once the ravioli are completely frozen solid (this usually takes a few hours), transfer them to a resealable freezer bag or an airtight container. They will keep well for up to 2 months. When ready to cook, boil them directly from frozen in generously salted water, adding a minute or two to the cooking time.

Serving Suggestions for Your Homemade Ravioli
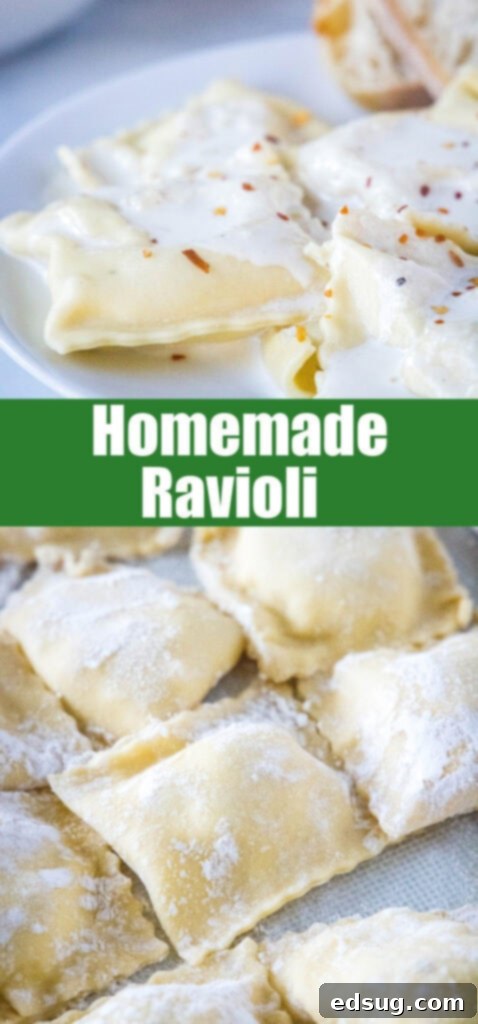
While our Roasted Garlic Cream Sauce is an absolute dream with this ravioli, don’t hesitate to pair your culinary creation with your favorite pasta topping. Whether it’s a robust marinara, a vibrant pesto, a simple olive oil and herb drizzle, or even just butter and sage, your homemade ravioli will shine. Here are some complementary sides to complete your meal and create a truly memorable dining experience:
- Homemade Roasted Garlic Cream Sauce (highly recommended!)
- Warm, Garlicky Breadsticks
- Fresh Caprese Salad (Tomato Mozzarella Salad)
- Crusty French Bread Rolls
- A Light and Simple Green Tossed Salad
More Delightful Homemade Dinner Recipes
If you enjoyed the satisfaction and delicious results of making ravioli from scratch, you’ll love exploring more of our homemade dinner recipes that bring joy, flavor, and a sense of accomplishment to your table. Expand your culinary skills with these fantastic dishes:
- Copycat Chick-fil-A Grilled Nuggets
- Savory Cashew Chicken Stir-Fry
- Hearty Enchilada Pasta Casserole
- Crispy Homemade Flautas
- Comforting Chicken Stuffed Shells
- Flavorful Chile Relleno Casserole
- Authentic Vietnamese Egg Rolls
- Classic Salisbury Steak (Bobby Flay Inspired)

Homemade Ravioli
Erin Sellin
1 hr
10 mins
1 hr 10 mins
6
Rate Recipe
Print Recipe
Ingredients
For Pasta
- 10 ounces all-purpose flour (or “00” flour for best results)
- 3 large eggs
- Water (as needed, 1 tsp at a time)
For Chicken & Artichoke Filling
- 12 oz artichoke hearts, drained and finely chopped
- 6 oz cooked chicken breast, finely chopped or shredded
- 1 large egg
- 2 cloves garlic, freshly minced
- 1 1/2 cup ricotta cheese (full-fat recommended, well-drained)
- 2/3 cup shredded Mozzarella cheese (freshly grated is best)
- 1/2 teaspoon salt
- 1/2 teaspoon black pepper
For Velvety Roasted Garlic Cream Sauce
- 8 cloves roasted garlic, minced (or more, to taste)
- 2 teaspoons butter
- 1 cup heavy cream
- 1/4 cup shredded Parmesan cheese
- 1/2 teaspoon salt
- 1/4 teaspoon black pepper
Instructions
-
For the Pasta: In a food processor, pulse the flour a few times to eliminate lumps and ensure a uniform consistency. Add the eggs and pulse for about 30 seconds until the mixture starts to resemble coarse crumbs and begins to form a ball, pulling away from the sides of the bowl. If the dough seems too dry and isn’t coming together, add water (1 teaspoon at a time), pulsing briefly after each addition, until a cohesive dough ball forms. Transfer the dough to a clean, dry, and lightly floured countertop and knead gently for 1-2 minutes until it feels very smooth and elastic. Shape the dough into a flat rectangle, wrap it tightly in plastic wrap, and let it rest at room temperature for at least 15 minutes, or up to 2 hours. This resting period is crucial for relaxing the gluten, making the dough easier to roll.
-
Prepare the Filling: While the dough rests, prepare your delicious filling. Place all filling ingredients – the thoroughly drained and finely chopped artichoke hearts, finely chopped or shredded cooked chicken, large egg, freshly minced garlic, well-drained ricotta cheese, freshly shredded mozzarella cheese, salt, and black pepper – into a large mixing bowl. Mix thoroughly until all components are well combined, uniformly distributed, and the mixture is cohesive. Taste and adjust seasoning as needed.
-
Roll Out Dough (Initial Passes): After the dough has adequately rested, remove the plastic wrap. Set your pasta roller to its largest, widest setting. Pass a portion of your dough through the roller once. Then, take the ends of the dough sheet and fold them into the center, creating a neat rectangle (this is often called “letter folding”). Pass this folded dough through the same largest setting two more times. This step helps to further knead, smooth, and strengthen the dough, preparing it for the gradual thinning process.
-
Thin the Dough Gradually: After the initial passes, gradually adjust your pasta roller to a smaller setting after each subsequent pass. Continue rolling the dough through, progressively decreasing the setting each time, until the dough sheet is thin enough that you can distinctly see the outline of your hand through it when held up to the light. For reference, on many standard pasta rollers, this ideal thinness is achieved around setting #5 or #6. Aim for a delicate yet strong sheet of pasta.
-
Lay Out Dough & Trim: Carefully lay the long, thin sheet of pasta dough onto a lightly floured work surface. To ensure neatly shaped and uniform ravioli, trim any uneven ends with a sharp knife or pasta cutter, striving for a perfectly rectangular sheet of dough. This precision will prevent odd-shaped ravioli and minimize wasted dough when you fold it over.
-
Portion the Filling: Using a clean tablespoon, scoop approximately 1 tablespoon of your prepared filling for each ravioli. Carefully drop these scoops onto one half of the dough sheet, spacing them consistently, about 2 inches apart. Crucially, ensure the filling mounds are positioned roughly ¾ of an inch away from all the edges of the dough to allow for ample space for proper sealing and crimping.
-
Fold and Cover: Gently drape the empty portion of dough (the other half of your sheet) directly over the mounds of filling. You are essentially folding the dough in half so that the edges of the top sheet meet the edges of the bottom sheet, completely covering the filling pockets. Carefully pat down the dough around the filling to remove any trapped air.
-
Cut the Ravioli: Using a pasta cutter (fluted or straight edge), a pizza slicer, or a sharp knife, carefully cut through both layers of dough around each individual scoop of filling. Remember to leave sufficient space (about ½ inch) around each filling mound to create a robust and reliable seal. This margin is critical to prevent leaks and bursting during the cooking process.
-
Seal and Prepare for Cooking: Before sealing, gently press out any remaining air from each ravioli pocket, working from the center outwards towards the edges. This is vital to prevent them from bursting during boiling. Then, firmly crimp all the edges of each ravioli with the tines of a fork or a specialized pasta roller to seal them securely and add a decorative touch. Transfer each finished ravioli to a lightly floured baking sheet, ensuring they don’t touch each other, until you are ready to cook or freeze.
-
Boil the Pasta: Bring a large pot of generously salted water to a rolling boil. Carefully add the fresh ravioli to the boiling water, making sure not to overcrowd the pot; cook in batches if necessary. They will cook quickly due to their freshness, taking only about 4-6 minutes to reach al dente perfection. They are done when they float to the surface. Drain gently.
To Make The Roasted Garlic Cream Sauce
-
Sauté Garlic: In a small saucepan, melt the butter over medium heat. Add the minced roasted garlic and sauté for about 1 minute until fragrant and lightly golden. Be careful not to burn the garlic.
-
Add Cream and Simmer: Pour in the heavy cream and bring the mixture to a gentle simmer, stirring occasionally to prevent scorching.
-
Whisk in Cheese & Seasonings: Whisk in the shredded Parmesan cheese, salt, and black pepper until well combined and the sauce is smooth and homogeneous.
-
Thicken the Sauce: Reduce the heat to low and let the sauce gently simmer for 5-7 minutes, stirring occasionally, until it thickens to a rich, velvety, and creamy consistency. It should lightly coat the back of a spoon.
-
Serve Immediately: Pour the warm, velvety sauce generously over your freshly cooked ravioli. Garnish with fresh parsley or extra Parmesan if desired, and serve immediately for the best experience. Enjoy your homemade masterpiece!
Notes
For comprehensive tips and troubleshooting advice on making perfect ravioli, refer to the detailed blog post above this recipe card.
Nutrition
Calories: 418kcal |
Carbohydrates: 14g |
Protein: 27g |
Fat: 29g |
Saturated Fat: 17g |
Polyunsaturated Fat: 10g |
Trans Fat: 1g |
Cholesterol: 228mg |
Sodium: 681mg |
Fiber: 4g |
Sugar: 2g
Nutrition information is automatically calculated and should be used as an approximation. Actual values may vary based on ingredients and preparation methods.
Additional Info
Erin Sellin
1 hour
10 minutes
1 hour 10 minutes
Dinner Recipes
American
6
418
homemade ravioli, fresh pasta, chicken and artichoke ravioli, roasted garlic cream sauce
Like this recipe? Leave a comment below!
Your feedback helps us grow and inspires other home cooks.
Join Our Culinary Community! I’ve created a vibrant and engaging group on Facebook, and I would absolutely love for you to become a part of it! It’s a fantastic space where you can share YOUR favorite recipes, ask questions, get advice, and stay updated on all the exciting new content from Dinners, Dishes, and Desserts – ensuring you never miss a delicious new recipe or a chance to connect with fellow food enthusiasts!
Be sure to follow me on Instagram and tag #dinnersdishes so I can see all the wonderful creations you make using DINNERS, DISHES, AND DESSERTS recipes! I love seeing your culinary triumphs and sharing them with our community.
Don’t forget to connect with me across all my social media platforms, so you never miss a post, update, recipe inspiration, or behind-the-scenes peek!
Facebook |
Twitter |
Pinterest |
Instagram
