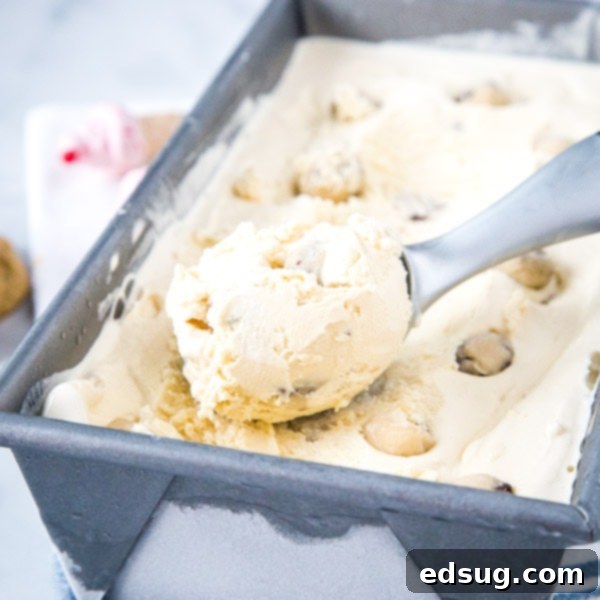
Ultimate Homemade Cookie Dough Ice Cream: Creamy, Dreamy, and Irresistible
When the heat of summer arrives, there’s truly nothing better than a scoop (or two!) of luscious, homemade ice cream. It’s the ultimate sweet treat, a delightful way to cool down and indulge your cravings. While classic vanilla or refreshing Mint Chocolate Chip Ice Cream always hit the spot, there’s one flavor that consistently captures hearts: Cookie Dough Ice Cream. Imagine rich, creamy ice cream that not only features generous chunks of chewy cookie dough but also boasts a base that itself tastes exactly like your favorite unbaked cookie. That’s the magic we’re about to create!
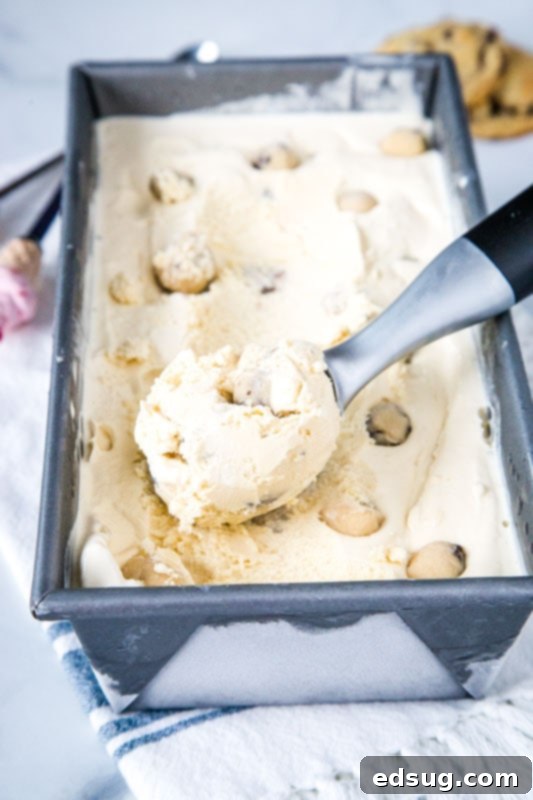
The Quest for the Perfect Cookie Dough Ice Cream Experience
For years, I found myself joyfully torn between the invigorating coolness of Mint Chocolate Chip and the comforting indulgence of Cookie Dough. Both were perennial favorites in my ice cream lineup. But then, a culinary revelation struck, prompting me to develop a method to elevate my beloved cookie dough ice cream from merely good to absolutely extraordinary. This isn’t just a simple vanilla ice cream base with a few cookie dough bits mixed in; this meticulously crafted recipe delivers a profound, authentic cookie dough flavor throughout the entire base, ensuring every single spoonful is a dream come true.
My personal journey to perfecting this ultimate cookie dough ice cream began years ago during a memorable college trip to visit my husband’s sister in sunny Florida. We stumbled upon a quaint, unassuming ice cream parlor that offered something truly unique and captivating: chocolate chip cookie-flavored ice cream. It was, for me, an absolute game-changer. Up until that serendipitous moment, my experience with cookie dough ice cream had been limited to vanilla bases studded with chunks. This was the first time I encountered an ice cream where the frozen base itself tasted distinctly like a freshly prepared (or rather, unbaked) cookie. The moment it touched my palate, I was instantly, irrevocably in love! That unforgettable flavor lingered, inspiring me to recreate that magic in my own kitchen.
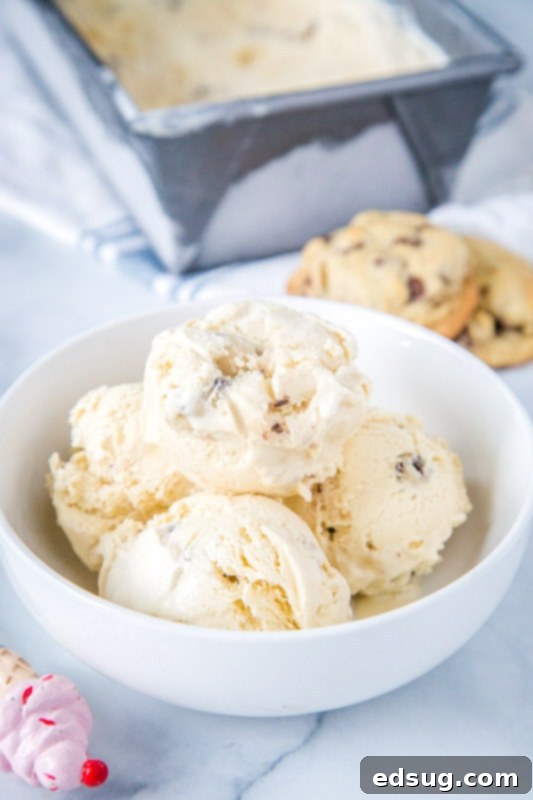
Fast forward to today, and this homemade cookie dough ice cream recipe has become an absolute must-try for any dessert enthusiast, proving especially perfect for those sweltering summer days when only the creamiest, most flavorful ice cream will do. The profound secret to achieving that authentic, deep, and satisfying cookie flavor in the ice cream base lies in the strategic use of two simple yet incredibly powerful ingredients. These aren’t just additions; they are flavor transformers:
- Brown Butter: A mere whisper of browned butter transforms the entire flavor profile. When unsalted butter is gently cooked over medium heat until it becomes a golden amber hue and emits a rich, nutty fragrance, its flavor compounds undergo a magical transformation. This process develops a complex, subtly caramelized, and deeply nutty essence. This depth is not just a fleeting note; it deeply enhances the overall taste of the ice cream base, elevating it far beyond a plain vanilla. It truly brings out the “cookie” character in cookie dough, providing a sophisticated background note that complements the sweet elements beautifully. This small step adds an incredible layer of complexity that store-bought versions often lack.
- Brown Sugar: While many traditional ice cream recipes often call for simple granulated white sugar, opting for brown sugar is absolutely crucial for achieving that quintessential cookie dough profile. Brown sugar, rich in molasses, imparts a distinct caramel-like sweetness that is warmer and more nuanced than white sugar. Furthermore, the molasses contributes to a slightly chewier and softer texture in the frozen dessert, mimicking the delightful chewiness found in actual cookie dough. This deliberate choice significantly contributes to the desired flavor and luxurious texture that makes this homemade recipe so unique and utterly special.
Demystifying Edible Cookie Dough: Is Raw Dough in Ice Cream Safe to Eat?
A common and entirely valid concern when indulging in cookie dough ice cream, especially homemade versions, is the safety of consuming raw cookie dough. In well-formulated homemade recipes like this one, the cookie dough pieces swirled throughout are specifically designed to be 100% safe for consumption. This means we utilize egg-free edible cookie dough. It manages to capture all the delicious taste and satisfying texture of the dough you’d normally prepare for baking, but without any of the associated health risks. This allows you to enjoy every bite without a single worry.
The key to making cookie dough perfectly safe for raw consumption, ensuring it’s free from harmful bacteria, involves two primary modifications to a standard cookie dough recipe:
- Exclusion of Raw Eggs: Traditional cookie dough, intended for baking, typically includes raw eggs. Raw eggs carry a small, but present, risk of containing salmonella bacteria. To circumvent this risk entirely, edible cookie dough recipes completely omit eggs. Instead, a small amount of milk or water is used to achieve the necessary moistness and binder effect, ensuring the dough has the perfect consistency without the need for eggs.
- Heat-Treated Flour: Perhaps less commonly known, raw flour can sometimes harbor harmful bacteria, such as E. coli, picked up during the milling process. To neutralize this potential threat, the flour used in edible cookie dough must be heat-treated. This crucial step is surprisingly easy to perform: simply spread the required amount of flour evenly on a baking sheet and bake it in a preheated oven at 350°F (175°C) for approximately 5 minutes. Alternatively, you can microwave it in a heat-safe bowl, stirring occasionally, until it registers 160°F (71°C) with a food thermometer. After heat-treating, it is imperative to allow the flour to cool completely before incorporating it into your dough mixture. This simple yet vital step guarantees that your cookie dough chunks are perfectly safe, delightfully palatable, and entirely worry-free for consumption.
So, you can rest assured that the delectable cookie dough swirled into this homemade ice cream tastes just like the irresistible dough you might have snuck a spoonful of as a child, but it’s engineered to be completely safe and enjoyable for everyone!
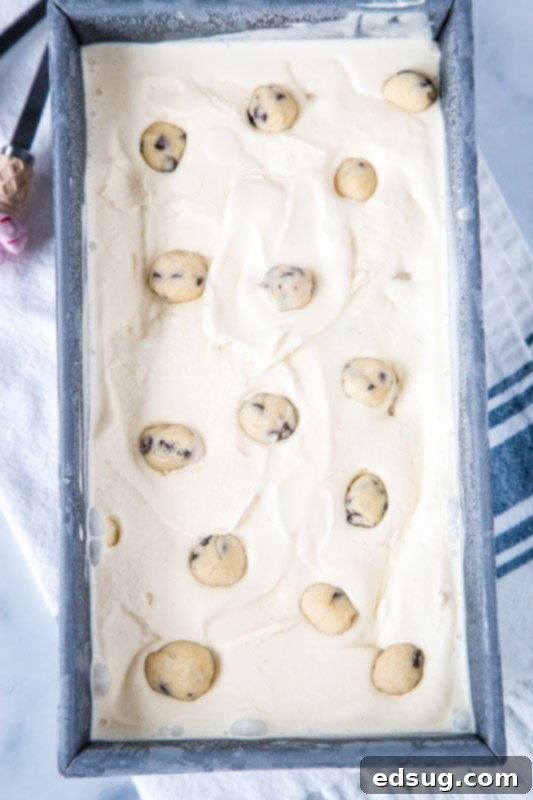
How to Craft Your Own Irresistible Cookie Dough Ice Cream: A Detailed Guide
Creating this incredibly rich, smooth, and deeply flavored cookie dough ice cream from scratch is an immensely rewarding culinary experience. While the process does require a bit of patience due to essential chilling times, the active preparation steps are straightforward and manageable for any home cook. Here’s a detailed, step-by-step breakdown of the entire process, designed to ensure you achieve absolute perfection in every scoop:
- Initiate by Browning the Butter: Begin this flavor journey by melting the specified amount of butter in a light-colored saucepan. A lighter pan helps you visually track the browning process. Cook it gently over medium heat, stirring occasionally to ensure even cooking. The butter will first melt, then foam, and eventually, the foam will subside, revealing small amber-colored bits forming at the bottom of the pan. As soon as you detect a delightful, nutty aroma filling your kitchen and observe these solids turn a beautiful golden-brown, immediately remove the saucepan from the heat. Promptly pour the browned butter into a separate heatproof bowl to halt the cooking process, and allow it to cool slightly before moving to the next step. This crucial stage lays the foundation for the ice cream’s signature deep, complex flavor.
- Combine Cream and Brown Butter: In a clean, medium-sized saucepan, gently whisk together the slightly cooled brown butter and the heavy cream. Heat this mixture over medium heat until it just reaches a low simmer. You’ll notice tiny, delicate bubbles beginning to form gracefully around the very edges of the saucepan, signaling it’s ready.
- Prepare the Egg Yolks and Sugar Mixture: In a separate, adequately large and heatproof bowl, vigorously whisk together the brown sugar, egg yolks, and a pinch of salt until the mixture becomes smooth, takes on a pale yellow hue, and thickens ever so slightly. This meticulously prepared mixture will form the rich, velvety base of your custard, contributing significantly to its final texture and taste.
- Temper the Eggs and Skillfully Cook the Custard: This is a critical culinary technique designed to prevent the eggs from scrambling. Slowly, in a thin, continuous stream, carefully pour about one-third of the warm cream and brown butter mixture into the egg yolk mixture, whisking constantly and vigorously all the while. This gradual incorporation gently raises the temperature of the egg yolks, tempering them. Once tempered, meticulously pour the entire contents of the egg mixture back into the saucepan containing the remaining warm cream. Continue to heat this combined mixture over a steady medium-low heat. Stir constantly and patiently with a wooden spoon or heatproof spatula, ensuring the bottom doesn’t scorch. The key here is unwavering patience; under no circumstances should the mixture be allowed to boil. Continue cooking until the mixture thickens sufficiently to gracefully coat the back of your spoon, typically reaching a precise temperature between 170-175°F (77-79°C). A reliable instant-read thermometer is your indispensable companion here, guaranteeing accuracy.
- Strain and Flavor the Custard Base: Once the custard has achieved the desired thickness, immediately pour the hot mixture through a fine-mesh strainer into a large, clean bowl. This essential step meticulously removes any tiny bits of cooked egg, ensuring an impeccably silky-smooth and luxurious texture for your ice cream base. Once strained, thoroughly stir in the whole milk and the vanilla extract until all ingredients are perfectly blended and homogenous, infusing the custard with its final notes of flavor.
- Chill Thoroughly for Optimal Texture: Cover the bowl containing your beautifully prepared custard with plastic wrap, pressing it directly onto the surface to prevent the formation of an undesirable skin. Place the bowl in the refrigerator to chill completely and thoroughly. This critical chilling period is absolutely vital for your ice cream maker to operate efficiently and to ensure the final ice cream achieves its desired smooth, creamy texture, free from ice crystals. This process typically requires a minimum of 8 hours, making it an ideal step to prepare the night before you plan to churn your ice cream. Patience here will be richly rewarded.
- Meticulously Prepare the Edible Cookie Dough Chunks: While your luscious custard is undergoing its extensive chilling, dedicate your attention to preparing the egg-free cookie dough. Once the dough is mixed to perfection, roll it into small, uniform, bite-sized balls or chop it into delightful small chunks. Arrange these prepared dough pieces on a parchment-lined tray and place them into the refrigerator or freezer. Chilling the dough ensures that it retains its shape beautifully and disperses more evenly throughout the ice cream without melting prematurely during the mixing process. As a vital safety reminder, always remember to heat-treat your flour beforehand, as detailed in the “Demystifying Edible Cookie Dough” section above, to ensure it is entirely safe for raw consumption!
- Expertly Churn the Ice Cream: Once your custard base is thoroughly and impeccably chilled, retrieve it from the refrigerator. Pour the cold custard into the frozen bowl of your ice cream maker and initiate the churning process according to your manufacturer’s specific instructions. The churning process typically takes between 20-30 minutes, resulting in a soft-serve consistency that is both delightful and highly tempting.
- Gently Fold in the Cookie Dough: Once the ice cream has achieved its soft-serve consistency, carefully transfer it from the ice cream maker to an airtight freezer-safe container. At this stage, gently and evenly fold in the prepared, perfectly chilled cookie dough chunks. You have complete creative freedom here: add as much or as little as you like, depending entirely on how “chunky” and indulgent you prefer your ice cream to be. A good starting point is to incorporate half the dough and then add more if you desire an even greater cookie dough presence.
- Final Freeze and Ultimate Enjoyment: Securely cover the container with a lid and place it back into the freezer for at least 2-4 hours, or until the ice cream reaches your desired firm, scoopable consistency. Once perfectly set, scoop generously, serve with a smile, and savor every incredible, creamy, and cookie-filled bite of your magnificent homemade cookie dough ice cream!

There is truly nothing quite like homemade ice cream. Its unparalleled richness, superior creaminess, and the sheer joy of customizing flavors make it far, far superior to anything you could ever purchase from a store. This particular cookie dough ice cream, meticulously crafted from scratch, will undoubtedly convert you into a homemade ice cream aficionado after just one bite. Get ready for a dessert experience that will not only redefine your expectations but also become a cherished favorite in your recipe collection!
Essential Tips for Crafting the Best Homemade Cookie Dough Ice Cream
To ensure your homemade cookie dough ice cream turns out perfectly creamy, rich, and utterly delicious every single time, keep these expert tips in mind:
- Prioritize Quality Ingredients: The foundation of exceptional ice cream lies in its ingredients. Opt for high-quality heavy cream, fresh whole milk, and farm-fresh eggs if possible. The superior quality of your base ingredients will directly translate to a richer, more luxurious, and incredibly flavorful final ice cream.
- Never Skip the Chilling Process: This step is non-negotiable for achieving a superior texture. The custard base absolutely must be thoroughly chilled—ideally overnight—before it goes into the ice cream maker. A sufficiently cold base is crucial for efficient churning, preventing the formation of undesirable ice crystals, and ensuring a smoother, wonderfully creamy ice cream.
- Always Heat-Treat Your Flour: For the edible cookie dough component, it is imperative to heat-treat your flour. Spread it on a baking sheet and bake at 350°F (175°C) for 5 minutes, then allow it to cool completely before incorporating it into your dough. This vital step eliminates any potential bacteria in the raw flour, making the cookie dough entirely safe to consume uncooked.
- Prevent Overcooking the Custard: When cooking the custard base, precision and attention are key. Watch it closely and stir continuously. If the custard is allowed to overcook, it can curdle, resulting in a grainy texture. Remove it from the heat immediately as soon as it coats the back of a spoon and registers the target temperature of 170-175°F (77-79°C).
- Ensure Cookie Dough Chunks are Chilled: Before adding your cookie dough pieces to the freshly churned ice cream, make sure they are well-chilled (or even slightly frozen). This foresight prevents them from melting into the soft ice cream and helps them maintain their distinct shape and satisfying chewy texture within the frozen dessert.
- Optimal Storage for Freshness: Store your homemade ice cream in a shallow, airtight container. Press a piece of plastic wrap directly onto the surface of the ice cream before sealing the container to minimize exposure to air, which helps prevent freezer burn and keeps it fresher. For optimal flavor and texture, it’s best enjoyed within 1-2 weeks.
More Delicious Frozen Summer Treats to Explore
If you’ve fallen in love with this homemade cookie dough ice cream, you’re sure to enjoy these other wonderfully refreshing frozen delights, perfect for any warm day or as a delightful dessert year-round:
- Strawberry Popsicles
- Nutella Ice Cream
- Pistachio Ice Cream
- Chocolate Chip Ice Cream Sandwich Cookies
- Ice Cream Sandwich Icebox Cake
- Peanut Butter Lover’s Ice Cream
- Swiss Roll Ice Cream Cake
- Hot Chocolate Popsicles

Double Cookie Dough Ice Cream
Pin Recipe
Rate Recipe
Print Recipe
Ingredients
Cookie Dough
- 6 Tbls butter, softened
- 1/3 cup brown sugar
- 1/3 cup sugar
- 1/2 tsp vanilla
- 2 Tbls milk
- 1 cup flour
- 1/2 tsp salt
- 1/2 cup mini chocolate chips
Ice Cream
- 3 Tbls brown butter
- 2 cups heavy cream
- 2/3 cup brown sugar
- 4 egg yolks
- 1/8 tsp salt
- 2 tsp vanilla
- 1 1/2 cups whole milk
Instructions
-
Prepare the cookie dough: Cream butter, sugar, and brown sugar together. Add milk and the vanilla, mix well. Mix in the flour (see notes below) and salt until everything is combined. Fold in the chocolate chips. Make small balls of dough the size of 1/2 teaspoon. Place in the fridge until ready to use.
-
Prepare the ice cream: Combine brown butter and heavy cream in a large sauce pan. Whisk until well combined. Heat to a simmer.
-
In a separate bowl (heatproof) mix together brown sugar, egg yolks, and salt.
-
Slowly pour in the warm cream mixture, whisking constantly. Pour back into the saucepan, and heat over medium-low heat. Stir constantly, until the mixture thickens to coat the back of a wooden spoon (170-175 degrees).
-
Pour the mixture through a strainer into a large bowl. Add whole milk and vanilla; stir until well blended.
-
Cover and place in the fridge until cold. Can take up to 8 hours, over night works great.
-
Pour the custard into your ice cream maker, and freeze according to the instructions.
-
Once frozen, transfer to an air tight container. Stir in pieces of cookie dough until evenly distributed. You may have more than you need, depends on how chunky you like it.
-
Cover and freeze about an hour before serving.
Notes
Nutrition
Nutrition information is automatically calculated, so should only be used as an approximation.
Additional Info
Like this recipe? Leave a comment below!
I created a fun group on Facebook, and I would love for you to join us! It’s a place where you can share YOUR favorite recipes, ask questions, and see what’s new at Dinners, Dishes and Desserts (so that you never miss a new recipe)! If you’d like to check it out, you can request to join HERE.
Be sure to follow me on Instagram and tag #dinnersdishes so I can see all the wonderful DINNERS, DISHES, AND DESSERTS recipes YOU make!
Connect with Dinners, Dishes, and Desserts!
Be sure to follow me on my social media, so you never miss a post!
Facebook | Twitter | Pinterest | Instagram
