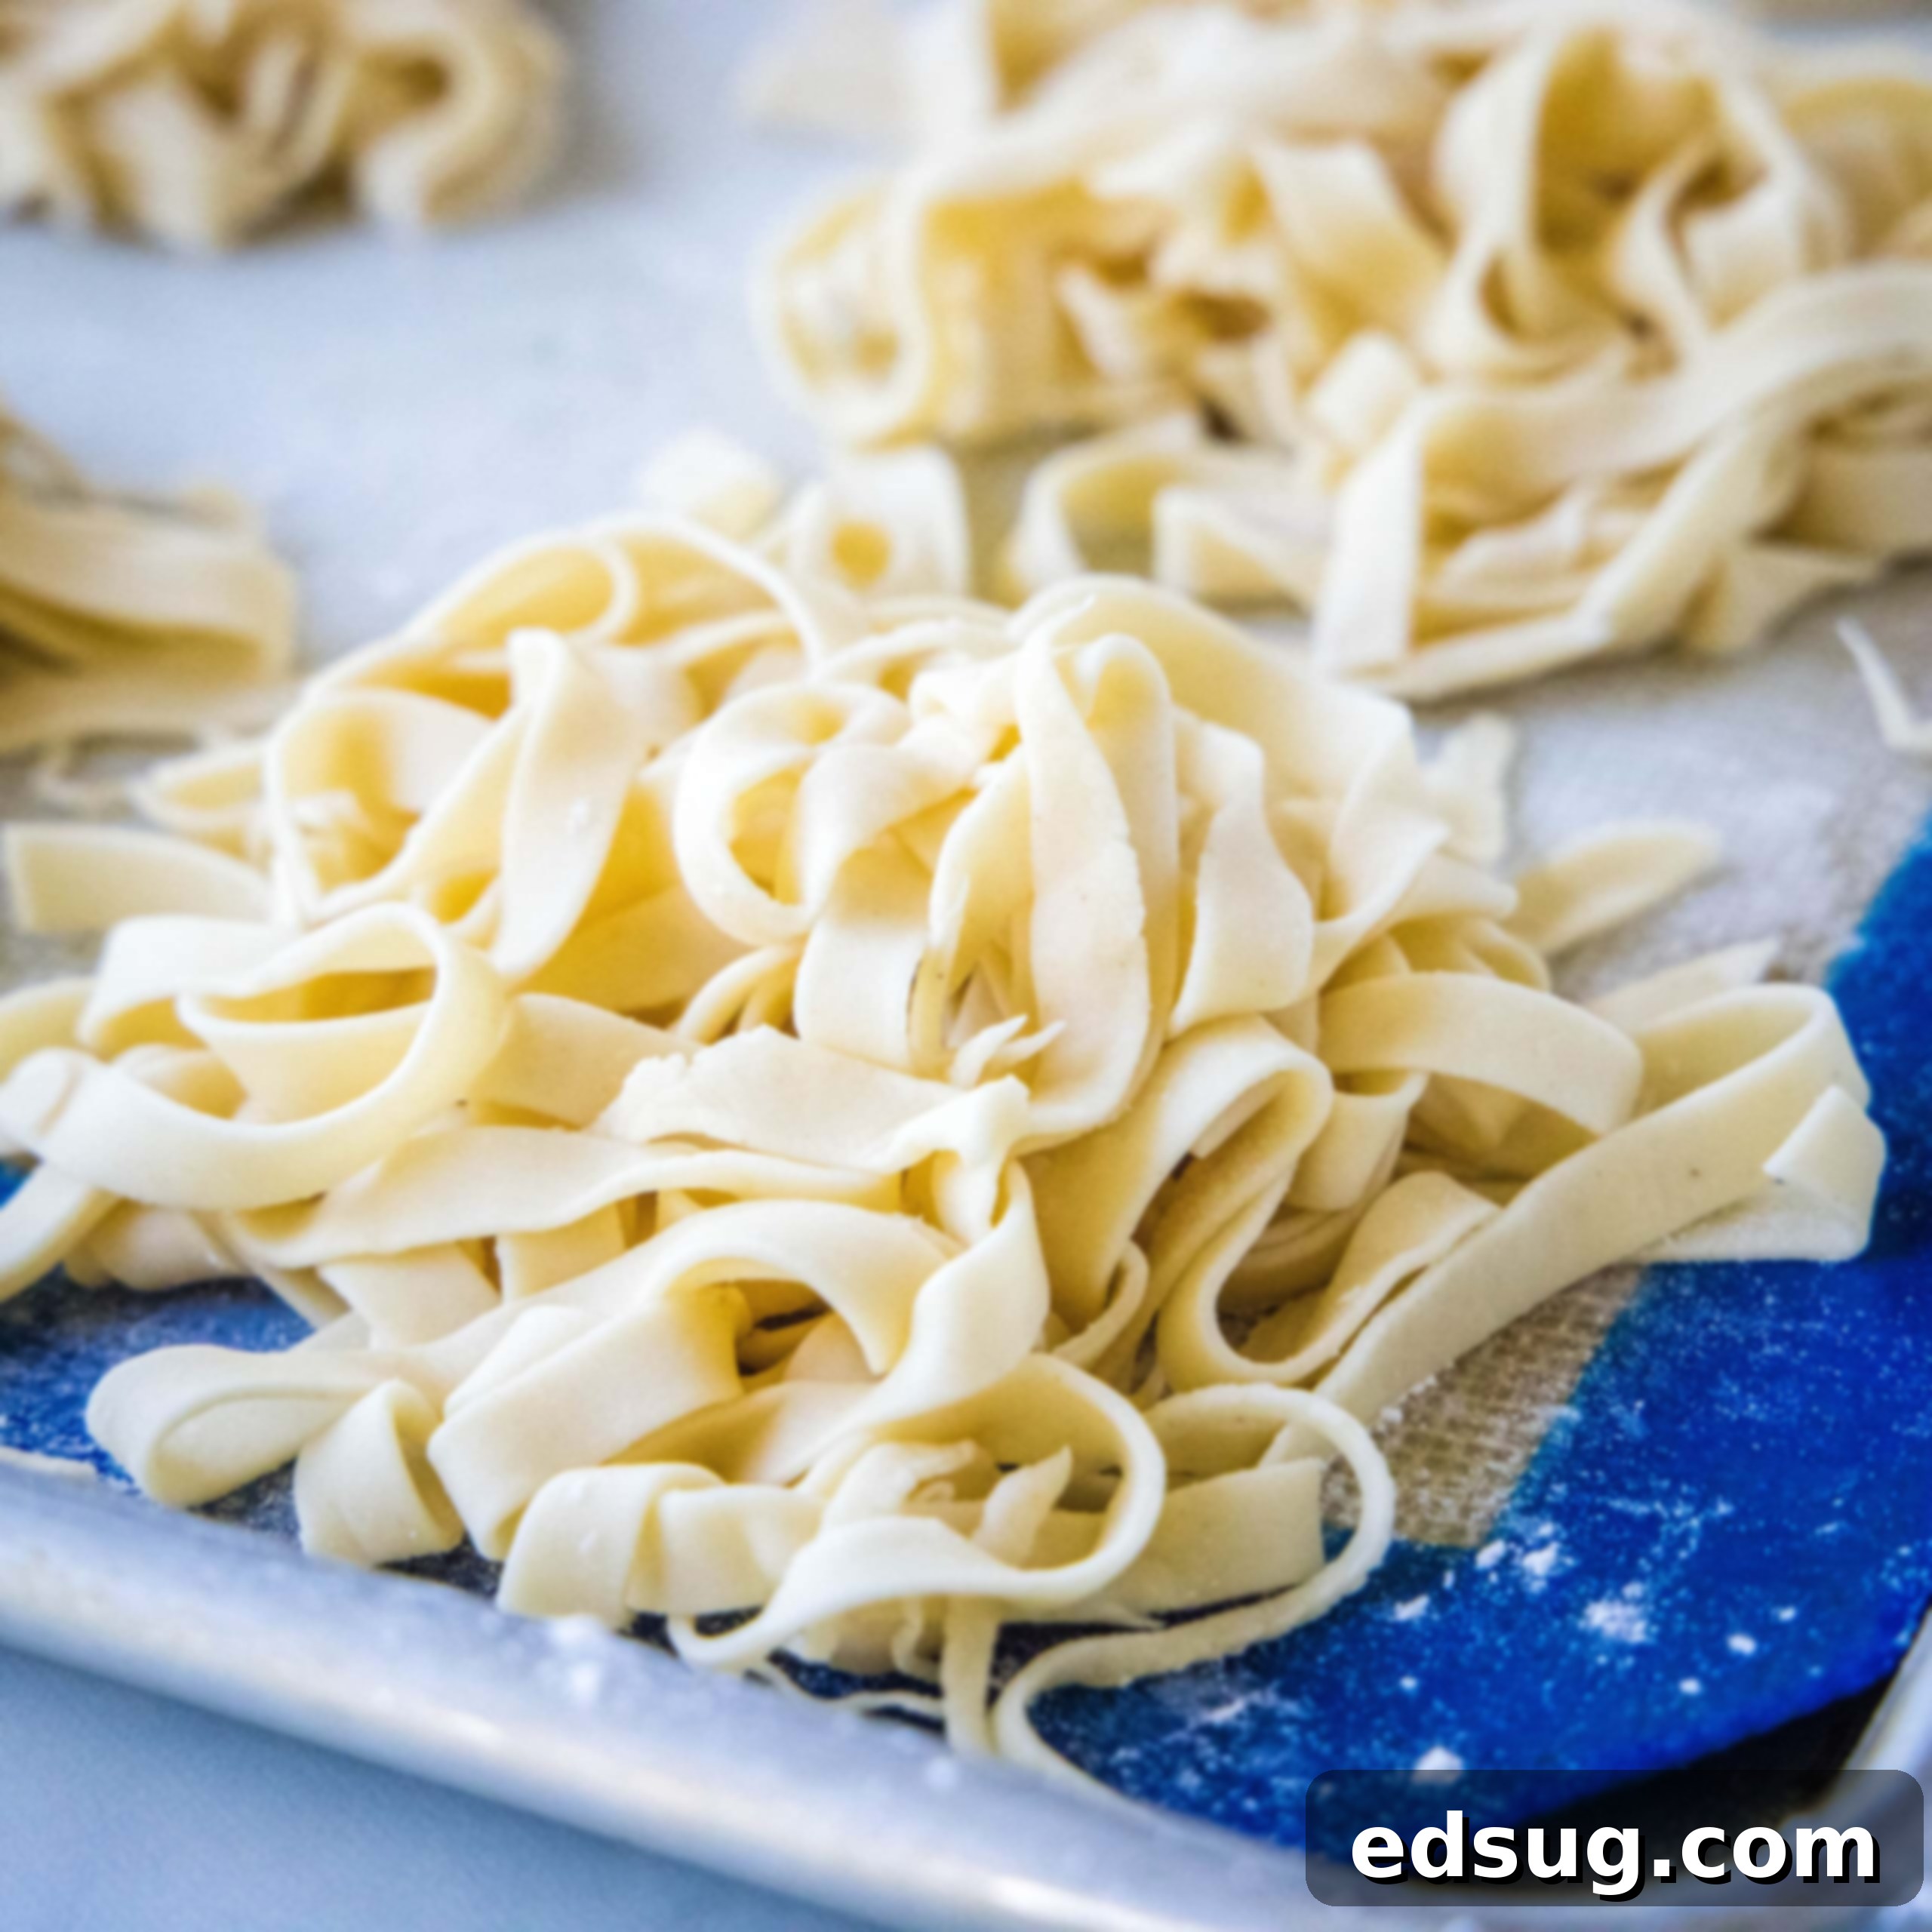
Homemade Pasta From Scratch: The Easiest 3-Ingredient Food Processor Recipe
Making fresh pasta at home is an incredibly rewarding experience that delivers unparalleled flavor and texture. With just three simple ingredients and the help of a food processor, you can create the most tender and delicious pasta you’ve ever tasted – it’s far easier than you might imagine!
There’s a magical quality to homemade pasta that store-bought, dried varieties simply can’t replicate. The moment you taste those fresh, silken noodles, you’ll understand why so many home cooks are captivated by the process. It’s not just about the superior taste and delightful chewiness; it’s also about the satisfaction of crafting something truly special from scratch. And the best part? Once you see how straightforward it is, you’ll wonder why you haven’t been doing it more often!
For us, the journey into fresh pasta making began right after college, and we haven’t looked back since. While dried pasta certainly has its place in our pantry for quick weeknight meals, special occasions and a desire for an extraordinary meal definitely call for homemade. Over the years, we’ve refined our technique to be both efficient and consistently delicious.
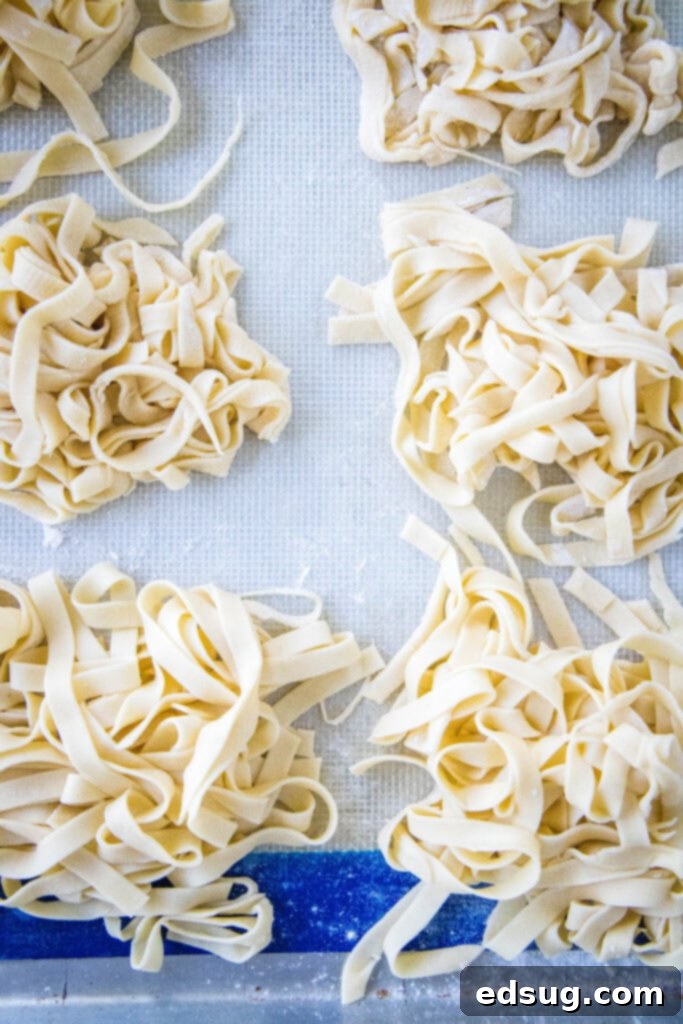
A few years ago, during an unforgettable trip to Italy, I immersed myself in an all-day cooking class led by authentic Italian chefs. There, I learned the traditional art of pasta making by hand – kneading the dough on a wooden board, rolling it out meticulously with a long, thin rolling pin, and then expertly cutting various shapes, even filling delicate tortellini. It was an epic day, a true culinary adventure that deeply enriched my understanding and appreciation for pasta.
Upon returning home, I tried the traditional hand-kneading and rolling method a few times. While deeply satisfying, it can be quite time-consuming and a bit messy for everyday preparation. That’s when I rediscovered my trusty food processor, and it truly revolutionized my approach. Using a food processor makes the dough preparation significantly quicker, less labor-intensive, and much tidier. It’s the perfect method for anyone who has felt intimidated by the idea of homemade pasta – it brings the magic of fresh pasta within reach for every home cook!
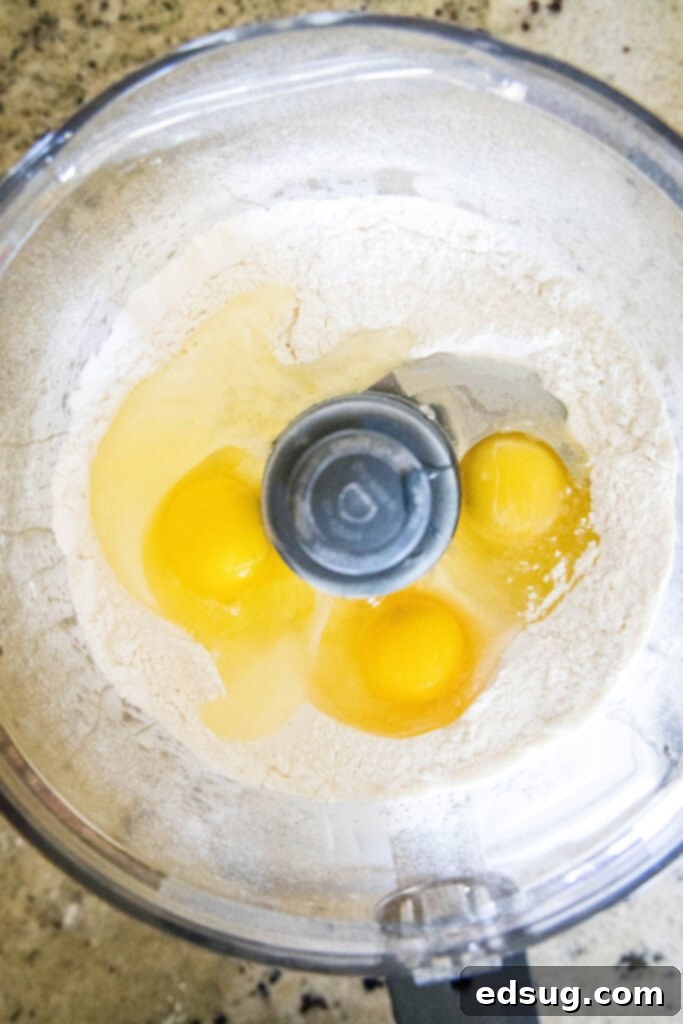
Essential Ingredients for Perfect Homemade Pasta
Crafting perfect pasta from scratch requires surprisingly few ingredients, but the quality and understanding of each plays a vital role. Here’s what you’ll need for this simple yet exquisite recipe:
- **Flour:** The foundation of your pasta, providing structure and texture.
- **Eggs:** For richness, beautiful color, and crucial elasticity.
- **Water:** Used sparingly to fine-tune the dough’s consistency.
- *(Optional: A pinch of salt for subtle flavor enhancement.)*
Choosing the Right Flour: All-Purpose vs. “00”
The type of flour you choose is paramount for a tender and authentic pasta. In Italy, chefs traditionally use “00” flour, also known as doppio zero. This finely milled soft wheat flour has a lower protein content than many American all-purpose flours, resulting in an incredibly silky, delicate, and tender pasta with a beautiful chew. The fine grind helps in creating a very smooth dough that rolls out easily.
While “00” flour is the gold standard and can be found in specialty stores (we even brought a bag back from our trip!), it’s not always readily available in standard supermarkets in the United States. But here’s the good news: don’t let the lack of “00” flour deter you! All-purpose flour works remarkably well for homemade pasta, delivering a perfectly tender and delightfully chewy noodle. Many home cooks achieve fantastic results with standard all-purpose flour. There’s no need to go out of your way or spend a fortune ordering specialty flour if your local store doesn’t carry it. Use what you have, and you’ll still be amazed by the results of your fresh homemade pasta.
The Role of Fresh Eggs
Eggs are another critical component, contributing significantly to the pasta’s structure, richness, color, and flavor. We highly recommend using large, fresh eggs. The yolks provide a beautiful golden hue to the pasta and a subtle depth of flavor, while the proteins in both the yolk and white help bind the dough, adding elasticity and strength. This elasticity is what allows the pasta to be rolled out incredibly thinly without tearing and gives it that characteristic “al dente” bite when cooked. The specific ratio of eggs to flour is crucial for the dough’s workability and final texture, so precise measurement is important to avoid a dough that’s too stiff or too sticky.
Adjusting with Water
While some traditional pasta recipes rely solely on flour and eggs, a small amount of water can be a game-changer, especially when using all-purpose flour or if your eggs happen to be on the smaller side. Water helps in achieving the perfect dough consistency, ensuring it’s hydrated enough to come together without being overly sticky or excessively dry. It’s vital to add water very gradually, literally a teaspoon at a time, as too much can quickly turn your dough into a sticky, unmanageable mess. Observing the dough as you add water is key to getting it just right – you want a dough that feels firm, slightly tacky, but not wet.
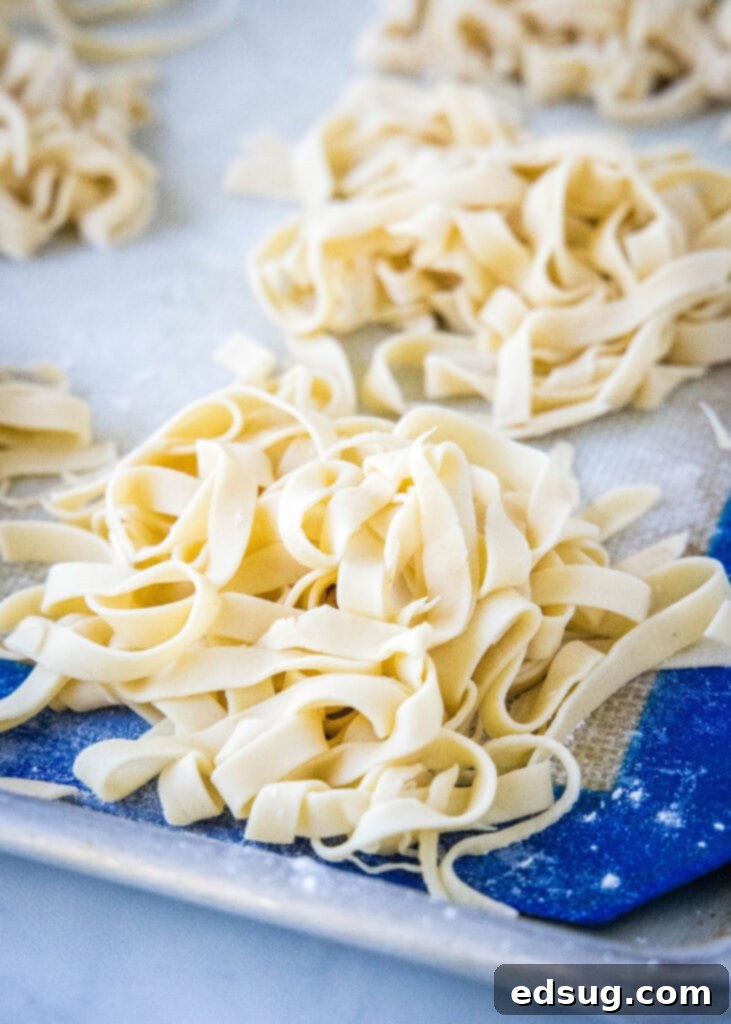
Essential Equipment for Homemade Pasta
Making pasta at home is made much easier and more enjoyable with a few key pieces of equipment. While some steps can be done by hand, these tools streamline the process and help achieve professional-level results with minimal effort.
- **Food Processor:** This is the star of our recipe, simplifying the initial mixing of flour and eggs. It transforms what can be a messy, laborious kneading process into a quick, hands-off task. A good food processor ensures uniform blending and significantly reduces overall preparation time.
- **Pasta Machine (Manual or Electric):** A pasta roller is highly recommended for achieving consistently thin sheets of pasta. Manual hand-crank machines are affordable, widely available, and highly effective. For added convenience, electric attachments for stand mixers are excellent options. Both types typically come with various settings for thickness, allowing you to gradually thin your dough, and often include cutting attachments for different pasta shapes like fettuccine or spaghetti.
- **Plastic Wrap:** Essential for resting the dough. It prevents the dough from drying out and forming a crust, which would make it difficult to roll smoothly.
- **Clean Work Surface:** A spacious, clean countertop or a large wooden board is vital for kneading the dough by hand and rolling out the pasta sheets.
- **Baking Sheets and Parchment Paper (or a Pasta Drying Rack):** For drying and storing your freshly cut pasta, it’s important to prevent the strands from sticking together. Lightly dusting a baking sheet with flour or semolina and lining it with parchment paper works well. Alternatively, a dedicated pasta drying rack is a great investment if you make pasta frequently.
- **Measuring Cups and Spoons:** Accurate measurements are crucial for achieving the correct pasta dough consistency, especially when it comes to flour and the small amounts of water.
How To Make Homemade Pasta: Step-by-Step Guide
Follow these detailed steps to create beautiful, tender homemade pasta using your food processor and a pasta machine. Get ready for a delicious culinary adventure!
- **Prepare the Flour:** Add your chosen flour (whether “00” or all-purpose) to the bowl of your food processor fitted with the steel blade. Pulse a few times to aerate the flour, ensuring it’s light, fine, and free of any lumps. This step helps create a smoother, more uniform dough.
- **Incorporate the Eggs:** Crack your large eggs directly into the food processor bowl with the flour. Secure the lid and pulse for about 30 seconds. The mixture should start to come together, resembling coarse crumbs or a loose, shaggy dough. Avoid over-processing at this stage; we’re just combining the wet and dry ingredients evenly.
- **Add Water Gradually:** With the food processor running on low, slowly add water, one teaspoon at a time, through the feed tube. Continue adding water until the mixture forms a cohesive ball that gathers and rolls around the blade. This step requires patience and careful observation. If the dough seems too dry and isn’t quite forming a ball, add a tiny bit more water (another 1/2 teaspoon). If it looks too wet and sticky, add a small sprinkle of flour. The goal is a firm, slightly tacky, but not sticky, dough.
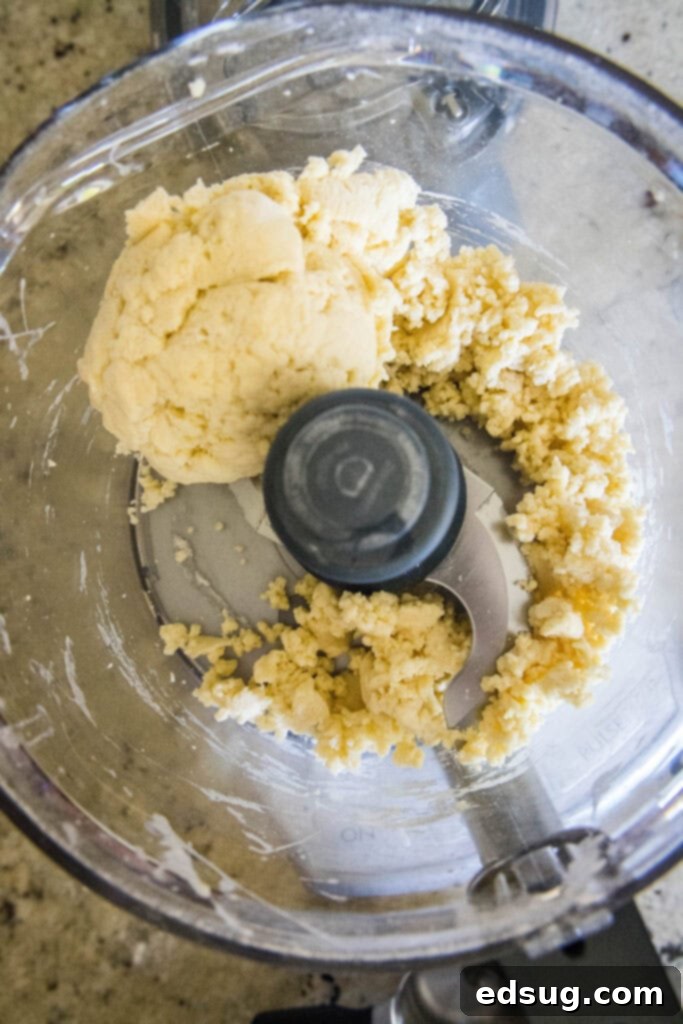
- **Knead the Dough:** Remove the dough ball from the food processor and place it onto a clean, dry, lightly floured surface. Knead the dough by hand for 1-2 minutes. This brief but crucial kneading process helps to further develop the gluten, resulting in a smooth, elastic dough that will be easy to roll and have a perfect chewy texture. The dough should feel springy and smooth, losing any rough edges, when adequately kneaded.
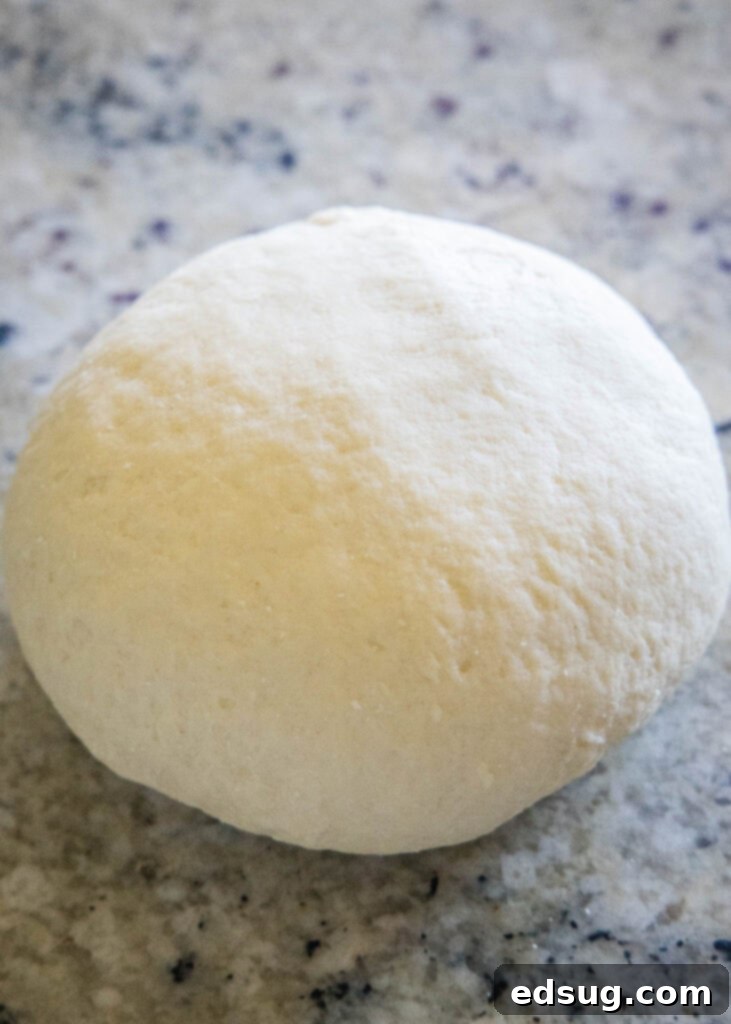
- **Rest the Dough:** Wrap the kneaded dough tightly in plastic wrap to prevent it from drying out and forming a crust. Let the dough rest at room temperature for at least 30 minutes, or up to an hour. This resting period is critical; it allows the gluten to relax, making the dough much more pliable and significantly easier to roll out thinly without tearing.
- **Prepare for Rolling:** When you’re ready to make your pasta, unwrap the dough and gently flatten the rested dough ball into a thick disc. This makes it easier to feed into the pasta machine. Divide the dough into 2 or 3 manageable pieces. Always keep the unused portions covered with plastic wrap to prevent them from drying out.
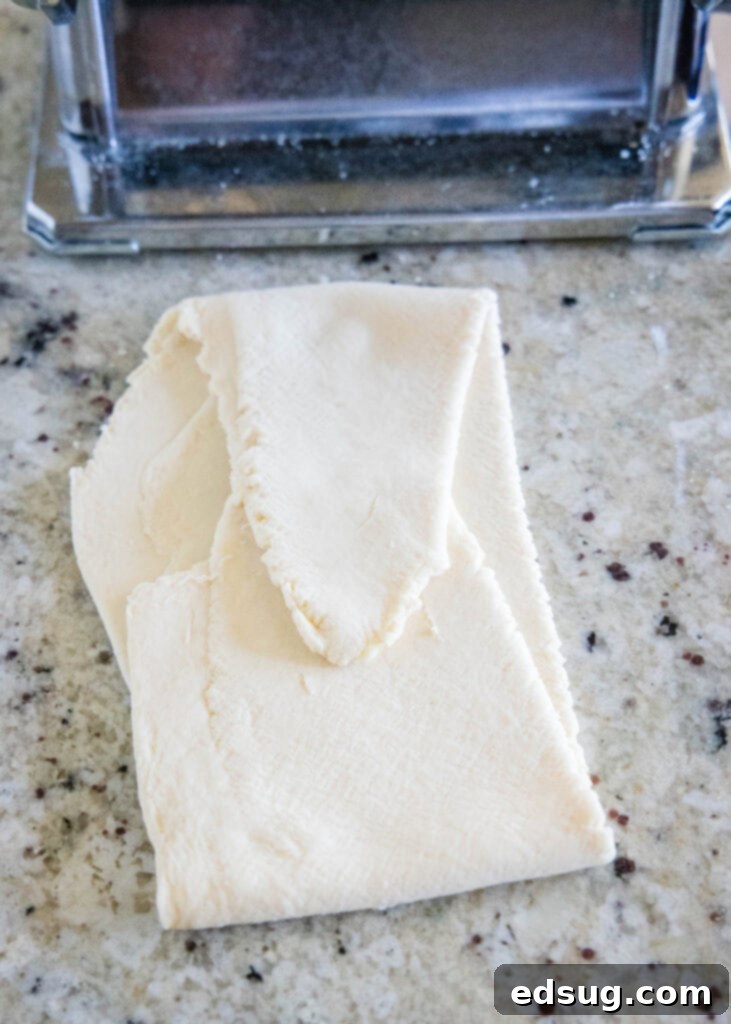
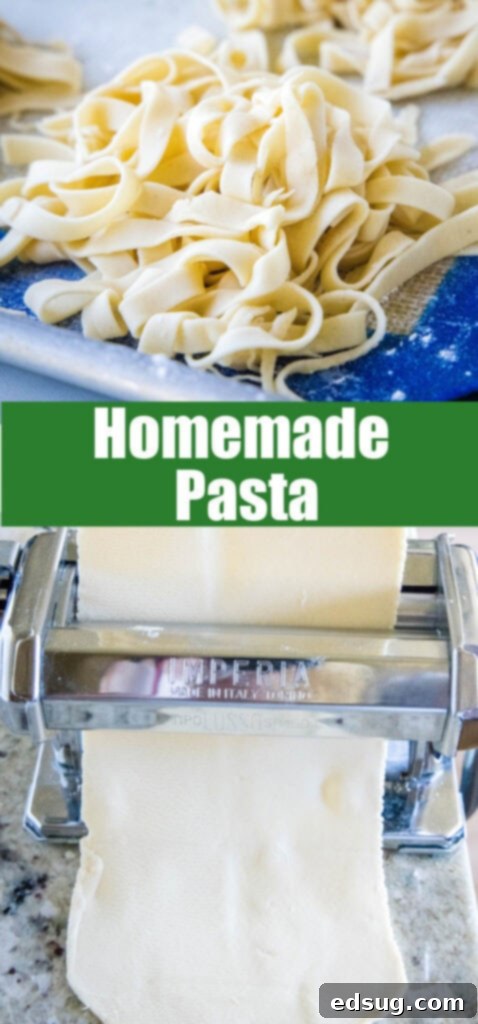
- **Initial Rolling and Folding (Widest Setting):** Take one piece of dough and flatten it slightly. Pass it through your pasta roller at its widest setting (usually ‘1’ on most machines). Once it comes out, fold both ends of the pasta sheet into the center, creating a roughly rectangular shape. Then, fold it in half again. Pass the folded dough through the widest setting once more. Repeat this folding and rolling process (through the widest setting) two more times. This helps to further strengthen the dough, align the gluten, and create perfectly smooth, even sheets.
- **Gradual Thinning:** Now, move the pasta roller to the next setting (e.g., ‘2’ for a slightly thinner sheet). Pass the dough through without folding. Continue to incrementally adjust the setting, rolling the pasta thinner and thinner through each successive setting (e.g., ‘3’, ‘4’, ‘5’, etc.). You typically won’t need to fold the dough anymore once you’re past the initial widest setting. If the pasta sheet becomes too long to handle, you can cut it in half. Lightly dust the dough with flour if it starts to feel sticky or resists rolling smoothly.
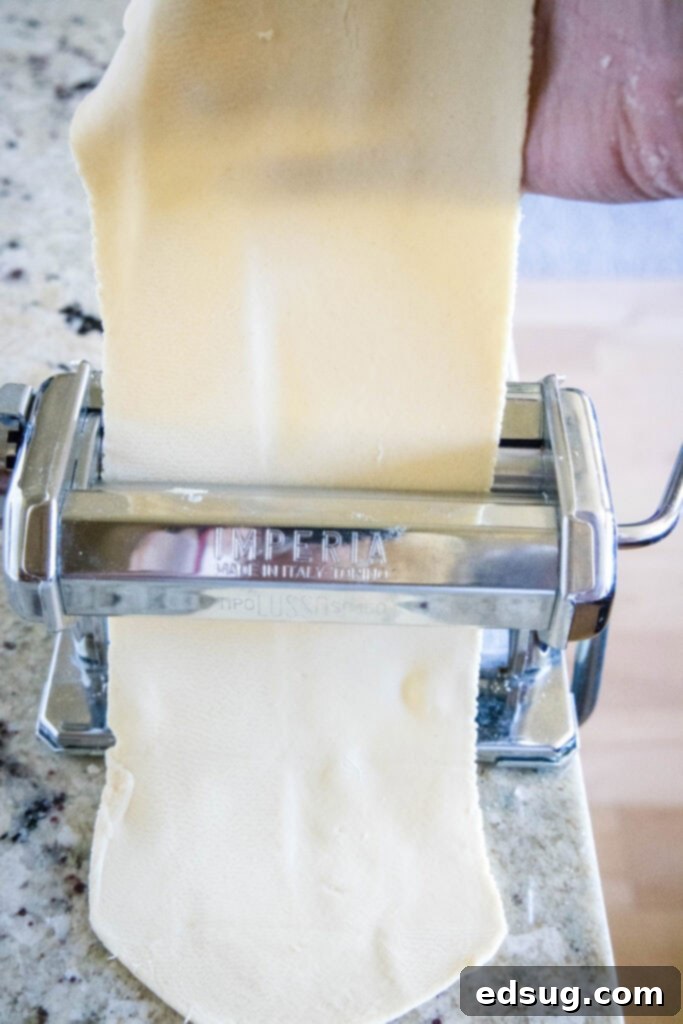
- **Achieve Desired Thickness and Cut:** Continue rolling until the pasta sheet reaches your desired thickness. A good rule of thumb for most pasta shapes is when you can faintly see the outline of your hand through the dough. For delicate shapes like ravioli, you might go even thinner; for heartier fettuccine, a slightly thicker setting works well. Once your sheet is thin enough, you can cut it into your desired shape using a pasta cutter attachment on your machine, or by hand with a sharp knife for shapes like tagliatelle or pappardelle.
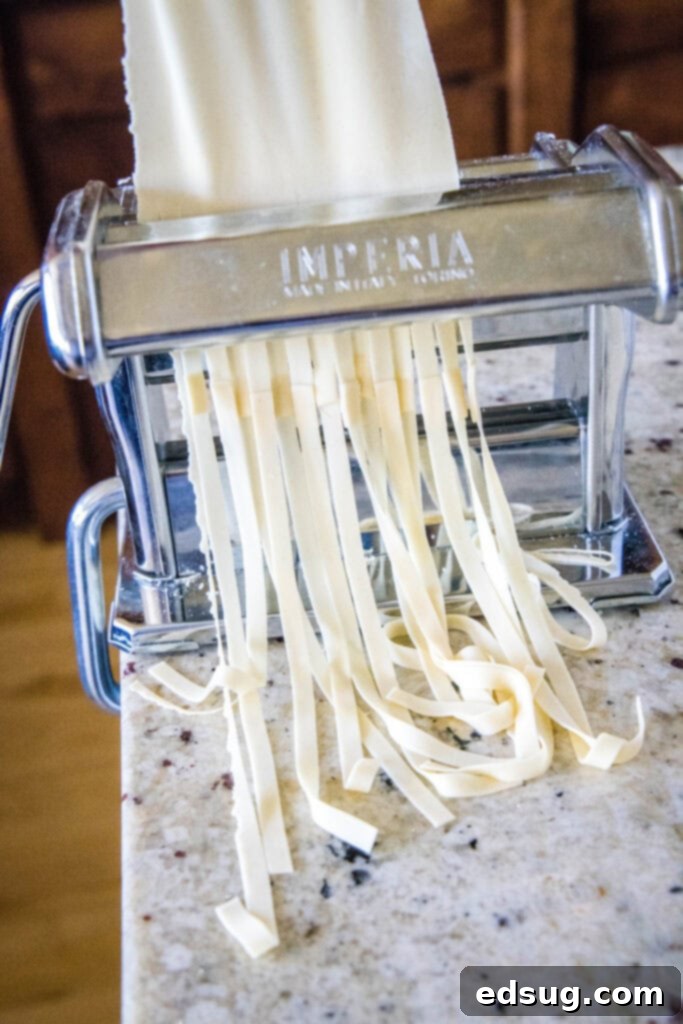
- **Cook and Serve:** Your fresh pasta is now ready to cook! Bring a large pot of generously salted water to a rolling boil – salting the water is crucial for flavoring the pasta itself. Carefully add the fresh pasta to the boiling water. Fresh pasta cooks incredibly quickly due to its higher moisture content, usually taking only 2-3 minutes to reach al dente perfection. Keep a close eye on it and taste frequently to achieve your preferred texture. Drain immediately and serve with your favorite sauce.
Homemade Pasta Troubleshooting & Expert Tips
Even with the simplest recipes, a few common issues can arise during pasta making. Don’t worry, they’re usually easy to fix! Here are some troubleshooting tips and expert advice to ensure your homemade pasta experience is always a success:
- **Dough Too Sticky:** If your dough feels too wet and sticky after the food processor stage, lightly dust your work surface and your hands with flour. Knead in a bit more flour, adding one tablespoon at a time, until the dough reaches the desired smooth, elastic, and slightly tacky consistency. Avoid adding too much at once.
- **Dough Too Dry/Crumbly:** If the dough isn’t coming together or is too crumbly in the food processor, it needs more moisture. Add a tiny bit more water (1/2 teaspoon at a time) and pulse again. When kneading by hand, you can moisten your hands slightly with water or add a few drops directly to the dough and knead it in until it’s pliable.
- **Dough Tearing During Rolling:** This usually means the gluten hasn’t relaxed enough, or the dough is too dry. Ensure you allow sufficient resting time (at least 30 minutes). If it’s tearing, fold it back up, wrap it in plastic, and let it rest for another 15-20 minutes. A lightly floured surface and gentle handling can also help prevent tearing.
- **Preventing Cut Pasta from Sticking:** As soon as your pasta is cut, toss it very lightly with a small amount of flour or semolina flour to prevent the individual strands from clumping together. You can also arrange it in loose nests on a floured baking sheet or hang it on a pasta drying rack for about 15-30 minutes before cooking.
- **Storage of Fresh Pasta:** Fresh pasta is best cooked immediately for the ultimate flavor and texture. However, if you have leftovers or are preparing ahead, you can store it in a few ways. For short-term storage (1-2 days), place lightly floured pasta in an airtight container in the refrigerator. For longer storage, fresh pasta freezes beautifully. Arrange individual nests or portions of pasta on a floured baking sheet and freeze until solid. Once frozen, transfer to a freezer-safe bag or container for up to 1-2 months. Cook directly from frozen, adding an extra minute or two to the boiling time.
- **Cooking Al Dente:** Remember that fresh pasta cooks significantly faster than dried pasta. Always bring a large pot of generously salted water to a rolling boil. Add the pasta and begin tasting a strand about 1-2 minutes into cooking to ensure it’s “al dente” – tender but still with a slight, pleasant bite. Overcooked fresh pasta can quickly become mushy.
- **Keep Dough Covered:** Always keep any dough not currently being worked with tightly covered with plastic wrap. Exposure to air will dry it out, making it brittle and difficult to roll.
Homemade Pasta Serving Suggestions
If you’ve ever tasted truly homemade pasta, you know there’s simply nothing else like it. The fresh pasta sold in grocery stores, while convenient, often pales in comparison to the tender, flavorful noodles you can create in your own kitchen. While this pasta is so exquisite it could almost be enjoyed plain with just a drizzle of good olive oil and a sprinkle of freshly grated Parmesan, you can absolutely use it in any dish where you’d normally use dried pasta. The goal is to let the pasta’s incredible texture and flavor shine, complementing your chosen sauce or ingredients.
- Sun-Dried Tomato Pasta
- Creamy Mushroom Pasta
- Creamy Chicken Pasta
- Toasted Walnut Pasta
- Pasta Carbonara
- Creamy Pasta with Ricotta and Garlic Sauce
- Pasta with Garlic Breadcrumbs
- Sautéed Shrimp Pasta
Homemade Pasta
Pin Recipe
Rate Recipe
Print Recipe
Ingredients
- 10 ounces all-purpose flour or “00” flour
- 3 large eggs
- Water, as needed (1-3 teaspoons)
Instructions
-
Add your flour to a food processor and pulse a few times to get the flour nice and fine and get rid of any lumps.
-
Crack in your eggs and pulse for about 30 seconds until the mixture starts to come together in coarse crumbs.
-
Through the top of the food processor, add water, only 1 teaspoon at a time, until the mixture forms a cohesive ball around the blade. Be careful not to add too much water; the dough should be firm but slightly tacky.
-
Remove the dough from the food processor and knead for 1-2 minutes on a clean, dry, lightly floured surface, until it is nice and smooth and elastic.
-
Wrap the dough tightly in plastic wrap and let it rest at room temperature for at least 30 minutes.
-
When you are ready to make your pasta, unwrap the dough and gently flatten it. Divide the dough into 2-3 manageable pieces, keeping unused portions covered.
-
Take one piece and run it through your pasta roller at the widest setting (e.g., #1). Fold both ends of the pasta sheet into the center, then fold it in half. Pass the folded dough through the widest setting again. Repeat this folding and rolling step 2 more times (3 times total at the widest setting) to strengthen and smooth the dough.
-
Move the pasta roller to the next setting (e.g., #2), and pass the dough through without folding. Continue to progressively thin the pasta sheet by moving to the next smaller setting, passing the dough through each setting once, until you reach your desired thinness. Dust lightly with flour if needed to prevent sticking.
-
Once the pasta sheet is thin enough (you should be able to faintly see your hand through it), cut it into your desired shape using a pasta cutter attachment or a sharp knife. Lightly dust the cut pasta with flour to prevent sticking.
-
To cook, bring a large pot of generously salted water to a rolling boil. Add the fresh pasta and cook for only 2-3 minutes, or until al dente. Drain immediately and serve as desired.
Notes
Nutrition
Nutrition information is automatically calculated, so should only be used as an approximation.
Additional Info
Loved this recipe? Share your thoughts and leave a comment below!
Join Our Community! I’ve created a vibrant group on Facebook, and I’d be absolutely delighted for you to become a part of it! It’s a fantastic space where you can share YOUR favorite recipes, ask questions, connect with other food enthusiasts, and stay updated on all the new delicious content from Dinners, Dishes and Desserts (so you’ll never miss a fresh recipe!)
Be sure to follow me on Instagram and tag #dinnersdishes so I can see all the wonderful DINNERS, DISHES, AND DESSERTS recipes YOU make!
Don’t miss out on any culinary inspiration! Be sure to follow me on my social media channels for the latest recipes, tips, and culinary adventures:
Facebook | Twitter | Pinterest | Instagram
