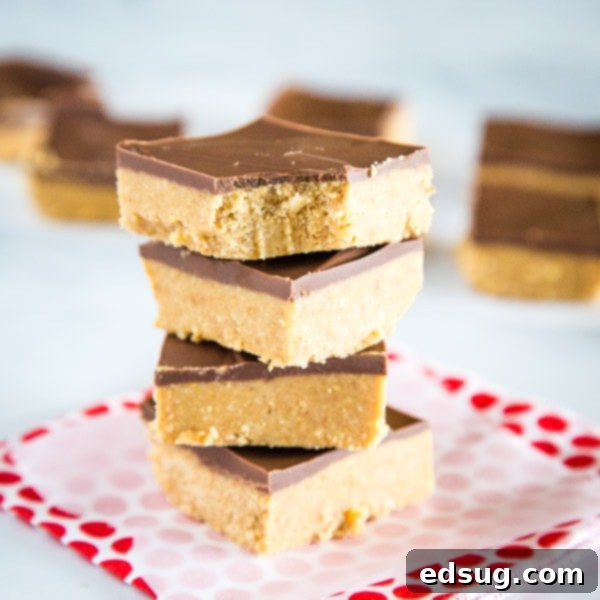
Ultimate No-Bake Peanut Butter Bars: Your Go-To Easy Chocolate & Peanut Butter Dessert
There’s an undeniable magic that happens when chocolate and peanut butter come together. It’s a flavor combination loved by millions, evoking a sense of nostalgic comfort and pure delight. Whether you’re a fan of classic Peanut Butter Chocolate Chip Cookies or simply crave that iconic sweet and salty pairing, these No-Bake Peanut Butter Bars are an absolute dream come true. Imagine indulging in a treat that tastes remarkably like homemade peanut butter cups, yet requires minimal effort and no oven time. This recipe delivers exactly that: a simple, quick, and utterly irresistible dessert perfect for any occasion.
What makes these peanut butter bars truly exceptional is their incredible simplicity. With just 5 basic ingredients and a mere 10 minutes of active prep time, you can whip up a batch of these soft, chewy, and decadently rich bars. They’re an ideal solution for busy weeknights, last-minute gatherings, or when you simply need a quick dessert fix without the fuss of baking. This recipe has been a blog favorite since its original posting in 2011, and it’s easy to see why. It’s reliable, delicious, and incredibly versatile, making it a staple in any dessert repertoire.
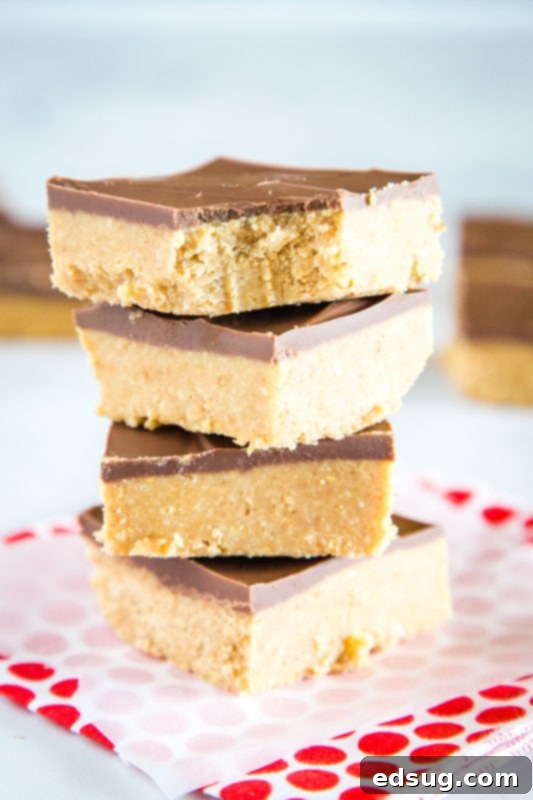
Why You’ll Love These No-Bake Peanut Butter Bars
Life can be incredibly busy, and sometimes, the thought of spending an hour baking a complicated dessert is just not feasible. That’s where no-bake recipes shine! These No-Bake Peanut Butter Bars are not just easy; they are a revelation of convenience and flavor. Here’s why they’ll quickly become your favorite:
- Effortless Preparation: No need to preheat an oven or worry about baking times. Just mix, press, and chill!
- Minimal Ingredients: You likely have most of the 5 key ingredients in your pantry right now.
- Quick to Make: The active prep time is truly just 10-15 minutes, making it perfect for last-minute cravings or entertaining.
- Crowd-Pleasing Flavor: The classic combination of rich peanut butter and smooth chocolate appeals to almost everyone.
- Kid-Friendly: It’s a fantastic recipe to get kids involved in the kitchen, as there’s no hot oven involved.
- Perfect for Any Occasion: From casual family desserts to potlucks and holiday treat platters, these bars fit right in.
This recipe was originally shared when this blog was first starting out in 2011, and while the core recipe remains as delicious as ever, it’s gotten a bit of a refresh. With its proven track record and universal appeal, it truly is a fantastic easy bar recipe to have in your culinary arsenal.
Essential Ingredients for Your No-Bake Peanut Butter Bars
Creating these heavenly bars relies on a handful of simple, readily available ingredients. While the original description lists 5 main items, remember that the chocolate topping also benefits from a touch of extra peanut butter, making it truly reminiscent of those beloved candy cups. Scroll down to the bottom of the post for the FULL PRINTABLE recipe card with exact measurements, but here’s a closer look at what you’ll need and why each component is vital:
- Unsalted Butter: For baking and no-bake treats, unsalted butter gives you control over the overall saltiness. It provides the crucial fat content that binds the base together and contributes to a rich, smooth texture. If you only have salted butter, you can use it but might consider reducing any additional salt if your recipe called for it (though this one doesn’t).
- Creamy Peanut Butter: A commercial brand of creamy peanut butter (like Jif or Skippy) is highly recommended for these bars. Its consistent texture and oil content are perfect for a smooth, stable base. While crunchy peanut butter can be used if you prefer a textural contrast, it will slightly alter the consistency of the base. Natural peanut butters (the kind that separate) are generally *not* ideal for no-bake bars as their oil tends to separate from the solids, leading to a greasy or crumbly result.
- Graham Crackers: These form the delicious, slightly sweet, and crunchy base of the bars. You can either buy pre-crushed graham cracker crumbs for ultimate convenience or easily grind your own using a food processor. Simply pulse whole graham cracker sheets until they resemble fine crumbs.
- Powdered Sugar (Confectioners’ Sugar): This fine sugar is key to achieving the smooth, melt-in-your-mouth texture of the peanut butter layer. Unlike granulated sugar, powdered sugar dissolves easily without heat, preventing a grainy texture in your no-bake dough.
- Chocolate Chips: The choice of chocolate can truly customize your bars. For that classic Reese’s peanut butter cup flavor, milk chocolate chips are perfect – they offer a sweet, creamy counterpoint to the peanut butter. However, feel free to experiment with semi-sweet chocolate chips for a richer, less sweet bar, or even dark chocolate for a more intense cocoa flavor. White chocolate chips could also create an interesting variation! You can also use chopped chocolate bars if you prefer.
- Additional Creamy Peanut Butter (for topping): A small amount of extra peanut butter is melted with the chocolate chips for the topping. This isn’t just for flavor; it helps the chocolate layer achieve a softer, more pliable consistency, preventing it from becoming too hard and prone to cracking when sliced. It also makes the chocolate taste more intensely like peanut butter, bringing the whole “peanut butter cup” vibe full circle.
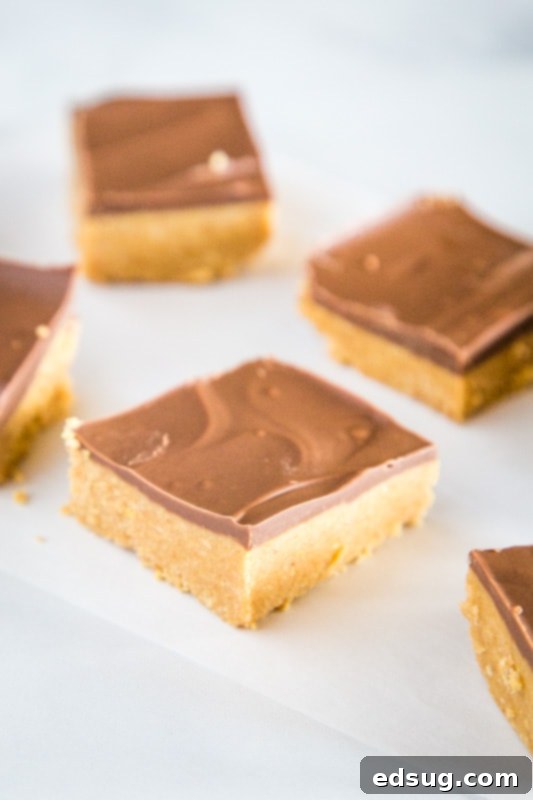
How to Make Irresistible No Bake Peanut Butter Bars
The beauty of these bars lies in their straightforward preparation. Follow these simple steps for a truly delightful dessert:
- Melt the Base Ingredients: In a microwave-safe bowl or a saucepan over low heat, combine the butter and the first cup of creamy peanut butter. Gently heat, stirring frequently, until both ingredients are fully melted and smoothly combined. You don’t want to bring it to a boil, just melt it until it’s a uniform, creamy mixture.
- Form the Peanut Butter Dough: Remove the melted butter-peanut butter mixture from the heat. Add the graham cracker crumbs and powdered sugar to the bowl. Stir vigorously until all ingredients are thoroughly combined. The mixture will be thick and resemble a dense dough. If you find it too challenging to mix by hand, a stand mixer with a paddle attachment or a hand mixer can make this step easier and ensure everything is evenly incorporated.
- Press into Pan and Chill: Prepare a 13×9 inch baking pan by lining it with parchment paper, leaving an overhang on the sides for easy removal later. This step is optional but highly recommended for clean slicing and serving. Press the peanut butter dough firmly and evenly into the prepared pan. Use the back of a spoon, a spatula, or your hands (lightly greased if it’s too sticky) to create a smooth, compact layer. Place the pan in the refrigerator while you prepare the chocolate topping; this initial chill helps the base firm up slightly.
- Prepare the Chocolate Topping: In a separate microwave-safe bowl or a small saucepan, combine the chocolate chips and the remaining 4 tablespoons of creamy peanut butter. Melt gently, either in 20-30 second intervals in the microwave (stirring after each interval) or over very low heat on the stovetop. Stir until the mixture is completely smooth and glossy. The added peanut butter helps create a silkier, more pliable chocolate layer that won’t crack as easily when you slice the bars.
- Assemble and Chill: Pour the melted chocolate topping evenly over the chilled peanut butter base. Use a spatula to gently spread it to the edges, creating a smooth, attractive top layer. Return the pan to the refrigerator for at least 1 hour, or until the chocolate topping is completely set. For best results and to prevent cracking, avoid over-chilling the bars before slicing.
Storage Tips for Your No-Bake Peanut Butter Bars
To keep your peanut butter bars fresh and perfectly structured, proper storage is key. I always recommend storing these bars in the refrigerator.
Once the chocolate topping has fully set – typically after about an hour in the fridge – carefully remove the pan. For the cleanest cuts, it’s best to slice the entire batch of bars while they are chilled but not overly frozen. A warm, sharp knife can also help achieve clean slices; simply run your knife under hot water, wipe it dry, and then make your cuts. After slicing, you have a couple of options: you can either leave the bars in the baking dish and cover it tightly with plastic wrap or aluminum foil, or transfer the individual bars to an airtight container. Stored this way, they will remain fresh and delicious in the refrigerator for up to a week.
For serving, I like to take them out of the fridge about 15-20 minutes before serving. This allows them to come to a slightly warmer temperature, which softens the peanut butter layer and chocolate topping just enough to enhance their texture and flavor, making them truly melt in your mouth.
If you wish to store them for an extended period, these bars freeze beautifully. Simply slice them, then arrange them in a single layer on a parchment-lined baking sheet and freeze until firm. Once frozen, transfer the bars to a freezer-safe airtight container or a heavy-duty freezer bag, separating layers with parchment paper to prevent sticking. They can be stored in the freezer for up to 2-3 months. Thaw them in the refrigerator overnight or at room temperature for about an hour before serving.
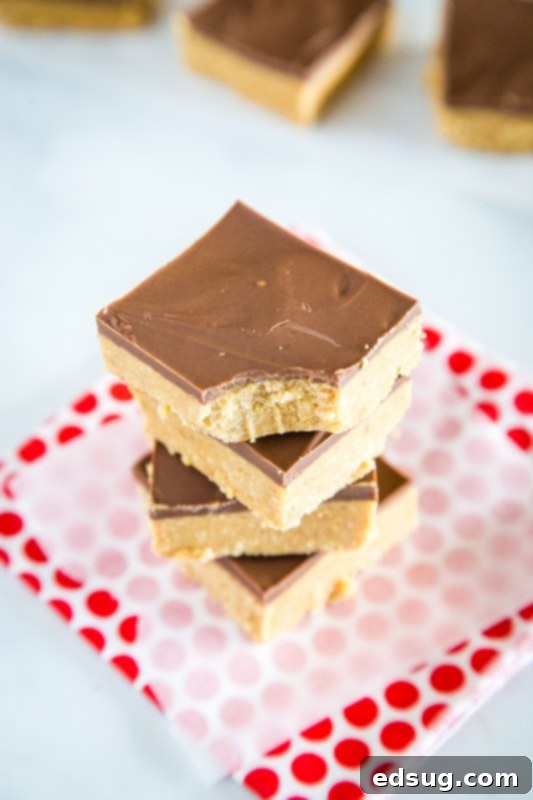
Recipe Tips & Tricks for Perfect Peanut Butter Bars
While this recipe is incredibly forgiving, a few simple tips and potential substitutions can elevate your No-Bake Peanut Butter Bars even further and ensure success every time.
- Graham Cracker Alternatives: If you’re outside the US and graham crackers aren’t readily available, don’t worry! Digestive biscuits make an excellent substitute, offering a similar texture and mild sweetness. For a different flavor profile, you could also experiment with finely crushed vanilla wafers (Nilla Wafers) or even Ritz crackers for a delightful sweet and salty crunch. The goal is to use a dry biscuit or cracker that provides structure and complements the peanut butter and chocolate flavors. Gluten-free graham crackers are also an option if you need to accommodate dietary restrictions.
- Chocolate Choices: The recipe suggests milk chocolate chips for that classic Reese’s flavor, but your chocolate topping can be customized to your taste preferences. Dark chocolate chips will yield a richer, less sweet bar, while semi-sweet provides a good balance. For a truly unique twist, white chocolate can also be used. Remember, it doesn’t have to be chips; good quality chocolate bars, finely chopped, will melt beautifully and create a wonderfully smooth topping.
- Peanut Butter Substitutions for Allergies: If you or someone you’re serving has a peanut allergy, you can easily adapt this recipe. SunButter (made from sunflower seeds) is a fantastic peanut-free alternative that behaves similarly to peanut butter in terms of consistency. If tree nuts aren’t an issue, almond butter or cashew butter can also be used, offering their unique nutty flavors. Just ensure that whichever alternative you choose is a creamy, commercial-style spread, as natural nut butters often have too much oil separation for no-bake bars.
- Melting the Base: You have flexibility here! Both a microwave and the stovetop work perfectly for melting the butter and peanut butter. If using the microwave, heat in short 20-30 second bursts, stirring well after each. For the stovetop, use low heat and stir constantly to prevent scorching. The key is to achieve a smooth, well-combined liquid, not to bring the mixture to a boil.
- Achieving Clean Slices: Slicing the bars at the right temperature is crucial to prevent the chocolate topping from cracking and separating from the base. It’s best to slice the bars as soon as the chocolate has set, which is usually about an hour after placing them in the fridge. For perfectly clean edges, run a sharp knife under hot water, wipe it dry, and then make each cut. Repeat this for every slice. This warmth helps glide through the chocolate smoothly.
- Don’t Skip the Chill Time: While the prep is quick, the chilling time is essential. It allows the peanut butter base to firm up properly and the chocolate topping to set into a solid, sliceable layer. Patience here will be rewarded with perfect bars!
- Serving Temperature: For the best texture and flavor experience, allow the bars to sit at room temperature for 15-20 minutes before serving. This slight warming makes the peanut butter layer softer and the chocolate topping less rigid, enhancing the overall sensory enjoyment.
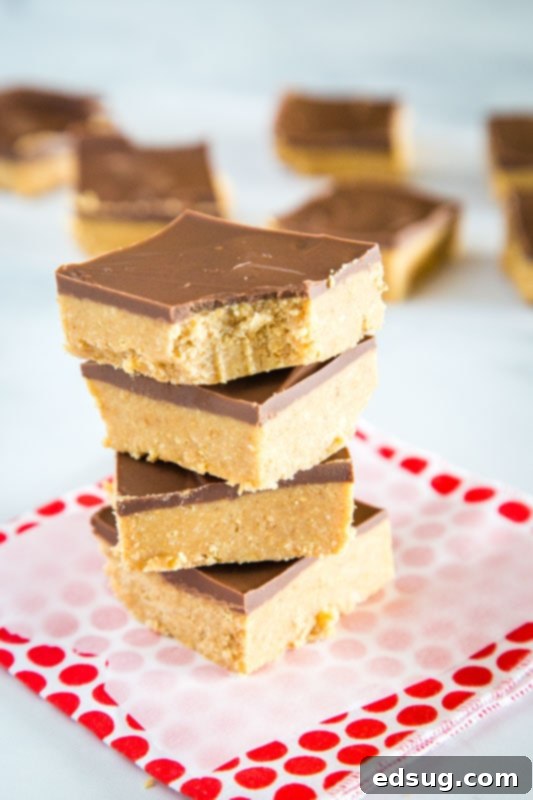
If you’re a devoted fan of the incredible combination of chocolate and peanut butter, then these no-bake bars are an absolute must-make! They are so quick to prepare, requiring only minutes of your time, and are simple enough that even younger kitchen helpers can get involved. They truly are the perfect easy dessert for any day of the week, offering maximum flavor with minimal effort.
More Delightful No-Bake Desserts to Try
If you’ve fallen in love with the ease and deliciousness of these No-Bake Peanut Butter Bars, you’re in luck! There’s a whole world of no-bake desserts waiting to be explored. These recipes are perfect for hot weather, busy schedules, or whenever you crave a sweet treat without turning on the oven. Expand your repertoire with these other fantastic no-bake creations:
- No Bake Peanut Butter Cheesecake: A creamy, dreamy delight for cheesecake lovers.
- No Bake Kool Aid Pie: A vibrant, fruity, and incredibly fun dessert for all ages.
- Strawberry Cheesecake Lasagna: Layers of deliciousness, perfect for feeding a crowd.
- No Bake Oreo Cheesecake: The ultimate treat for cookie and cream enthusiasts.
- No Bake Mint Chocolate Chip Pie: A refreshing and cool dessert with a delightful minty kick.
- No Bake Jello Pie: A light, jiggly, and wonderfully nostalgic dessert.
Peanut Butter Bars
Pin Recipe
Rate Recipe
Print Recipe
Video
Ingredients
- 1 cup unsalted butter
- 1 cup creamy peanut butter
- 2 cups graham cracker crumbs
- 2 cups powdered sugar
- 1 1/2 cups milk chocolate chips
- 4 Tablespoons creamy peanut butter
Instructions
-
Melt butter and 1 cup peanut butter together, mix until well combined.1 cup unsalted butter, 1 cup creamy peanut butter
-
Add graham cracker crumbs and powdered sugar. Mix until fully incorporated.2 cups graham cracker crumbs, 2 cups powdered sugar
-
Press into a 13×9 baking pan. Refrigerate for 15 minutes.
-
Meanwhile, Melt chocolate chips and 4 Tablespoons peanut butter together, mix until smooth.1 1/2 cups milk chocolate chips, 4 Tablespoons creamy peanut butter
-
Spread over peanut butter layer. Chill for at least 1 hour before serving.
Notes
Nutrition
Nutrition information is automatically calculated, so should only be used as an approximation.
Additional Info
Like this recipe? Leave a comment below!
I’ve created a fun group on Facebook, and I would absolutely love for you to join us! It’s a vibrant community where you can share YOUR favorite recipes, ask questions, and stay updated on all the exciting new creations at Dinners, Dishes and Desserts (so you’ll never miss a delicious new recipe)!
Make sure to follow me on Instagram and tag #dinnersdishes so I can see all the wonderful DINNERS, DISHES, AND DESSERTS recipes YOU make! Your culinary creations inspire me!
Don’t forget to follow me on my social media channels, so you never miss a post and stay connected with all the latest recipes and kitchen adventures!
Facebook | Twitter | Pinterest | Instagram
