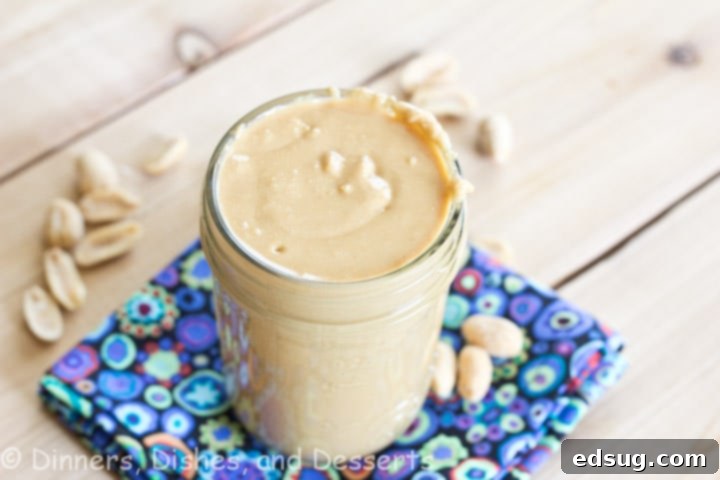
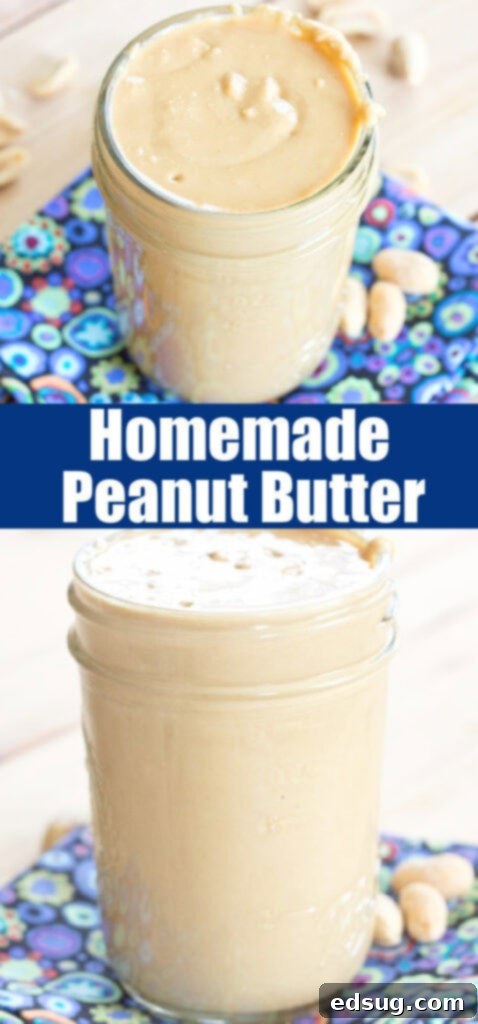
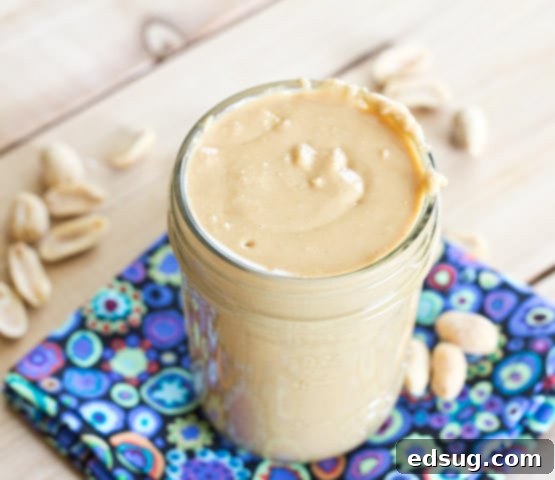
Homemade Peanut Butter: The Ultimate 5-Minute Recipe for Fresh, Creamy Goodness
Say goodbye to bland, store-bought spreads! This dreamy 5-minute homemade peanut butter recipe will revolutionize your pantry. It’s so incredibly simple to make, boasting a flavor and freshness that will have you scraping every last bit from the container and licking your fingers for more.
There’s a world of difference between freshly churned homemade peanut butter and anything you’ve ever picked up from the grocery store shelf. It’s more than just a spread; it’s an experience. The process is incredibly simple, yet the result is a culinary revelation that will profoundly change your perspective on this beloved staple. Let me tell you why.
If you’re a returning reader, you’ll know my passion for crafting homemade sauces and spreads. My pantry often overflows with delightful concoctions like Mixed Berry Jam and Homemade Nutella, which are not only family favorites but also cherished gifts for friends and loved ones. However, among all these delicious creations, the most highly anticipated and universally adored spread in my household remains homemade peanut butter.

If you’ve never had the pleasure of tasting homemade peanut butter, prepare to be astonished. You’ll quickly realize just how dull and unremarkable the commercial versions often are. Store-bought brands, while convenient, frequently contain added sugars, oils, and stabilizers that dilute the pure, rich flavor of peanuts. With this recipe, you’re in control, and doing better is not just easy – it’s a revelation!
The best part? This incredible transformation takes barely any time at all. In fact, you can go from whole roasted peanuts to a delectable, spreadable butter in as little as 5 minutes. Ready to discover the magic? Let me walk you through the simple steps.
Why You’ll Fall in Love with Homemade Peanut Butter
Beyond its vastly superior flavor, there are countless compelling reasons to embrace the world of homemade peanut butter. Here are some of my top favorites, highlighting the incredible benefits and versatility this simple recipe offers:
- Effortlessly Simple: Is it difficult to make? Absolutely not! This recipe is so straightforward that even my 7-year-old son can confidently whip up a batch in about 5 minutes. You’ll truly wonder why you haven’t been making your own all along, skipping the unnecessary additives and expense of store-bought jars. It’s a foundational recipe that empowers you to create something truly delicious with minimal fuss.
- Tailored to Your Taste: Whether your heart desires a silken, creamy spread or a satisfyingly crunchy texture, this peanut butter is incredibly adaptable. Starting with my basic recipe, you’ll find experimentation a breeze. Want it sweeter? Add more honey. Prefer a hint of spice? A dash of cinnamon works wonders. The power to customize is entirely in your hands.
- The Perfect Heartfelt Gift: This homemade spread makes an extraordinary gift, especially when you’re short on time or working with a modest budget. Simply spoon your freshly made peanut butter into a charming mason jar, tie it with a beautiful ribbon, and attach a personalized card. Voilà! You’ve created a thoughtful, delicious, and deeply appreciated present that shows you care. It’s perfect for holidays, hostess gifts, or just a sweet gesture.
- Endless Culinary Possibilities: There’s always a reason for peanut butter! Enjoy it straight from the spoon for a quick energy boost, spread generously on apple slices or pretzels for a healthy snack, or elevate your breakfast toast to gourmet status. This versatile spread also shines in baking recipes, smoothies, savory dishes, and so much more. It’s a pantry essential that opens up a world of delicious potential.
- Control Over Ingredients: Making your own peanut butter means you dictate what goes into it. No unwanted sugars, unhealthy hydrogenated oils, or mysterious preservatives. You get pure peanut goodness, sweetened and salted exactly to your preference, ensuring a healthier and more natural product for you and your family.
- Incredible Freshness: The moment you taste homemade peanut butter, you’ll notice an unparalleled freshness. The vibrant, nutty aroma and rich flavor simply can’t be matched by products that have sat on a shelf for months. It’s truly a gourmet experience from your own kitchen.
Essential Ingredients and Equipment for Homemade Peanut Butter
Before you dive into the delightful process, let’s gather what you’ll need. Be sure to scroll to the bottom of the post for the FULL PRINTABLE recipe card with exact measurements.
- Food Processor: While technically some powerful blenders can handle this task, a good food processor is your best friend for making peanut butter. It generally makes the process much easier, more consistent, and allows you to create larger batches without overworking the machine. The wider base and S-blade are ideal for continuously circulating the peanuts, transforming them from dry nuts into a smooth, creamy butter.
- Roasted Peanuts: The foundation of our delicious spread! Any high-quality dry roasted peanuts will work beautifully. I often opt for the jumbo containers found at stores like Costco for convenience and value. For those looking to elevate their peanut butter to an even more gourmet level, Spanish Peanuts are highly recommended. These smaller, rounder peanuts have a naturally higher oil content, which contributes to an incredibly smooth and luxurious peanut butter texture. Ensure your peanuts are *dry roasted* and not raw, as roasting brings out their deep, nutty flavor. You can choose salted or unsalted based on your preference, but remember this choice will impact your salt addition later.
- Honey (Optional Sweetener): Honey is my personal favorite natural sweetener for this recipe, lending a subtle sweetness and lovely aroma. However, you have several options! Date syrup offers a rich, caramel-like sweetness, while maple syrup or agave nectar can also be used. If you prefer your peanut butter unsweetened and completely natural, simply omit any sweetener entirely. This flexibility allows you to cater to dietary needs or taste preferences.
- Salt: A pinch of salt is crucial for amplifying the natural nuttiness and balancing the flavors in your peanut butter. It truly brings out the best in the peanuts. However, and this is a critical point, *omit* the salt if you are starting with already salted peanuts. You can always add a small amount more to taste after processing, but it’s nearly impossible to correct overly salty peanut butter once it’s made. Start with unsalted peanuts for the most control over sodium levels, adding fine sea salt or kosher salt as desired.
- Peanut Oil (Optional for Smoothness): Adding a small amount of peanut oil helps to achieve an extra-smooth, pourable consistency, especially if you prefer a very creamy spread. It aids in the emulsification process and prevents the peanut butter from becoming too thick or stiff. However, it is completely optional! If you desire a thicker, more natural-style peanut butter, feel free to skip the added oil. The natural oils from the peanuts themselves are often sufficient. If you don’t have peanut oil, a neutral-flavored oil like grapeseed or sunflower oil can be a substitute, but peanut oil enhances the peanut flavor most effectively.
- Optional Flavor Enhancers: Consider having on hand ingredients like cinnamon, vanilla extract, a touch of cocoa powder, or even some dark chocolate chips if you plan on experimenting with flavored peanut butter.
Your Simple Guide to Making Homemade Peanut Butter
Creating your own peanut butter is surprisingly quick and satisfying. Follow these steps for perfect results every time:
1. The Initial Blend: Add all of your dry roasted peanuts, along with your chosen sweetener (honey, if using), and salt (if using unsalted peanuts) to the bowl of your food processor. Secure the lid and let the processor run for about a minute. At this stage, the peanuts will break down into a coarse, crumbly meal. Pause the machine, open the lid, and use a spatula to scrape down the sides of the processor cup. This ensures that all the peanut pieces are incorporated, leading to an evenly blended and consistent spread. Close the lid and continue processing.
PRO TIP for Chunky Peanut Butter: If you’re a fan of chunky peanut butter, now’s the time for a quick modification! Reserve approximately ⅓ cup of your roasted peanuts. Add these whole or coarsely chopped peanuts back into the food processor during the *last 15 to 30 seconds* of the final blending stage. This short processing time will incorporate them into the smooth butter while retaining their satisfying crunch.
2. Drizzle in the Oil (Optional for Smoothness): As the food processor continues to run, slowly and gradually drizzle in the peanut oil through the feed tube. The key here is *slowly*. Drizzling the oil gradually allows it to properly emulsify and incorporate into the peanut butter, preventing separation and ensuring a beautifully smooth consistency. Let the processor run for another 2-3 minutes, or until the spread reaches your desired level of creaminess and is perfectly smooth. During this stage, you’ll observe the mixture transform from a thick paste to a more fluid, luxurious butter as the natural oils are released and the added oil is integrated. If you prefer a thicker, more rustic peanut butter, you can completely skip the added oil.
PRO TIP for Flavor Additions: If you plan on adding any additional flavorings such as cinnamon, vanilla extract, cocoa powder, or melted chocolate, it’s best to mix them in by hand *after* your peanut butter has been processed to your desired smoothness. This prevents the delicate flavors from being over-processed and allows for better control over their distribution.
3. Store and Enjoy: Once your peanut butter has reached its perfect texture, carefully transfer it to an airtight container. At first, it will appear quite liquid-y and warm due to the friction and heat generated by the food processor. Don’t worry, this is completely normal! Once you move it into the refrigerator, expect the mixture to firm up considerably, transforming into a perfectly scoopable and easily spreadable consistency within a few hours. Your delicious homemade peanut butter is now ready to be enjoyed!
Expert Tips for Your Best Homemade Peanut Butter
Mastering homemade peanut butter is easy, but a few expert tips can elevate your spread from good to absolutely fantastic. Keep these in mind as you embark on your peanut butter journey:
- Flavorful Additions: Unleash your creativity by infusing your peanut butter with exciting flavors! After the main processing, try stirring in ½ teaspoon of ground cinnamon for a warm, comforting twist, or add ½ teaspoon of pure vanilla bean extract for an aromatic sweetness. For a decadent treat, drizzle in a bit of melted dark chocolate or mix in a tablespoon of cocoa powder for a rich chocolate peanut butter. Other ideas include a pinch of cayenne for a spicy kick, a swirl of maple syrup, or even a touch of shredded coconut.
- Choose Your Peanuts Wisely: While any dry roasted peanuts will yield delicious results, remember that Spanish peanuts, with their higher oil content, are often considered the gold standard for achieving the creamiest homemade peanut butter. If you can find them, give them a try! Otherwise, ensure your chosen peanuts are indeed dry roasted, as raw peanuts won’t develop the same deep, rich flavor and may require more processing time.
- Mind Your Salt: Always taste your peanuts before adding any additional salt. If you’ve started with pre-salted peanuts, you will likely not need to add any more. If using unsalted peanuts, start with a small amount (like ½ teaspoon) and add more in tiny increments, tasting as you go, until you reach your perfect savory balance. It’s always easier to add more salt than to fix overly salted butter.
- Airtight Storage is Key: To maintain maximum freshness and prevent spoilage, always store your homemade peanut butter in an airtight container. Mason jars with tight-fitting lids or quality food storage containers work wonderfully. Proper storage will significantly extend its shelf life.
- Embrace Natural Separation: Unlike commercial peanut butter which often contains emulsifiers to prevent separation, homemade versions are all-natural. Therefore, oil separation is a perfectly natural phenomenon. If you notice the oils rising to the top of your spread, simply give it a good stir with a spoon or knife before each use. This redistributes the oils and restores the creamy consistency.
- Temperature Matters: The consistency of your homemade peanut butter will vary with temperature. It will be softer and more liquid at room temperature (especially right after processing) and firm up considerably when refrigerated. If you prefer a very thick spread, chilling it is essential. If you like it softer, let it sit out for a few minutes before serving.
- Troubleshooting Consistency:
- **Too Thick?** If your peanut butter is too thick after chilling, simply add another ½ to 1 tablespoon of peanut oil (or a neutral oil) and process it again for 30-60 seconds until smooth.
- **Too Thin?** If it’s too thin (unlikely with this recipe), try adding a handful of additional peanuts and processing until incorporated. Chilling it will also help it firm up.
- **Not Blending?** Ensure you’re scraping down the sides frequently, especially in the initial stages. Sometimes a larger batch or a more powerful food processor helps. Be patient, as the peanuts go through stages: crumbs, paste, then finally smooth butter.
Frequently Asked Questions About Homemade Peanut Butter
To ensure your homemade peanut butter remains fresh and delicious for as long as possible, it is crucial to store it in an airtight container. Glass mason jars with their secure lids are an excellent choice, as are high-quality plastic food storage containers (like Tupperware) with well-fitting seals. The goal is to minimize air exposure, which can lead to oxidation and a quicker decline in quality and flavor. Always ensure the container is clean and dry before adding your peanut butter.
While you are not strictly required to keep homemade peanut butter in your fridge, doing so will significantly extend its shelf life and maintain its freshness. Refrigeration slows down the natural oxidation process of the oils in the peanuts, which can cause the butter to go rancid. It is also possible to store it in a cool, dark place, such as a pantry, as long as it is in a truly airtight container. However, if you notice the natural oils beginning to separate consistently, or if you live in a particularly warm or humid environment, it’s a strong indicator that you should transfer your peanut butter to the refrigerator to prevent it from spoiling prematurely. For optimal freshness and to be safe, the fridge is always the best bet.
Regardless of where you choose to store your homemade peanut butter, always use an airtight container to preserve its quality. When stored in the refrigerator, homemade peanut butter can last reliably for between 3 and 4 months, although it’s often so delicious it gets finished much sooner! If you opt to keep it in a cool, dark pantry, your spread should maintain its quality for approximately 1 month. Always use your senses: if it smells off, or tastes anything other than fresh and nutty, it’s best to discard it.

Creative Ways to Enjoy Your Homemade Peanut Butter
The culinary versatility of peanut butter is truly astounding, and your fresh, homemade version deserves to be showcased in myriad delicious ways. Here are just a few of my favorite ideas to inspire you:
- Mixed Berry Jam: The classic pairing! If you take the extra step to make both your peanut butter and your jam from scratch, you will undoubtedly elevate your humble PB&J sandwich to extraordinary new heights. It’s a match made in culinary heaven.
- Thai Peanut Noodles: For those craving savory sensations, this vibrant and fresh Asian noodle dish is an absolute crowd-pleaser. The rich, nutty flavor of homemade peanut butter forms the perfect base for a delectable, creamy, and slightly spicy sauce that coats every strand of noodle.
- Chocolate Peanut Butter Smoothie: When your morning sweet tooth calls but you want to keep things wholesome and healthy, reach for this protein-packed smoothie. The combination of rich chocolate and creamy peanut butter provides a delicious and satisfying breakfast or snack that will keep you fueled and full for hours.
- Chocolate Protein Balls: A wonderfully quick, nutritious, and convenient snack that you can simply grab and enjoy, knowing you’re nourishing your body with something genuinely good. Homemade peanut butter binds these delightful bites together and adds a boost of flavor and protein.
- Peanut Butter Protein Bars: Ditch the store-bought versions and create your own wholesome, energy-boosting bars at home. These homemade protein bars, inspired by popular commercial “Perfect Bars,” are ideal for a quick breakfast on the go, a post-workout refuel, or a satisfying snack anytime.
- Peanut Butter Banana Bread: Imagine the intoxicating aroma filling your home as this delightful bread bakes! Whether you prefer smooth or chunky, homemade peanut butter works perfectly in this recipe, adding incredible moistness and an irresistible nutty depth to a classic comfort food. My mouth’s watering just thinking about it.
- Fruit & Veggie Dipper: Pair it with crisp apple slices, celery sticks, banana coins, or pear wedges for a wholesome and satisfying snack.
- Oatmeal & Yogurt Topping: Swirl a spoonful into your morning oatmeal or a bowl of Greek yogurt for added protein, healthy fats, and flavor.
- Salad Dressings: Whisk it into savory salad dressings for a creamy, nutty base, especially for Asian-inspired salads.
- Toast & Bagels: A classic for a reason! Spread generously on warm toast, English muffins, or bagels for a simple yet satisfying breakfast.
- Energy Bites & Granola: Use it as a binder for homemade energy bites, granola bars, or even a crunchy granola topping.

Homemade Peanut Butter
Pin Recipe
Rate Recipe
Print Recipe
Ingredients
- 15 oz roasted peanuts
- 3 Tablespoons honey, optional
- 1 1/2 Tablespoons peanut oil, optional
- 1 teaspoon salt, omit if peanuts have salt on them
Instructions
-
Add the roasted peanuts, honey (if desired), and salt (if using unsalted peanuts) into your food processor. Ensure the lid is securely fastened.
-
Turn on the food processor and let it run for approximately 1 minute. The peanuts will initially break down into a coarse meal. Pause the machine and thoroughly scrape down the sides of the bowl to ensure all peanut pieces are incorporated.
-
Turn the processor back on. If you’re adding peanut oil for a smoother consistency, drizzle it in slowly through the feed tube while the machine is running. Continue processing for another 2-3 minutes, or until the mixture transforms into a perfectly smooth and creamy peanut butter. (For chunky peanut butter, add reserved peanuts during the last 15-30 seconds of this step).
-
Transfer your freshly made peanut butter into a clean, airtight container. Store it in the refrigerator for optimal freshness, where it will firm up and become easily spreadable. It can last for up to 3-4 months when refrigerated.
Notes
You can omit the added peanut oil entirely if you prefer a thicker, more rustic peanut butter. The natural oils from the peanuts will still create a spreadable consistency.
If you prefer your peanut butter unsweetened and completely natural, simply omit the honey (or any other sweetener) from the recipe.
Nutrition
Nutrition information is automatically calculated and should be used as an approximation. Actual values may vary based on ingredients and preparation.
Additional Recipe Information
Love this recipe as much as we do? Don’t forget to leave a comment and rate it below!Your feedback helps us share delicious recipes with more home cooks.
Join Our Community! I’ve created a fantastic and fun group on Facebook, and I would absolutely love for you to join us! It’s a vibrant space where you can share YOUR favorite recipes, ask questions, get cooking tips, and stay updated on all the exciting new creations at Dinners, Dishes and Desserts, ensuring you never miss a new recipe or culinary inspiration!
Be sure to follow me on Instagram and tag #dinnersdishes so I can see all the wonderful DINNERS, DISHES, AND DESSERTS recipes YOU make! I love seeing your creations!
Stay connected and never miss a delicious update! Be sure to follow me on my social media channels:
Facebook | Twitter | Pinterest | Instagram
