Homemade No-Bake Granola Bars: Your Go-To Recipe for Healthy, Easy Snacks
Discover how to make quick, easy, and incredibly delicious homemade granola bars that are far superior to anything you’ll find in stores. Perfect for a healthy snack or a lunchbox treat!

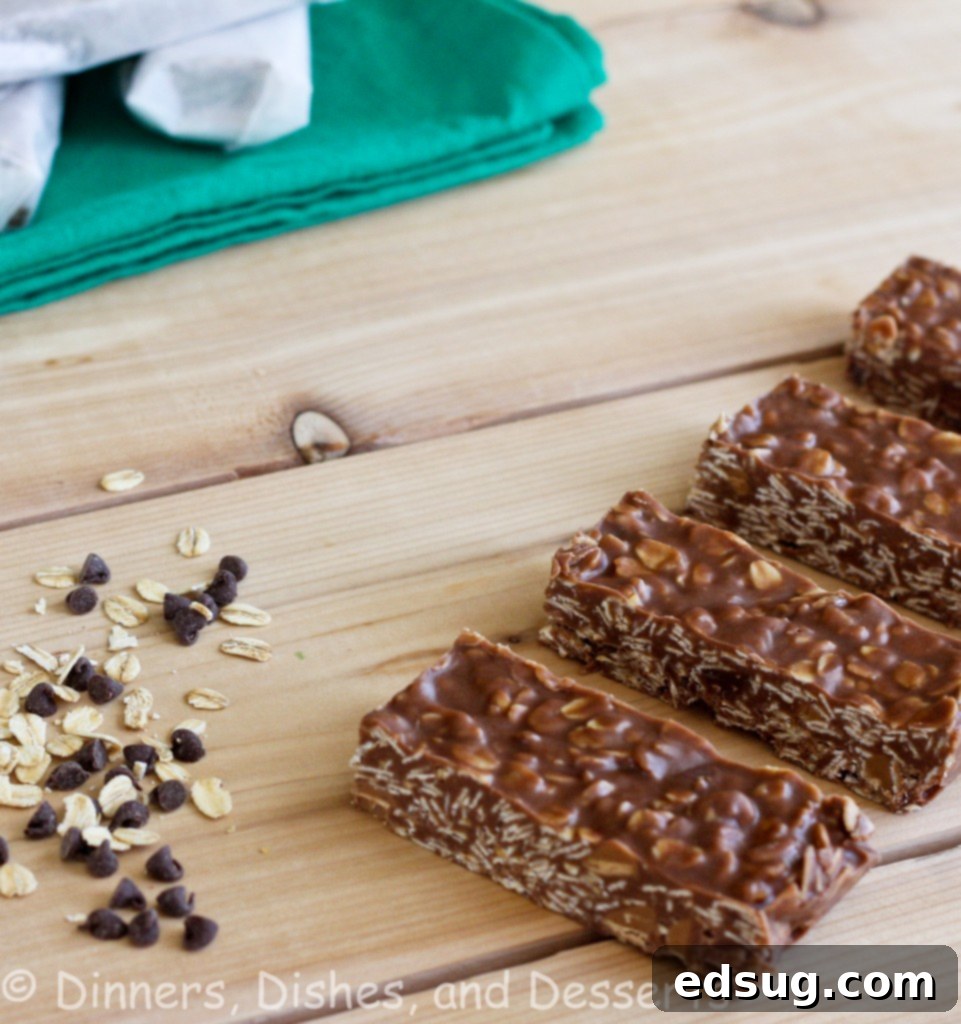
As a parent, the quest for healthy, convenient snacks for school lunches and busy afternoons is a never-ending mission. My 6-year-old, like many kids, would happily subsist on crackers if given the chance. Store-bought granola bars are often a hit-or-miss affair – sometimes they’re devoured, other times they return home untouched, often loaded with ingredients I’d rather avoid. This common parental dilemma led me on a personal quest: to create a wholesome, homemade granola bar that he would not only eat but actively *love*. And I’m thrilled to say, mission accomplished! These no-bake granola bars are a game-changer.
This recipe has quickly become an absolute staple in our household. In fact, my son has even requested these homemade granola bars as the “dessert” in his lunchbox – a true testament to their deliciousness! If you follow me on Facebook, you might remember me raving about these recently. Be warned: they are incredibly addicting. It’s tough to keep your hands off them once they’re made, which almost defeats the purpose of a healthier snack if you end up eating twice as much! But seriously, these quick and easy granola bars will revolutionize your snack routine.

Why Homemade Granola Bars Are Always the Best Choice
Opting for homemade granola bars over their store-bought counterparts offers a significant advantage, particularly for those focused on health and nutrition. Here’s why making your own is a decision you won’t regret:
- Full Control Over Ingredients: This is arguably the biggest benefit. When you craft your own healthy granola bars, you dictate what goes into them. You can easily avoid artificial flavors, high-fructose corn syrup, unnecessary preservatives, and excessive refined sugars that often lurk in commercial brands. This empowers you to choose wholesome, natural ingredients for a truly nutritious snack.
- Significant Cost Savings: The price of pre-packaged “healthy” granola bars can quickly add up. Making a batch at home is far more economical, especially since staple ingredients like oats, peanut butter, and honey are relatively inexpensive when bought in larger quantities.
- Tailored to Dietary Needs and Preferences: Homemade allows for unparalleled customization. Whether you need gluten-free granola bars (by using certified gluten-free oats), nut-free options (by substituting with sunflower seed butter), or wish to reduce sugar content, you have the flexibility to adapt the recipe. This is perfect for managing allergies or accommodating specific diets.
- Unbeatable Freshness and Flavor: There’s simply no comparison to the taste and texture of a freshly made granola bar. They’re chewier, more flavorful, and you can genuinely savor the individual ingredients. The delightful aroma wafting from a batch chilling in your refrigerator is an added bonus!
- Environmentally Friendly: By making your own snacks, you contribute to reducing packaging waste associated with individually wrapped store-bought items, making it a more sustainable choice for your household and the planet.
The Star Ingredient: Coconut Oil, a Game-Changer for No-Bake Goodness
A few years ago, Tropical Traditions sent me a generous jar of coconut oil to experiment with, and it truly transformed my approach to creating these delicious treats. That stuff is absolutely amazing! I had used coconut oil before, but the natural aroma alone is simply wonderful. It imparts a delicate hint of coconut to whatever you’re making, which is especially delightful during colder months when everyone is yearning for a taste of warmer, tropical climates.
For this specific homemade granola bar recipe, I made a conscious decision to use coconut oil instead of traditional butter, and it was one of the best culinary choices I’ve ever made for this particular dish! (Okay, maybe not *ever* in life, but you get the idea – it really elevates these bars to a new level!) Coconut oil not only acts as an excellent binder for these no-bake bars, helping them set beautifully and maintain their shape, but its healthy fats contribute to a satisfying texture and a subtle richness that butter simply can’t replicate here. It melts wonderfully, blending seamlessly with the peanut butter and honey to create the perfect sticky, flavorful base. Seriously, pick up a jar today and prepare to be amazed by the results in your own kitchen!
Essential Ingredients for Your Wholesome Granola Bars
This recipe relies on a handful of simple, wholesome ingredients that come together effortlessly to create a satisfying and delicious snack. Each component plays a vital role in achieving the perfect texture and flavor:
- 1/3 cup Coconut Oil: As previously highlighted, this is our primary fat source and a fantastic binder crucial for the no-bake aspect of these easy granola bars. It contributes significantly to both flavor and the desired chewy texture.
- 1/2 cup Peanut Butter: The backbone of these bars, providing a rich, nutty flavor, a good source of protein, and essential stickiness to hold everything together. For the best results and a healthier profile, I highly recommend using natural, creamy peanut butter without added sugars or hydrogenated oils. However, any smooth peanut butter will work if that’s what you have on hand.
- 1/3 cup Honey: Our natural sweetener that also plays a vital role in binding all the dry ingredients together, giving the bars their characteristic chewiness and a lovely golden hue. For a vegan alternative, pure maple syrup can be substituted effectively, offering a slightly different but equally delicious flavor.
- 1 1/2 cup Old-Fashioned Oats: These are the main bulk of our granola bars and provide essential fiber and complex carbohydrates for sustained energy. Old-fashioned (rolled) oats are specifically preferred over instant or quick oats because they provide a much better, chewier texture and don’t become mushy when mixed with the wet ingredients.
- 1/3 cup Semi-Sweet Chocolate Chips: The delightful “treat” element that makes these bars irresistible! Feel free to adjust the amount based on your personal preference or even omit them if you’re aiming for a completely sugar-free snack. I’ve found that even cutting back a bit on the chocolate doesn’t diminish their overall appeal.
Video Tutorial: See How Easy They Are to Make!
Sometimes, seeing is believing. To truly grasp how incredibly simple these homemade granola bars are to prepare, I’ve put together a quick video. Watch below to see each step in action, from melting the binders to pressing the mixture into the pan. You’ll be amazed at how quickly these come together – no oven required!
Granola Bars Recipe

Granola Bars
Pin Recipe
Rate Recipe
Print Recipe
Ingredients
- 1/3 cup coconut oil
- 1/2 cup peanut butter
- 1/3 cup honey
- 1 1/2 cup old-fashioned oats
- 1/3 cup semi-sweet chocolate chips
Instructions
-
In a small sauce pan, gently heat the coconut oil, peanut butter, and honey over medium-low heat. Stir frequently until the mixture is melted and completely smooth. Be careful not to boil it.
-
Remove the pan from the heat. Add the old-fashioned oats and semi-sweet chocolate chips to the warm mixture. Stir thoroughly until all the ingredients are well combined and the chocolate chips are mostly melted and distributed throughout the mixture.
-
Prepare an 8×8 inch baking pan by lining it with parchment paper, ensuring there’s an overhang on the sides for easy removal. Press the granola bar mixture firmly and evenly into the prepared pan. Use the back of a spoon or a flat spatula to really compact the mixture, which is key for bars that hold their shape.
-
Transfer the pan to the refrigerator and chill for at least 1-2 hours, or until the granola bar mixture is completely set and firm.
-
Once firm, use the parchment paper overhang to lift the entire slab of granola from the pan. Place it on a cutting board and cut it into 12 equal squares or rectangles using a sharp knife. Store the finished granola bars in an airtight container in the fridge to maintain their freshness and texture.
Notes
Nutrition
Nutrition information is automatically calculated, so should only be used as an approximation.
Additional Info
Like this recipe? Leave a comment below!
Tips for Perfect Homemade Granola Bars
Achieving perfectly firm, chewy, and delicious no-bake granola bars is simple with these key tips:
- Don’t Overheat the Binders: When melting the coconut oil, peanut butter, and honey, use medium-low heat and stir constantly. The goal is to gently warm and combine them until smooth, not to bring them to a boil. Overheating can affect the texture of the finished bars and may scorch the honey.
- Press, Press, Press Firmly: This is arguably the most crucial step for ensuring your no-bake bars hold their shape and don’t crumble. After mixing in the oats and chocolate chips, transfer the mixture to your lined 8×8 pan. Use the back of a sturdy spoon, a flat spatula, or even another piece of parchment paper to press the mixture down *very firmly* and evenly into the pan. This compression helps the ingredients bind together tightly.
- Chill Thoroughly: Patience is a virtue here! Ensure the bars are completely chilled and set in the refrigerator before you attempt to cut them. This usually takes at least 1-2 hours, but a longer chilling time (e.g., 3-4 hours or overnight) will result in even firmer and cleaner cuts. A well-chilled bar will slice effortlessly.
- Use Parchment Paper for Easy Removal: Lining your pan with parchment paper (making sure to leave some overhang on the sides) is a lifesaver. Once the bars are set, you can simply lift the entire slab out of the pan, making cutting and cleanup a breeze.
- Achieve Clean Cuts: For neat, professional-looking squares, use a sharp, non-serrated knife. If your knife starts to get sticky, you can warm it slightly under hot water and wipe it clean between cuts. This trick is especially helpful if your chocolate chips are quite firm.
Endless Customization: Make Your Granola Bars Uniquely Yours!
While the basic recipe for these no-bake granola bars is fantastic on its own, one of the greatest joys of making homemade snacks is the ability to customize them. Feel free to experiment with these delicious and nutritious additions to create a bar that’s perfectly suited to your taste and dietary needs:
- Dried Fruits: Stir in 1/4 to 1/2 cup of your favorite dried fruits. Classic choices like plump raisins, tart dried cranberries, or finely chopped apricots add natural sweetness and a lovely chewiness. You could also try dried cherries, blueberries, or even finely diced dates for extra texture and flavor.
- Nuts and Seeds: Boost the protein, healthy fats, and crunch factor by adding 1/4 to 1/2 cup of chopped nuts like almonds, walnuts, pecans, or cashews. For seed options, chia seeds, flax seeds (ground for better nutrient absorption), sunflower seeds, or pumpkin seeds are excellent choices, providing an extra nutritional punch and satisfying crunch.
- Different Chocolates: If semi-sweet isn’t your preference, don’t hesitate to swap them out! Dark chocolate chips offer a more intense, less sweet flavor, while milk chocolate chips provide extra sweetness. White chocolate chips can add a different visual and flavor dynamic. Mini chocolate chips are great as they distribute more evenly throughout the bars.
- Shredded Coconut: To enhance the subtle tropical notes already present from the coconut oil, try adding 1/4 cup of unsweetened shredded coconut to the mixture. Lightly toasting the coconut beforehand can bring out an even deeper, nuttier flavor.
- Spices and Extracts: A pinch of warm spices like cinnamon, nutmeg, or even a dash of cardamom can truly elevate the flavor profile of your granola bars. A splash of vanilla extract (added with the wet ingredients) is almost always a good idea to round out the flavors. Almond extract can also be a delightful addition if you’re using almond butter.
- Added Crunch: For a lighter, crispier texture, consider folding in about 1/2 cup of rice krispies or another type of puffed cereal along with the oats. This adds an interesting textural contrast.
- Protein Boost: For an extra protein kick, you can stir in 1-2 tablespoons of your favorite protein powder. You might need to adjust the wet ingredients slightly to maintain the right consistency.
The beauty of this recipe lies in its incredible flexibility. Don’t be afraid to mix and match your favorite flavors, textures, and nutritional boosts to create your own signature granola bar – the possibilities are truly endless!
Storing Your Homemade Granola Bars
Once your delicious homemade granola bars are cut into squares, proper storage is essential to maintain their firm texture and extend their freshness. They should be stored in an airtight container in the refrigerator. This keeps the coconut oil firm and prevents the bars from becoming too soft or sticky at room temperature. They will typically last for up to 1-2 weeks in the fridge, making them perfect for meal prepping a week’s worth of healthy snacks. For longer storage, you can individually wrap them in plastic wrap or parchment paper and then place them in a freezer-safe bag or container. They can be frozen for up to 3 months. When you’re ready to enjoy a frozen bar, simply thaw it at room temperature for a quick, convenient snack on the go!

More Delicious Snack Recipes to Try
If you’ve fallen in love with how easy and delicious these homemade granola bars are, you’ll surely enjoy exploring other quick and healthy snack recipes. Here are some favorites from my kitchen that you might like:
We hope you enjoy the simple process of making these delightful treats. Rest assured that you’re providing a healthier, more delicious, and incredibly convenient snack option for yourself, your family, and anyone who appreciates a wholesome bite. Don’t forget to rate the recipe and share your favorite customizations in the comments below! Happy snacking!
