Refreshing Key Lime Icebox Cake: Your Ultimate No-Bake Summer Dessert
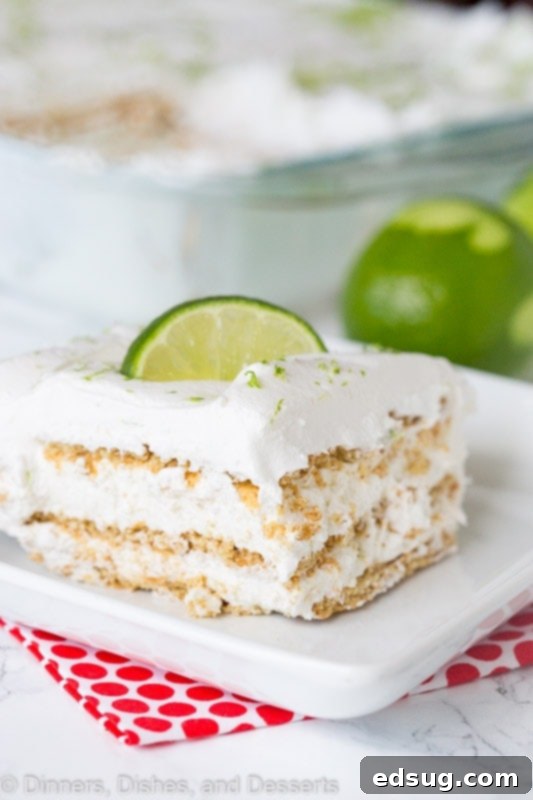
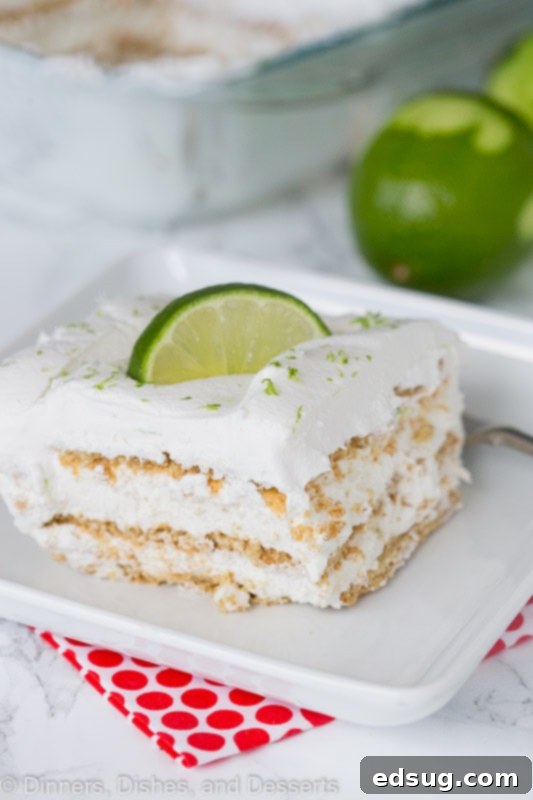
Welcome to the world of effortless desserts, where the refreshing zest of key lime pie meets the convenience of a no-bake cake. This Key Lime Icebox Cake is a true summer savior, offering layers of creamy, tangy filling nestled between crisp graham crackers that magically transform into a soft, cake-like texture as it chills. Simple to assemble and utterly delicious, it’s the perfect cool treat that everyone will adore, without ever needing to turn on your oven.
Say goodbye to hot kitchens and complicated baking schedules. This simple yet spectacular recipe brings all the classic, vibrant flavors of key lime pie into a fuss-free, no-bake cake form, making it an ideal choice for any warm-weather occasion. Imagine the bright, citrusy notes paired with a rich, velvety cream cheese filling, all melding together with tender graham cracker layers to create a dessert that is both light and incredibly satisfying. It’s the quintessential treat for those lazy summer afternoons or lively backyard barbecues.

The beauty of this Key Lime Icebox Cake lies in its simplicity and the remarkable transformation it undergoes in your refrigerator. As it chills, the graham crackers absorb moisture from the luscious key lime and cream cheese filling, softening to create a delightful, almost cake-like consistency. This foolproof dessert requires minimal effort but delivers maximum flavor, ensuring your kitchen stays cool even on the most sweltering summer days.
Whether you’re hosting a festive barbecue, searching for a refreshing dessert after a day by the pool, or simply craving something sweet and satisfying without the typical baking hassle, this key lime icebox cake is your perfect culinary companion. It’s a crowd-pleaser that appeals to all palates, offering a delightful balance of sweet and tart flavors in every bite. And if you’re keen to explore more no-bake wonders to add to your repertoire, don’t forget to check out my Boston Cream Pie Icebox Cake or a heavenly No-Bake Oreo Cheesecake. Both are fantastic additions for any summer gathering!
Why You’ll Adore This Key Lime Icebox Cake
- Effortless No-Bake Convenience: One of the greatest joys of this Key Lime Icebox Cake is its ability to deliver an exquisite dessert without ever requiring you to switch on the oven. This means escaping the summer heat and enjoying a cool, refreshing treat with minimal effort. The preparation involves simple mixing, layering, and chilling, making it incredibly straightforward and perfect for relaxed summer days or impromptu gatherings where time is of the essence. No complex techniques or fancy equipment needed – just pure, simple dessert magic.
- Versatile Dessert Option for Any Occasion: This Key Lime Icebox Cake is far more than just an after-dinner treat. Its light and vibrant flavor profile makes it an incredibly versatile dessert that shines in various settings. Serve it as a dazzling centerpiece for a festive brunch, a delightful addition to a picnic spread, or a refreshing conclusion to any potluck or family get-together. Its appealing appearance and universally loved taste ensure it will be a hit wherever it’s served.
- Perfect Make-Ahead Dessert for Stress-Free Entertaining: Imagine being able to prepare your dessert well in advance, leaving you free to enjoy your event without any last-minute stress. This Key Lime Icebox Cake is precisely that kind of dessert. As it chills in the refrigerator, not only does it firm up beautifully, but its flavors also deepen and meld together, resulting in an even more delicious and harmonious taste. This make-ahead capability ensures seamless entertaining, allowing you to relax and savor every moment with your guests.
Essential Ingredients for Your Key Lime Icebox Cake
Before you begin, make sure to scroll to the bottom of the post for the FULL PRINTABLE recipe card with exact measurements.
- Cream Cheese: The base of our rich and creamy filling. Ensure it’s softened to room temperature for a lump-free, smooth mixture. It provides a delightful tang that perfectly complements the key lime.
- Powdered Sugar: Also known as confectioners’ sugar, this fine sugar sweetens the cream cheese filling and helps create its silky-smooth texture.
- Key Lime Juice: The star of the show! Freshly squeezed key lime juice is highly recommended for the most authentic and vibrant flavor, but bottled key lime juice works well too. It provides that iconic tart and floral citrus punch.
- Heavy Cream: Used in both the main filling and the luscious whipped topping. When whipped, it adds incredible lightness and volume to the dessert. Make sure it’s very cold for optimal whipping.
- Vanilla Extract: A touch of vanilla enhances the overall sweetness and provides a subtle, warm undertone that balances the bright lime flavor.
- Graham Crackers: These form the “cake” layers. They absorb the creamy filling as the cake chills, transforming from crisp crackers into a tender, cake-like texture.
For the Whipped Topping & Garnish
- Heavy Cream: Additional heavy cream for making a fluffy, homemade whipped topping.
- Powdered Sugar: To sweeten the whipped cream topping to perfection.
- Vanilla Extract: A dash for flavor in the topping.
- Lime Zest: Freshly grated zest adds intense lime aroma and a beautiful pop of green color, signaling the delicious citrus within.
- Lime Wedges: Perfect for an elegant garnish, providing an extra visual appeal and an optional squeeze of fresh lime juice for those who love an extra tang.

How To Craft The Perfect Key Lime Ice Box Cake
Creating this refreshing Key Lime Icebox Cake is a straightforward process, promising delicious results with minimal fuss. Follow these simple steps for a dessert that will impress:
- Prepare the Cream Cheese Filling Base: In a large mixing bowl, use an electric mixer to beat the softened cream cheese with 3/4 cup of powdered sugar. Continue mixing until the mixture is completely smooth and creamy, with no lumps remaining. This ensures a velvety texture for your filling. Gradually beat in the key lime juice until it is fully incorporated, creating a wonderfully tangy and smooth cream cheese mixture. Transfer this mixture to a separate bowl and set it aside.
- Whip the Light and Fluffy Cream: In a clean, chilled mixing bowl, use an electric mixer fitted with a whisk attachment to whip 2 cups of cold heavy cream. Begin whipping on medium speed, gradually increasing to high until soft peaks begin to form. At this point, carefully add 1/2 cup of powdered sugar and 1 teaspoon of vanilla extract. Continue to whip until stiff peaks form, indicating your whipped cream is stable and ready to be folded into the filling.
- Gently Combine Cream Mixtures: The key to a light and airy filling is gentle handling. Carefully fold the prepared whipped cream into the key lime cream cheese mixture. Use a rubber spatula and a gentle, upward motion to combine them, ensuring the whipped cream’s volume is maintained. Continue folding until the mixture is smooth and uniformly combined, but avoid overmixing.
- Layer Your Icebox Cake: Take a 13×9-inch baking dish and arrange a single, even layer of graham crackers at the bottom. You may need to break some crackers to fit the space perfectly. Evenly spread half of your fluffy key lime cream mixture over this first layer of crackers. Place another layer of graham crackers on top of the cream. Then, spread the remaining key lime cream mixture over these crackers. Finish your cake with a final layer of graham crackers, creating a beautiful layered dessert.
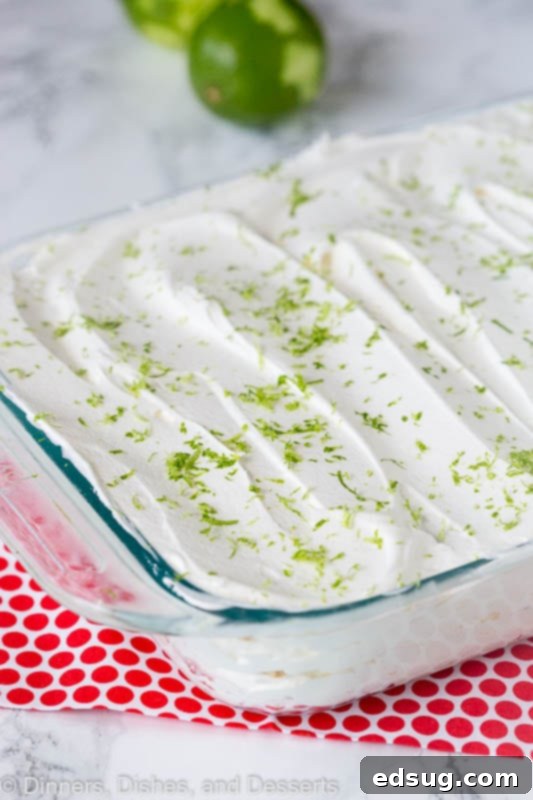
- Craft the Decadent Topping: For the final touch, prepare the topping. In a separate chilled bowl, whip 1 cup of heavy cream with 1/4 cup of powdered sugar and 1/2 teaspoon of vanilla extract using the whisk attachment of your electric mixer, just as you did for the filling’s whipped cream. Whip until stiff peaks form. Spread this delightful whipped topping evenly over the final layer of graham crackers. For an extra burst of flavor and visual appeal, generously sprinkle fresh lime zest over the top.
- Chill to Perfection: This step is crucial for the icebox cake’s signature texture and flavor development. Refrigerate the assembled cake for a minimum of 4-5 hours. This extended chilling time allows the graham crackers to fully soften and absorb the moisture from the creamy filling, transforming them into a tender, cake-like texture. It also gives the flavors ample time to meld and deepen, resulting in a firm, incredibly delicious dessert. For an elegant presentation, garnish with fresh lime wedges just before serving.
Recipe Tips & Tricks for a Flawless Key Lime Icebox Cake
- Maintain the Airiness of the Filling: When combining the whipped cream with the cream cheese mixture, the goal is to fold them gently rather than stir vigorously. Use a rubber spatula and incorporate the whipped cream with light, sweeping motions. This technique helps to maintain the volume and airiness of the whipped cream, preventing the filling from becoming dense and ensuring a wonderfully light and fluffy texture for your cake.
- Consider Store-Bought Whipped Topping for Speed: If you’re looking to save a little time without compromising on taste, using a high-quality store-bought whipped topping, such as Cool Whip, is an excellent shortcut. It’s incredibly stable and holds its structure beautifully both within the layers and as the final topping, making assembly even quicker and simpler. This can be a great option for busy days or when you need a dessert in a pinch.
- Ensure Room Temperature Cream Cheese: This is a critical step for achieving a smooth, lump-free cream cheese filling. Always allow your cream cheese to come to room temperature before you begin mixing. Softened cream cheese blends much more easily with other ingredients, creating a velvety consistency that is essential for this icebox cake.
- Chill Your Mixing Bowl and Whisk for Optimal Whipping: For the best whipped cream, place your mixing bowl (preferably metal) and the whisk attachment of your electric mixer in the freezer for about 10-15 minutes before you start. This chill helps the heavy cream whip up faster and achieve greater volume and stiffer peaks, resulting in a more stable and luxurious whipped cream for both your filling and topping.
- The Importance of Adequate Chilling Time: While it might be tempting to dig in sooner, the recommended 4-5 hours of chilling is non-negotiable for this recipe. This time allows the graham crackers to fully soften and meld with the creamy filling, creating that signature cake-like texture. Insufficient chilling will result in crunchy crackers and a less cohesive cake. For best results, consider making it the night before and chilling it overnight.
- Creative Garnish Ideas: While lime zest and wedges are classic, don’t hesitate to get creative with your garnishes. A sprinkle of toasted coconut flakes, a few fresh berries, or even a drizzle of white chocolate can add extra flair and flavor dimensions to your Key Lime Icebox Cake.

If key lime juice is unavailable, you can absolutely substitute regular lime juice. While the flavor profile will be slightly different—key limes are typically more aromatic and less acidic than Persian limes—your dessert will still be wonderfully delicious and refreshing. You might find you need a tiny bit more sugar to balance the tartness if using regular lime juice.
Yes, making this cake dairy-free is entirely possible! For a non-dairy version, you can substitute coconut whipped topping (often found in the freezer aisle, like CocoWhip) for both the heavy cream in the filling and the whipped cream topping. Pair this with a high-quality dairy-free cream cheese alternative, ensuring all other ingredients like graham crackers are also dairy-free. Always check labels to confirm.
Storing leftover Key Lime Icebox Cake is easy. Simply cover the cake tightly with plastic wrap or transfer any remaining slices to an airtight container. Keep it refrigerated, and it will stay fresh and delicious for up to 3 days. The flavors often deepen beautifully overnight!
Yes, you can freeze Key Lime Icebox Cake, though it’s important to note that the texture of the cream layers might change slightly upon thawing, potentially becoming a bit softer or more watery. For best results, wrap the entire cake (or individual slices) tightly in plastic wrap, then again in aluminum foil, to prevent freezer burn. Consume within a month for optimal quality. When ready to serve, thaw the cake in the refrigerator overnight to allow it to return to its ideal consistency.

Key Lime Ice Box Cake
Rate Recipe
Print Recipe
Ingredients
- 2 8 oz packages cream cheese, softened
- 3/4 cup powdered sugar
- 1/2 cup key lime juice
- 2 cups heavy cream
- 1/2 cup powdered sugar
- 1 teaspoon vanilla extract
- 1 box graham crackers
Topping
- 1 cup heavy cream
- 1/4 cup powdered sugar
- 1/2 teaspoon vanilla extract
- Zest of 2 limes
- Lime wedges, for garnish
Instructions
-
Using an electric mixer, beat cream cheese and 3/4 cup powdered sugar together until the mixture is smooth, light, and creamy, ensuring no lumps remain. Gradually beat in the key lime juice until it is fully incorporated and the mixture is silky smooth. Pour this filling into a separate bowl and set it aside.
-
In a chilled mixing bowl, use the whisk attachment of your electric mixer to whip 2 cups of heavy cream. Start on medium speed, then increase to high, whipping until soft peaks begin to form. Carefully add 1/2 cup of powdered sugar and 1 teaspoon of vanilla extract, then continue to whip until stiff peaks are achieved.
-
Gently fold the prepared whipped cream into the key lime cream cheese mixture using a rubber spatula. Use a light, upward motion to combine, taking care not to deflate the whipped cream. Mix until just combined and smooth.
-
Arrange a single, even layer of graham crackers at the bottom of a 13×9-inch baking dish. You may need to break some crackers to fit the space perfectly. Spread half of the key lime cream mixture evenly over this first layer of crackers. Add another layer of graham crackers, followed by the remaining key lime cream mixture. Finish with a final layer of graham crackers on top.
-
Prepare the topping by whipping 1 cup of heavy cream in a chilled bowl, again using the whisk attachment of a mixer. Whip until soft peaks form, then add 1/4 cup of powdered sugar and 1/2 teaspoon of vanilla extract. Continue whipping until stiff peaks are achieved.
-
Carefully spread the prepared whipped topping evenly over the top layer of graham crackers. Sprinkle fresh lime zest generously over the cream for an added burst of flavor and a beautiful presentation.
-
Place the assembled icebox cake in the refrigerator for a minimum of 4-5 hours to allow the graham crackers to soften completely and the flavors to meld. For best results and a firmer texture, chilling overnight is recommended.
-
Just before serving, garnish the Key Lime Icebox Cake with fresh lime wedges for an extra touch of elegance and zest. Slice and serve chilled.
Nutrition
Carbohydrates: 11g |
Protein: 1g |
Fat: 13g |
Saturated Fat: 9g |
Polyunsaturated Fat: 4g |
Cholesterol: 42mg |
Sodium: 18mg |
Sugar: 10g
Nutrition information is automatically calculated, so should only be used as an approximation.
Additional Info
I’ve created a fantastic community on Facebook, and I’d be absolutely thrilled for you to join us! It’s a vibrant space where you can share your favorite recipes, ask questions, and stay updated on all the new and exciting content from Dinners, Dishes and Desserts (so you’ll never miss a fresh recipe!).
Be sure to follow me on Instagram and tag #dinnersdishes so I can see all the wonderful DINNERS, DISHES, AND DESSERTS recipes YOU create!
Don’t forget to follow me on my social media channels, so you never miss a post or a delicious new recipe!
Facebook | Twitter | Pinterest | Instagram