Rich & Fudgy Chocolate Peppermint Cookies: Your Essential Holiday Baking Recipe
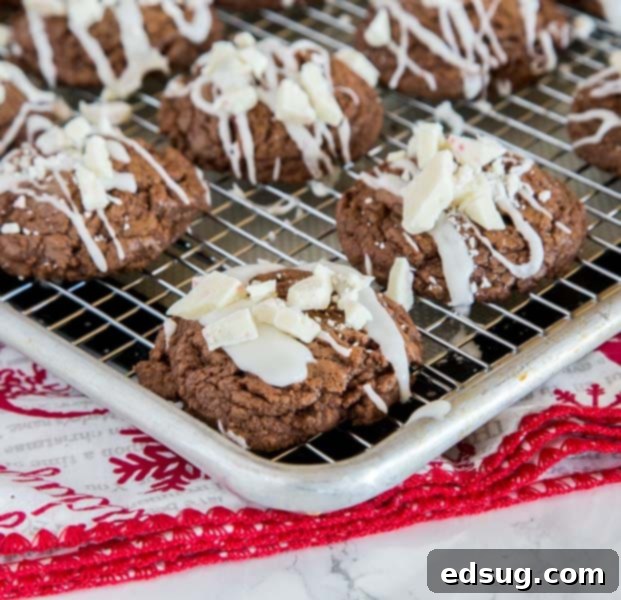
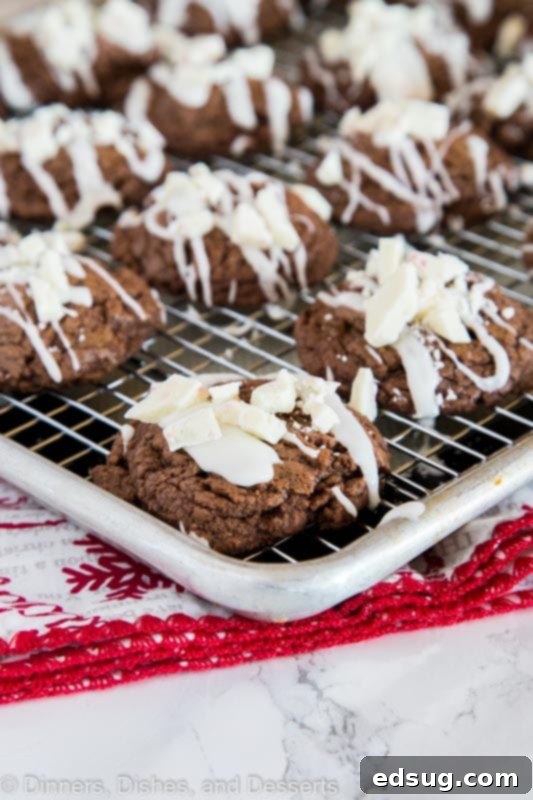
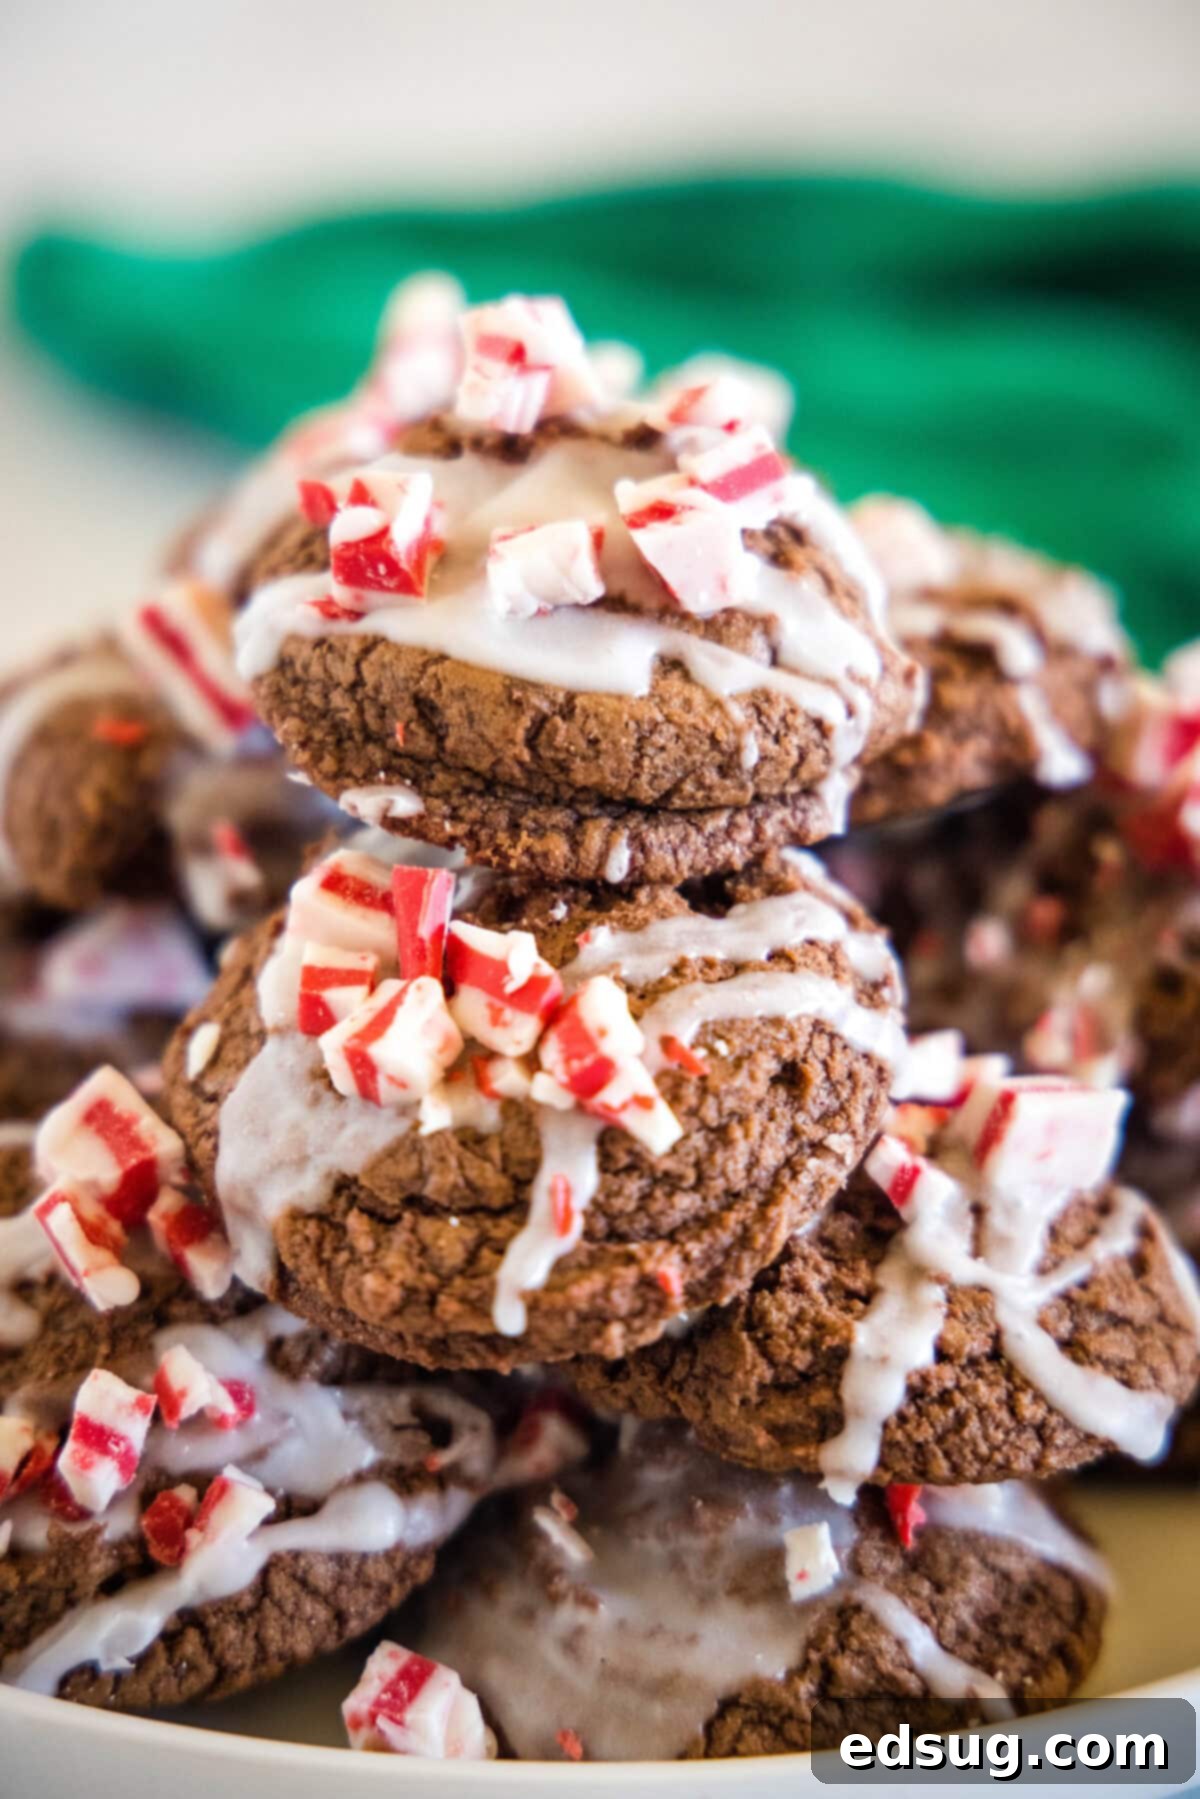
As the holiday season draws near, there’s no better way to spread cheer than with homemade treats. These **Chocolate Peppermint Cookies** are a quintessential festive delight, capturing the spirit of winter with every bite. Imagine biting into a deeply rich, intensely fudgy chocolate cookie, perfectly balanced with a cool, refreshing hint of peppermint. Each cookie is then generously topped with a smooth, bright white peppermint glaze and adorned with sparkling crushed candy canes, creating a truly irresistible and visually stunning dessert.
These cookies aren’t just a treat for the taste buds; they’re a celebration of classic holiday flavors. They masterfully blend the decadent richness of chocolate with the vibrant coolness of peppermint, ensuring that neither flavor overpowers the other. The result is a harmonious symphony that feels both comforting and exhilarating. Whether you’re an experienced baker or just starting your holiday traditions, this recipe is designed to be straightforward and rewarding, promising beautiful, delicious cookies every time.
Perfect for any festive occasion, these chocolate peppermint cookies are incredibly versatile. They’re ideal for holiday parties, cozy family gatherings, or as thoughtful, homemade gifts for teachers, neighbors, and friends. Their impressive presentation and melt-in-your-mouth texture make them a standout addition to any cookie swap or dessert table. Get ready to bake a batch that will undoubtedly steal the show and become a new favorite holiday tradition!
The enchanting combination of chocolate and peppermint is truly a holiday classic, and it’s a personal favorite of mine. There’s something undeniably magical about how the cool, minty notes complement the deep, rich cocoa. If you’re as devoted to this festive flavor pairing as I am, you’ll also adore my other creations like Peppermint Hot Chocolate for a comforting evening treat, or a showstopping Chocolate Peppermint Cheesecake for grander holiday dessert tables.
However, these particular Chocolate Peppermint Cookies hold a special place. They are designed for pure enjoyment, whether you’re baking for a crowd, planning festive gifts, or simply indulging in a moment of sweet bliss. Their soft, melt-in-your-mouth texture is utterly addictive, making it hard to stop at just one. The delightful crunch from the crushed peppermint candies on top not only adds a burst of flavor but also elevates their visual appeal, giving them that quintessential holiday sparkle. These cookies are guaranteed to bring a smile to anyone’s face.
Why These Chocolate Peppermint Cookies Will Become Your Holiday Favorite
These Chocolate Peppermint Cookies aren’t just another holiday recipe; they offer a delightful baking experience and an even more delightful eating experience. Here are a few compelling reasons why they’re destined to become a staple in your festive repertoire:
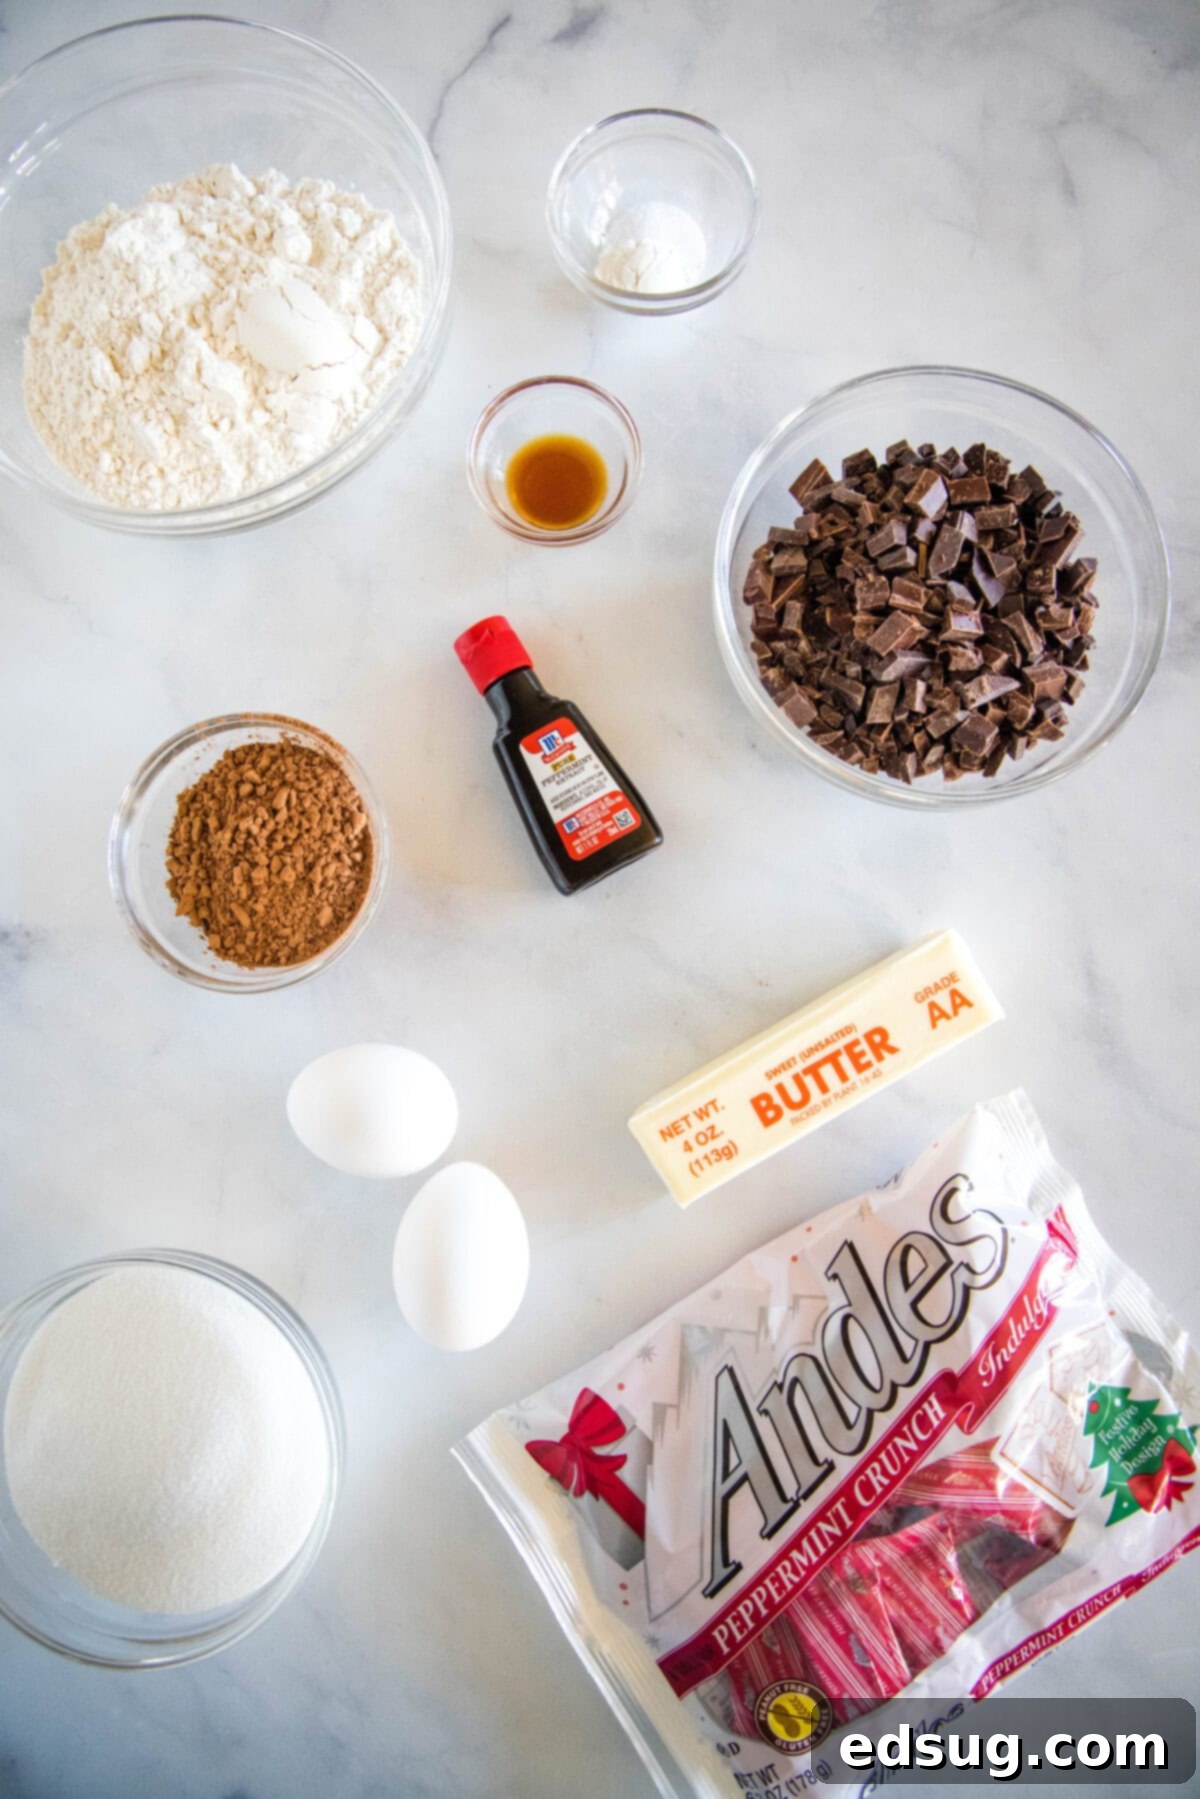
- Effortless Peppermint Glaze: Achieving that stunning, professional-looking finish is surprisingly simple. Our quick-to-make glaze, a blend of confectioners’ sugar, milk, and a touch of peppermint extract, delivers a burst of sweetness and that signature holiday coolness without any fuss. It drizzles beautifully and sets perfectly, enhancing both flavor and appearance.
- Stunning Visual Appeal: Beyond their incredible taste, these cookies are a feast for the eyes. The vibrant white glaze paired with the red and white speckles of crushed candy canes creates a festive masterpiece. They look wonderfully handcrafted and sophisticated, making them an instant showstopper on any dessert platter or cookie tin.
- Remarkably Quick Baking Time: Time is often of the essence during the busy holiday season. You’ll appreciate that these delightful cookies require only 9-10 minutes in the oven per batch. This rapid baking time means you can whip up a large quantity in a relatively short period, perfect for unexpected guests or last-minute holiday preparations.
- Perfect for Thoughtful Gifting: If you’re looking for an impressive yet easy homemade gift, look no further. These cookies maintain their freshness and appealing appearance, making them ideal for packaging into festive treat bags. They are a beloved choice for teacher appreciation, thoughtful neighbor gifts, or a highly sought-after contribution to any holiday cookie exchange.
- Irresistibly Fudgy Texture: Each bite promises a soft, chewy, and intensely fudgy chocolate cookie base. This rich texture provides the perfect counterpoint to the crisp, cool peppermint, ensuring a satisfying mouthfeel that keeps everyone coming back for more.
Gather Your Ingredients: Essential Components for Perfect Chocolate Peppermint Cookies
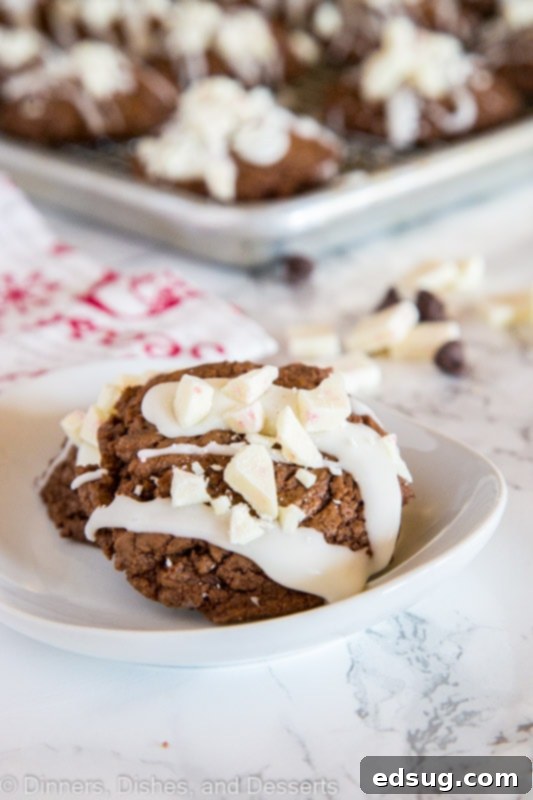
Creating these delightful chocolate peppermint cookies requires a few pantry staples and a couple of key flavor enhancers. You’ll find the complete, printable recipe card with precise measurements at the very bottom of this post, but let’s review the main components you’ll need to gather to embark on this festive baking adventure.
For the Fudgy Chocolate Cookies:
- All-Purpose Flour: The foundational dry ingredient, providing the necessary structure and tender crumb for our cookies.
- Cocoa Powder: Essential for that deep, rich chocolate flavor and fudgy texture. For the best results, use a good quality unsweetened cocoa powder.
- Baking Powder: Our leavening agent, helping the cookies achieve a soft, slightly puffy texture without being cakey.
- Salt: A crucial flavor enhancer that balances the sweetness and intensifies the chocolate notes.
- Unsalted Butter: Using unsalted butter allows you to control the total salt content in your baking. Ensure it’s softened to room temperature for optimal creaming with sugar.
- Granulated Sugar: Provides sweetness and contributes to the cookie’s texture, helping them spread just right.
- Vanilla Extract: A classic flavor pairing with chocolate, it adds depth and warmth to the cookie base.
- Peppermint Extract: The star flavor for the cookies! Use a pure extract for the best, most authentic minty taste. Start with the recommended amount and adjust to your preference.
- Eggs: Act as a binder, adding moisture and richness, and helping to emulsify the batter for a smooth consistency.
- Dark Chocolate Chips: Divided for melting into the batter and folding in whole for delicious pockets of melted chocolate. Dark chocolate complements the peppermint beautifully.
For the Dazzling Peppermint Glaze:
- Confectioners’ Sugar (Powdered Sugar): Forms the base of our smooth, drizzle-able glaze, dissolving easily for a silky finish.
- Peppermint Extract: Infuses the glaze with a bright, cool peppermint flavor that pairs perfectly with the chocolate cookies.
- Milk: Used to thin the glaze to the perfect consistency for drizzling. Any type of milk (dairy or non-dairy) will work.
- Crushed Peppermint Candies (or Candy Canes): The festive topping that adds a delightful crunch and extra burst of mint, making these cookies visually pop and taste even more like the holidays.
With these ingredients at hand, you’re well on your way to creating a batch of Christmas cookies that are so easy and enjoyable to make, you’ll want to bake them on repeat throughout December. They are not only a joy to eat but also make for heartwarming, homemade gifts that teachers, neighbors, and loved ones will truly cherish. Prepare for rave reviews – everyone is going to fall in love with these!
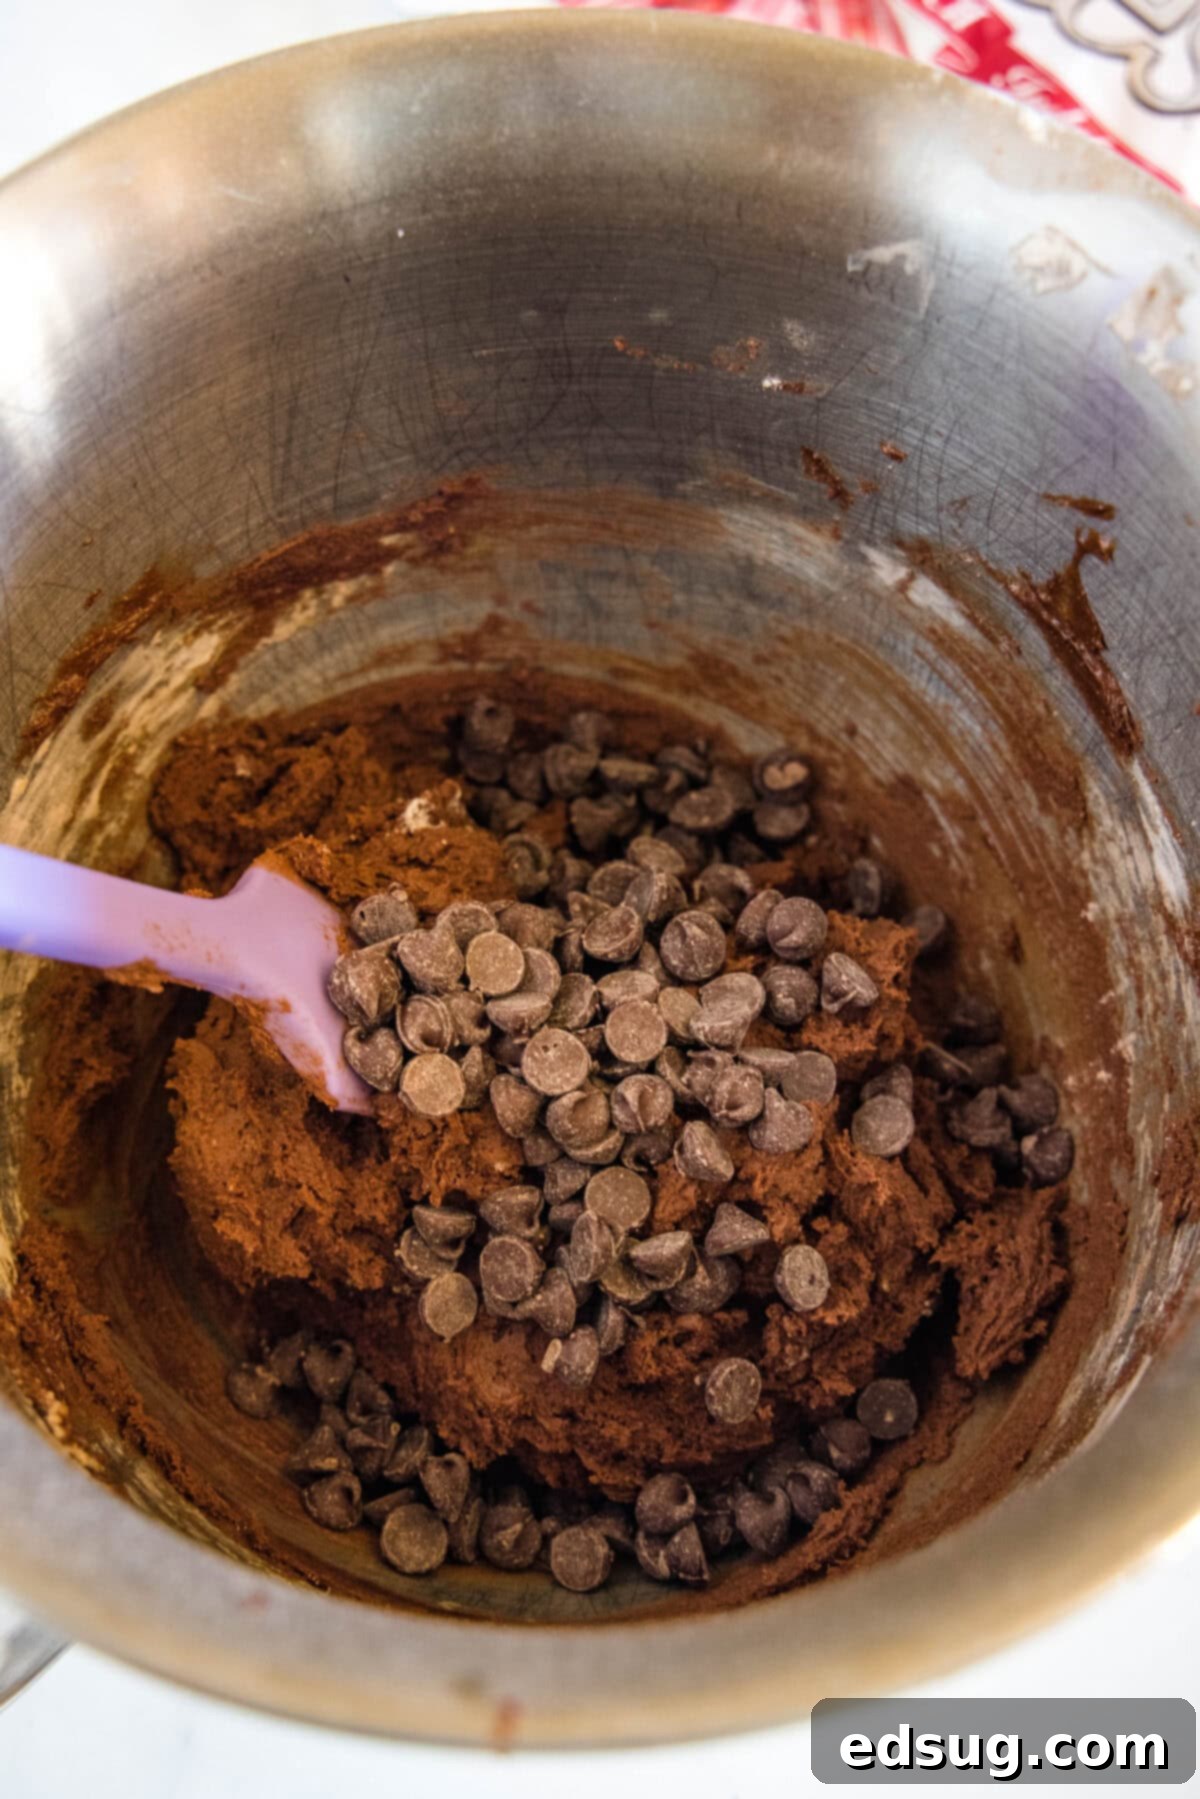
Step-by-Step Guide: Crafting Your Delicious Chocolate Peppermint Cookies
Baking these festive chocolate peppermint cookies is a straightforward and enjoyable process. Follow these detailed steps to achieve perfect, fudgy cookies topped with a delightful peppermint glaze and crunchy candy canes. Remember, the key to great baking is often in the preparation, so have all your ingredients measured and ready to go!
- Prepare the Dry Ingredients: In a medium-sized bowl, thoroughly whisk together the all-purpose flour, rich cocoa powder, baking powder, and salt. This ensures all leavening and flavor agents are evenly distributed throughout the dough. Once combined, set this mixture aside.
- Melt and Cool the Chocolate: Measure out 1 1/4 cups of your dark chocolate chips. Gently melt them using a double boiler or in the microwave in 30-second intervals, stirring until smooth. Crucially, allow the melted chocolate to cool slightly to a warm but not hot temperature. This prevents it from melting the butter or scrambling the eggs when added to the wet ingredients.
- Cream Butter and Sugars: In the bowl of an electric mixer (or using a hand mixer), beat the softened unsalted butter until it’s light and creamy. Gradually add the granulated sugar, vanilla extract, and peppermint extract, beating until the mixture is fluffy and well combined. Incorporate the eggs one at a time, mixing thoroughly after each addition until fully blended.
- Combine Wet and Dry Ingredients: Carefully pour the slightly cooled melted chocolate into the butter-sugar mixture and mix until fully integrated. Next, gradually add the dry ingredients (from Step 1) to the wet mixture, mixing on low speed until *just* combined. Be careful not to overmix, as this can lead to tough cookies. Finally, gently fold in the remaining 1/2 cup of dark chocolate chips, ensuring they are evenly distributed throughout the rich dough.
- Scoop and Bake the Cookies: Using a small cookie scoop or your hands, roll the dough into uniform 1-inch balls. Place them onto a baking sheet lined with parchment paper, leaving about 2 inches of space between each cookie to allow for spreading. Bake in a preheated oven at 375°F (190°C) for 9-10 minutes. The edges should be set, but the centers may still look slightly soft, which contributes to their fudgy texture.
- Cool the Cookies: Once baked, remove the baking sheet from the oven and let the cookies cool on the sheet for about 5 minutes. This allows them to firm up before you transfer them. After 5 minutes, carefully move the cookies to a wire rack to cool completely. It’s essential that they are fully cool before glazing to prevent the glaze from melting.
- Prepare the Peppermint Glaze: While your cookies are cooling, prepare the simple yet effective glaze. In a small bowl, whisk together the confectioners’ sugar, peppermint extract, and milk. Start with the suggested amount of milk and add more a tiny bit at a time until you achieve a smooth, drizzle-able consistency – not too thick, not too runny.
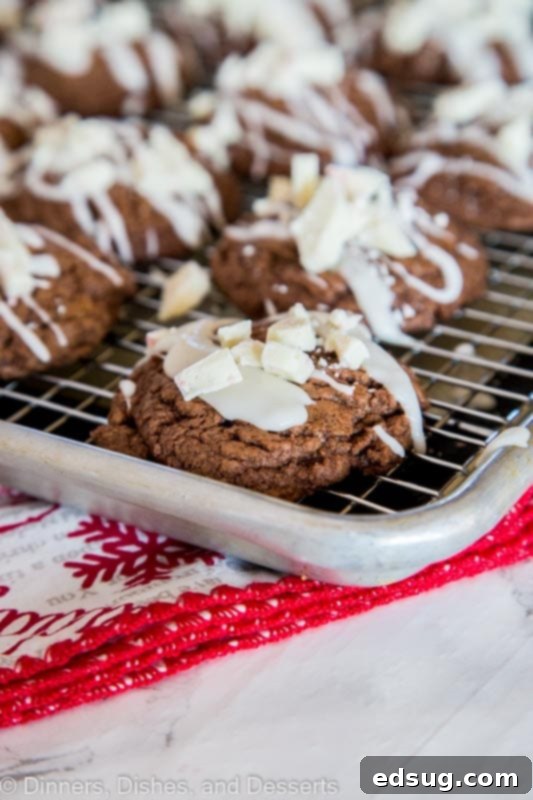
- Glaze and Decorate: Once the cookies are completely cool, drizzle the peppermint glaze generously over the tops. Immediately, and while the glaze is still wet, sprinkle the crushed peppermint candies or candy canes over each cookie. This ensures the crushed candy adheres beautifully.
- Set and Store: Allow the glazed and decorated cookies to sit undisturbed for at least 30 minutes, or until the glaze has fully hardened. Once set, these delightful Chocolate Peppermint Cookies are ready to be served and enjoyed, or stored in an airtight container at room temperature for maximum freshness.
Expert Tips & Tricks for Flawless Chocolate Peppermint Cookies
Even though this recipe is designed to be straightforward, a few expert tips can elevate your chocolate peppermint cookies from great to absolutely exceptional. Keep these insights in mind to ensure your holiday baking is a resounding success:
- Prioritize High-Quality Chocolate: The foundation of a truly fudgy and flavorful chocolate cookie lies in the quality of your chocolate. Opt for good dark chocolate chips or a high-quality dark chocolate bar (chopped) for melting. Better chocolate translates directly to a richer, more profound chocolate flavor in your final cookies, perfectly complementing the peppermint.
- Crucial Cooling of Melted Chocolate: This step is often overlooked but is vital. After melting your chocolate chips, allow them to cool slightly until they are just warm to the touch, not hot. Adding hot chocolate to your butter and sugar mixture can cause the butter to melt prematurely or, worse, scramble the eggs, leading to a greasy or curdled batter. Patience here pays off!
- Ensure Complete Cookie Cooling Before Glazing: This tip cannot be stressed enough. If your cookies are even slightly warm when you apply the peppermint glaze, it will immediately melt and soak into the cookie, losing its beautiful white drizzle and festive appearance. For the best results, let your cookies cool completely on a wire rack for at least 30 minutes, or longer if needed, before reaching for the glaze.
- Tailor the Peppermint Flavor to Your Liking: Peppermint extract can be quite potent, so feel free to adjust the amount according to your preference. If you’re a true peppermint enthusiast and desire a bolder minty kick, consider adding an extra 1/4 teaspoon of peppermint extract to either the cookie dough or the glaze. Always taste a tiny bit of the batter/glaze (before adding raw eggs to the batter!) if you’re unsure.
- Get Creative with Toppings: While crushed candy canes are the quintessential topping for these festive cookies, don’t hesitate to personalize them. For an alternative look or flavor, try sprinkling on holiday-themed sprinkles, mini chocolate chips for extra chocolatey goodness, or even a delicate dusting of cocoa powder for a more understated elegance.
- Prepare Ahead for Stress-Free Baking: The holiday season is busy enough! To make your baking experience as smooth as possible, consider preparing the cookie dough in advance. The dough can be made and refrigerated, tightly covered, for up to 24 hours before you plan to bake. This makes these cookies an excellent option for party prep or when you need fresh cookies on short notice.
Variations & Serving Suggestions for Your Peppermint Chocolate Treats
While these chocolate peppermint cookies are utterly delightful as written, there’s always room for a little creative flair! Here are some ideas to customize them or enhance your serving experience:
- Double Chocolate Mint: For an even more intense chocolate experience, consider using a mix of dark and semi-sweet chocolate chips in the dough, or even adding a handful of white chocolate chips to the batter for a contrasting sweetness.
- Different Peppermint Toppings: Instead of traditional crushed candy canes, you could use green or red colored sugar sprinkles for a different visual effect, or finely chopped peppermint patties for an extra layer of minty chocolate. Melted white chocolate swirled over the glaze could also add an artistic touch.
- Make Them Gluten-Free: With a simple swap of your favorite 1:1 gluten-free baking flour blend, you can easily adapt this recipe to be gluten-free, ensuring everyone can enjoy these festive treats. Be sure the blend contains xanthan gum or add it separately if not.
- Serving Ideas: These cookies are fantastic on their own, but they also make an excellent accompaniment to a mug of hot cocoa (especially Peppermint Hot Chocolate!), a cup of coffee, or a glass of cold milk. They’re also perfect for assembling into a beautiful holiday cookie box or platter.
Storage Instructions for Maximum Freshness
To keep your delicious Chocolate Peppermint Cookies fresh and flavorful for as long as possible, proper storage is key:
- Room Temperature: Once the glaze has completely set and hardened, store the cookies in an airtight container at room temperature for up to 3-4 days. Layer them between sheets of parchment paper to prevent sticking and preserve their delicate decoration.
- Freezing Dough: If you want to get a head start, you can prepare the cookie dough and freeze it. Roll the dough into balls, place them on a baking sheet, and freeze until solid. Once frozen, transfer the cookie dough balls to a freezer-safe bag or container for up to 3 months. When ready to bake, thaw them slightly in the refrigerator before baking as directed, adding a minute or two to the baking time if needed.
- Freezing Baked Cookies: You can also freeze baked and glazed cookies. Ensure the glaze is completely hardened. Arrange cookies in a single layer on a baking sheet and freeze until solid. Then, transfer to an airtight freezer-safe container, separating layers with parchment paper. Thaw at room temperature before serving. They will last for up to 1 month.
Explore More Irresistible Christmas Cookie Recipes
If you’ve fallen in love with these Chocolate Peppermint Cookies and are eager to expand your holiday baking repertoire, you’re in luck! The festive season is the perfect time to experiment with a variety of flavors and textures. Here are some more beloved Christmas cookie recipes that are sure to bring joy and deliciousness to your celebrations:
- Frosted Sugar Cookies: Classic, customizable, and always a crowd-pleaser, perfect for decorating.
- Snickerdoodles: Soft, chewy, and coated in cinnamon sugar – a timeless comfort cookie.
- Mint Chocolate Pudding Cookies: For another delightful minty twist, these cookies are incredibly soft and flavorful.
- Peanut Butter Cup Blossom Cookies: A fantastic combination of peanut butter and chocolate, a guaranteed favorite.
- Sour Cream Cookies: Surprisingly tender and flavorful, offering a unique texture profile.
Chocolate Peppermint Cookies
Pin Recipe
Rate Recipe
Print Recipe
Ingredients
Chocolate Cookies
- 1 1/2 cups all-purpose flour
- 1/4 cup cocoa powder
- 1 teaspoon baking powder
- 1/2 teaspoon salt
- 1/2 cup butter
- 1 cup granulated sugar
- 1 teaspoon vanilla extract
- 1 teaspoon peppermint extract
- 2 whole large eggs
- 1 3/4 cups dark chocolate chips, divided
Glaze
- 1 cup powdered sugar
- 1/4 teaspoon peppermint extract
- 1/4 cup milk
- 1/2 cup peppermint candies, crushed
Instructions
-
Preheat oven to 375°F (190°C). Line baking sheets with parchment paper.
-
In a bowl, whisk together flour, cocoa powder, baking powder, and salt. Set aside.
-
Melt 1 1/4 cups dark chocolate chips; let cool slightly to warm.
-
In an electric mixer, cream butter until smooth. Beat in sugar, vanilla, and peppermint extract until fluffy. Add eggs one at a time, mixing well after each.
-
Stir the cooled melted chocolate into the wet mixture. Gradually add the dry ingredients and mix until just combined. Fold in the remaining 1/2 cup chocolate chips.
-
Scoop 1-inch dough balls onto prepared baking sheets, spacing 2 inches apart. Bake for 9-10 minutes. Let cool on sheet for 5 minutes, then transfer to a wire rack to cool completely.
-
For the glaze: Whisk powdered sugar, peppermint extract, and milk until smooth and drizzle-able. Once cookies are completely cool, drizzle with glaze and immediately sprinkle with crushed peppermint candies. Allow glaze to set fully before serving or storing in an airtight container.
Nutrition
Nutrition information is automatically calculated, so should only be used as an approximation.
Additional Info
Like this recipe? Leave a comment below!
Join Our Community! If you love baking and sharing delicious recipes, I invite you to join our vibrant and fun group on Facebook! It’s the perfect place to share your culinary creations, ask questions, and stay updated on all the newest recipes from Dinners, Dishes and Desserts. We’d love to have you!
Don’t forget to follow me on Instagram and tag #dinnersdishes. I love seeing all the amazing Dinners, Dishes, and Desserts recipes YOU bring to life!
Stay connected and never miss out on a new recipe or update! Follow me on all my social media channels:
Facebook | Twitter | Pinterest | Instagram
