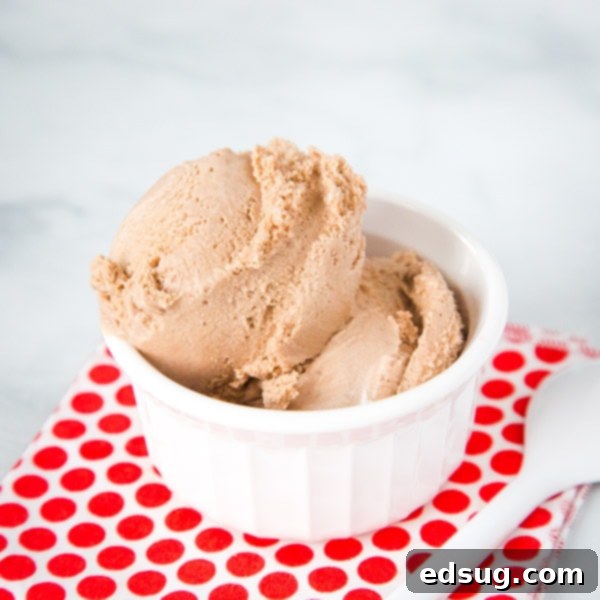
Indulge in Homemade Nutella Ice Cream: Your Ultimate Guide to a Rich, Creamy Frozen Treat
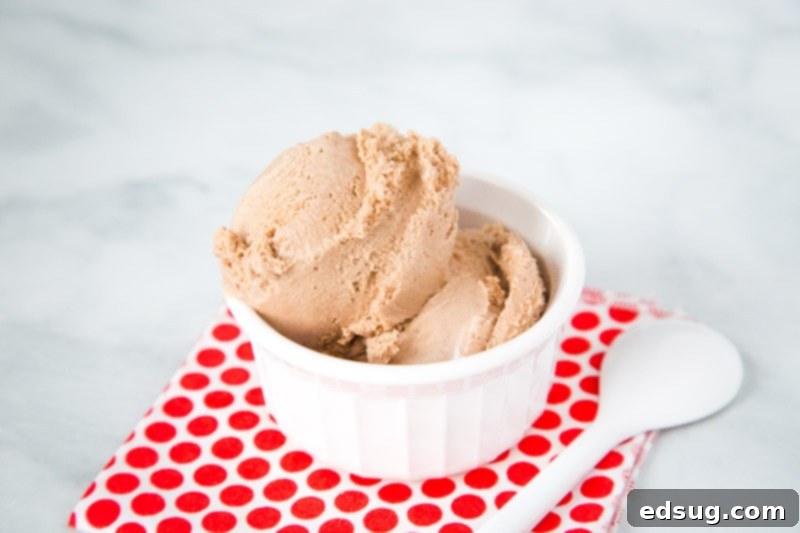
For lovers of chocolate and hazelnut, there’s little that compares to the sheer delight of Nutella. This iconic spread has captured hearts worldwide, transforming breakfast, snacks, and desserts into something truly special. But what if you could harness that irresistible flavor and infuse it into the ultimate summer indulgence? Enter homemade Nutella Ice Cream – a rich, creamy, and intensely chocolatey frozen treat that promises to be a game-changer for your dessert repertoire. This isn’t just ice cream; it’s a celebration of flavor, a luxurious escape in every spoonful, and the perfect way to beat the heat or satisfy any sweet craving.
My own journey with Nutella began in high school, during a French class where its unique taste was first introduced. It was an instant love affair, a moment that cemented Nutella’s place as a pantry staple in my home. You’ll often find me with a jar (or even a giant two-pack from Costco) ready for any culinary adventure. So, when it comes to finding new and exciting ways to enjoy this hazelnut spread, homemade ice cream naturally rose to the top of the list. The idea of transforming Nutella into a velvety-smooth, frozen dessert was simply too good to resist.
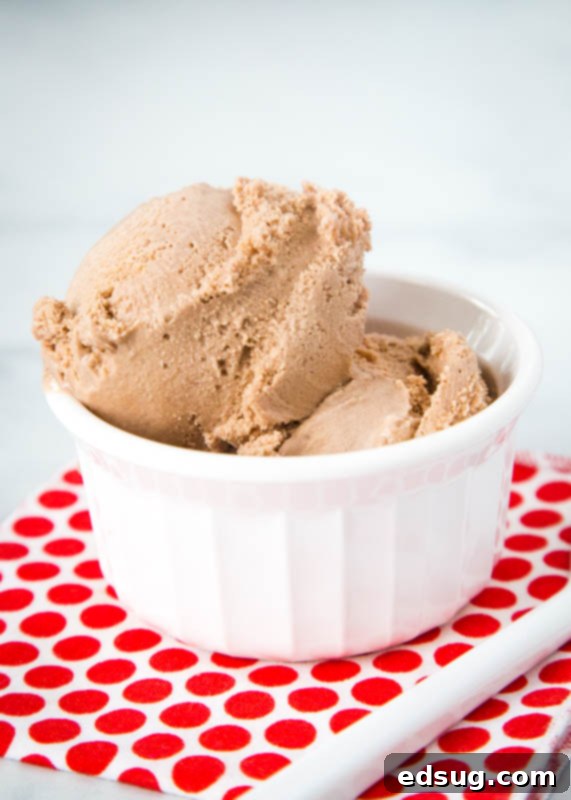
The Irresistible Allure of Homemade Nutella Ice Cream
There’s a distinct magic to homemade ice cream that store-bought varieties, however good, often struggle to replicate. The texture, the freshness, and the ability to control the depth of flavor are unparalleled. When you combine this with the beloved taste of Nutella, you get a dessert that is not only incredibly satisfying but also deeply comforting. This recipe, which I first developed over nine years ago when I started this blog, originally even featured homemade Nutella. While using homemade spread offers a unique nuance, rest assured that this Nutella Ice Cream recipe shines brilliantly whether you opt for your own creation or a readily available store-bought jar.
Often, I find myself torn between classics like Cookie Dough Ice Cream and Mint Chip. However, Nutella, while a popular spread, isn’t a universally common ice cream flavor, which makes this recipe even more special. If you’re a true Nutella enthusiast, this is your cue to dust off that ice cream maker. Preparing a batch of this extraordinary ice cream is surprisingly simple, yet the reward is a profoundly rich, wonderfully chocolatey, and unmistakably Nutella-flavored bowl that will leave you wanting more. Its creamy consistency and deep flavor surpass many commercial chocolate ice creams, offering an authentic taste experience that is hard to beat.
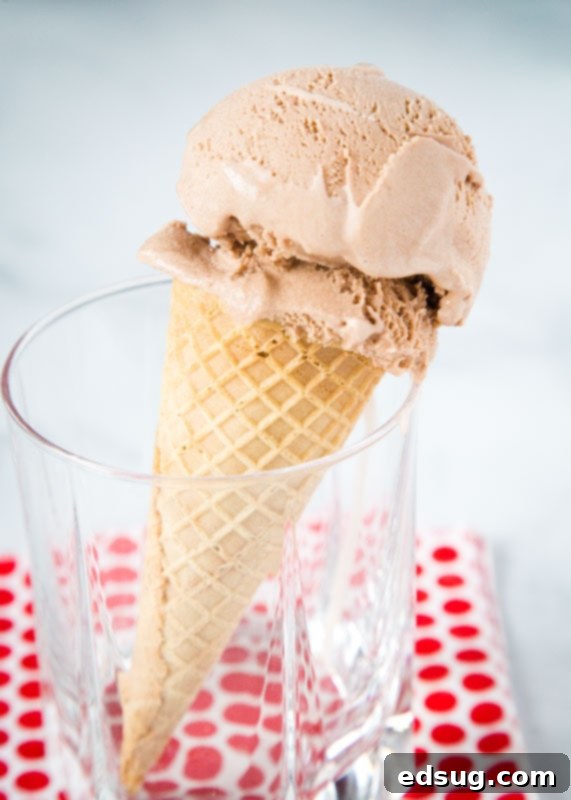
Mastering the Art of Nutella Ice Cream: A Step-by-Step Guide
Creating this decadent Nutella ice cream involves a classic custard base, which is the secret to its unparalleled creaminess. While it requires a bit of patience, the process is straightforward and incredibly rewarding. For the full printable recipe card with exact measurements, be sure to scroll to the bottom of this post.
Essential Ingredients for the Best Nutella Ice Cream
- Whole Milk and Heavy Cream: These form the luxurious foundation of our custard base. Whole milk contributes to a richer flavor, while heavy cream is indispensable for achieving that signature velvety, melt-in-your-mouth texture that makes homemade ice cream so special.
- Granulated Sugar: Beyond just sweetening, sugar plays a vital role in the ice cream’s final texture, helping to prevent excessive ice crystal formation and ensuring a smoother, more palatable result.
- Egg Yolks: The cornerstone of any classic French-style ice cream, egg yolks are crucial for creating a rich, thick custard. They act as an emulsifier, binding the fats and liquids, which results in an incredibly smooth and creamy ice cream that resists iciness.
- Vanilla Extract: A touch of pure vanilla extract enhances the complex flavors of chocolate and hazelnut, adding a warm, aromatic depth that rounds out the overall taste.
- Nutella: The star of the show! This chocolate-hazelnut spread is what gives our ice cream its distinctive, beloved flavor. Use your favorite brand or even try making your own for a personalized touch.
Equipment You’ll Need for Success
- Saucepan: For gently heating the dairy and cooking the custard base. A medium-sized, heavy-bottomed pan is ideal for even heat distribution.
- Whisk: Essential for combining ingredients smoothly, especially when tempering egg yolks and incorporating Nutella.
- Large Heatproof Bowl: Needed for beating egg yolks and later for chilling the custard.
- Fine-mesh Strainer: Crucial for straining the custard after cooking, ensuring an impeccably smooth final texture by removing any small lumps or bits of cooked egg.
- Ice Cream Maker: A vital tool for churning the custard into ice cream. Ensure your machine’s bowl is frozen solid (if it’s a freezer-bowl type) before you begin.
- Airtight Container: For storing the finished ice cream in the freezer, preventing freezer burn and maintaining its freshness and creamy consistency.
Detailed Instructions for Crafting Your Nutella Dream
- Gentle Heating of Dairy and Sugar: In a medium saucepan, combine the whole milk, heavy cream, and approximately 1/2 cup of the granulated sugar. Place the saucepan over medium-low heat. Stir the mixture occasionally, allowing the sugar to fully dissolve. This process typically takes about 5 to 7 minutes. It’s important not to rush this step; ensuring complete sugar dissolution is key to preventing a grainy texture in your finished ice cream. A gentle heat is crucial to avoid scorching the milk.
- Preparing the Egg Yolks: While your dairy mixture warms, take a separate, medium-sized bowl and add the egg yolks along with the remaining 1/4 cup of granulated sugar. Using a whisk (or an electric mixer for ease), beat these together vigorously until the mixture becomes notably pale yellow in color and thickens to a creamy consistency. This aeration and emulsification process usually requires 3 to 4 minutes of beating, creating a stable base for the custard.
- Tempering the Egg Yolks: This is a critical step to prevent the egg yolks from scrambling. Once the sugar in your dairy mixture is completely dissolved and the mixture is warm (but not boiling), carefully scoop out about half a cup of this warm milk mixture. Slowly, in a thin stream, whisk this warm liquid into your beaten egg yolks, constantly whisking the egg mixture. This gradual addition and continuous whisking slowly raises the temperature of the egg yolks, tempering them and preparing them to be combined with the rest of the hot dairy without cooking. After this is well blended, pour the entire tempered egg mixture back into the saucepan with the remaining warm dairy.
- Cooking the Custard: Return the saucepan to medium-low heat. Continue to cook the mixture slowly, stirring frequently and scraping the bottom of the pan with a spatula or wooden spoon to prevent sticking. The custard is ready when it thickens sufficiently to coat the back of your spoon, and when you run your finger across the coated spoon, it leaves a clear trail. For precision, use a candy or instant-read thermometer to ensure the mixture reaches a temperature between 170-175 degrees F (77-79 degrees C). Do not allow the custard to boil, as this will cause the eggs to curdle. This slow cooking develops the rich, unctuous base that gives homemade ice cream its superior mouthfeel.
- Infusing Nutella and Chilling: Immediately after cooking, pour the hot custard through a fine-mesh strainer into a large, clean bowl. This step is essential for removing any small cooked egg particles or lumps, guaranteeing a perfectly smooth base. Stir in the vanilla extract and the Nutella until the Nutella is completely melted and smoothly incorporated into the warm custard, creating a beautiful, uniform chocolate-hazelnut mixture. Cover the bowl tightly with plastic wrap, ensuring the wrap presses directly onto the surface of the custard to prevent a “skin” from forming. Refrigerate the mixture for a minimum of 8 hours, or ideally overnight (up to 24 hours), until it is thoroughly chilled. This extended chilling period is crucial for the flavors to meld and for the base to reach the ideal cold temperature required for efficient churning and maximum creaminess.
- Churning and Freezing: Once your Nutella custard base is perfectly chilled, pour it into your ice cream maker. Follow the specific instructions provided by your ice cream maker’s manufacturer for churning. Churning times can vary but typically range from 20 to 30 minutes, resulting in a soft-serve consistency. After churning, transfer the soft ice cream into a clean, airtight freezer-safe container. Place the container in the freezer for at least an additional hour, or until it firms up to a scoopable consistency. This final freezing step, often referred to as “ripening,” ensures the ice cream sets properly and develops its ultimate texture.
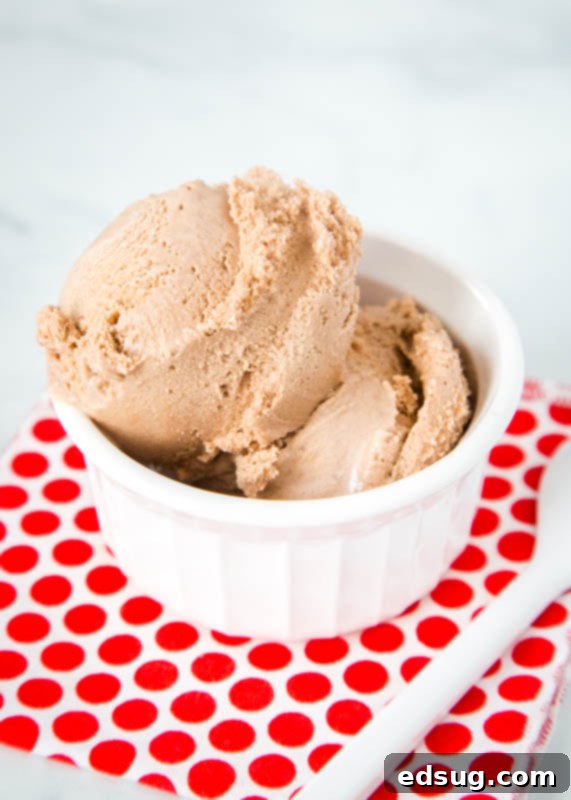
Expert Tips for Achieving the Creamiest Homemade Ice Cream
Making ice cream at home is a delightful culinary experience, and with a few key tips, you can ensure your Nutella ice cream is as smooth and creamy as possible, free from unwanted ice crystals. These pointers go beyond the basic recipe steps to help you master the art of homemade frozen desserts:
- Maximize Chilling Time: This is arguably the most important step for creamy ice cream. The longer your custard base chills in the refrigerator (ideally 12-24 hours), the colder it will be when it enters the ice cream maker. A thoroughly chilled base freezes faster, which prevents the formation of large ice crystals that can make ice cream gritty. It also allows the flavors to deepen and meld beautifully.
- Invest in Quality Ingredients: The final taste and texture of your ice cream are directly influenced by the quality of your ingredients. Use full-fat whole milk and heavy cream for optimal richness and smoothness. Fresh, large egg yolks contribute significant body and emulsifying power to the custard, resulting in a silkier product. And, of course, a good quality Nutella (or homemade alternative) is paramount for that authentic hazelnut-chocolate flavor.
- Don’t Overfill Your Ice Cream Maker: Ice cream expands as it churns and freezes, incorporating air and increasing in volume. Most ice cream makers should only be filled to about two-thirds of their capacity. Overfilling can lead to an inefficient churning process, a less creamy result, and potential overflow. Always refer to your specific machine’s instructions.
- Proper Airtight Storage is Key: Once your ice cream has churned and is transferred to the freezer, storing it correctly is crucial to maintain its texture and prevent freezer burn. Use a shallow, airtight container. For extra protection against ice crystals and freezer burn, press a piece of plastic wrap directly onto the surface of the ice cream before sealing the container.
- Allow for “Ripening”: While your ice cream may be soft-serve consistency right after churning, it greatly benefits from an additional 1-4 hours in the freezer to “ripen.” This allows it to firm up to a scoopable texture and further develop its creamy consistency.
- Bring to Temperature Before Serving: To enjoy your homemade Nutella ice cream at its absolute best, take it out of the freezer and let it sit on the counter for 5-10 minutes before scooping. This allows it to soften slightly, making it easier to scoop and enhancing its luxurious, creamy mouthfeel.
Serving Suggestions & Creative Variations
The beauty of this Nutella ice cream lies in its versatility. It’s magnificent on its own, offering a luxurious chocolate-hazelnut experience. However, don’t hesitate to elevate it further with creative toppings and serving ideas:
- Classic Toppings: Enhance the hazelnut notes with a generous sprinkle of chopped toasted hazelnuts. A drizzle of warm chocolate fudge sauce or a dollop of freshly whipped cream can turn a simple scoop into a gourmet dessert.
- Berry Bliss: The tartness of fresh raspberries, sliced strawberries, or even a berry compote provides a wonderful contrast to the rich sweetness of the Nutella, creating a balanced and refreshing treat.
- Epic Milkshakes: As mentioned, this ice cream makes the most epic Chocolate Milkshake. Simply blend a few scoops with a splash of milk (dairy or non-dairy) for an incredibly decadent and cooling beverage, perfect for those scorching 90+ degree days.
- Dessert Companion: Serve a scoop alongside a warm brownie, a slice of pound cake, a stack of pancakes, or even a delicate crepe. The melting ice cream will create a rich sauce that complements almost any baked good.
- Nutella Swirl: For an even more intense Nutella experience, gently swirl in an extra tablespoon or two of slightly softened Nutella into the churned ice cream as you transfer it to your storage container. This creates beautiful ribbons of concentrated Nutella flavor throughout.
- Affogato Style: Pour a shot of hot espresso over a scoop of Nutella ice cream for a sophisticated and energizing dessert. The hot and cold, bitter and sweet combination is truly divine.
I genuinely believe this is one of the best chocolate ice creams you’ll ever make. Unlike many chocolate ice creams that can taste artificial, this homemade Nutella version is deeply authentic and incredibly satisfying. If you’re a Nutella fan, this recipe is an absolute must-try. Trust me, it will be the highlight of your summer desserts and a treat you’ll crave year-round.
More Delicious Nutella Recipes to Explore
If this rich, hazelnut-chocolate delight has sparked your interest in all things Nutella, you’re in luck! There’s a world of delicious Nutella-infused treats waiting to be discovered. From breakfast delights to show-stopping desserts, Nutella’s unique flavor profile makes it an incredibly versatile ingredient, capable of elevating a wide array of dishes.
- Nutella Muffins: A perfect start to your day, these fluffy muffins boast a delightful hint of hazelnut chocolate, making breakfast feel like a special treat.
- Nutella Swirl Blondies: Chewy, sweet, and beautifully marbled with ribbons of Nutella, these blondies are a comforting dessert that’s easy to make and impossible to resist.
- Nutella Skillet Cookie: A warm, gooey, and utterly shareable dessert, baked in a cast-iron skillet, perfect for a cozy night in.
- Flourless Nutella Cake: For those seeking a gluten-free option or just an intensely rich chocolate experience, this dense and fudgy cake is a true indulgence.
- Nutella Donuts: Light and fluffy, these homemade donuts are often filled or glazed with a creamy Nutella, offering a delightful bite of sweetness.
- Nutella Cinnamon Rolls: A delightful twist on a breakfast classic, with the warm spice of cinnamon perfectly complementing the sweet, nutty flavor of Nutella.
- Fudgy Nutella Brownies: These dense, chocolatey brownies are elevated to new heights with the addition of Nutella, creating an even richer, more decadent texture and flavor.

Nutella Ice Cream
Pin Recipe
Rate Recipe
Print Recipe
Ingredients
- 2 cups whole milk
- 1 cup heavy cream
- 3/4 cup granulated sugar, divided
- 4 egg yolks
- 1/2 teaspoon vanilla extract
- 1/2 cup Nutella
Instructions
-
In a saucepan, combine milk, heavy cream and 1/2 cup of sugar. Heat over medium-low heat, stirring occasionally until the sugar is completely dissolved. This will take about 5 minutes.
-
Meanwhile, in a separate bowl, beat together egg yolks and remaining 1/4 cup of sugar until they are pale yellow and thick. This will take 3-4 minutes.
-
Once the sugar is completely dissolved, slowly add 1/2 cup of milk mixture into the eggs, whisking constantly. Once it is blended, pour everything back into the saucepan.
-
Heat over medium-low heat, stirring frequently until the mixture is thick enough to coat the back of a spoon (170-175 degrees F).
-
Pour through a strainer into a bowl and immediately add the vanilla and Nutella. Stir until the Nutella is completely incorporated into the mixture. Cover and store in the fridge until it is completely chilled, about 8 hours.
-
Once chilled, pour into your ice cream maker and follow the manufacturer instructions to freeze.
-
Store in an airtight container for about an hour until it is set before serving.
Nutrition
Nutrition information is automatically calculated, so should only be used as an approximation.
Additional Info
Like this recipe? Leave a comment below!
I created a fun group on Facebook, and I would love for you to join us! It’s a place where you can share YOUR favorite recipes, ask questions, and see what’s new at Dinners, Dishes and Desserts (so that you never miss a new recipe)!
Be sure to follow me on Instagram and tag #dinnersdishes so I can see all the wonderful DINNERS, DISHES, AND DESSERTS recipes YOU make!
Be sure to follow me on my social media, so you never miss a post!
Facebook | Twitter | Pinterest | Instagram
.
