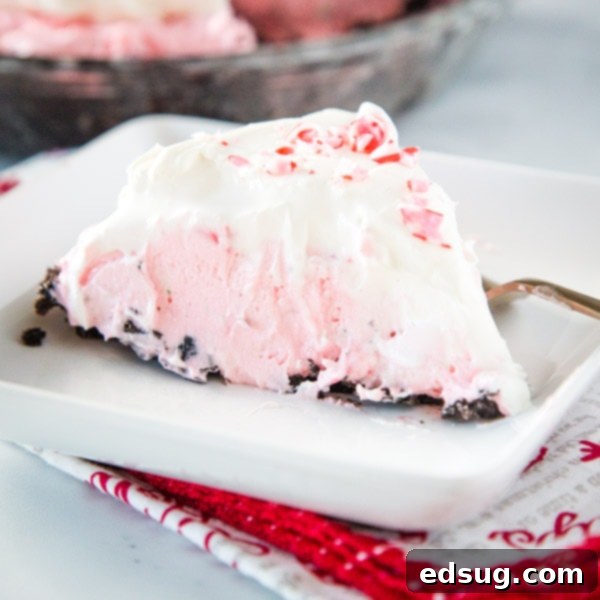
Irresistible No-Bake Candy Cane Pie: The Ultimate Peppermint Cheesecake for Effortless Holiday Entertaining
Indulge in the festive flavors of this delightful Candy Cane Pie – a luscious no-bake peppermint cheesecake, generously topped with fluffy whipped cream and sparkling crushed candy cane pieces. It’s truly the easiest and most impressive dessert for your holiday celebrations!
There’s something uniquely satisfying about no-bake recipes, and their appeal extends far beyond the warmer months. During the summer, they offer a welcome respite from a hot oven, keeping your kitchen cool. But when the holidays roll around, their true magic shines. With so many festive dishes vying for precious oven space, a delicious, easy-to-prepare dessert that doesn’t require baking is an absolute lifesaver. This Candy Cane Pie perfectly embodies that convenience, allowing you to create a show-stopping dessert without any added stress or heating up your kitchen.
Our family, for instance, has a cherished tradition of making Grasshopper Pie every Christmas Day, a ritual passed down since my husband’s childhood, and one we happily continue today. While classic traditions are wonderfully comforting, the holiday season also encourages a little culinary adventure and the joy of trying new, exciting treats. This year, why not introduce a new favorite to your festive spread with this spectacular no-bake Candy Cane Pie, offering a refreshing twist that will surely become a beloved addition?
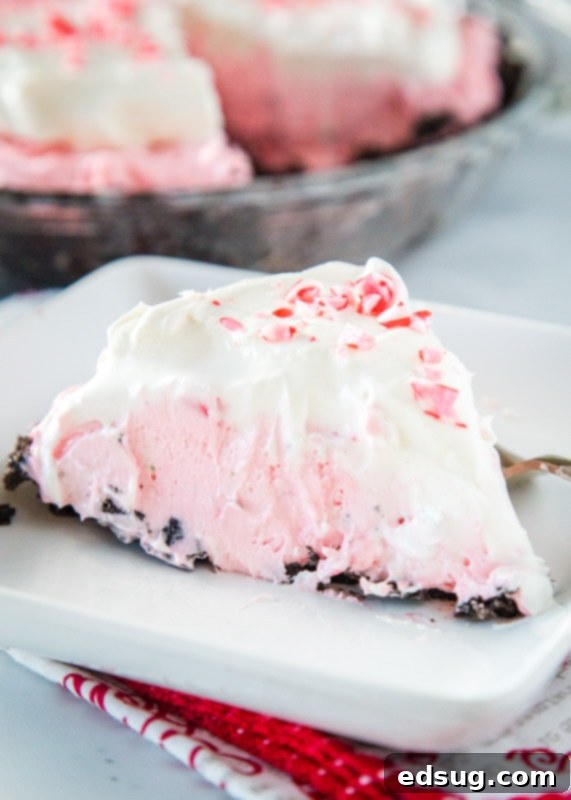
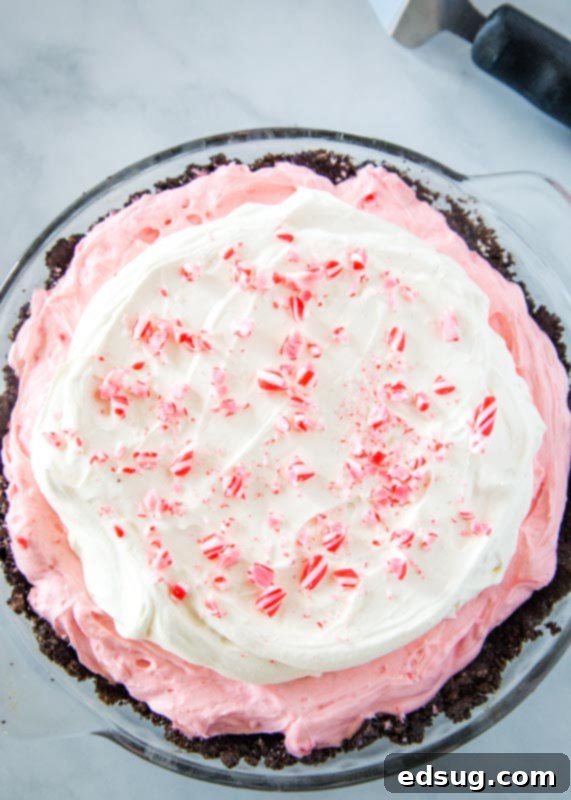
This Candy Cane Pie is truly a dream come true for peppermint enthusiasts! It’s essentially a creamy, no-bake peppermint cheesecake crafted with a rich, dark chocolate Oreo cookie crust, offering a delightful contrast to the cool minty filling. The vibrant, smooth peppermint cheesecake is generously studded with crunchy crushed candy cane pieces, providing bursts of festive flavor and texture with every bite. To complete this stunning holiday dessert, it’s crowned with a light, airy layer of homemade whipped cream, then sprinkled with more dazzling crushed candy canes for a beautiful presentation and an extra hint of minty goodness. It’s a visually appealing and incredibly satisfying treat that captures the essence of the holiday spirit.
Why This No-Bake Peppermint Pie Will Be Your Holiday Favorite
Discover the many reasons why this No-Bake Candy Cane Pie is destined to become a beloved staple in your holiday dessert repertoire:
- Effortless Preparation: The “no-bake” aspect is a huge advantage, especially during the busy holiday season. You won’t need to turn on your oven, saving you time, energy, and valuable oven space for other festive dishes. It’s a perfect dessert to whip up when your oven is already occupied with roasts or casseroles.
- Irresistible Flavor Combination: This pie offers a harmonious blend of rich chocolate from the Oreo crust and the cool, invigorating flavor of peppermint. It’s a classic holiday pairing that truly delights the taste buds, creating a refreshing yet indulgent experience.
- Visually Stunning Presentation: The vibrant, subtle pink hue of the creamy peppermint filling, juxtaposed with the crisp white whipped cream and sparkling red crushed candy cane pieces, creates a truly eye-catching dessert. It looks incredibly festive and sophisticated, making it a perfect centerpiece for any holiday table.
- Make-Ahead Mastery: One of the best features of this cheesecake is that it requires ample chilling time to set properly. This means you can easily prepare it a day or even two in advance, allowing you to focus on other holiday preparations closer to your event. Just add the final candy cane garnish before serving for optimal freshness and crunch.
- A Crowd-Pleasing Treat: Whether you’re serving adults or children, this peppermint cheesecake is universally appealing. Its smooth, creamy texture and familiar, beloved holiday flavors make it a guaranteed hit at any gathering, from intimate family dinners to larger holiday parties.
- Simple Ingredients: Despite its impressive appearance, this pie is made with straightforward, accessible ingredients that you can easily find at any grocery store. No exotic or hard-to-find components needed!
Key Ingredients for Your Perfect Candy Cane Pie
Crafting this delectable no-bake pie requires a few simple, readily available ingredients. Each component plays a vital role in creating the perfect balance of flavor and texture:
- Oreo Crust: This forms the irresistible foundation of our pie. You’ll need about 40 Oreo Thins cookies (or regular chocolate wafer cookies) finely crushed. These crumbs are then combined with melted butter, which acts as a binder, creating a firm, flavorful base. The dark chocolate of the Oreos provides a rich, complementary contrast to the bright peppermint filling.
- Heavy Cream (1 cup for filling, 1 cup for topping): This is essential for both the luscious cheesecake filling and the homemade whipped cream topping. When whipped, heavy cream adds lightness, airiness, and a rich mouthfeel. Make sure it’s very cold for optimal whipping results.
- Cream Cheese (one 8 oz package): The backbone of any cheesecake, providing that essential tangy, rich, and wonderfully creamy texture. For a perfectly smooth, lump-free filling, ensure your cream cheese is softened to room temperature before you begin mixing.
- Powdered Sugar (1 1/2 cups for filling, 1/4 cup for topping): Also known as confectioners’ sugar, this finely milled sugar sweetens the cream cheese filling and the whipped topping, dissolving easily to ensure a silky-smooth consistency without any graininess.
- Vanilla Extract (2 teaspoons for filling, 1/2 teaspoon for topping): A dash of pure vanilla extract enhances all the other flavors, adding a warm, aromatic depth that beautifully complements the cool peppermint, preventing the mint from being too overwhelming.
- Peppermint Extract (1 teaspoon): This is the star flavor component! Peppermint extract delivers that signature refreshing and festive minty taste. You can adjust the amount slightly to your preference, adding a little more if you desire a stronger minty kick, or a little less for a subtle hint.
- Red Food Coloring (8 drops): While optional, a few drops of red food coloring create a lovely, festive pink hue in the cheesecake filling, visually tying it to the candy cane theme. This makes the pie even more appealing and appropriate for holiday celebrations.
- Crushed Candy Canes (1/2 cup for filling, plus extra for decoration): These delightful crunchy bits are folded directly into the pie filling, providing texture and bursts of concentrated peppermint flavor. More crushed candy canes are sprinkled on top just before serving, not only for an extra layer of flavor but also for a beautiful, sparkling garnish that makes the pie truly pop.

If you’re looking to make this pie even simpler and save a step, you absolutely can use a store-bought Oreo cookie crust. However, for those who enjoy making things from scratch, I highly recommend using Oreo Thins to create your homemade crust. They produce a thinner, more delicate base that perfectly complements the smooth and creamy peppermint filling without being overly thick or crumbly, ensuring a balanced bite every time.
Step-by-Step Guide: How To Make Your Delicious Candy Cane Pie
Creating this festive peppermint pie is incredibly straightforward and surprisingly quick, even for novice bakers. Follow these simple, easy-to-understand steps to assemble your show-stopping holiday dessert:
- Prepare the Crust: If you’re opting for a homemade crust, begin by finely crushing your Oreo Thins cookies or chocolate wafer cookies. A food processor is ideal for achieving a uniform, fine crumb, but placing them in a Ziploc bag and crushing with a rolling pin works too. Combine these crushed cookies thoroughly with the melted butter until the mixture resembles wet sand. Press this mixture firmly and evenly into the bottom and slightly up the sides of a standard 9-inch pie plate. Once formed, place the prepared crust in the fridge to chill while you move on to the filling. This crucial step helps it firm up and prevents crumbling when sliced.
- Whip the Heavy Cream for Filling: In a large, clean mixing bowl (preferably chilled, along with your beaters), whip 1 cup of very cold heavy cream using an electric mixer on high speed. Continue whipping until stiff peaks form. Stiff peaks mean that when you lift the beaters, the cream holds its shape firmly and doesn’t droop. Be cautious not to over-whip, as it can quickly turn grainy or separate. Gently set this whipped cream aside.
- Create the Cream Cheese Base: In a separate, medium-sized bowl, beat the softened cream cheese with 1 1/2 cups of powdered sugar using an electric mixer. Beat until the mixture is completely smooth, light, and wonderfully creamy. Take your time with this step to ensure there are absolutely no lumps, which is key for a velvety filling.
- Add Flavor and Color: To the cream cheese mixture, add the vanilla extract, peppermint extract, and 8 drops of red food coloring. Mix thoroughly on low speed until the color is evenly distributed and the entire filling achieves a lovely, consistent, festive pink hue. Start with the suggested amount of peppermint extract; you can always taste-test and add a few more drops if you prefer a stronger mint flavor, but remember extracts are potent!
- Combine Filling Ingredients: Now, it’s time to gently incorporate the whipped cream into the flavored cream cheese mixture. Add the reserved whipped cream to the cream cheese bowl. Mix on a very low speed or, ideally, gently fold it in by hand with a spatula until everything is just evenly combined and no streaks remain. The goal here is to maintain the airy, light texture of the whipped cream, so avoid overmixing.
- Fold in Candy Canes: Finally, gently fold in 1/2 cup of the crushed candy canes into the creamy filling. This adds delightful bursts of peppermint flavor and a pleasing textural contrast. Once mixed, carefully pour the entire filling into your prepared and thoroughly chilled pie crust, spreading it evenly with a spatula.
- Prepare the Topping: For the luxurious topping, whip the remaining 1 cup of heavy cream in a clean bowl until stiff peaks form. Gradually add the 1/4 cup of powdered sugar and 1/2 teaspoon of vanilla extract, beating until well blended, smooth, and fluffy. Spread this luscious homemade whipped cream evenly over the top of the pie. For an extra festive touch and delightful crunch, sprinkle generously with additional crushed candy cane pieces right before serving.
- Chill to Set: This is a crucial step! Place the assembled pie back into the refrigerator for at least 2 hours to allow the cheesecake filling to set properly. This chilling time ensures that when you slice into it, you get clean, beautiful, firm slices. For the absolute best results and a perfectly set pie, overnight chilling is highly recommended.
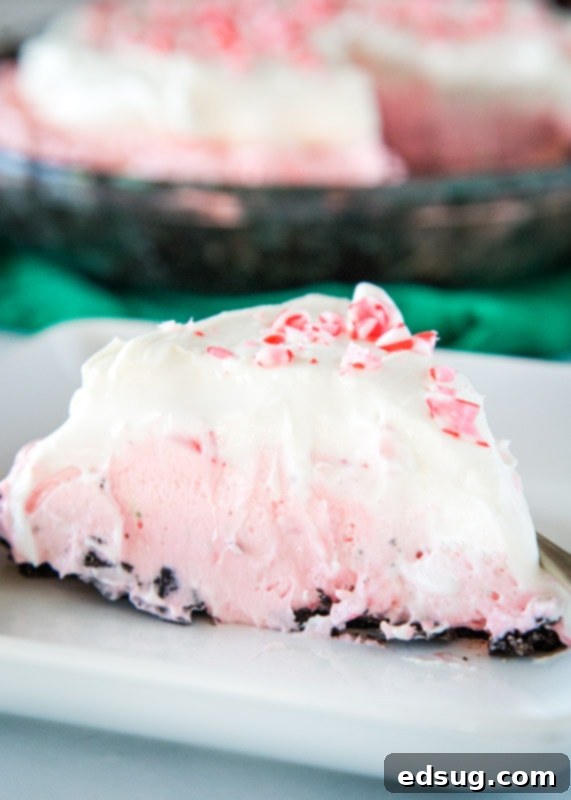
This peppermint pie isn’t just remarkably easy to make; it’s a wonderfully light, irresistibly creamy, and vibrantly flavored dessert that’s perfect for any holiday gathering. Its refreshing taste and beautiful presentation make it a welcome and impressive addition to any festive table, promising smiles and satisfied palates.
Storing Your No-Bake Peppermint Pie to Keep it Fresh
Proper storage is essential to keep your Candy Cane Pie tasting fresh, maintaining its creamy texture, and looking its absolute best for as long as possible. Since this is a dairy-based dessert, it absolutely needs to be stored in the refrigerator at all times. To protect its delicate flavors and prevent it from absorbing other refrigerator odors, cover the pie loosely but securely with plastic wrap or aluminum foil. When stored correctly, this delightful pie will maintain its quality for 3-4 days in the fridge.
A helpful tip regarding the crushed candy canes on the top: after a couple of days, they may start to soften and melt slightly into the whipped cream topping due to moisture. While this won’t diminish the delicious taste, if presentation is paramount for your serving, you might want to consider adding the final sprinkle of crushed candy canes just before you plan to serve the pie. This ensures they retain their crisp texture and vibrant, sparkling look, making each slice a visual treat.
This makes the Candy Cane Pie a fantastic dessert to make ahead of time. You can fully prepare the pie the day before your event, allowing it to chill thoroughly overnight. Then, simply adorn it with fresh crushed candy canes right before slicing and serving. This approach not only frees up your time on the day of your gathering but also guarantees a perfectly fresh and visually appealing dessert that will undoubtedly impress your guests with its festive charm and irresistible flavor.
Expert Tips for Success & Creative Variations
To ensure your No-Bake Candy Cane Pie turns out perfectly every single time, and to spark your culinary creativity, keep these valuable tips and exciting variations in mind:
Tips for a Flawless Pie:
- Softened Cream Cheese is Crucial: This cannot be stressed enough! Using room temperature cream cheese ensures it blends smoothly with the powdered sugar, preventing any unsightly lumps in your filling. If your cream cheese is too cold, you’ll end up with a chunky texture, so plan ahead!
- Avoid Overmixing: When gently folding in the whipped cream into the cream cheese mixture, mix just until everything is combined and no streaks of white cream remain. Overmixing can deflate the airy whipped cream, leading to a denser, less ethereal filling. A light hand is key to maintaining that fluffy texture.
- Chill Time is Your Best Friend: Resist the temptation to slice the pie early! The minimum 2-hour chill time (and ideally, overnight refrigeration) is absolutely essential. This allows the gelatin-like properties of the cream cheese and the butter in the crust to firm up beautifully, ensuring clean, picture-perfect slices.
- Effortless Candy Cane Crushing: The easiest way to crush candy canes is to place them in a sturdy Ziploc bag, seal it, and then use a rolling pin or a meat mallet to gently (or not-so-gently!) smash them into your desired size pieces. This prevents a sticky mess and ensures uniform crumbles.
- High-Quality Extracts: The flavor of your peppermint extract will significantly impact the overall taste of your pie. Opt for a good quality pure peppermint extract for the best, brightest, and most authentic mint flavor.
Creative Variations to Try:
- Explore Different Crusts: While the Oreo crust is a beloved classic for this pie, don’t hesitate to experiment! A simple graham cracker crust can offer a lighter, less intense chocolate flavor, allowing the peppermint to truly shine. Alternatively, a vanilla wafer crust could provide a sweeter, more delicate base.
- Indulgent Chocolate Drizzle: For an extra layer of decadence and visual appeal, consider drizzling melted dark or white chocolate over the whipped cream topping just before serving. A quick swirl pattern can make it look incredibly gourmet.
- Add Mint Chocolate Chips: If you’re a true chocoholic, instead of, or in addition to, the crushed candy canes in the filling, you could fold in mini mint chocolate chips. These would add another dimension of chocolatey goodness and a different textural element.
- No Food Coloring Option: If you prefer to avoid food coloring, or simply enjoy a more minimalist look, feel free to omit the red food coloring. The pie will still be incredibly delicious and will simply have a beautiful creamy white filling, which can be equally elegant.
- Spiced Crust: For a more complex flavor profile in the crust, try adding a pinch of cinnamon or nutmeg to your crushed Oreo mixture. It can add a subtle warmth that complements the cool peppermint.
This holiday season, delight your family and friends with this incredibly delicious Oreo Peppermint Pie. It’s so effortlessly simple to prepare, yet guarantees to be a showstopper that will receive rave reviews and requests for the recipe. Make it a new cherished tradition or a refreshing twist on your usual holiday dessert spread!
More Festive Christmas Dessert Recipes to Explore
If you’re looking for even more delightful sweet treats to grace your holiday table, or simply seeking inspiration for your next baking adventure, consider these other fantastic and festive recipes:
- Christmas Dessert Lasagna
- Vanilla Caramel Pie
- Bailey’s Chocolate Cheesecake
- Pumpkin Dream Cake
- Peppermint White Chocolate Mousse Pie
- Grasshopper Cupcakes
- Peppermint Chocolate Cheesecake


Candy Cane Pie
Pin Recipe
Rate Recipe
Print Recipe
Ingredients
Cookie Crust
- 40 Oreo Thins cookies or chocolate wafer cookies
- 1/4 cup butter, melted
Pie Filling
- 1 cup heavy cream
- 1 8 oz package cream cheese
- 1 1/2 cups powdered sugar
- 2 teaspoons vanilla extract
- 1 teaspoon peppermint extract
- 8 drops red food coloring
- 1/2 cup crushed candy cane
Topping
- 1 cup heavy cream
- 1/4 cup powdered sugar
- 1/2 teaspoon vanilla extract
- Crushed candy cane for decoration
Instructions
-
Mix together crushed Oreos or chocolate wafer cookies with the melted butter and press into the pie plate. Store in the fridge until you are ready to use.
-
In a large bowl whip the heavy cream to stiff peaks and set aside.
-
In a separate bowl beat together cream cheese and powdered sugar until smooth and creamy.
-
Add in vanilla extract, peppermint extract, and red food coloring. Mix until it is an even pink color.
-
Add the whipped cream to the cream cheese mixture and mix on low until everything is evenly combined.
-
Fold in the crushed candy canes and pour into the prepared pie crust.
-
To make the topping, beat heavy cream until stiff peaks, add in powdered sugar and vanilla until blended. Spread over the top of the pie and sprinkle with more candy cane pieces.
-
Let the pie sit in the fridge for at least 2 hours to set up before you slice it.
Notes
For the topping, instead of fresh whipped cream, you can use an 8-ounce container of Cool Whip.
Nutrition
Nutrition information is automatically calculated, so should only be used as an approximation.
Additional Info
Like this recipe? Leave a comment below!
I’ve created a fun and engaging community group on Facebook, and I’d be absolutely thrilled for you to join us! It’s a vibrant space where you can share your favorite recipes, ask culinary questions, and stay updated on all the exciting new content from Dinners, Dishes, and Desserts (so you’ll never miss a delicious new recipe!).
Be sure to follow me on Instagram and
tag #dinnersdishes so I can see all the wonderful DINNERS, DISHES, AND DESSERTS
recipes YOU create and share!
Don’t miss out on any posts! Be sure to follow me on my social media channels:
Facebook | Twitter | Pinterest | Instagram
