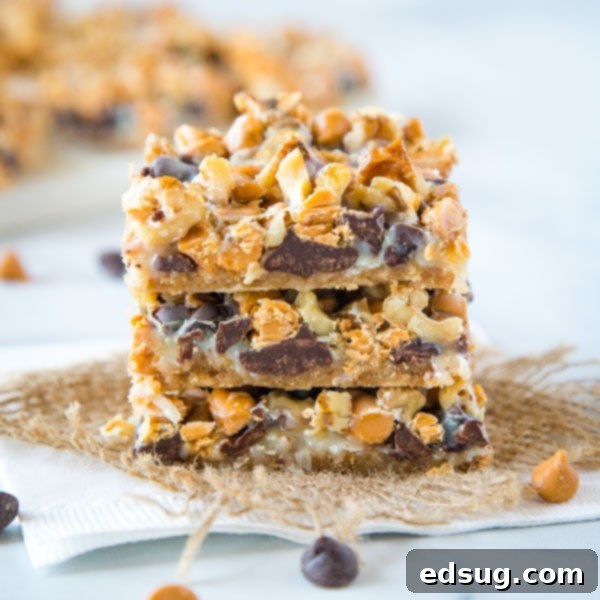
Irresistible Magic Cookie Bars: The Ultimate 7-Layer One-Pan Dessert
Prepare to be enchanted by the timeless delight of Magic Cookie Bars! These incredibly easy-to-make dessert bars are a true classic, celebrated for their rich layers and effortless preparation. Often known by affectionate nicknames like Seven Layer Bars, One-Pan Bars, or Hello Dolly Bars in various families and regions, these treats require minimal effort but deliver maximum flavor. Imagine a symphony of crunchy graham cracker crust, rich chocolate, sweet butterscotch, flaky coconut, and hearty nuts, all bound together by the luscious embrace of sweetened condensed milk. Baked in a single pan, they’re the ultimate fuss-free dessert perfect for holiday gatherings, potlucks, or simply satisfying that deep sweet craving.
For many, Magic Cookie Bars evoke a powerful sense of nostalgia. Growing up, these delectable squares were a cherished staple at my grandma’s house. Her kitchen always smelled of their warm, sweet aroma, and a tray of them rarely lasted long once they were cooled and cut. If you hail from the Midwest or have a connection to classic American baking, chances are you’ve enjoyed these many times before! They are a beloved part of American culinary heritage, gaining significant popularity in the 1960s thanks to promotions by Eagle Brand Sweetened Condensed Milk, which cemented their place in countless recipe boxes. Their enduring popularity is no mystery – they’re simply irresistible and remarkably simple to make.
Why Magic Cookie Bars are a Crowd-Pleasing Favorite
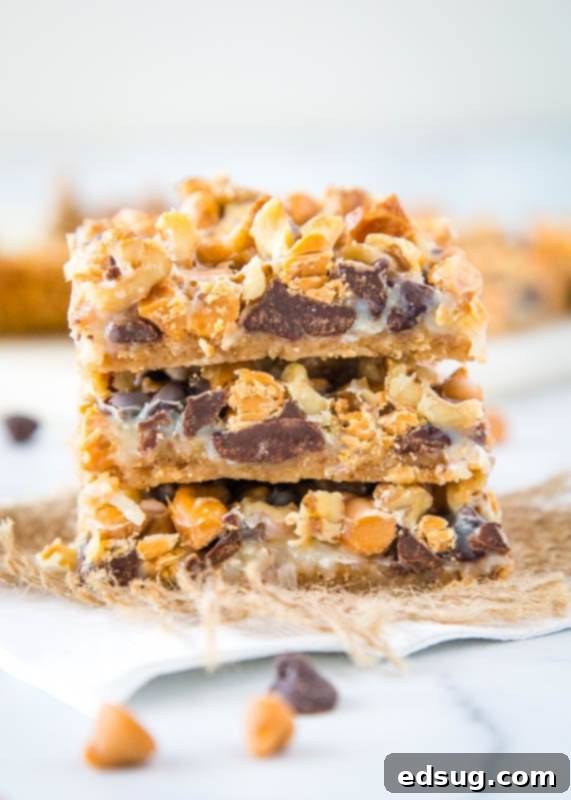
What gives Magic Cookie Bars their universal appeal? It’s their perfect combination of textures and flavors that create a harmonious dessert experience. Each bite offers a satisfying crunch from the graham crackers and nuts, a delightful chewiness from the coconut, and a melt-in-your-mouth richness from the gooey chocolate and butterscotch. The star ingredient, sweetened condensed milk, truly works its “magic” by caramelizing during baking. It seeps down through all the layers, binding everything into a cohesive, unbelievably decadent bar that is both sweet and incredibly moist. This caramelization process adds a depth of flavor that sets these bars apart.
Beyond the phenomenal taste and texture, their simplicity is a huge draw. As the name “One-Pan Bars” suggests, almost all the action happens right in the baking dish, which means significantly less cleanup compared to many other baking projects. This recipe is an ideal choice for beginner bakers, busy parents, or anyone looking for a quick yet impressive dessert that consistently delivers smiles. They are incredibly forgiving, making them a low-stress option for any occasion.
The Essential Ingredients for Your Magical Creation
The beauty of these bars lies in their straightforward, yet perfectly balanced ingredients. While the “seven layers” can vary slightly depending on personal preference, the core components combine to create that signature magical taste and texture. This recipe keeps things classic and simple, requiring just seven common pantry staples. Here’s a closer look at what you’ll need:
- Butter: We always recommend using unsalted butter in baking to allow you to control the overall salt content in your recipe. Melted butter forms the delicious, sturdy foundation of our graham cracker crust.
- Graham Crackers: Crushed graham crackers are the base of these bars, providing a sweet, subtly spiced, and crumbly foundation that perfectly complements the rich toppings. You can buy pre-crushed crumbs or crush whole crackers yourself in a food processor or by hand.
- Shredded Coconut: Sweetened shredded coconut adds a delightful tropical flavor and a wonderful chewiness that is an iconic characteristic of these bars. It toasts beautifully during baking, enhancing its flavor.
- Semi-Sweet Chocolate Chips: A generous scattering of semi-sweet chocolate chips provides a familiar, comforting chocolatey goodness that melts into luscious pockets throughout the bars.
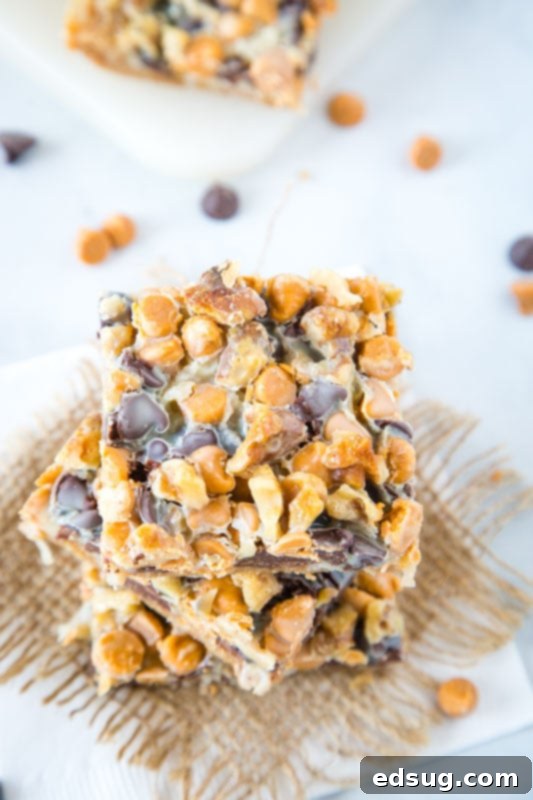
- Butterscotch Chips: These are crucial for the classic Magic Bar flavor! Butterscotch chips add a distinctive, caramel-like sweetness with a hint of a salty-butter note that makes these bars truly unique and incredibly addictive.
- Walnuts: Finely chopped walnuts contribute a lovely crunch and an earthy, nutty flavor, helping to balance the sweetness of the other ingredients. They add a satisfying texture contrast.
- Sweetened Condensed Milk: This is arguably the most “magic” ingredient! Poured over all the layers, it caramelizes during baking, transforming into a rich, gooey sauce that permeates every layer, binding everything together into a golden, irresistible masterpiece. Make sure it’s sweetened condensed milk, not evaporated milk!
Step-by-Step Guide: How to Make Magic Cookie Bars
This Magic Bar recipe truly lives up to its name – it’s incredibly simple to assemble. You literally just need seven ingredients that you layer into a single pan, then bake. My grandma always started by mixing the butter and graham cracker crumbs directly in the bottom of the pan, which is a fantastic shortcut that eliminates extra dishes and makes cleanup even easier. Here’s a detailed breakdown of the steps to ensure perfect bars every time:
- Prepare Your Oven & Baking Dish: First things first, preheat your oven to 350°F (175°C). For easy removal and cleanup, which is a key part of the “one-pan” magic, line a 13×9 inch baking dish with parchment paper. Ensure the parchment paper hangs over the longer sides of the pan; these flaps will be your handles to lift the entire slab of bars out once they’ve cooled.
- Create the Graham Cracker Crust: In the base of your prepared baking dish, pour in the melted butter. Then, add the graham cracker crumbs directly on top of the butter. Using your hands or the back of a spoon, mix these two ingredients together until the crumbs are evenly moistened. Once combined, press this mixture firmly and evenly into the bottom of the pan to form a compact crust. Don’t worry if it looks like a very thin layer; this is perfectly fine and provides the ideal base.
- Begin Layering the Goodness: Once your crust is prepared, it’s time to add the “magic” layers. Sprinkle the shredded coconut evenly over the graham cracker crust. Aim for an even distribution across the entire surface.
- Add the Chips and Nuts: Next, follow with a generous layer of semi-sweet chocolate chips, ensuring good coverage. Then, add the butterscotch chips, distributing them evenly across the pan. Finally, sprinkle the chopped walnuts over the top of the chips. The key here is to create an even distribution so every single bar gets a delightful mix of all the flavors and textures.
- The Sweetened Condensed Milk Drizzle: To finish the layering, take your can of sweetened condensed milk and evenly pour it over all the layered ingredients. Don’t worry if it doesn’t look like it covers everything perfectly at this stage; as it bakes, the milk will seep down, melt, and meld with all the layers, creating that characteristic gooey, caramelized texture that everyone loves.
- Bake to Golden Perfection: Place the baking dish in your preheated oven and bake for approximately 25-30 minutes. You’ll know they’re ready when the edges are visibly bubbling, and the top layers (especially the coconut) are beautifully golden brown. The center should also appear mostly set when gently jiggled.
- Cool Completely Before Slicing: This step is absolutely crucial for achieving perfectly clean, non-crumbly bars! Remove the bars from the oven and allow them to cool completely on a wire rack before attempting to cut them. Rushing this step will result in messy, sticky, and difficult-to-slice bars. Once thoroughly cooled, use the parchment paper overhang to lift the entire slab out of the pan, then carefully slice into your desired square or rectangular portions.
Recipe Tips, Creative Variations, and Expert Suggestions
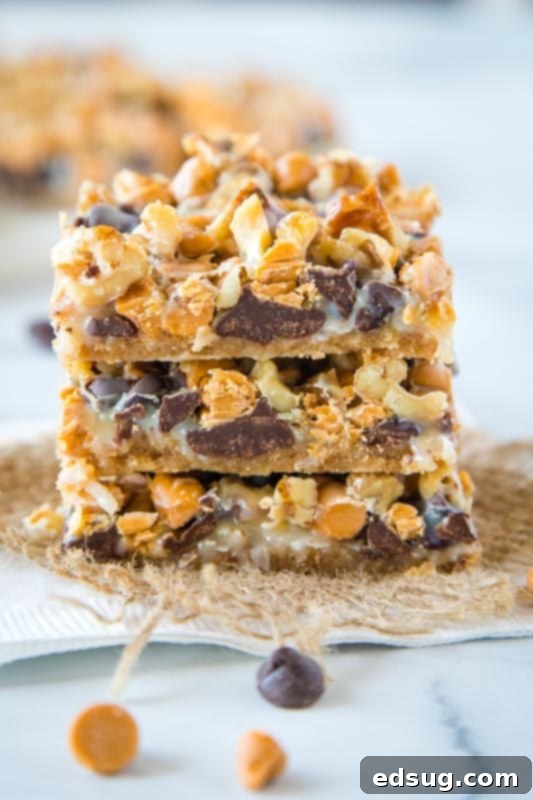
While the classic Magic Cookie Bar recipe is utterly perfect as is, it’s also incredibly versatile, allowing for fun customizations to suit your taste, dietary preferences, or simply what you happen to have on hand. Don’t be afraid to get creative and make these bars truly your own!
- Experiment with Nuts: My grandma always used walnuts, and they are undoubtedly a classic choice. However, you can absolutely use whatever nuts you like best! Pecans are another incredibly popular choice, adding a rich, buttery flavor that many find irresistible. Almonds, cashews, or even a mixed nut blend would also be wonderful additions, offering a different texture and taste profile. If you’re nut-free, simply omit them or replace them with an equal amount of seeds (like sunflower or pumpkin seeds) or even more chips!
- Not a Coconut Fan? No Problem! Coconut is one of those ingredients that tends to divide opinion – you either love it or you don’t. If you’re not keen on coconut, you can easily substitute it with old-fashioned oats (rolled oats). Oats provide a pleasant chewiness and a wholesome, nutty flavor that complements the other ingredients beautifully without being overpowering. Another simple option is to simply omit the coconut and add an extra half cup of chocolate chips or nuts to fill the void.
- Chip Choices Galore: This recipe traditionally calls for semi-sweet chocolate and butterscotch chips, a truly iconic combination that defines the classic Magic Bar. But feel free to mix and match to create new flavor profiles! White chocolate chips offer a creamy, sweet contrast, while dark chocolate chips provide a richer, more intense flavor that balances the overall sweetness. Peanut butter chips are a fantastic addition for a salty-sweet twist, or try milk chocolate for an even sweeter profile. You could even use a combination of three different chip types for an extra burst of flavor and visual appeal.
- No Graham Crackers? No Worries! If graham crackers aren’t readily available in your region, don’t despair! Crushed Digestive Biscuits are an excellent substitute and will yield a very similar, delicious crust. You could also use crushed vanilla wafers, shortbread cookies, ginger snaps for a spiced version, or even oat biscuits. Just ensure you have the correct amount of crumbs as specified in the recipe.
- Add a Pinch of Salt: For an extra layer of flavor and to help cut through the sweetness, consider adding a tiny sprinkle of flaky sea salt over the top of the bars just before baking. This simple addition can enhance all the sweet and rich flavors beautifully.
- Lining the Pan is Key: Seriously, do not skip lining your pan with parchment paper! This simple step ensures that your bars lift out easily and intact, making cutting a simple, mess-free task and dramatically reducing cleanup time. It’s a game-changer!
- Even Layers Matter: While the process is incredibly simple, try to distribute your layers as evenly as possible across the pan. This ensures that each individual bar gets a balanced mix of all the delicious ingredients, guaranteeing a consistent and satisfying bite every time.
- Don’t Overbake: Keep a close eye on the bars during the last few minutes of baking. You want them to be golden brown and set, but not dried out. Overbaking can make them less gooey and slightly harder, losing some of that coveted “magic.”
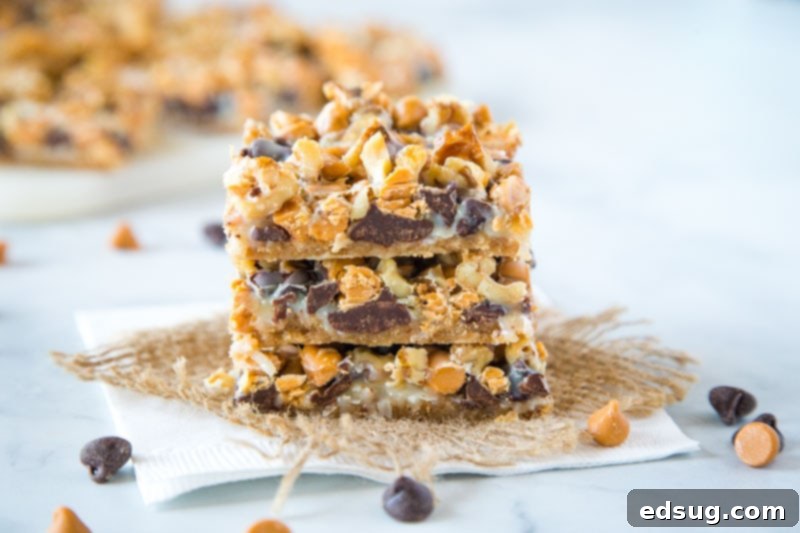
Why You’ll Fall in Love with This One-Pan Dessert
I absolutely adore a simple dessert that doesn’t demand much time or result in a towering pile of dirty dishes. These Magic Cookie Bars truly fit that description perfectly. From the moment you start to the moment they go into the oven, you’re looking at about five minutes of hands-on work. Just a couple of measuring cups to wash, no extra mixing bowls, no complicated steps or fancy techniques – it’s baking at its most relaxing and rewarding! The result is always a consistently crowd-pleasing tray of golden, chewy, and utterly delicious bars that disappear almost as quickly as you made them.
They are the perfect solution for impromptu guests, fantastic for last-minute bake sale contributions, an easy treat for school lunches, or simply a comforting dessert for your family on a busy weeknight. The combination of sweet, salty, and crunchy is truly addictive, and the gooey texture is pure bliss. Once you try this recipe, these bars are sure to become a beloved and frequently requested addition to your recipe repertoire, just as they have been a cherished favorite in my family for generations.
Storage and Serving Suggestions
To keep your Magic Cookie Bars fresh and delicious, store them at room temperature in an airtight container for up to 3-4 days. If you want them to last longer, you can refrigerate them for up to a week. For even longer storage, these bars freeze beautifully! To freeze, wrap individual bars tightly in plastic wrap, then place them in a freezer-safe bag or container. They can be stored in the freezer for up to 2-3 months. Thaw frozen bars at room temperature for about an hour before serving for the best texture.
While Magic Cookie Bars are absolutely perfect on their own, there are ways to elevate the experience. A warm Magic Cookie Bar with a scoop of vanilla bean ice cream is a truly decadent treat. They also pair wonderfully with a hot cup of coffee, a soothing mug of tea, or a cold glass of milk. For a festive twist during the holidays, you can swap in seasonal chips like peppermint chips or white chocolate chips with a sprinkle of crushed candy canes. The versatility of this dessert makes it a fantastic canvas for your culinary imagination!
More Great Dessert Recipes to Satisfy Your Sweet Tooth
If you’ve enjoyed the ease and deliciousness of these Magic Cookie Bars, you’re in for a treat! Here are some other fantastic dessert recipes that are equally simple to make and sure to become new family favorites:
- Copycat Cosmic Brownies
- Classic Peanut Butter Chocolate Chip Cookies
- Easy No-Bake Kool-Aid Pie
- Decadent Chocolate Peanut Butter Cream Pie
- Chewy Golden Coconut Macaroons
Magic Cookie Bars Recipe
A classic one-pan dessert featuring seven glorious layers of graham cracker crust, shredded coconut, semi-sweet chocolate chips, butterscotch chips, and chopped walnuts, all generously drenched in sweetened condensed milk and baked to gooey perfection. This recipe is incredibly easy and yields a truly irresistible treat!
Quick Stats
- Author: Erin Sellin
- Prep Time: 5 minutes
- Cook Time: 25-30 minutes
- Total Time: 30-35 minutes (plus cooling)
- Yields: 24 servings
- Course: Dessert
- Cuisine: American
Ingredients
- 1/2 cup (1 stick) unsalted butter, melted
- 1 1/4 cups graham cracker crumbs
- 1 cup shredded coconut (sweetened or unsweetened)
- 1 cup semi-sweet chocolate chips
- 1 cup butterscotch chips
- 1 cup chopped walnuts (or pecans)
- 1 (14 oz) can sweetened condensed milk
Instructions
- Preheat Oven & Prep Pan: Preheat your oven to 350°F (175°C). Line a 13×9 inch baking dish with parchment paper, leaving an overhang on the longer sides for easy lifting.
- Make the Crust: In the bottom of the prepared baking dish, combine the melted butter and graham cracker crumbs. Press the mixture firmly and evenly into the base of the pan to form a thin crust.
- Layer the Coconut: Sprinkle the shredded coconut evenly over the graham cracker crust.
- Add the Chips & Nuts: Next, evenly sprinkle the semi-sweet chocolate chips, followed by the butterscotch chips, and then the chopped walnuts over the coconut layer.
- Pour the Magic Milk: Drizzle the entire can of sweetened condensed milk evenly over all the layers. It will bind everything together as it bakes.
- Bake: Bake for 25-30 minutes, or until the edges are golden brown and bubbling, and the center appears set.
- Cool & Slice: Remove the pan from the oven and let the bars cool completely on a wire rack before slicing them into squares or rectangles. Cooling completely is crucial for clean cuts. Enjoy!
Nutrition Information (Approximate per serving)
- Calories: 246 kcal
- Carbohydrates: 27g
- Protein: 3g
- Fat: 15g
- Saturated Fat: 8g
- Polyunsaturated Fat: 6g
- Cholesterol: 18mg
- Sodium: 96mg
- Fiber: 1g
- Sugar: 23g
Nutrition information is automatically calculated, so should only be used as an approximation.
Like this recipe? We’d love to hear from you! Leave a comment below and share your experience.
Connect With Our Community!
We absolutely love hearing from you and seeing all your wonderful culinary creations! Join our fun and supportive community where you can share your favorite recipes, ask questions, and stay updated on all the new recipes from Dinners, Dishes and Desserts.
I created a fun group on Facebook, and I would love for you to join us! It’s a fantastic place where you can share YOUR favorite recipes, get inspiration, ask questions, and see what’s new at Dinners, Dishes and Desserts (so that you never miss a new recipe)!
Be sure to follow me on Instagram and tag #dinnersdishes so I can see all the wonderful DINNERS, DISHES, AND DESSERTS recipes YOU make! I love seeing your posts!
Don’t miss a single post or delicious recipe update! Be sure to follow us on all our social media channels:
Facebook |
Twitter |
Pinterest |
Instagram
