Mastering Homemade Croissants: Your Guide to Flaky, Buttery Perfection
Discover the secrets to making exquisite, melt-in-your-mouth croissants right in your own kitchen!
Our Thanksgiving plans took an unexpected, delightful turn a few years ago. Instead of a traditional family gathering in Wisconsin, we found ourselves booking flights to Paris. Surprisingly, the cost of airfare to France was less expensive than flying domestically, making a Parisian Thanksgiving an irresistible offer we couldn’t refuse. This serendipitous decision led us on an incredible culinary adventure that forever changed my perception of this classic French pastry.
Knowing that November in Paris would likely bring cold and rainy weather, we planned a variety of indoor activities. As I researched options, one particular experience caught my eye: a croissant baking class. The thought of learning to bake these iconic pastries in their homeland filled me with immense excitement. For me, fresh croissants are synonymous with Paris – a vivid memory from a trip there when I was 17, and a culinary delight I cherished deeply.

Our journey to Paris was not without its challenges. Cancelled flights and unexpected delays meant that our croissant class was scheduled just hours after our weary arrival. Having been awake for nearly 30 hours, it was far from ideal, but the anticipation of buttery, flaky goodness fueled us. We pushed through the exhaustion, determined to embrace this unique opportunity.
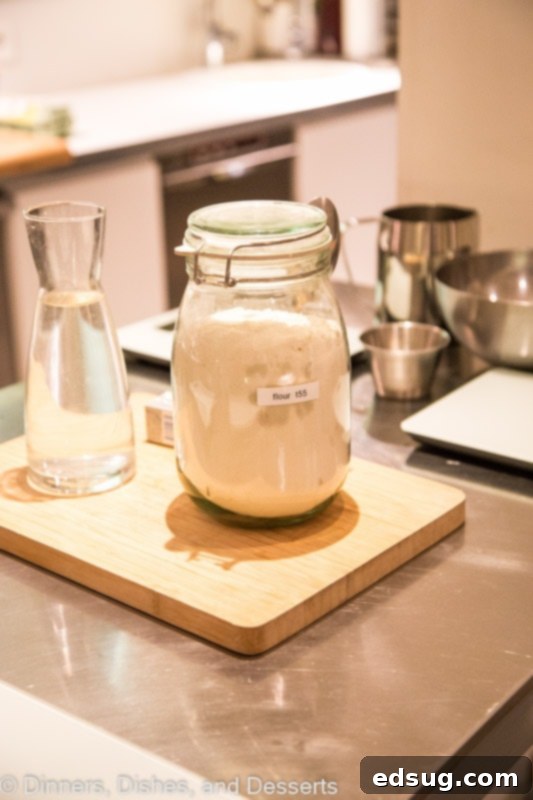
Upon arrival, we were warmly greeted by our instructor and the three other enthusiastic participants. Our teacher, a true artisan, immediately put us at ease and began with the fundamental principles of croissant making. We delved into the intricacies of different flour types – the protein content in bread flour for structure and the delicate nature of pastry flour for tenderness. We learned about the critical role of high-quality butter, particularly European-style butter with its higher fat content, which is essential for achieving those coveted flaky layers. The importance of selecting premium ingredients, even for a seemingly simple recipe, was repeatedly emphasized as the cornerstone of exceptional results.

Divided into small groups, we embarked on the journey of creating three batches of croissants. Precision was paramount, and we meticulously measured every ingredient using digital scales. We each took turns, first mixing the initial dough components, then kneading the dough until it reached the perfect consistency – smooth, elastic, and ready for the next crucial step. However, the most memorable and surprisingly fun part of the process was undoubtedly “pounding the butter.” Using a rolling pin, we systematically pounded a large block of cold butter into a perfectly uniform rectangle of specific thickness. This meticulous preparation ensures the butter can be seamlessly incorporated into the dough, creating distinct, even layers during the lamination process.
These thin, even layers of butter, meticulously folded and rolled into the dough, are the magic behind a croissant’s ethereal flakiness. The key lies in maintaining the butter’s cold temperature throughout the rolling process. If the butter melts and integrates too much into the dough, those beautiful, separate layers will be lost, resulting in a dense, bread-like texture rather than the light, airy, and shatteringly crisp crumb we all crave. This hands-on experience, understanding the ‘why’ behind each step, has truly inspired me. I’m incredibly excited to replicate this process and master a batch of homemade croissants in my own kitchen!

The Art and Science: How to Make Croissants at Home
Embarking on the journey of making homemade croissants is a rewarding experience, though it requires patience and attention to detail. While the process is involved, it’s not inherently difficult. With a methodical approach and quality ingredients, you can achieve bakery-worthy results. Here are some essential tips we learned in our Parisian class and insights for success:
- Embrace the Process and Be Patient: Making croissants is a multi-step process that spans several hours, often over two days. This extended timeline allows for proper chilling and proofing, which are critical for developing flavor and structure. Don’t rush; you can easily break down the steps, allowing the dough to rest and rise in the refrigerator overnight, making the process manageable even for busy schedules. Think of it as a culinary meditation, where each step contributes to the final masterpiece.
- Choose High-Quality European Style Butter: This is arguably the most crucial ingredient for truly exceptional croissants. European butter boasts a higher fat content (typically 82-84% compared to 80% in American butter) and less water. This higher fat percentage makes the butter more pliable, easier to work with without tearing the dough, and less likely to melt too quickly. It also contributes significantly to the rich flavor and, most importantly, the distinct, delicate layers that create the signature flaky texture. Seek out brands specifically labeled “European-style butter” for the best results.
- Master the Even Roll: Precision in rolling is vital at every stage. When incorporating the butter block into the dough and during each subsequent “turn” or fold, it’s imperative to roll the dough into an even rectangle without thin spots. Uneven rolling can lead to inconsistent layers, resulting in areas that are dense and doughy, while others might be too thin and tear. A perfectly even rectangle ensures that when you fold the dough multiple times (the lamination process), the butter layers are distributed uniformly, allowing for maximum rise and flakiness during baking.
- Follow Instructions and Prioritize Accuracy: Croissant making is often described as baking science. Every measurement, every chilling time, the temperature of your ingredients, and the exact dimensions you roll and fold the dough are significant. Unlike some baking where you can eyeball quantities, precision is non-negotiable here. Invest in a good digital kitchen scale for accurate ingredient measurements. Respect the rise times, as inadequate proofing can lead to heavy croissants, while over-proofing can collapse the delicate structure. Temperature control, especially keeping the butter and dough cold, is key to preventing the butter from melting into the dough prematurely. While I’m not always the most meticulous baker, this experience taught me that for truly outstanding homemade croissants, strict adherence to the recipe is essential.
- Understand Lamination: The core of a croissant’s structure is lamination – the process of repeatedly folding and rolling butter into dough to create hundreds of thin layers. Each fold creates new layers of butter and dough, which separate during baking as the water in the butter turns to steam, pushing the dough layers apart. This creates the characteristic airy, open crumb and crisp exterior. Maintaining the cold temperature of the butter prevents it from integrating with the dough and ensures these distinct layers can form.

Our enriching croissant class was hosted by Le Foodist, a fantastic culinary school in Paris. They offer an impressive array of workshops, and I genuinely wish we had more time to explore their other offerings. On the same day, a macaroon baking class was taking place on a different level, and when we left, their perfectly formed, vibrant macarons looked absolutely exquisite! We proudly carried a box of our freshly baked croissants home, savoring them as delicious snacks throughout the rest of our trip, a constant reminder of our culinary achievement.
If you’re planning a visit to Paris and are looking for a unique, enriching experience beyond the typical tourist attractions, I wholeheartedly recommend considering a cooking class. It’s an incredible way to immerse yourself in French culture, deepen your understanding of the food you’re enjoying, and gain valuable skills you can bring back to your own kitchen. This hands-on experience provides a memorable souvenir that lasts far longer than any trinket. Even my 13-year-old son, who isn’t usually keen on cooking, found the croissant class to be incredibly engaging and fun. It truly is an activity for everyone, offering both education and enjoyment.

I created a fun group on Facebook, and I would love for you to join us! It’s a place where you can share YOUR favorite recipes, ask questions, and see what’s new at Dinners, Dishes and Desserts (so that you never miss a new recipe)! If you’d like to check it out, you can request to join HERE.
Be sure to follow me on Instagram and tag #dinnersdishes so I can see all the wonderful DINNERS, DISHES, AND DESSERTS recipes YOU make!
Connect with Dinners, Dishes, and Desserts!
Be sure to follow me on my social media, so you never miss a post!
Facebook | Twitter | Pinterest | Instagram


Homemade Croissants
Pin Recipe
Rate Recipe
Print Recipe
Ingredients
- Starter
- 20 g fresh yeast
- 112 g water, room temperature,
- 75 g all purpose flour
- 375 g pastry flour
- 100 g all purpose flour
- Dough
- 175 g milk, room temperature
- 110 g butter, cold
- 50 g sugar
- 12 g salt
- 350 g butter, chilled
- Egg Wash
- 1 whole egg
- 1 yolk
- pinch of salt.
Instructions
-
Whisk together the yeast, water and 75 grams of all purpose flour in the bottom of an electric mixer bowl. This forms your initial starter, a crucial step for developing flavor and active yeast.
-
In a separate bowl, mix together the pastry flour and 100 grams of all purpose flour. Carefully place this flour mixture on top of the yeast starter in the mixer bowl. Do NOT mix these together yet; instead, gently press down on the flour to create a smooth, flat surface. Cover the bowl and let it rest for 15-30 minutes at room temperature, or until you observe deep cracks beginning to form in the flour layer. This indicates the yeast is active and the starter is ready.
-
Now, add the milk, the 110g of cold butter (cut into small pieces), sugar, and salt to the starter mixture in the electric mixer bowl. Attach the dough hook and mix on a low speed for 2-3 minutes. Continue mixing until all ingredients are thoroughly combined and a smooth, cohesive ball of dough forms. Transfer the dough to a large, clean bowl, cover it with plastic wrap, and let it rise in a warm place for approximately one hour, or until it has visibly doubled in size.
-
Once the dough has risen, gently turn it out onto a lightly floured surface. Using your hands, carefully press the dough into a rectangle measuring approximately 14×10 inches. Cover this dough rectangle loosely with plastic wrap and transfer it to the refrigerator for 1-2 hours. This chilling step is essential to firm up the dough and relax the gluten, preparing it for the butter lamination.
-
While the dough chills, prepare your butter block. Place the 350 grams of chilled butter between two sheets of parchment paper. Using a rolling pin, pound the butter evenly until it forms a square, roughly 6×6 inches in size. The goal is a uniform thickness without soft spots. Place the butter block back into the refrigerator to keep it very cold and firm until needed.
-
Lightly flour your work surface once more. Remove the chilled dough from the refrigerator. Gently roll the dough out to ensure it is wide enough to perfectly encase the butter block.
-
Position the cold butter square at an angle (like a diamond) in the center of the rolled-out dough. Fold the four corners of the dough over the butter, completely encasing it to form a neat parcel. Press down gently but firmly with your rolling pin to eliminate any air pockets trapped inside. Now, carefully and evenly roll the dough out into a rectangle, approximately 20 x 8 inches. It’s crucial that the butter is spread uniformly throughout the dough layer, so maintain even pressure. This completes your first encapsulation.
-
Turn 1 (Single Fold): Gently fold the rolled-out dough into thirds, as you would a business letter. Bring one end of the dough rectangle to the center, then fold the other end over it, ensuring the edges align perfectly. Cover the folded dough with plastic wrap and return it to the refrigerator to chill for at least 1 hour. This chilling time is vital to re-harden the butter and relax the gluten.
-
Turn 2 (Single Fold): After the first chill, remove the dough from the fridge. Place it on your lightly floured surface with the open seam facing you (like a book spine). Roll the dough out again to approximately 20×8 inches, maintaining even thickness. As before, fold it into thirds, cover with plastic wrap, and chill for another 1 hour. This repeated rolling and folding creates the numerous delicate layers characteristic of croissants.
-
Turn 3 (Optional Overnight Chill): At this point, you have the flexibility to leave the dough in the fridge overnight if you prefer to continue the process the following day. This extended chill can also enhance flavor. For Turn 3, place the chilled dough on your floured surface with the open seam facing you. Roll it out to approximately 20×8 inches. Fold it into thirds once more, cover, and chill for a final 30 minutes. Once all three turns are complete, the dough is ready for shaping, or you can store it in the refrigerator for a couple of days, or even freeze it for future use.
-
To shape the croissants, take one third of the laminated dough (keeping the rest chilled). Place it on your floured surface, orienting it like a book. Roll the dough out to approximately 20 x 8 inches. Using a sharp knife or pastry wheel, trim the edges to create clean, straight lines. Then, cut the dough width-wise into three equal sections. Place one section onto your floured surface and cover the remaining dough, keeping it chilled in the fridge until you are ready to roll out more.
-
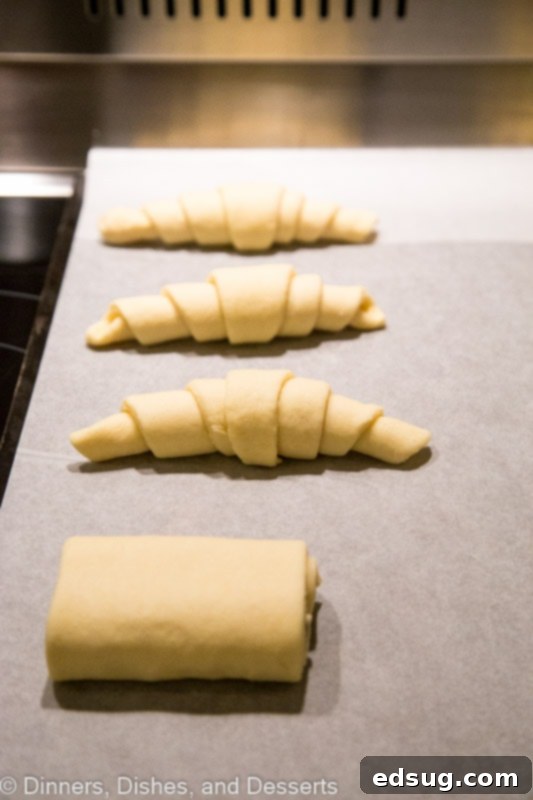
Take one of the cut sections of dough and roll it out further to achieve a rectangle of approximately 20 x 8 inches (if not already there after previous step, adjust as needed). Clean up the edges again for a perfect rectangle. Now, cut this rectangle into triangles, each roughly 5×8 inches (base x height). Make a small, approximately 1/2-inch slit in the center of the base of each triangle. Gently give the two corners of the base a little tug to slightly stretch them, then tightly roll up each triangle from the base towards the tip, forming the classic croissant shape. Ensure the tip is tucked underneath to secure the roll.
-
Arrange your shaped croissants on a baking sheet lined with parchment paper. Prepare the egg wash by whisking together 1 whole egg, 1 yolk, and a pinch of salt. Lightly coat the croissants with a thin layer of this egg wash. Allow the croissants to rise in a warm, draft-free place for 30-50 minutes, or until visibly puffy and almost doubled in size (this is the final proofing). Just before baking, apply a second, thin layer of the remaining egg wash for a beautiful golden-brown crust.
-
Preheat your oven to 350°F (175°C). Bake the croissants for approximately 12-15 minutes, or until they are deeply golden brown, puffed, and incredibly fragrant. Baking time may vary slightly depending on your oven, so keep an eye on them.
-
Once baked, remove the croissants from the oven and transfer them to a wire rack. Allow them to cool completely before indulging. While warm croissants are tempting, cooling allows the butter to set and the internal structure to stabilize, giving you the best flaky texture. Enjoy your magnificent homemade croissants!
Nutrition
Nutrition information is automatically calculated, so should only be used as an approximation.
Additional Info
Like this recipe? Leave a comment below!
