Perfect Homemade Caramels: Your Guide to Soft, Chewy, Buttery Delights
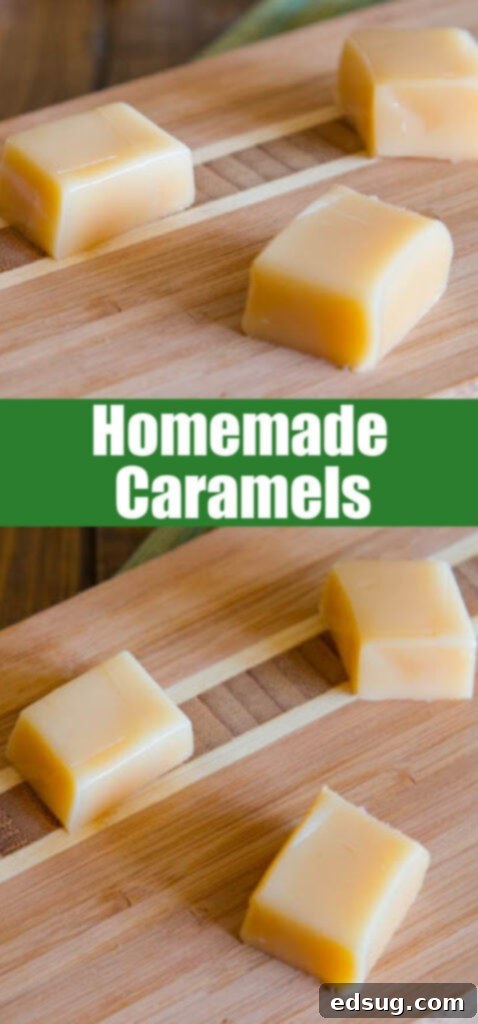
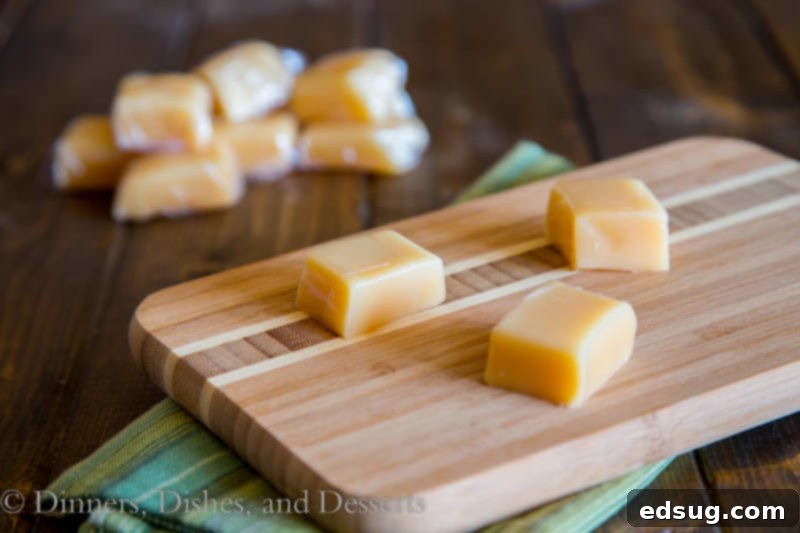
There’s something truly magical about homemade caramels. Imagine sinking your teeth into a piece of candy that is incredibly soft, delightfully chewy, exquisitely buttery, and utterly delicious. It’s a taste experience that elevates any occasion, especially during the festive holiday season. While store-bought caramels can be good, nothing quite compares to the rich, nuanced flavor and perfect texture of a caramel made from scratch in your own kitchen. These classic homemade caramels are not just a treat; they’re an experience, a tradition waiting to be born in your home, just as they became a cherished tradition for my family.
My love affair with homemade caramels began during my college years, thanks to my husband. He’s the engineer in our family – precise, detail-oriented, and excellent at following directions. So, it was no surprise when he decided to master the art of candy making, and homemade caramels became our signature holiday confection. While it might seem daunting, especially with the need for exact temperatures, I promise you, making your own caramels is incredibly rewarding and surprisingly simple once you understand the basic principles. The secret lies in a few quality ingredients and a good understanding of temperature control.
Why Make Caramels from Scratch?
Beyond the simple joy of creating something delicious, homemade caramels offer several advantages:
- Unbeatable Flavor and Texture: You control the ingredients, leading to a richer, more buttery, and perfectly chewy caramel that store-bought versions often can’t match.
- Perfect for Gifting: Hand-wrapped homemade caramels make an incredibly thoughtful and impressive gift for friends, family, and neighbors during the holidays or any time of year.
- A Fun Family Tradition: Like many holiday baking projects, making caramels can become a cherished annual tradition, creating lasting memories.
- Customization: Once you master the basic recipe, you can experiment with variations like sea salt caramels, chocolate-dipped caramels, or different flavor extracts.
The Essential Ingredients for Irresistible Caramels
Making delicious homemade caramels requires just a few basic ingredients, but the quality of these ingredients truly makes a difference in the final product. Here’s what you’ll need and why each component is crucial:
- Butter: Opt for unsalted butter. It provides the rich, creamy flavor and helps create that smooth, melt-in-your-mouth texture. Butter is fundamental to the caramel’s luxurious mouthfeel.
- Granulated Sugar: This is the base of your caramel. When cooked, sugar undergoes a caramelization process, developing the signature amber color and deep, complex flavors.
- Heavy Cream: Essential for achieving the signature soft and chewy consistency. The high fat content in heavy cream adds richness and prevents the caramel from becoming brittle.
- Light Corn Syrup: This often-misunderstood ingredient is vital for preventing sugar crystallization, which can make your caramels grainy. Corn syrup helps maintain a smooth texture and contributes to the chewiness. Don’t skip it!
- Vanilla Extract: Added at the very end, vanilla enhances all the other flavors, providing a warm, aromatic finish that makes the caramels truly irresistible. Use a good quality pure vanilla extract for the best results.
The simplest and most reliable way to ensure consistently perfect caramels every time is to use a high-quality Candy Thermometer. This tool takes the guesswork out of the cooking process, allowing you to hit the precise temperature needed for that ideal soft, chewy texture. Without it, you’re essentially guessing, which can lead to caramels that are either too hard or too soft.
How To Make Irresistible Homemade Caramels: A Step-by-Step Guide
For the exact measurements and a convenient printable format, please refer to the FULL PRINTABLE recipe card located at the bottom of this post.
- Prepare Your Pan: First, select an 8-inch square baking dish. Line it completely with parchment paper, making sure the paper extends over the edges to create “handles.” Lightly grease the parchment paper with butter or non-stick spray. This preparation is critical for easy removal once the caramels have cooled.
- Combine and Cook Ingredients: In a large, heavy-bottomed saucepan, combine the butter, granulated sugar, heavy cream, and light corn syrup. Place the saucepan over medium heat. Stir the mixture constantly with a sturdy whisk or wooden spoon. Continuous stirring is essential to prevent scorching and ensure even cooking. Attach your candy thermometer to the side of the pan, ensuring the tip is submerged in the mixture but not touching the bottom. Continue stirring until the mixture reaches precisely 245º F (118º C) on your candy thermometer. This process typically takes 15-20 minutes once the mixture begins to boil. **Important:** Resist the urge to increase the heat to speed things up, as this can cause the sugar to crystallize or burn, resulting in a failed batch. If you don’t have a candy thermometer, you can use the cold water test: drop a small amount of the hot caramel mixture into a cup of very cold water. Allow it to cool for a moment, then try to shape it into a ball. When it’s ready, it should form a firm, yet pliable ball that holds its shape but can still be pressed flat.
- Add Vanilla: Once the mixture reaches 245º F, immediately remove the pan from the heat. Carefully stir in the vanilla extract. The mixture will bubble and steam, so be cautious.
- Cool Completely: Pour the hot caramel mixture into your prepared baking dish. Do not scrape the bottom or sides of the saucepan, as this can introduce crystallized sugar into your smooth caramel. Allow the caramels to cool completely at room temperature, undisturbed, for several hours or even overnight. This cooling process is crucial for the caramels to set properly.
- Cut and Wrap: Once thoroughly cooled and firm, use the parchment paper handles to lift the caramel slab out of the dish. Place it on a cutting board. Using a sharp, buttered knife or a pizza cutter, cut the caramel into 1-inch squares or desired shapes. Individually wrap each caramel in small pieces of plastic wrap, wax paper, or foil to prevent sticking and maintain freshness.
Expert Tips for Homemade Caramel Success
- Patience is Key: Caramel making is a precise art that cannot be rushed. Cooking the mixture slowly over medium heat and stirring constantly prevents burning and ensures even caramelization. Don’t be tempted to turn up the heat; consistency is more important than speed.
- Invest in a Good Candy Thermometer: While the cold water test can work, a reliable candy thermometer is your best friend for perfect caramels every single time. It eliminates guesswork and helps you hit the exact temperature for the desired chewiness. Look for one that clips to the side of your pot and has clear temperature markings.
- Calibrate Your Thermometer: Even the best thermometers can be off by a few degrees. Calibrating it ensures accuracy. See the section below for how to do this simple test.
- Use a Heavy-Bottomed Pan: A heavy-bottomed saucepan distributes heat more evenly, reducing the risk of scorching the sugar at the bottom while the rest of the mixture cooks.
- Avoid Stirring After Boiling: Once the mixture comes to a boil, you can stop constant stirring, but continue to occasionally scrape down the sides of the pan with a wet pastry brush to prevent sugar crystals from forming. However, once you’re close to your target temperature, it’s best to stop stirring entirely and let the thermometer do its job.
- Humidity Matters: High humidity can affect how your caramels set, making them softer or stickier. On very humid days, you might need to cook the caramel an extra degree or two to achieve the desired firmness.
How To Calibrate Your Candy Thermometer for Accuracy
An accurate candy thermometer is paramount for successful caramel making. This simple test will help you adjust for any discrepancies:
Place your candy thermometer in a large pot filled with water. Bring the water to a rolling boil. Pure water boils at 212º F (100º C) at sea level. Observe what temperature your thermometer reads once the water is at a full boil. If your thermometer reads 215º F, it’s 3 degrees too high. This means you would need to cook your caramel to 242º F instead of the recipe’s specified 245º F. Conversely, if it reads 205º F, it’s 7 degrees too low, so you would cook your caramel to 238º F. Always adjust your target temperature based on your thermometer’s calibration to ensure perfect results.
Frequently Asked Questions About Homemade Caramels
Hard caramels typically occur when the mixture has been overcooked and reached too high a temperature. This means too much moisture evaporated, leaving a very firm candy. It’s crucial to monitor your candy thermometer closely and remove the pan from the heat as soon as it hits the target temperature of 245º F. The cold water test should also indicate a firm ball, not a brittle one.
You might be able to! A common salvage method is to return the hard caramels to a saucepan with a few tablespoons of water. Melt them down slowly over low heat, stirring occasionally. Once fully melted, bring the mixture back up to 244º F (just slightly lower than the original target) on your candy thermometer. Pour back into a prepared dish to cool. While this doesn’t always guarantee a perfect fix, it’s definitely worth attempting before discarding the batch.
This indicates that your caramels were undercooked and did not reach a high enough temperature. Not enough moisture evaporated, resulting in a sticky, unset consistency. Similar to hard caramels, you can try to fix them. Return the soft caramels to a clean saucepan with 2 tablespoons of water. Slowly melt them down, then cook the mixture again until it reaches 244º F (118º C). Be patient and stir constantly. Recooking can sometimes restore the proper texture, though results can vary.

Storage Solutions for Your Homemade Caramels
Proper storage is essential to keep your homemade caramels soft, fresh, and non-sticky for as long as possible. Once the caramels have cooled completely and been cut into individual pieces, it’s crucial to wrap each one separately. You can use small squares of plastic wrap, wax paper, or foil. This individual wrapping prevents them from sticking to each other and protects them from air exposure, which can cause them to harden or become dry.
Store your wrapped caramels in an airtight container at room temperature. A cool, dry pantry is ideal. Avoid refrigerating them, as the cold can alter their texture, making them too firm. When stored correctly, these delightful homemade caramels will maintain their wonderful soft and chewy texture for 2-3 weeks, making them perfect for preparing ahead for holidays or special events. They also make fantastic edible gifts when placed in decorative tins or bags.
More Festive Dessert Recipes to Enjoy
If you’ve enjoyed making these classic homemade caramels, you’re likely a fan of other sweet treats, especially during the festive season. Here are some more of my favorite dessert recipes perfect for holidays, gatherings, or simply satisfying your sweet tooth:
- Reese’s Fudge: A peanut butter and chocolate dream in fudge form.
- Peanut Butter Balls: A no-bake classic, rich with peanut butter and coated in chocolate.
- Classic Chocolate Fudge: Smooth, creamy, and undeniably decadent.
- White Chocolate Peppermint Cookies: A refreshing and festive cookie with a delightful minty crunch.
- Cream Cheese Spritz Cookies: Delicate, buttery, and perfect for piping into intricate holiday shapes.
- Buckeye Cookies: The perfect combination of chocolate and peanut butter in a delightful cookie form.
- Chocolate Covered Oreos: A simple yet elegant treat, especially when dipped in chocolate and sprinkled with peppermint.
- Gingerbread Truffles: Spicy, sweet, and bursting with holiday flavor.

Homemade Caramels
Erin Sellin
5 minutes
35 minutes
40 minutes
64
Rate Recipe
Print Recipe
Ingredients
-
2
cups
granulated sugar
-
1/2
cup
unsalted butter
-
2
cups
heavy cream
-
3/4
cup
light corn syrup -
1/2
teaspoon
vanilla extract
Instructions
-
Grease or line an 8 inch baking dish with parchment paper.
-
Combine all ingredients in a large saucepan over medium heat. Stir constantly until mixture reaches 245º F on a candy thermometer. If you don’t have a thermometer; test in a cup of cold water. Drop a small amount into water, and shape into a ball. Once it holds is shape until pressed, it is done.
-
Remove the pan from the heat immediately and stir in the vanilla extract.
-
Pour into prepared baking dish, and allow to cool completely.
-
Cut into 1 inch squares, and wrap individual in plastic wrap, foil, or wax paper.
Notes
Nutrition
Serving:
1
g
|
Calories:
74
kcal
|
Carbohydrates:
10
g
|
Fat:
4
g
|
Saturated Fat:
3
g
|
Polyunsaturated Fat:
1
g
|
Cholesterol:
12
mg
|
Sodium:
16
mg
|
Sugar:
10
g
Nutrition information is automatically calculated, so should only be used as an approximation.
Additional Info
Erin Sellin
5 minutes
35 minutes
40 minutes
Dessert Recipes
American
64
74
Like this recipe? Leave a comment below!
I created a fun group on Facebook, and I would love for you to join us! It’s a place where you can share YOUR favorite recipes, ask questions, and see what’s new at Dinners, Dishes and Desserts (so that you never miss a new recipe)!
Be sure to follow me on Instagram and tag #dinnersdishes so I can see all the wonderful DINNERS, DISHES, AND DESSERTS recipes YOU make!
Don’t miss out on new recipes and updates! Be sure to follow me on my social media channels:
Facebook | Twitter | Pinterest | Instagram
