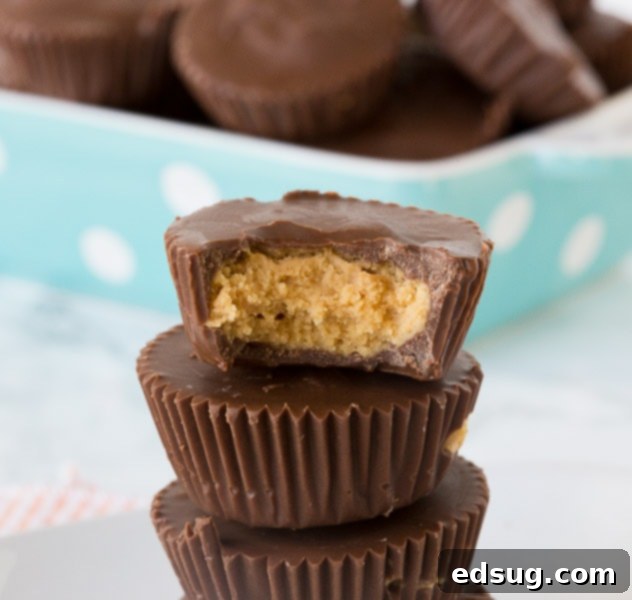
Ultimate Guide to Easy Homemade Peanut Butter Cups: Your Favorite Chocolate Candy, Made Simple
Recreate your beloved classic candy at home with just a handful of basic ingredients. While making homemade candy can sometimes seem daunting, these delightful peanut butter cups are incredibly easy to prepare and yield truly irresistible results!
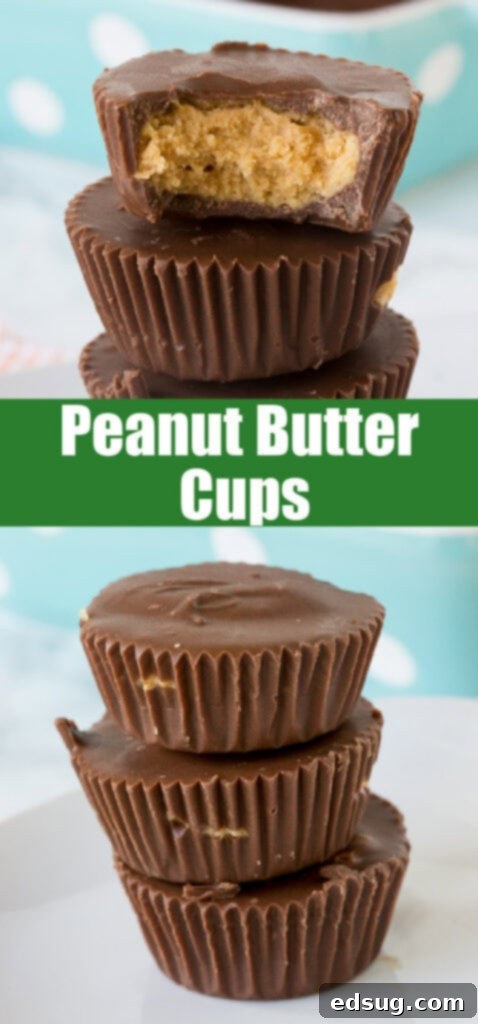
There’s a special place in my heart, and frankly, my pantry, for peanut butter cups. I confess to having a slight obsession with incorporating them into almost every dessert recipe imaginable. However, constantly relying on store-bought Reese’s became a less appealing option when I realized just how simple it is to craft my own. And let me assure you, these homemade peanut butter cups are every bit as delicious as their commercial counterparts – if not superior. There’s an immense satisfaction that comes from knowing exactly what ingredients go into these sweet treats, free from unfamiliar preservatives or artificial flavors.
You too can indulge in the joy of my chocolate peanut butter obsession by exploring other recipes like these Chocolate Peanut Butter Cookies, which perfectly blend two classic flavors. For a bite-sized delight, try my Peanut Butter Brownie Bites, featuring a rich, sweet, and nutty filling. Kids, and adults alike, absolutely adore Reese’s Peanut Butter Rice Krispie Treats – a fantastic way to elevate a lunchbox staple to an extraordinary new level!
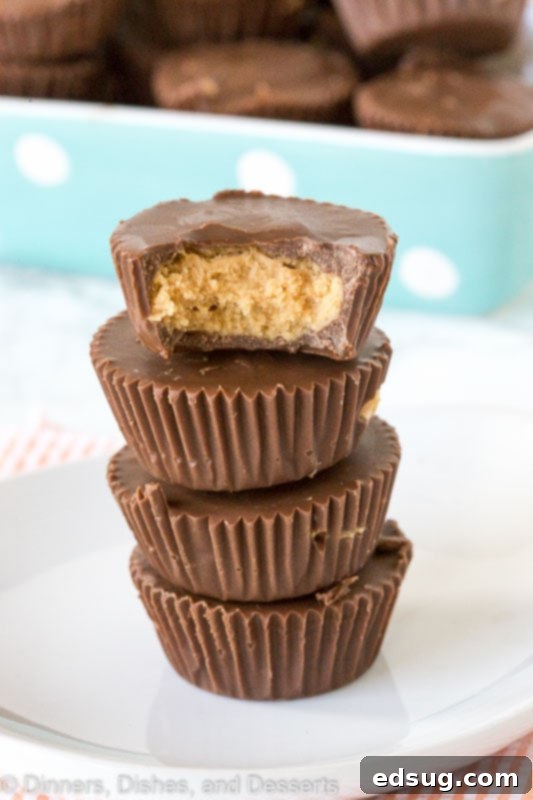
Why This Easy Homemade Peanut Butter Cup Recipe Works So Well
This homemade peanut butter cup recipe is a winner for several compelling reasons, making it a favorite for both novice and experienced candy makers:
- Quick & Convenient: You can have these delectable treats cooling in the fridge, ready to set, in approximately 30 minutes or less. The most challenging part of the entire process is patiently waiting for the chocolate to firm up so you can finally savor them! This makes them perfect for a last-minute dessert or a fun kitchen project.
- Wholesome Ingredients: With a straightforward and minimal ingredient list, you’re in complete control of what goes into your homemade peanut butter cups. This means no strange preservatives, artificial colors, or unidentifiable flavors, just pure, simple goodness you can trust.
- Unbeatable Flavor & Texture: The inclusion of real butter in the peanut butter filling is a game-changer. It imparts an incredibly rich, smooth, and oh-so-scrumptious texture that elevates these peanut butter cups far beyond ordinary. The combination of creamy peanut butter and luscious chocolate is truly divine.
- No Tempering Required: One of the biggest fears in home candy making is tempering chocolate. Thankfully, with this recipe, there’s absolutely no need to fuss over tempering! The addition of shortening helps the chocolate maintain a beautiful, smooth, and stable consistency as it sets, ensuring a professional-looking finish without any extra effort.
Essential Ingredients for Your Homemade Peanut Butter Cups
Gathering your ingredients is the first step to creating these delightful treats. You’ll find that everything on this list is readily available at your local grocery store, ensuring a hassle-free baking experience.
- Creamy Peanut Butter: This is the star of the show and absolutely essential for achieving the rich, smooth, and creamy filling that defines these peanut butter cups. Opt for a classic creamy variety rather than natural or crunchy peanut butter, as its consistent texture is key to a flawless filling.
- Milk Chocolate: To truly replicate the beloved flavor and comforting texture of a classic Reese’s, milk chocolate is the preferred choice for the outer shell. You can use milk chocolate chips, melting wafers, or a good quality milk chocolate bar chopped into pieces. The sweetness and creaminess of milk chocolate perfectly complement the peanut butter.
- Powdered Sugar (Confectioners’ Sugar): Beyond simply sweetening the peanut butter filling, powdered sugar plays a crucial role in giving it structure and helping it to thicken to the perfect consistency. Its fine texture also ensures a smooth, non-gritty filling.
- Butter: A touch of real butter adds an incredible depth of flavor and an irresistible richness to the peanut butter filling. It helps achieve that melt-in-your-mouth quality and a more luxurious mouthfeel. Unsalted butter is generally recommended so you can control the saltiness.
- Salt: A small pinch of salt is vital for balancing the sweetness of the chocolate and peanut butter. It enhances all the flavors, creating that perfect sweet and salty contrast that makes these treats so addictive.
- Shortening: This ingredient is your secret weapon for making the chocolate easy to work with and ensuring it sets beautifully without the need for tempering. Shortening helps the chocolate melt smoothly, creates a nice sheen, and prevents bloom (the white streaks that can appear on chocolate).
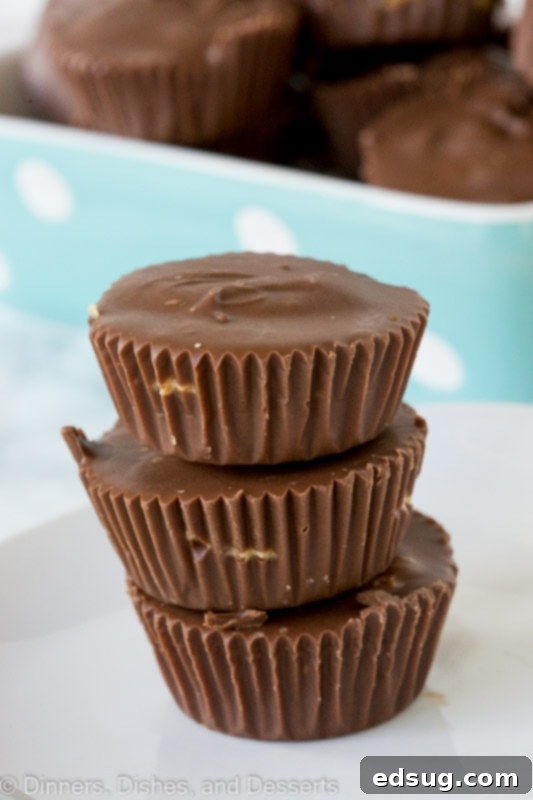
Step-by-Step Guide: How To Make Homemade Peanut Butter Cups
Creating these delightful chocolate and peanut butter candies is surprisingly simple. Follow these steps for perfect results every time:
- Prepare Your Muffin Tray: Start by lining a mini muffin tray with paper liners. These liners are essential for easily removing your finished peanut butter cups and for keeping them neat. Ensure each cavity has a liner for best results.
- Create the Peanut Butter Filling: In a microwave-safe bowl, combine the creamy peanut butter, softened butter, and a pinch of salt. Microwave the mixture for about 20-30 seconds, just until the butter is softened and the mixture is pliable enough to stir easily. Be careful not to fully melt the butter or overheat the peanut butter. Once soft, stir in the powdered sugar until everything is thoroughly combined and forms a thick, smooth, and slightly crumbly dough-like consistency.
- Melt the Chocolate: Using a double boiler, gently melt the milk chocolate and shortening together. A double boiler provides indirect, gentle heat, which is crucial for melting chocolate smoothly without scorching it. If you don’t have a double boiler, you can create one by placing a heatproof bowl over a pot of simmering water, ensuring the bowl does not touch the water. Stir frequently until the chocolate is completely smooth and glossy.
- Assemble Your Peanut Butter Cups: Now for the fun part! Spoon about a teaspoon of the melted chocolate into the bottom of each prepared mini muffin liner. Next, take a teaspoon of the peanut butter mixture, flatten it slightly with your fingers, and gently place it on top of the chocolate layer in each liner. Finally, cover the peanut butter layer with another teaspoon or so of melted chocolate, ensuring the peanut butter is fully encased.
- Release Air Bubbles: Once all your cups are assembled, carefully bang the muffin tin on your kitchen counter a few times. This simple step helps to settle the chocolate and release any trapped air bubbles, ensuring a smooth, even top and preventing any unsightly holes in your finished peanut butter cups.
- Refrigerate to Set: Transfer the muffin tin to the refrigerator. Allow the peanut butter cups to chill for at least 30 minutes, or until the chocolate is completely set and firm to the touch. Once hardened, they are ready to be enjoyed!
Expert Recipe Tips for Perfect Homemade Peanut Butter Cups
Achieve optimal results and customize your homemade peanut butter cups with these helpful tips:
- Dark Chocolate Variation: For those who prefer a more intense chocolate flavor and less sweetness, feel free to use dark chocolate instead of milk chocolate. The rich bitterness of dark chocolate beautifully complements the sweet and salty peanut butter. Remember, however, to still include the shortening, as it’s crucial for achieving a smooth melt and a nice, stable set without needing to temper the chocolate.
- Get Creative with Toppings: Elevate the visual appeal and flavor of your peanut butter cups by adding fun toppings. Before refrigerating, you can drizzle them with melted white chocolate for an elegant touch, or melt some peanut butter chips and drizzle for an extra nutty flavor. Colorful sprinkles are always a hit, especially for parties or if you’re making them with kids!
- Achieve Smooth Tops: For a professional and polished finish, use the back of a small spoon or an offset spatula to gently smooth out the top layer of chocolate after you’ve added it to each cup. Do this immediately after filling, while the chocolate is still warm and pliable. This creates a beautifully even surface.
- Don’t Skip the “Bang”: The step of banging the muffin tin on the counter might seem trivial, but it’s incredibly important. Any air bubbles left trapped in the melted chocolate can create small, undesirable holes or imperfections in the surface of your finished peanut butter cups. A few firm taps ensure a solid, smooth chocolate shell.
- Microwave vs. Double Boiler: While a double boiler is recommended for melting chocolate due to its gentle, even heat, you can use a microwave. If microwaving, heat in 20-30 second intervals, stirring thoroughly after each interval, until the chocolate is melted and smooth. Be careful not to overheat, as chocolate can seize and become grainy.
- Peanut Butter Consistency: If your peanut butter filling seems too crumbly, add a tiny bit more softened butter. If it’s too sticky, incorporate a little more powdered sugar until it’s easy to handle and press into the cups.
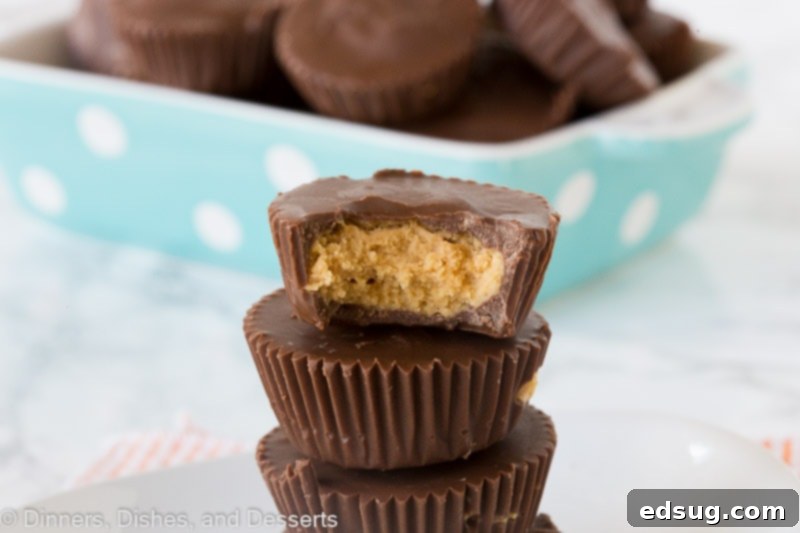
Absolutely! This recipe is incredibly versatile and can be adapted using various nut butters. Feel free to experiment with almond butter, cashew butter, or even pecan butter for a unique twist on the classic. Each will impart its own distinct flavor profile. For individuals with nut allergies, sunflower butter (like SunButter) is an excellent and safe alternative that maintains a similar creamy texture and rich taste, making these treats accessible to almost everyone.
Yes, transforming these peanut butter cups into a vegan-friendly treat is straightforward. To make them vegan, you’ll need to swap a couple of key ingredients. Instead of milk chocolate, use a high-quality vegan dark chocolate or vegan milk chocolate alternative. For the butter in the peanut butter filling, substitute it with a reliable vegan butter or margarine. Brands like Earth Balance offer excellent vegan butter sticks that perform beautifully in baking and taste great, ensuring your vegan peanut butter cups are just as rich and delicious.
Creative Ways to Serve Your Homemade Peanut Butter Cups
These homemade peanut butter cups are fantastic on their own, but they also make a wonderful addition to various dessert spreads. Have a special event or party coming up? You might consider crafting an entire candy buffet to go along with these delightful treats, offering a variety of homemade confections that are sure to impress your guests.
- Homemade Caramels are incredibly creamy, chewy, and utterly irresistible. They are simple candy perfection that pairs beautifully with the richness of peanut butter cups.
- Homemade Milky Ways create a magical melt-in-your-mouth experience with only 5 ingredients, offering a nougat and caramel delight alongside your peanut butter creations.
- Caramel-Nougat Layer Bars are an absolute must-make if you’re a fan of the classic Snickers bar. Their complex layers of chocolate, caramel, and peanuts will be a hit.
- Cookie Dough Truffles are always a crowd-pleaser, especially popular with kids! These no-bake delights are a fun, safe way to enjoy raw cookie dough.
- Nutella Oreo Truffles offer the best of both worlds – the beloved hazelnut spread and crunchy Oreos, all enrobed in decadent chocolate.
Storing Your Delicious Homemade Peanut Butter Cups
Proper storage ensures your homemade peanut butter cups remain fresh and delicious for as long as possible. Here are the best ways to keep them:
Room Temperature or Refrigerate: Store your freshly made Peanut Butter Cups in an airtight container. They will keep beautifully at room temperature for up to one week, especially if your kitchen is cool. For extended freshness, or if you prefer a firmer chocolate shell, place the airtight container in the refrigerator. When refrigerated, they will last for approximately 2 weeks, maintaining their perfect texture and flavor. Storing them in the fridge also helps prevent melting in warmer climates.
Freeze: To enjoy your homemade peanut butter cups for an even longer period, they can be easily frozen. Arrange them in a single layer on a baking sheet and freeze until firm (this prevents them from sticking together). Once solid, transfer them to an airtight container or a heavy-duty zip-top freezer bag. Properly frozen, these delightful treats will last for at least 3 months. When ready to enjoy, simply remove them from the freezer and let them thaw at room temperature for a few minutes until they reach your desired consistency.
More Irresistible Peanut Butter Dessert Recipes
- Peanut Butter Cream Pie
- No Bake Peanut Butter Cookies
- Peanut Butter Banana Bread
- No Bake Peanut Butter Cheesecake
- Reese’s Peanut Butter Cookies
- Peanut Butter Oatmeal Bars
- Peanut Butter Chocolate Balls
- Reese’s Fudge
Homemade Peanut Butter Cups
Pin Recipe
Rate Recipe
Print Recipe
Equipment
-
Mini Muffin Tin
Ingredients
- 1/2 cup creamy peanut butter
- 1/2 cup powdered sugar
- 2 Tablespoons butter
- pinch of salt
- 2 cups milk chocolate chips or chopped bar
- 1 Tablespoon shortening
Instructions
-
Line a mini muffin tray with paper liners, ensuring each cavity is ready.
-
Combine peanut butter, butter, and salt in a microwave-safe bowl. Microwave for about 20-30 seconds, just until the butter is softened and the mixture is pliable. Be careful not to melt the butter completely. Stir in the powdered sugar until it is well combined and forms a smooth, thick peanut butter mixture.
-
Melt the milk chocolate and shortening together using a double boiler over simmering water, stirring until completely smooth and glossy.
-
Spoon about a teaspoon of melted chocolate into the bottom of each muffin liner. Top with approximately a teaspoon of the peanut butter mixture, gently flattening it. Finally, cover each one completely with more melted chocolate. Bang the muffin tin on the counter a few times to release any air bubbles and create a smooth top.
-
Refrigerate the muffin tin for at least 30 minutes, or until the chocolate is fully set and firm.
Nutrition
Nutrition information is automatically calculated and should only be used as an approximation.
Additional Info
Like this recipe? Leave a comment below!Your feedback helps us create more delicious content!
I’ve created a fun and engaging group on Facebook, and I would absolutely love for you to join us! It’s a vibrant community where you can share YOUR favorite recipes, ask questions, get inspiration, and stay updated on all the exciting new content at Dinners, Dishes and Desserts (so you never miss out on a delicious new recipe)!
Be sure to follow me on Instagram and tag #dinnersdishes so I can see all the wonderful DINNERS, DISHES, AND DESSERTS recipes YOU make and share your culinary creations with our growing community!
Don’t want to miss a single delicious post or update? Be sure to follow me on my social media channels:
Facebook | Twitter | Pinterest | Instagram
.
