Decadent Chocolate Pumpkin Bread: Your Ultimate Recipe for Fall & Holiday Baking
As December ushers in the most wonderful time of the year, we’re kicking off the festive season with a special celebration – and a fantastic giveaway! Get ready for a month filled with opportunities to win some truly amazing free stuff, including a few of my absolute favorite kitchen essentials. It’s been a lovely start to the holidays, beginning with a heartwarming Thanksgiving. My parents are visiting, which means our home has been bustling with cherished family moments and tables laden with delicious food. This year, my brother, his wife, and a dear friend joined us from Denver, turning our Thanksgiving into a lively, full house event. We decided to shake things up from the traditional turkey and opted for a unique menu of homemade calzones and delectable cannolis. It was a delightful change of pace, and everyone thoroughly enjoyed the culinary adventure!
The Irresistible Allure of Chocolate Pumpkin Bread
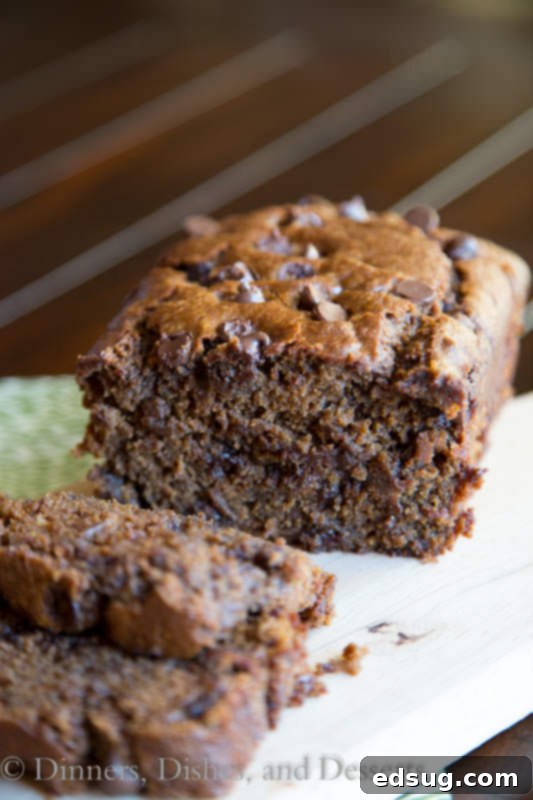
Speaking of switching things up, there’s another exciting way to elevate a classic fall favorite: transform your ordinary pumpkin bread into an extraordinary chocolate pumpkin bread! And I’m not talking about just tossing in a few chocolate chips at the end. We’re diving headfirst into a full-bodied, rich chocolate pumpkin batter that truly merges these two beloved flavors. It’s almost magical how perfectly chocolate and pumpkin complement each other. The earthy sweetness of pumpkin, enhanced by warm spices, finds its ideal partner in the deep, luxurious notes of chocolate. This isn’t just a bread; it’s a moist, tender, intensely chocolatey loaf that practically begs to be enjoyed at any time of day. Who says you can’t have cake for breakfast, especially when it’s this wonderfully rich and flavorful?
Perfect for Gifting and Sharing This Holiday Season
This chocolate pumpkin bread isn’t just a treat for your own home; it’s an ideal candidate for thoughtful holiday gifting. Imagine baking this delightful bread in mini loaf pans, wrapping them up with a festive bow, and presenting them to your children’s teachers, appreciative friends, or beloved neighbors. It’s a homemade gesture that speaks volumes and brings immense joy. This bread would also be a fantastic contribution to any holiday sweets exchange, guaranteed to be a crowd-pleaser. I often bake a batch and immediately wrap one of the extra loaves to store in my freezer, ensuring I always have a delicious treat on hand. This recipe yields a generous three full-sized loaves of bread, which is perfect for sharing or stocking up. On one occasion, I could only find two of my loaf pans, so I cleverly used the remaining batter to make muffins, which worked out perfectly. I definitely earned hero status when my son brought a friend home from school the very afternoon I had baked this wonderful pumpkin bread!
Tips for Baking the Perfect Chocolate Pumpkin Bread
Creating this irresistible chocolate pumpkin bread is straightforward, but a few tips can help ensure your loaves turn out perfectly moist and flavorful every time. First, always make sure your ingredients are at room temperature, especially the eggs and pumpkin puree, as this helps them incorporate more smoothly into the batter, leading to a more consistent texture. When mixing the wet and dry ingredients, be careful not to overmix. Overmixing can develop the gluten in the flour too much, resulting in a tough, dense bread rather than the tender, airy crumb we’re aiming for. Mix until just combined, with a few streaks of flour remaining, then fold in the chocolate chips gently.
Greasing your loaf pans thoroughly is crucial to prevent sticking. You can use butter and flour, baking spray, or even line them with parchment paper for easy removal. The baking time can vary slightly depending on your oven and the material of your loaf pans, so always use the “tester comes out clean” method. A wooden skewer or toothpick inserted into the center of the loaf should come out with no wet batter clinging to it. If it’s still gooey, continue baking for a few more minutes and retest. Cooling the bread in the pan for about 10-15 minutes before transferring it to a wire rack allows it to set and makes it easier to remove without breaking. Once on the wire rack, let it cool completely to achieve the best texture and flavor. This bread also freezes beautifully, making it an excellent option for meal prep or future gifting.
Elevate Your Chocolate Pumpkin Bread Experience
While this chocolate pumpkin bread is absolutely divine on its own, there are many ways to enhance its flavor and presentation. For a simple indulgence, serve it with a light dusting of powdered sugar or a dollop of freshly whipped cream. A thin smear of cream cheese frosting would turn it into an even more decadent dessert, perfect for a special occasion. If you enjoy a bit of crunch, consider adding a handful of chopped walnuts or pecans to the batter along with the chocolate chips. For an extra layer of chocolatey goodness, you could drizzle a simple chocolate glaze over the cooled loaves. Pair a slice with your morning coffee or a warm cup of spiced cider for the ultimate fall and winter comfort experience.
This recipe’s versatility also shines through in how you can adapt it. Instead of traditional loaves, try baking the batter in a bundt pan for a show-stopping presentation, adjusting the baking time as needed. Or, as I mentioned, baking them as muffins makes for perfectly portioned treats that are easy to grab and go. These are especially great for lunchboxes or a quick snack. No matter how you choose to bake and serve it, this chocolate pumpkin bread is sure to become a cherished recipe in your repertoire.

Chocolate Pumpkin Bread
Pin Recipe
Rate Recipe
Print Recipe
Ingredients
- 3 3/4 cups flour
- 3 1/2 cups sugar
- 1 1/2 teaspoon salt
- 1 1/2 teaspoon baking powder
- 1 1/4 teaspoon baking soda
- 1 1/4 teaspoon cinnamon
- 1 teaspoon ground cloves
- 1/2 teaspoon ground nutmeg
- 3 large eggs
- 1 (29 oz) can pumpkin puree
- 1 1/4 cups canola oil
- 3 oz unsweetened chocolate, melted
- 1 1/2 teaspoon vanilla extract
- 2 cups semisweet chocolate chips
Instructions
-
Preheat oven to 350 degrees F (175 C). Grease 3 9×5 inch loaf pans.
-
In a large bowl, whisk together the flour, sugar, salt, baking powder, baking soda, cinnamon, cloves, and nutmeg until well combined.
-
In a separate large bowl, whisk together the eggs, pumpkin puree, canola oil, melted unsweetened chocolate, and vanilla extract. Stir the wet pumpkin mixture into the dry flour mixture until just combined. Be careful not to overmix. Gently fold in the semisweet chocolate chips.
-
Pour the batter evenly into the three prepared loaf pans. Bake for 55-65 minutes, or until a wooden skewer or toothpick inserted into the center of a loaf comes out clean. Remove from the oven and let cool in the pans for 10 minutes before carefully removing the loaves from the pans and transferring them to a wire rack to cool completely.
Notes
Nutrition
Nutrition information is automatically calculated, so should only be used as an approximation.
Additional Info
Like this recipe? Leave a comment below!
Celebrate with a Giveaway: My Favorite Kitchen Essential!
Now, for the exciting part – it’s time for the **GIVEAWAY!** As promised, we’re sharing some of my absolute favorite things, and today’s spotlight is on **GIR** spatulas. These aren’t just any spatulas; they are truly exceptional kitchen tools. I received my very first GIR spatula when I attended the Food Blog Forum in May, and it was love at first use! I was so impressed by their quality, design, and durability that I quickly became a huge fan. My family and I even invested in their Kickstarter program, and I’m eagerly anticipating the arrival of their new line of products in just a couple of weeks.
What makes GIR spatulas so incredible? They stand for “Get It Right,” and they certainly do. Made from premium, platinum-cured silicone, they are heat-resistant, odor-resistant, stain-resistant, and incredibly flexible yet sturdy. Their unibody design means there are no crevices for food to get stuck in, making them super hygienic and easy to clean. They’re perfect for everything from scraping bowls clean to stirring hot sauces or flipping delicate items. Once you try a GIR spatula, you’ll understand why I rave about them. They truly elevate the cooking experience and are a must-have for any home chef. I wholeheartedly suggest you try them for yourself – you won’t be disappointed!
