Cranberry Icebox Cookies: A Timeless Slice-and-Bake Treat for Any Occasion
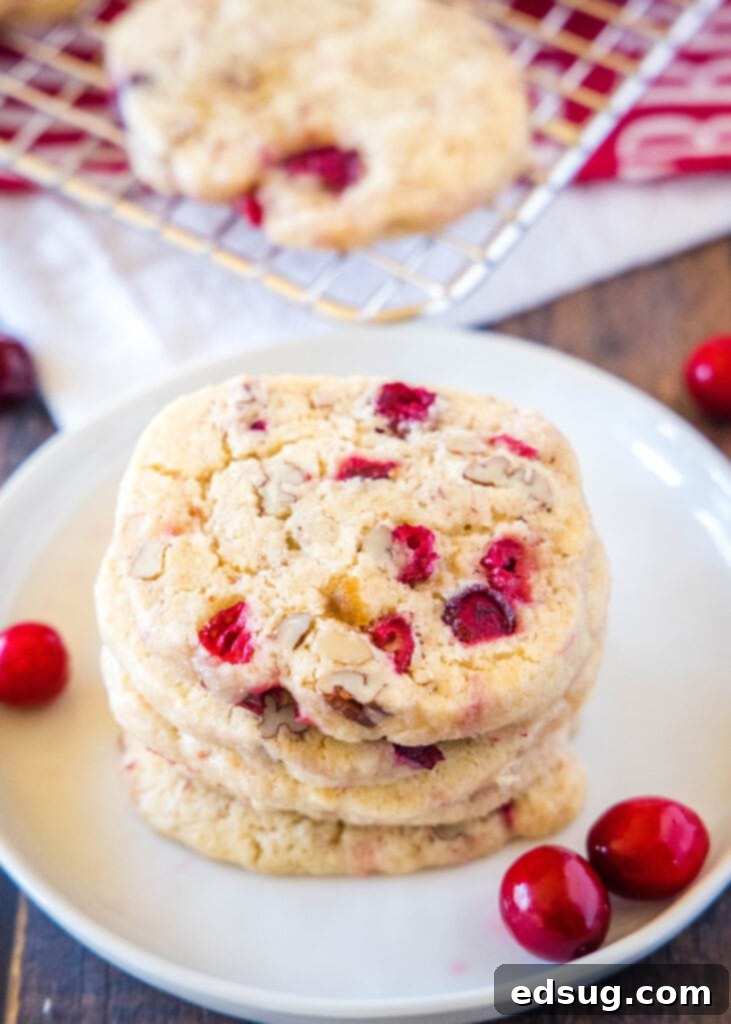
There’s something uniquely comforting about a cookie that brings back cherished memories. These delightful Cranberry Icebox Cookies are a perfect throwback, reminiscent of the simple, delicious treats Grandma used to bake. With their rich buttery flavor, vibrant cranberries, and crunchy walnuts, they offer a taste of nostalgia with every bite. Whether you’re preparing for the holidays, a special gathering, or simply craving a warm, fresh-baked cookie any time of the year, this easy recipe for Cranberry Icebox Cookies is your secret weapon for effortless indulgence and a truly satisfying dessert.
Icebox cookies, also affectionately known as slice-and-bake cookies, represent a brilliant old-school baking technique that perhaps doesn’t get the attention it deserves today. We believe it’s time for a resurgence! The sheer convenience of having perfectly portioned cookie dough chilled and ready in your refrigerator means warm, homemade cookies are just minutes away whenever the craving strikes or unexpected guests arrive. This particular recipe highlights the harmonious blend of tart cranberries and earthy walnuts, creating a festive and flavorful treat that’s ideal for any season.

What Makes Icebox Cookies So Special?
Icebox cookies stand out for their incredible convenience, delightful texture, and versatile nature. The core concept is wonderfully simple: prepare a batch of cookie dough, form it into logs, chill it in the refrigerator (or “icebox”), and then simply slice and bake as needed. This method is a total game-changer for busy bakers, allowing you to enjoy freshly baked goods without the last-minute fuss. Imagine the comforting aroma of warm cookies filling your kitchen on a whim, or being able to whip up a platter of treats for an impromptu gathering in under 15 minutes. Beyond the sheer speed and ease, the chilling process for icebox cookies is beneficial for flavor and texture. It allows the butter to solidify, preventing excessive spread during baking, and gives the flour a chance to fully hydrate, resulting in a wonderfully crisp exterior and a tender, chewy interior. They are truly the ultimate make-ahead dessert, perfect for any occasion or just a quiet afternoon treat.
The Sweet History of Icebox Cookies
The name “icebox cookie” itself offers a charming glimpse into culinary history, originating in the 1930s and 40s when refrigerators were commonly referred to as “iceboxes.” In an era before modern freezers were commonplace, storing perishable items, including cookie dough, in the icebox was standard practice. This period saw the rise of many innovative recipes designed to maximize efficiency and enjoyment in the home kitchen. Icebox cookies quickly became a household favorite because they provided an easy and practical solution for spontaneous baking. Homemakers could prepare several logs of dough in advance, knowing they had a delicious base for cookies ready at a moment’s notice. This eliminated the need to mix dough from scratch every time a craving or unexpected visitor arose, making it a time-saving and economical approach to baking. This tradition of preparing dough ahead of time, ensuring fresh-baked goodness with minimal effort, continues to make icebox cookies a beloved classic today. Their enduring popularity is a testament to their simple charm and undeniable deliciousness.
Key Ingredients for Perfect Cranberry Icebox Cookies
Crafting these delectable Cranberry Icebox Cookies relies on a few core ingredients, each playing a crucial role in achieving their signature taste and texture. Understanding the function of each component helps ensure your cookies turn out perfectly every time. For exact measurements, always refer to the FULL PRINTABLE recipe card available at the bottom of this post.
- Unsalted Butter: This is the foundation of any great cookie! Using unsalted butter gives you precise control over the overall saltiness of your dough. Ensure it’s softened to room temperature, as this is vital for optimal creaming, a process that incorporates air and contributes to a light and fluffy dough.
- Brown Sugar & Granulated Sugar: A harmonious blend of both sugars provides the best of both worlds. Brown sugar, with its molasses content, adds moisture, a subtle caramel note, and contributes significantly to the cookies’ wonderfully chewy texture. Granulated sugar, on the other hand, helps create crisp edges and ensures proper spreading during baking.
- Eggs: Large eggs serve as a crucial binder, holding the dough together, while also adding richness, moisture, and helping to create a tender, cake-like crumb.
- Vanilla Extract & Almond Extract: These extracts are true flavor powerhouses. Vanilla provides a warm, classic cookie base that is universally loved, while almond extract adds a sophisticated, slightly nutty undertone that beautifully complements the tart cranberries and earthy walnuts, elevating the overall flavor profile.
- All-Purpose Flour: As the primary dry ingredient, all-purpose flour provides the essential structure to the cookies. It’s important to measure it correctly, preferably by weight, or by spooning it into the measuring cup and leveling it off, to avoid dense cookies.
- Baking Powder & Baking Soda: These are our essential leavening agents. Baking powder helps the cookies rise and spread, contributing to a lighter texture, while baking soda reacts with the acidic components (like brown sugar) to further tenderize the dough and give a slight lift, ensuring a soft and pleasant bite.
- Salt: A small amount of salt is absolutely essential for balancing the sweetness and enhancing all the other wonderful flavors in the cookies, preventing them from tasting flat.
- Cranberries: The star of the show! Whether fresh or frozen, cranberries add a delightful tartness and vibrant red color, which beautifully cuts through the sweetness of the dough. It’s best to roughly chop them for even distribution throughout the cookie.
- Walnuts: These provide a delightful crunch and an earthy, slightly bitter counterpoint to the sweet dough and tart cranberries. Chopping them ensures they are evenly distributed and that you get a bit of nuttiness in every bite.

Step-by-Step Guide: How To Master Cranberry Icebox Cookies
Making these Cranberry Icebox Cookies is a straightforward process, but paying close attention to each step will ensure perfect, delicious results. Here’s a detailed guide to creating these delightful treats:
- Cream Butter and Sugars: Begin by placing the softened unsalted butter, light brown sugar, and granulated sugar into the bowl of an electric stand mixer fitted with the paddle attachment. Beat on medium-high speed for approximately 3-4 minutes. You’re looking for the mixture to become significantly lighter in color and fluffy in texture. This crucial step incorporates air, which is essential for a tender cookie.
- Incorporate Wet Ingredients: Next, add the large eggs, vanilla extract, and almond extract to the creamed butter and sugar mixture. Continue to beat until all the eggs are fully incorporated and the mixture appears smooth and well emulsified. Make sure to pause and scrape down the sides of the bowl with a rubber spatula as needed to ensure all ingredients are evenly mixed and no pockets of unmixed ingredients remain.
- Add Dry Ingredients: Gradually add the all-purpose flour, baking powder, salt, and baking soda to the wet ingredients. Mix on low speed, just until everything is combined and a soft, cohesive cookie dough forms. Be very careful not to overmix the dough at this stage, as excessive mixing can develop the gluten in the flour, leading to tough or dry cookies.
- Fold in Cranberries and Walnuts: Gently, by hand, use a sturdy spatula to fold in the chopped cranberries and walnuts. Mix until they are evenly distributed throughout the dough. The goal is to ensure that every slice of cookie dough will have a good mix of these delicious, flavorful additions.
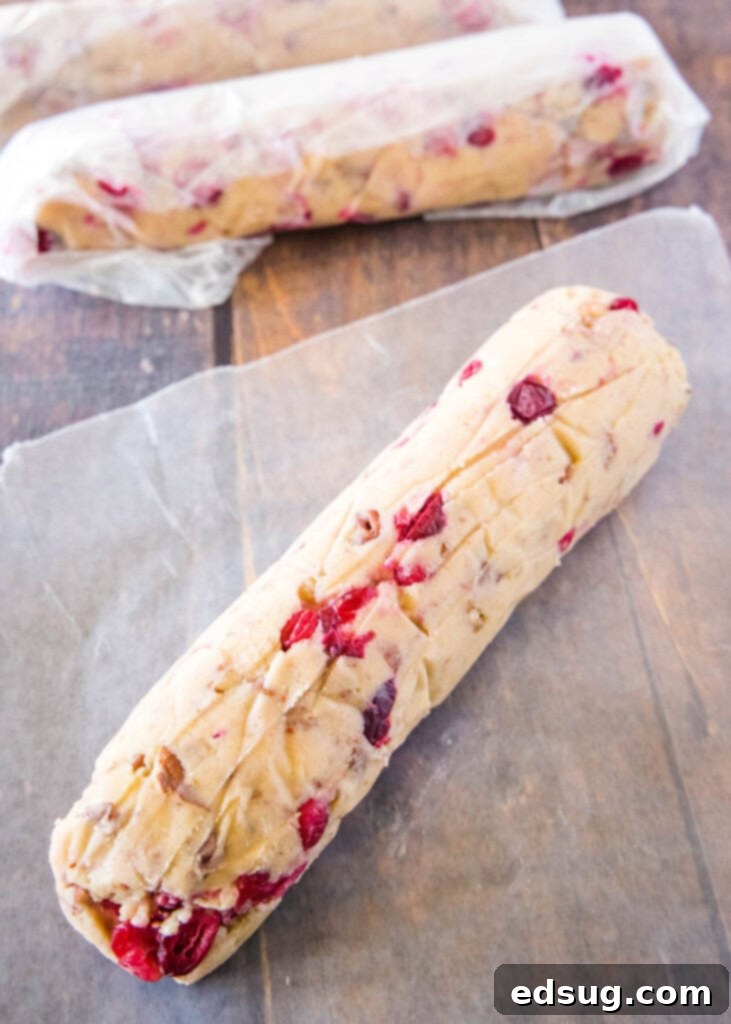
- Shape and Chill the Dough Logs: Divide the prepared cookie dough into three roughly equal portions. On a clean, lightly floured surface or a piece of wax paper, shape each portion into a uniform log, approximately 7 inches long and about 2 inches in diameter. Wrap each log tightly in wax paper, twisting the ends securely to seal. Place these wrapped logs in the refrigerator for at least 4 hours, or ideally overnight. This chilling period is absolutely essential for the dough to firm up, making it easy to slice cleanly, and allowing the flavors to deepen and meld beautifully.
- Prepare for Baking: When you’re ready to bake your cookies, preheat your oven to 375°F (190°C). Prepare a baking sheet by lining it with parchment paper or a silicone baking mat. This prevents sticking and promotes even baking.
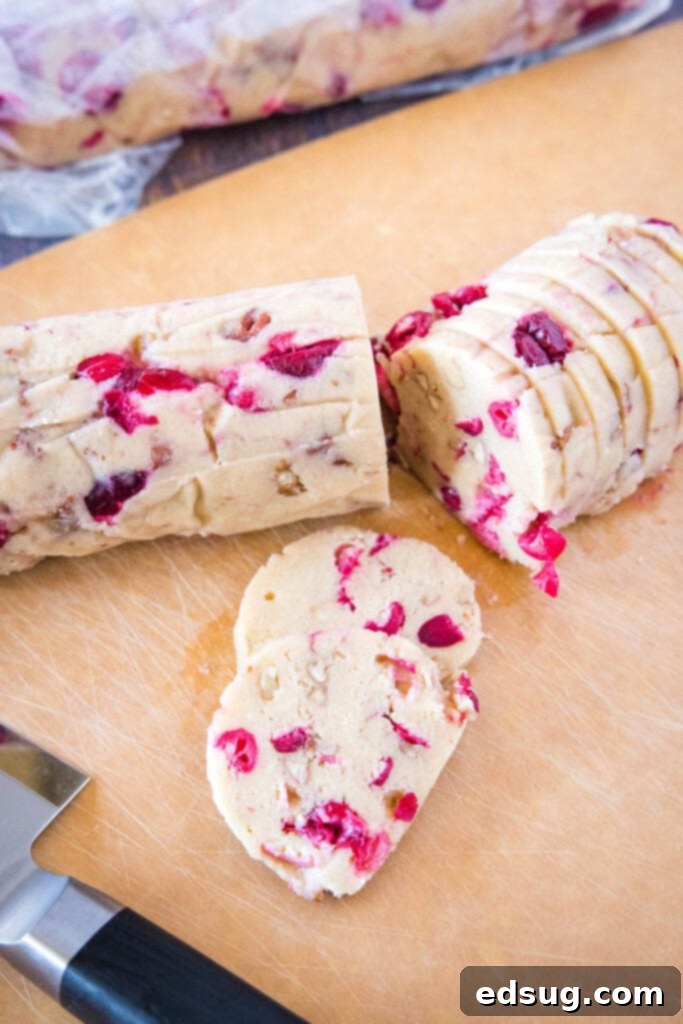
- Slice and Bake: Remove one chilled dough log from the refrigerator, unwrap it, and slice it into approximately 1/4-inch thick rounds. Arrange the cookie slices on the prepared baking sheet, ensuring there’s about 1-2 inches of space between each cookie to allow for proper spreading during baking. Bake for about 10-12 minutes, or until the edges are just beginning to turn a light golden brown. The centers may still appear slightly soft, but they will firm up as they cool.
- Cool Completely: Once baked, remove the baking sheet from the oven and let the cookies cool on the sheet for about 5-10 minutes. This allows them to set and become sturdy enough to handle. After this initial cooling, carefully transfer the cookies to a wire rack to cool completely. Enjoy them warm or at room temperature!

Freezing Your Cranberry Icebox Cookies: Baked vs. Dough
One of the many fantastic benefits of icebox cookies is their exceptional freezer-friendly nature. This allows you to freeze them both before and after baking, providing you with ultimate flexibility to enjoy fresh cookies whenever you desire, without the need for extensive last-minute preparation.
Freezing Baked Cookies:
If you’ve already baked a batch of these delicious cookies and find yourself with leftovers (which is a rare but welcome occurrence!), you can easily preserve them. First, allow the cookies to cool completely on a wire rack until they reach room temperature. Once fully cooled, arrange them in a single layer on a baking sheet and place them in the freezer for about 30 minutes, or until they are solid. This flash-freezing step is crucial as it prevents the cookies from sticking together when stored. After flash-freezing, transfer the solid cookies to an airtight freezer-safe container or a heavy-duty freezer bag. If you are stacking layers, place a piece of parchment paper between each layer to prevent them from freezing together. Baked Cranberry Icebox Cookies can be stored in the freezer for up to 2 months. To enjoy them, simply thaw them at room temperature for about 15-30 minutes, or for a warm, fresh-from-the-oven experience, gently warm them in a low oven (around 275°F / 135°C) for a few minutes.
Freezing Dough Logs:
This method truly showcases the convenience of icebox cookies! After you’ve shaped and wrapped your dough logs in wax paper as per the recipe instructions, add an extra layer of protection. Wrap each wax-paper-wrapped log tightly in a layer of aluminum foil. Alternatively, you can place the wrapped logs into a freezer-safe food storage bag, pressing out as much air as possible before sealing. These raw dough logs can be stored in the freezer for an impressive duration of up to 3 months. When you’re ready to bake, simply retrieve a log from the freezer and transfer it to the refrigerator. Let it thaw in the fridge for several hours (or ideally overnight) until it becomes pliable enough to slice. Once thawed and ready, proceed with slicing and baking as instructed in the recipe. You might find that very cold dough requires an extra minute or two of baking time, so keep an eye on them for those golden-brown edges.

Expert Tips for Elevating Your Icebox Cookies
While these Cranberry Icebox Cookies are already incredibly delicious and satisfying, a few expert tips and tricks can help you achieve perfection and even customize them to your liking. Follow these suggestions to make your baking experience even more rewarding:
- Nut Variations: Feel free to customize the nuts based on your preference or what you have on hand. If walnuts aren’t your favorite, or you’re looking for a different flavor profile, chopped pecans offer a similar buttery crunch and pair wonderfully with cranberries. Pistachios add a beautiful green hue and a distinct, slightly sweet flavor that complements the tartness of the cranberries exceptionally well. Almonds or even macadamia nuts could also be interesting alternatives for a unique twist.
- Cranberry Preparation: Both fresh and frozen cranberries work beautifully in this recipe, offering flexibility year-round. If you opt for frozen cranberries, there’s no need to thaw them completely; a quick rinse and a rough chop while still mostly frozen is sufficient. If they are thawed, ensure you drain any excess liquid thoroughly to prevent the dough from becoming too wet, which could affect the cookie’s texture. A rough chop is ideal to achieve varying sizes and bursts of tart flavor throughout the cookies.
- Dough Chilling is Crucial: Do not skip or rush the chilling process! The cookie dough absolutely needs at least 4 hours in the refrigerator to properly firm up. This extended chill time is essential for several reasons: it makes the dough much easier to slice cleanly and prevents it from crumbling, and it allows the butter to solidify, which significantly prevents excessive spreading during baking, ensuring your cookies maintain their shape. Furthermore, chilling gives the flavors a chance to deepen and meld, resulting in a more delicious cookie. For the best results and easiest slicing, chilling the dough logs overnight is highly recommended. The dough will safely last in the fridge for about a week; if you plan to bake beyond that timeframe, it’s best to move the wrapped logs to the freezer.
- Achieving Perfect Slices: For uniform cookies that bake evenly and look professional, use a sharp, thin knife to slice your chilled dough logs. A gentle rocking motion can help create clean cuts. For even more consistent thickness, some bakers like to use a ruler as a guide or even a chilled piece of dental floss for ultra-smooth edges.
- Dressing Them Up: To add an extra touch of elegance and a delightful burst of sweetness, consider drizzling a little melted white chocolate over the tops of your cooled cookies. The creamy white chocolate not only contrasts beautifully with the tart cranberries in flavor but also adds a lovely visual appeal, making these cookies perfect for gifting, holiday platters, or any special occasion.
- Don’t Overbake: Keep a very close eye on your cookies as they bake. They are done when the edges are just lightly golden brown. The centers might still appear slightly soft, but they will continue to set and firm up as they cool on the baking sheet. Overbaking will result in dry, crumbly cookies, so it’s always better to underbake slightly for a chewier, more tender result.
Cranberry and Walnut: A Match Made in Heaven
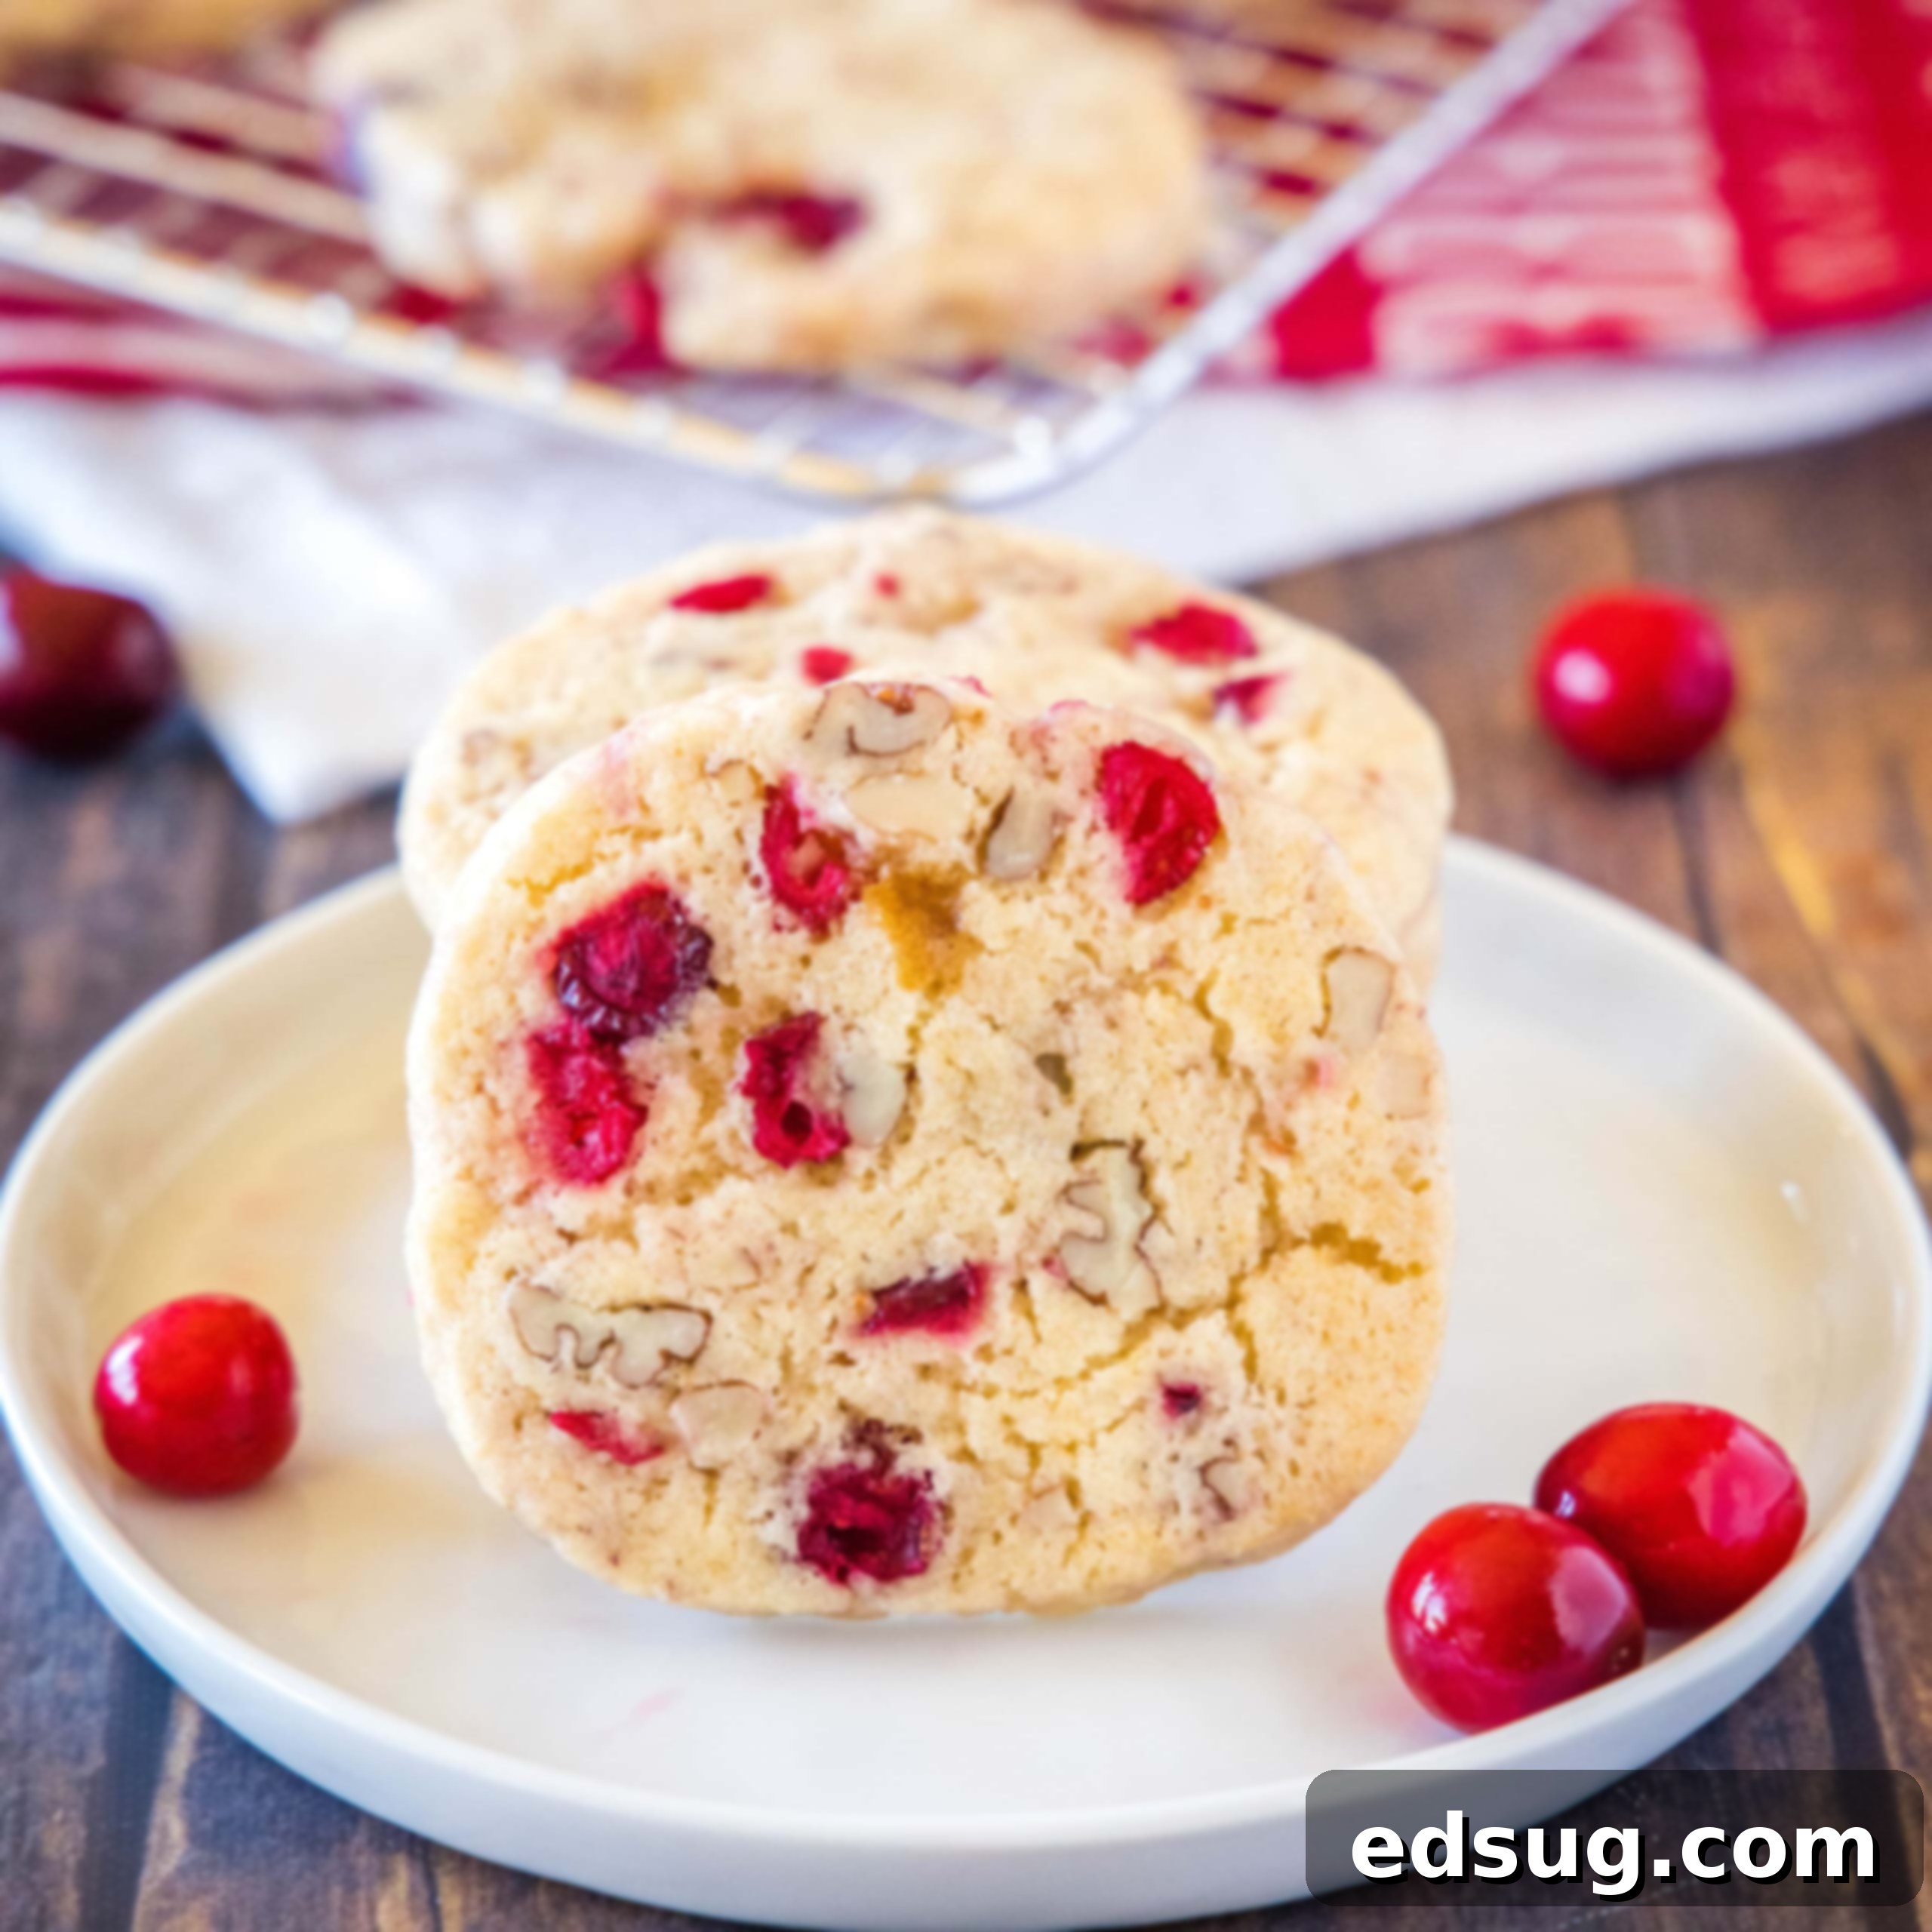
The combination of cranberries and walnuts in these icebox cookies is more than just a random pairing; it’s a classic flavor duo celebrated for good reason. Cranberries bring a bright, tangy zest that beautifully cuts through the richness of the buttery cookie dough, providing a refreshing counterpoint that prevents the cookies from being overly sweet. Their vibrant red hue also adds a cheerful and festive visual appeal, especially during the holiday season. Walnuts, on the other hand, contribute a satisfying crunch and a subtle, earthy bitterness that perfectly balances the sweetness and tartness of the other ingredients. The textural contrast between the soft cookie, chewy cranberries, and crisp walnuts makes each bite incredibly engaging and enjoyable. Together, they create a complex and incredibly addictive flavor profile that appeals to a wide range of palates, ensuring that these cookies are truly irresistible.
Beyond the Holidays: When to Enjoy These Cookies
While cranberries often evoke images of festive holiday spreads and winter celebrations, these Cranberry Icebox Cookies are far too delicious and versatile to be relegated to just one season. Their bright, refreshing flavor profile, coupled with the satisfying crunch of walnuts, makes them a wonderful treat year-round. They are perfect as a light dessert after any meal, a delightful addition to a leisurely brunch spread, or an elegant accompaniment to your afternoon tea or coffee break. Consider packing them in lunchboxes for a special surprise, bringing them to potlucks, bake sales, or simply keeping a stash of dough in your freezer for those moments when you need a quick, comforting snack. Their convenient make-ahead nature means you can enjoy freshly baked cookies any day of the week, transforming an ordinary moment into something truly extraordinary. They also make thoughtful homemade gifts!
More Fun Cookie Recipes
- Frosted Sugar Cookies
- Oatmeal Cranberry Cookies
- M&M Cookies
- Chick-Fil-A Cookies
- Maraschino Cherry Cookies
- Andes Mint Cookies
- Gingerbread Men Cookies
- Chewy Molasses Cookies

Cranberry Icebox Cookies
Ingredients
- 1 cup unsalted butter , softened
- 1 cup light brown sugar
- 1/2 cup granulated sugar
- 2 whole large eggs
- 1 teaspoon vanilla extract
- 1/2 teaspoon almond extract
- 3 cups all-purpose flour
- 1 teaspoon baking powder
- 1/2 teaspoon salt
- 1/4 teaspoon baking soda
- 2 cups cranberries, chopped (fresh or frozen)
- 1 cup walnuts , chopped
Instructions
-
In an electric stand mixer, cream together butter, brown sugar, and granulated sugar until well combined and light and fluffy, about 3-4 minutes.
-
Add eggs, vanilla, and almond extract. Mix until fully incorporated, making sure to scrape down sides if necessary.
-
Add flour, baking powder, salt, and baking soda. Mix until everything is blended.
-
Fold in cranberries and walnuts.
-
Shape dough into 3 logs, about 7 inches long. Wrap in wax paper and place in fridge for 4 hours, or overnight.
-
Preheat oven to 375º F. Prepare cookie sheet with parchment paper or a silicone baking mat.
-
Remove a log of dough, unwrap and slice into 1/4 inch thick pieces. Bake for about 12 minutes until edges of cookies are set and starting to turn golden brown.
-
Remove from oven and let cool for 10 minutes before removing to a wire rack to cool completely.
Nutrition
Nutrition information is automatically calculated, so should only be used as an approximation.
Additional Info
I created a fun group on Facebook, and I would love for you to join us! It’s a place where you can share YOUR favorite recipes, ask questions, and see what’s new at Dinners, Dishes and Desserts (so that you never miss a new recipe)!
Be sure to follow me on Instagram and tag #dinnersdishes so I can see all the wonderful DINNERS, DISHES, AND DESSERTS recipes YOU make!
Be sure to follow me on my social media, so you never miss a post!
Facebook | Twitter | Pinterest | Instagram
.
