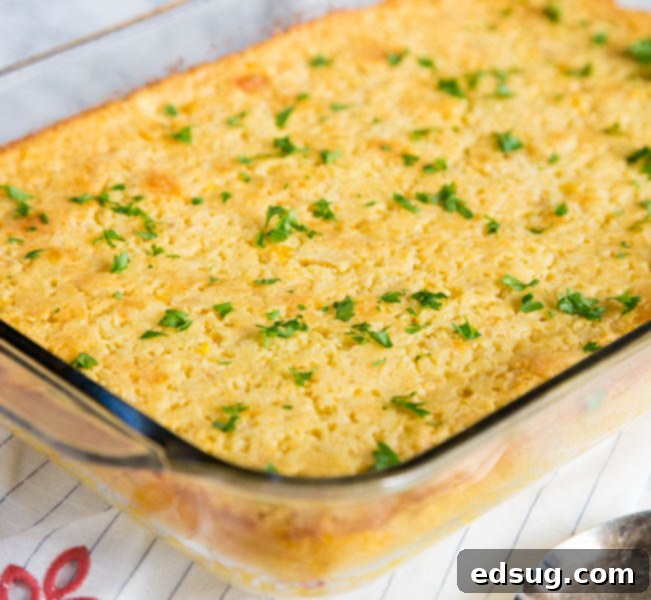
Easy Jiffy Corn Casserole: Your Go-To Holiday Side Dish & Weeknight Favorite
Discover the ultimate Corn Casserole Recipe – a beloved classic that effortlessly transitions from a festive holiday side to a simple, comforting weeknight addition. This delightful dish, a harmonious blend of creamy corn and fluffy cornbread, promises to be a delicious highlight at any meal.
As the holiday season approaches, many families cherish traditions, including the cherished recipes passed down through generations. While some main courses might vary year to year – perhaps a succulent Easy Prime Rib one Christmas and a flavorful Tangerine Glazed Ham the next – certain side dishes remain indispensable. For countless households, including my own, a rich and creamy corn casserole holds a special place at the holiday table, and its appeal extends far beyond special occasions. This versatile dish is often known as Jiffy Corn Casserole, Corn Pudding, or even Creamy Corn Bake, and no matter the name, it’s always a comforting crowd-pleaser.
This isn’t just any corn dish; it’s a nostalgic experience, reminiscent of childhood favorites. Growing up, we enjoyed what my dad affectionately called “special corn” – essentially creamed corn topped with a delightful Parmesan crust. While that tradition was wonderful, I’ve since discovered an even simpler, equally delicious alternative that has become a staple: this incredibly easy corn casserole. It perfectly marries the comforting sweetness of creamed corn with the satisfying texture of cornbread, creating a side dish that is truly a crowd-pleaser. Its versatility means it’s not only perfect for Thanksgiving or Christmas dinner but also simple enough to whip up for a casual family meal any night of the week. Forget the complexities, embrace the simplicity and deliciousness of this Jiffy corn casserole. If you love the flavors of homemade cornbread and creamy vegetables, this casserole brings the best of both worlds in one convenient package.
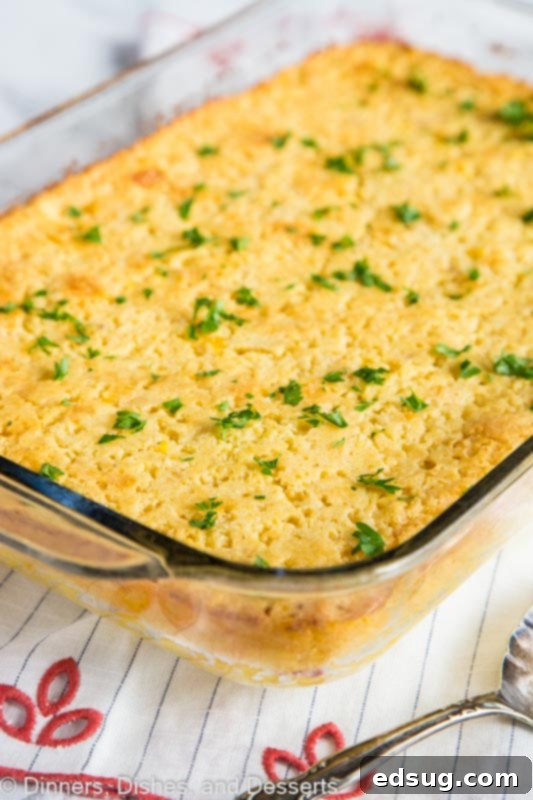
My first encounter with this specific corn casserole recipe was years ago at a friend’s gathering. I was instantly captivated by its creamy texture, golden crust, and irresistible flavor. They called it “Escaloped Corn,” but for me, it quickly became known as “the perfect corn casserole.” To this day, I use that same cherished recipe. It’s essentially the popular Jiffy corn casserole that many already know and adore, but with a slight, crucial modification: more corn! Because, as any corn enthusiast will agree, you can never have too much corn when it comes to a truly exceptional corn casserole. This recipe elevates the classic, delivering extra sweetness and texture that makes every spoonful a delight. The beauty of using Jiffy mix is that it ensures consistent results every time, making it a foolproof recipe even for novice cooks.
Key Ingredients for Your Delicious Jiffy Corn Casserole
Below is a summary of the main components that make this Jiffy corn casserole so incredibly good. For the exact measurements and full printable recipe instructions, please scroll down to the dedicated recipe card section at the bottom of the post.
- Jiffy Corn Muffin Mix: This is truly the star ingredient and the secret to the casserole’s quick preparation and consistent results. It provides a slightly sweet, delicate cornbread-like base that blends perfectly with the creamy corn. The mix includes flour, cornmeal, sugar, baking soda, and salt, creating a perfectly balanced foundation.
- Canned Corn Kernels (Drained): We use two cans of regular corn kernels to add extra texture and a burst of fresh corn flavor to every bite. Draining these thoroughly is important to prevent the casserole from becoming watery and ensuring a dense, rich consistency. Look for sweet corn for the best flavor.
- Canned Cream Style Corn: This ingredient is absolutely essential for achieving the signature creamy, luscious texture that defines a great corn casserole. It’s a blend of whole corn kernels and a creamy liquid, which thickens the casserole and provides an extra layer of sweetness and moisture.
- Sour Cream: A full cup of sour cream is incorporated to contribute a wonderful tangy note and rich moisture. It balances the sweetness of the corn beautifully, ensuring the casserole isn’t overly sweet, and helps create an incredibly tender, melt-in-your-mouth interior. Full-fat sour cream offers the best flavor and texture.
- Large Eggs: Eggs act as a vital binding agent in this recipe. They help the casserole set properly, ensuring it holds its shape when sliced and preventing it from being too crumbly or loose. They contribute to the overall structure and tenderness.
- Melted Butter: A generous half-cup of melted butter infuses the entire casserole with an irresistible rich, buttery flavor. It also plays a crucial role in developing that desirable golden, slightly crispy crust on top, which is a hallmark of a perfectly baked corn casserole. Unsalted butter is recommended so you can control the salt level.
If you find yourself with an extra box of Jiffy Corn Mix in your pantry, don’t let it go to waste! Consider transforming it into this hearty and satisfying Sloppy Joe Cornbread Casserole – another fantastic way to utilize this versatile pantry staple for a comforting, complete meal that’s perfect for family dinners.
Effortless Steps to Prepare Your Perfect Corn Casserole
One of the many charms of this corn casserole recipe is its incredible simplicity and minimal fuss. Whether you prefer to use a large mixing bowl for combining or even mix directly in your baking dish for fewer dirty dishes, the process is streamlined and hassle-free. It’s truly that easy to bring this comforting side dish to life – perfect for busy weeknights or holiday meal prep!
- Prepare the Butter: Begin by melting your butter. You can do this easily in a microwave-safe bowl for about 30-60 seconds, or gently on the stovetop. Once melted, set it aside to cool slightly while you gather the other ingredients.
- Combine All Ingredients: In a large mixing bowl (or directly in your greased baking dish), combine the melted butter with the full box of Jiffy corn muffin mix, both cans of corn (make sure the kernels are well-drained), the can of cream style corn, the cup of sour cream, and the two eggs. Using a spatula or large spoon, stir all ingredients together until they are just blended and evenly combined. It is crucial not to overmix the batter; stop stirring as soon as no dry streaks of mix are visible, as overmixing can lead to a tougher, less tender casserole.
- Bake to Perfection: Pour the thoroughly mixed casserole batter evenly into a greased 9×13 inch baking dish. Ensure your oven is preheated to 400°F (200°C). Bake for approximately 55-60 minutes. The casserole is done when a beautiful golden brown crust forms on the top and around the edges, and the center appears set and firm when gently jiggled or lightly pressed. The exact baking time may vary slightly depending on your specific oven, so start checking around the 50-minute mark.
While I typically advocate for homemade, from-scratch recipes, especially when it comes to baked goods like cornbread (my Best Cornbread Recipe is a personal favorite for traditional cornbread!), this particular corn casserole is a delightful exception. The Jiffy corn mix is not just acceptable; it’s genuinely recommended here. It contributes to the unique, slightly sweet texture and unparalleled convenience that makes this recipe a standout. It truly works wonders in achieving that classic, comforting corn casserole flavor and consistency, making it an indispensable part of this dish.
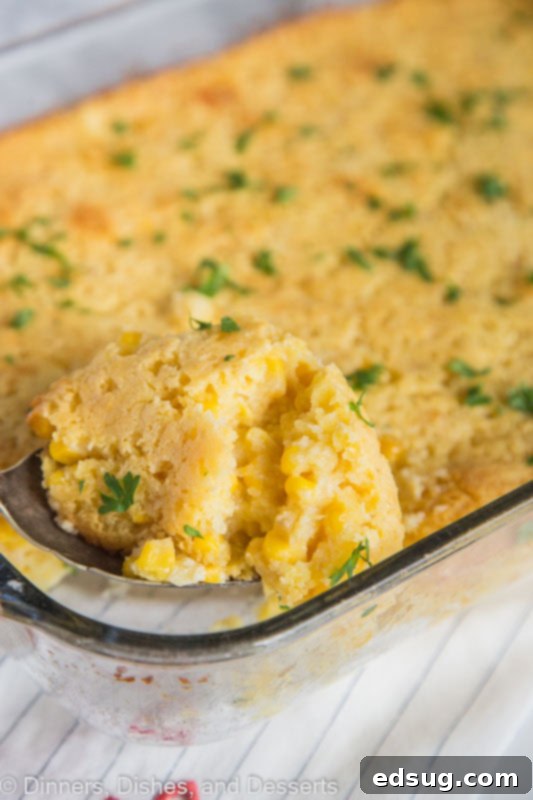
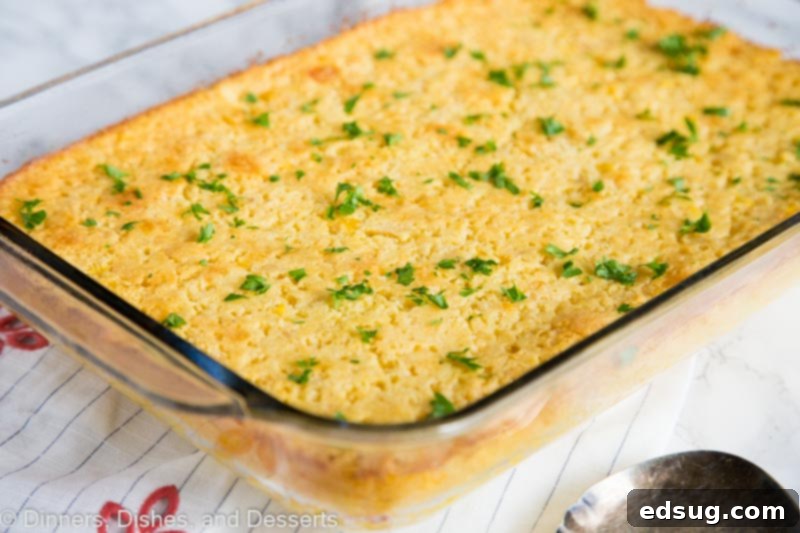
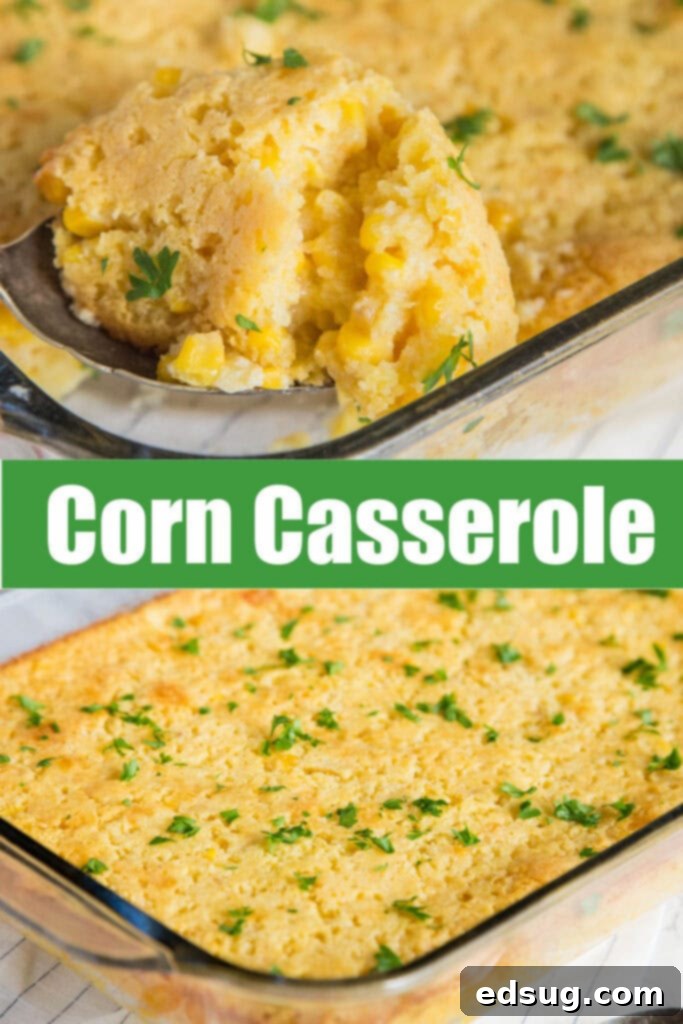
As your corn casserole bakes, you’ll witness the magic of a delightful, slightly crisp, golden-brown crust forming on the surface. This beautiful top is a clear indicator of doneness, offering a wonderful textural contrast to the incredibly creamy, tender interior that remains moist and bursting with sweet corn flavor. There’s no need to worry about making too much – leftovers are absolutely divine and, dare I say, often even better the next day as the flavors have more time to meld! Plus, experience tells me that this dish tends to disappear remarkably quickly from any gathering, as people can’t resist coming back for second (and sometimes third!) helpings. Before you know it, your baking dish will be surprisingly empty, leaving everyone satisfied and happy.
Corn Casserole Variations and Serving Suggestions
One of the best aspects of this easy corn casserole is how wonderfully it adapts to various additions, allowing you to customize it to your family’s taste, dietary preferences, or the specific occasion. Feel free to experiment with these delicious variations to make it your own:
- Cheesy Goodness: For an extra layer of savory flavor and gooey texture, stir in 1 to 1.5 cups of shredded cheese (such as sharp cheddar, Colby Jack, or a Mexican blend) with the other ingredients before baking. A sprinkle of Parmesan cheese on top during the last 15 minutes of baking also creates a lovely cheesy crust.
- Spicy Kick: If you and your guests enjoy a bit of heat, consider adding a can of diced green chiles (drained well) or one finely diced fresh jalapeño (seeds removed for less heat, or left in for more) to the corn mixture. This introduces a subtle, zesty warmth that complements the sweet corn.
- Savory Enhancements: Elevate the flavor profile with savory additions like crispy crumbled bacon bits (either mixed in or sprinkled on top), thinly sliced green onions (scallions), or even a dash of smoked paprika for depth. Sautéed onions or bell peppers can also be folded in for extra vegetables.
- Herbs & Spices: A pinch of garlic powder, onion powder, or a tablespoon of fresh chopped chives or parsley can add aromatic notes and brighten the overall taste. A touch of black pepper also enhances the savory elements.
- Sweetness Adjustment: If you prefer a sweeter corn casserole, you can add 1-2 tablespoons of granulated sugar to the mixture. Conversely, if you like it less sweet, you can sometimes find unsweetened corn muffin mixes or slightly reduce the amount of creamed corn.
This incredibly versatile side dish pairs beautifully with a wide array of main courses, making it a staple for many different meals. It’s an absolute must-have alongside traditional holiday centerpieces like roasted turkey, glazed ham, succulent prime rib, or even a classic pot roast for festive feasts. For everyday family meals, it perfectly complements grilled chicken, hearty pork chops, smoky BBQ ribs, or even as a comforting side to a simple weeknight meatloaf. Don’t forget to consider it for potlucks, church gatherings, and family reunions; its crowd-pleasing nature ensures it’s always one of the first dishes to disappear!
Can You Make Corn Casserole Ahead Of Time? Absolutely!
Preparing this corn casserole in advance is a fantastic time-saving strategy, especially during busy holiday preparations or for efficient make-ahead meal planning throughout the week. You can easily assemble the entire recipe the day before you plan to bake and serve it. Simply follow the mixing instructions exactly as written, combining all the ingredients thoroughly in your baking dish. Once the mixture is ready and poured into your dish, cover it tightly with plastic wrap or aluminum foil and place it in the refrigerator. It can be safely stored this way for up to 24 hours without any loss of quality. This allows you to do the prep work when you have time and simply pop it in the oven when you’re ready.
When you’re ready to bake and serve, remove the covered casserole from the fridge and allow it to sit at room temperature for about 30 minutes while your oven preheats. This step helps ensure a more even bake. Then, bake it according to the recipe instructions. If baking from a cold state directly from the refrigerator, you might need to add an extra 10-15 minutes to the total baking time to ensure it is thoroughly cooked through and heated to the center. Always look for that golden crust and firm center as indicators of doneness.
How Do You Reheat Jiffy Corn Casserole for Best Results?
Reheating leftover corn casserole is straightforward, ensuring you can enjoy its deliciousness days after baking. Proper reheating methods help maintain its creamy texture and crispy crust:
- Microwave: For individual servings, the microwave is a quick and convenient option. Place a portion of corn casserole on a microwave-safe plate. Cover it loosely with a paper towel to prevent splatters and help retain moisture, keeping the casserole from drying out. Heat on high for 1-2 minutes, or until thoroughly warmed through. Stirring halfway through the heating process can ensure more even warmth.
- Oven: For reheating larger amounts or an entire casserole, oven reheating is generally the preferred method. It helps restore the lovely crispy crust and ensures even heating without drying out the interior. Preheat your oven to 350°F (175°C). Place the casserole in an oven-safe dish, cover it with aluminum foil to prevent excessive browning and moisture loss, and bake for 20-25 minutes for a full casserole, or until heated through to the center. For individual slices, less time will be needed, typically around 10-15 minutes. For the ultimate crispy top, you can remove the foil for the last 5 minutes of baking.
Can You Freeze Corn Casserole? Yes, It Freezes Beautifully!
This Jiffy corn casserole is an excellent candidate for freezing, making it perfect for meal prep, portion control, or simply saving for future enjoyment. Proper freezing techniques ensure it retains its delicious flavor and comforting texture upon thawing and reheating:
- Freezing a Whole Casserole: Once the casserole is completely baked and has cooled down to room temperature, wrap the entire baking dish tightly with at least two layers of plastic wrap, followed by a layer of heavy-duty aluminum foil. This robust double layer is crucial for protecting against freezer burn and maintaining freshness. It can be safely stored in the freezer for up to 3 months.
- Freezing Individual Portions: For even greater convenience, you can cut the baked and cooled casserole into individual serving sizes. Wrap each piece individually in plastic wrap, then place these wrapped portions into an airtight, freezer-safe container or a heavy-duty freezer bag. This method allows you to easily take out and thaw just one portion at a time as desired, reducing waste and offering quick meal solutions.
- Thawing and Reheating: To enjoy your frozen corn casserole, the best approach is to transfer it from the freezer to the refrigerator and allow it to thaw slowly overnight. Once thoroughly thawed, you can reheat it using either the oven method (covered with foil at 350°F until warm, uncovering for the last few minutes to crisp) or by microwaving individual pieces as described in the reheating section above. This ensures a delicious outcome, nearly as good as fresh!
More Irresistible Holiday Side Dish Recipes
Whether you’re planning an elaborate festive meal, a cozy family dinner, or simply looking for delicious accompaniments to your main course, here are more fantastic side dish recipes that are sure to impress and complement any spread:
- Sausage Stuffing
- Green Beans with Bacon
- Texas Roadhouse Rolls
- Air Fryer Carrots
- Scalloped Potatoes
- Slow Cooker Cream Corn
- Loaded Twice Baked Potato Casserole

Jiffy Corn Casserole Recipe
By Erin Sellin
This easy corn casserole recipe is a classic holiday side dish that’s simple enough for any weeknight. A delightful combination of creamy corn and cornbread, it’s a delicious addition to any meal.
Prep Time: 5 mins
Cook Time: 1 hr
Total Time: 1 hr 5 mins
Servings: 8
Equipment
- 13×9 Baking Dish
- GIR Spatula
- Mixing Bowls
Ingredients
- 1 box Jiffy Corn Muffin Mix
- 2 (15 oz) cans corn kernels, drained
- 1 (15 oz) can cream style corn
- 1/2 cup butter, melted
- 1 cup sour cream
- 2 large eggs
Instructions
- Preheat your oven to 400°F (200°C). Lightly grease a 9×13 inch baking dish.
- In a large mixing bowl, combine the Jiffy Corn Muffin Mix, thoroughly drained corn kernels, cream style corn, melted butter, sour cream, and eggs. Stir gently until all ingredients are just incorporated and well combined. Avoid overmixing.
- Pour the mixture evenly into the prepared 9×13 inch baking dish. Spread it out with a spatula if needed.
- Bake for 55-60 minutes, or until a beautiful golden brown crust forms on the top and the center is firm and set.
- Remove the casserole from the oven and let it stand for a few minutes before serving warm. This allows it to set further and makes for easier serving.
Nutrition
Serving: 1g | Calories: 233kcal | Carbohydrates: 13g | Protein: 4g | Fat: 19g | Saturated Fat: 11g | Polyunsaturated Fat: 6g | Trans Fat: 1g | Cholesterol: 98mg | Sodium: 240mg | Fiber: 1g | Sugar: 4g
Nutrition information is automatically calculated and should be used as an approximation. It can vary based on specific brands and ingredients used.
I created a fun group on Facebook, and I would love for you to join us! It’s a vibrant community where you can share YOUR favorite recipes, ask questions, and stay updated on what’s new at Dinners, Dishes and Desserts (so that you never miss a new recipe)!
Be sure to follow me on Instagram and tag #dinnersdishes so I can see all the wonderful DINNERS, DISHES, AND DESSERTS recipes YOU make and share!
Stay connected by following me on my social media channels, so you never miss a delicious post, recipe, or cooking tip!
Facebook | Twitter | Pinterest | Instagram
