Perfect Chocolate Chip Scones: Your Guide to Moist, Tender, and Delicious Homemade Treats
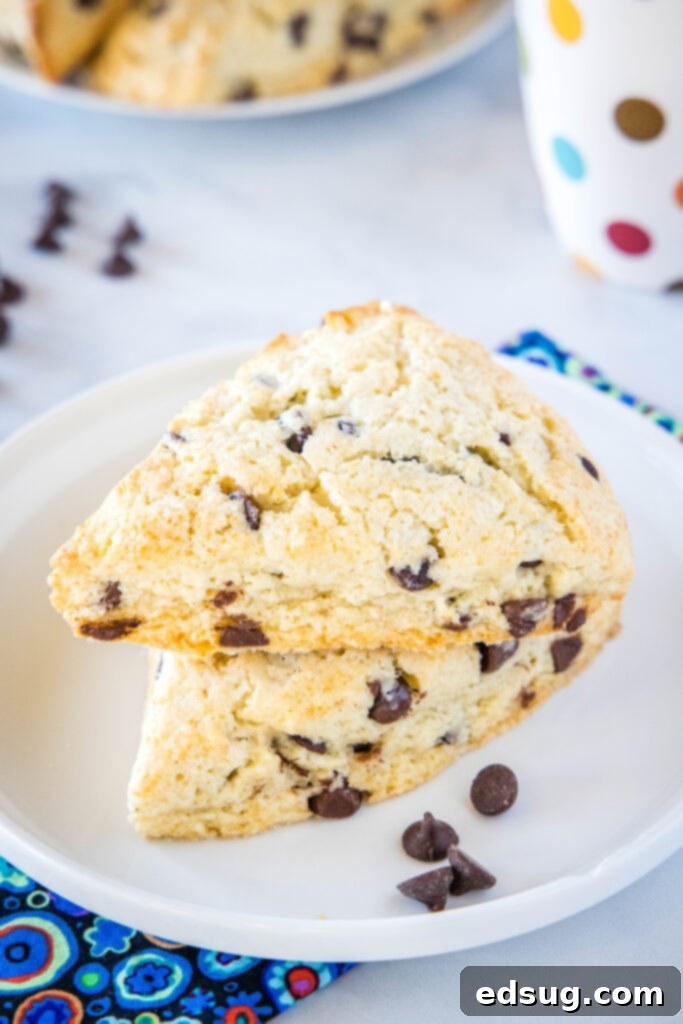
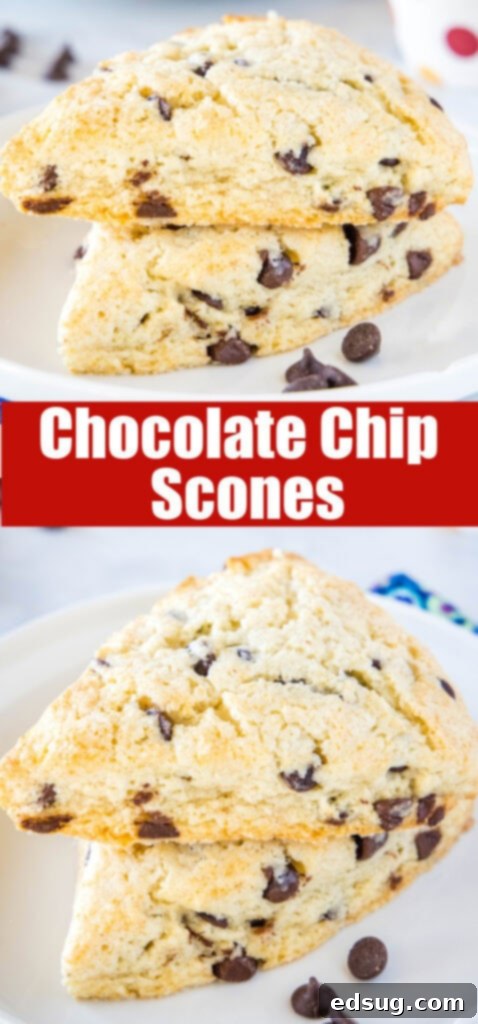
Forget everything you thought you knew about scones. For too long, many of us have endured dry, tough, and frankly, uninspiring bakery scones. But I’m here to tell you that a truly great scone is a revelation! Imagine a delightful fusion of your favorite Chocolate Chip Muffin and a classic Chocolate Chip Cookie, perfectly crafted for breakfast or any moment you crave a sweet, comforting treat. These homemade chocolate chip scones are moist, incredibly tender, and bursting with rich chocolate flavor. They boast a delightfully crumbly exterior that gives way to a soft, fluffy center, making them utterly irresistible. Get ready to transform your perception of scones and bake a batch that will impress everyone!
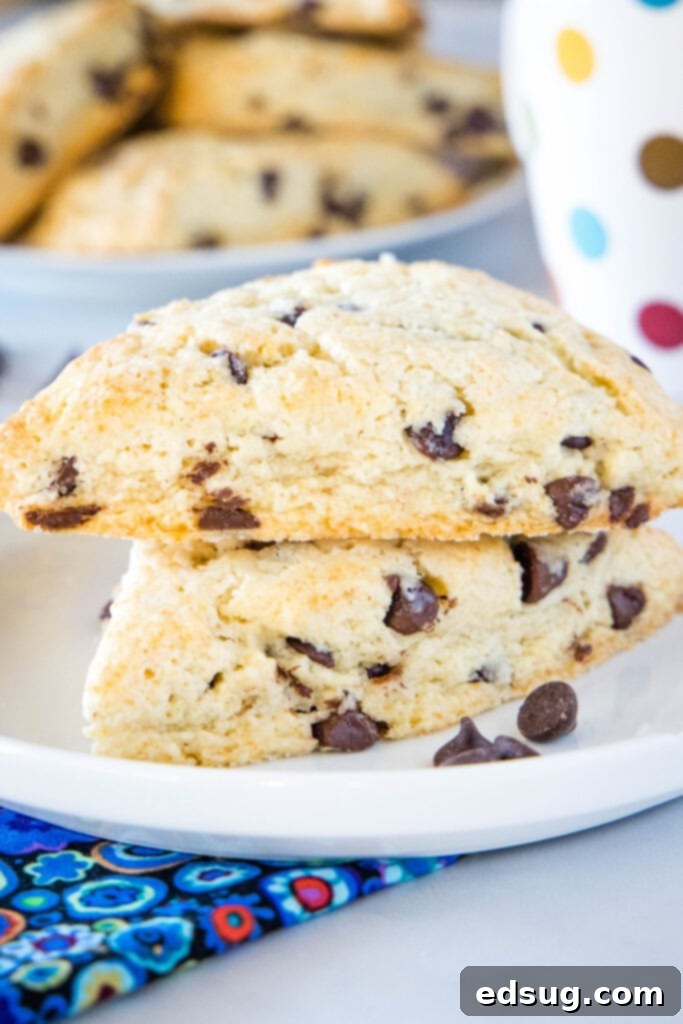
If the idea of baking scones has ever felt daunting, let me assure you, it’s far simpler than you might imagine. With just a few essential tips and a little patience, you’ll be consistently baking perfect scones that taste straight out of a professional bakery. The two golden rules for scone success are straightforward: always use **cold ingredients** and avoid **overworking the dough**. Master these, and you’re well on your way to tender, flaky perfection every single time.
Scones vs. Biscuits: Understanding the Delicious Difference
While scones and biscuits often share a similar appearance and a comforting, doughy texture, they are indeed distinct pastries with unique origins and characteristics. Scones are traditionally believed to have originated in Scotland and have become a beloved staple throughout Britain, particularly as a key component of afternoon tea, often served with jam and clotted cream. Over the centuries, their shape and preparation methods have evolved, but they remain a popular convenience food found in bakeries and stores across the UK.
Biscuits, on the other hand, are more typically American, characterized by their often savory nature, though sweet variations exist. They are usually made with buttermilk, yielding a lighter, flakier texture that separates into distinct layers. While both rely on cold fat cut into flour for their texture, scones tend to be a bit richer due with the inclusion of eggs and heavy cream, which also contributes to their signature tender crumb. Growing up with British family, clotted cream was a classic accompaniment for scones, but truthfully, these chocolate chip scones are so rich and flavorful on their own, you won’t even miss it!
Why You’ll Love Making Homemade Chocolate Chip Scones
There’s a special satisfaction that comes with baking something from scratch, and homemade scones are no exception. Beyond the incredible taste and texture that far surpasses store-bought options, making your own chocolate chip scones offers several advantages. You have complete control over the quality of ingredients, ensuring no artificial flavors or preservatives. Plus, the aroma of freshly baked scones filling your home is a treat in itself. They’re perfect for a leisurely weekend breakfast, a delightful brunch centerpiece, or an afternoon pick-me-up with a cup of tea or coffee. Once you experience the warmth and tenderness of a scone straight from your oven, you’ll wonder why you ever settled for anything less.
Essential Ingredients for Perfect Chocolate Chip Scones
Crafting delicious chocolate chip scones begins with a careful selection of common pantry staples. Each ingredient plays a vital role in achieving that coveted moist, tender, and flaky texture. Here’s a closer look at what you’ll need and why:
- All-Purpose Flour: The foundation of our scones. Using the correct amount is crucial for the right dough consistency.
- Granulated Sugar: Provides sweetness and helps with browning, contributing to the scones’ golden crust.
- Baking Powder: This leavening agent is key to achieving a light and airy texture and a good rise. Ensure yours is fresh for the best results.
- Salt: A pinch of salt balances the sweetness and enhances all the other flavors, especially the chocolate.
- Chocolate Chips: The star of the show! Use your favorite variety – semi-sweet, milk, or even dark chocolate chips work wonderfully. For extra pockets of melted chocolate, try a mix of sizes or even chopped chocolate bars.
- Cold Butter: This is arguably the most critical ingredient. Cold butter creates steam pockets as it melts in the oven, which is what gives scones their flaky layers and tender crumb. Grating it ensures even distribution and keeps it super cold.
- Heavy Cream: Provides richness and moisture, contributing to the scones’ tender interior. Using it cold is also important for maintaining the butter’s temperature. We’ll use a portion for the dough and a bit more for brushing before baking.
- Egg: Adds richness, helps bind the dough, and contributes to a tender texture and a beautiful golden color.
- Vanilla Extract: Enhances the sweet and chocolatey flavors, adding depth to the overall taste profile.
- Coarse Sugar (for sprinkling): Optional, but highly recommended for a beautiful sparkling finish and a delightful subtle crunch on top.
Step-by-Step Guide: How To Make Irresistible Chocolate Chip Scones
Follow these detailed instructions to create bakery-quality chocolate chip scones in your own kitchen:
- Prepare Dry Ingredients: In a large mixing bowl, combine the all-purpose flour, granulated sugar, baking powder, and salt. Whisk them together thoroughly until all ingredients are well blended. This ensures even distribution of the leavening and seasoning throughout the dough.
- Grate Cold Butter: Take your very cold butter and use a box grater to grate it directly into the flour mixture. This method is fantastic for creating tiny, evenly sized pieces of butter, which are essential for flaky scones. For an extra chill, you can place the grated butter in the freezer for a few minutes while you prepare other components.
- Cut in the Butter: Add the grated butter to your dry flour mixture. Using a pastry cutter (or two knives, or even your fingertips very quickly), cut the butter into the flour until the mixture resembles coarse meal with pea-sized crumbs. It’s crucial not to overwork the butter here; the goal is to keep it as cold as possible. Place this mixture back into the fridge while you measure your wet ingredients.
- Whisk Wet Ingredients: In a separate, medium-sized bowl, whisk together the 2/3 cup of heavy cream, the large egg, and the vanilla extract until the mixture is completely smooth and well combined.
- Combine Wet and Dry: Pour the heavy cream mixture and chocolate chips into the flour mixture. Using a spatula or your hands, gently mix everything together until just combined and moist. Be careful not to overmix; a shaggy dough is perfectly fine and desired. Overmixing develops gluten, leading to tough scones.
- Form the Dough: Turn the dough out onto a lightly floured surface. Use your hands to gently gather and pat the dough into a cohesive ball. If the dough feels too sticky, you can add a tiny bit more flour, a teaspoon at a time. If it seems too dry or crumbly, incorporate an extra tablespoon of heavy cream. Once you have a workable ball, press it down evenly into an 8-inch disk, aiming for a thickness of about 1 inch.
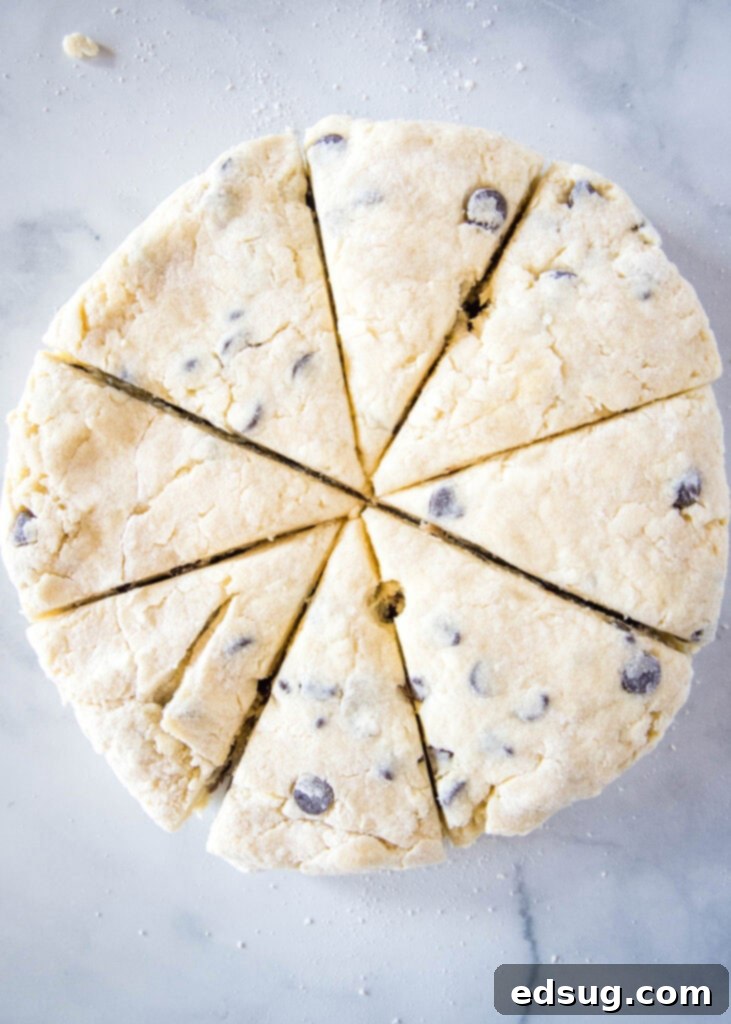
- Cut the Scones: Using a sharp knife or a bench scraper, cut the 8-inch disk into 8 equal wedges, similar to how you would slice a pizza. For perfectly clean cuts, you can wipe your knife between each slice.
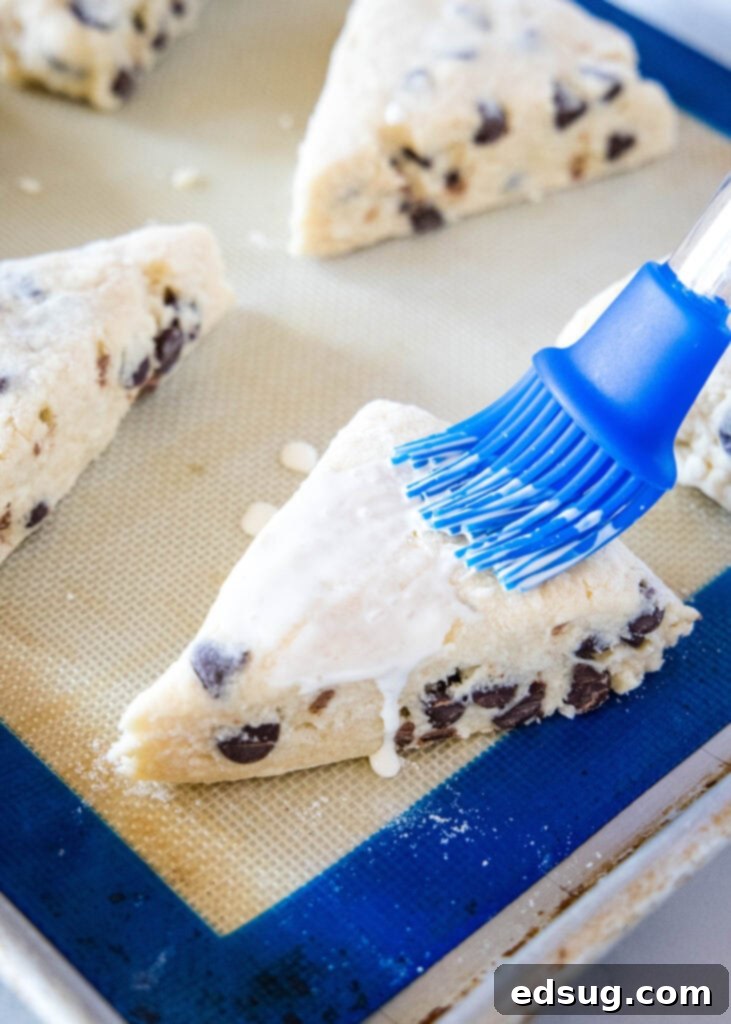
- Chill Before Baking: Carefully transfer the scone wedges onto a baking sheet lined with parchment paper. Brush the tops of each scone with the remaining 2 tablespoons of heavy cream. For a lovely sparkle and added crunch, sprinkle each scone with a little bit of coarse sugar. Place the entire baking sheet into the refrigerator for 15 minutes. This crucial step helps the butter firm up again, promoting a better rise and flakiness. While the scones chill, preheat your oven to 400°F (200°C).
- Bake to Golden Perfection: Bake the chilled scones in the preheated oven for 20-22 minutes, or until the edges are lightly golden brown and the tops are beautifully set. The internal temperature should reach around 200-205°F (93-96°C).
- Cool and Serve: Once baked, remove the scones from the oven and let them cool on the baking sheet for at least a few minutes before transferring them to a wire rack. While they are delicious warm, allowing them to cool slightly helps them set and prevents them from crumbling when handled. Serve warm with your favorite accompaniments.
Storing Your Homemade Chocolate Chip Scones
Scones are always at their absolute best when enjoyed fresh, ideally on the same day they are baked. Their delicate texture and crisp exterior are most pronounced then. However, if you have leftovers, they can be stored in an airtight container at room temperature for up to 2 days. Beyond this period, they tend to dry out and lose their desirable texture. For longer storage, freezing is an excellent option, and there are a couple of methods that work beautifully:
- Freezing Unbaked Scones: This is a fantastic option for fresh-baked scones on demand! After cutting your dough into wedges, arrange them on a baking sheet and place the entire sheet in the freezer until the scones are completely frozen solid (this prevents them from sticking together). Once frozen, transfer the scones to a freezer-safe food storage bag or airtight container. They can be frozen for up to a month. When you’re ready to bake, remove the desired number of scones from the freezer and let them thaw on the counter for 1-2 hours. Then, brush with cream, sprinkle with sugar, and bake as directed, potentially adding a couple of extra minutes to the baking time to ensure they are cooked through.
- Freezing Baked Scones: If you’ve already baked a batch and want to save some for later, you can also freeze them after baking. Allow the scones to cool completely to room temperature. Then, arrange them on a baking sheet and freeze until solid. Once frozen, transfer them to a freezer-safe bag or container, where they will keep for up to a month. To enjoy, simply remove from the freezer and let them thaw on the counter. You can gently warm them in a low oven for a few minutes to restore some of their fresh-baked goodness.
The Secret to Unforgettable Scones: Key Tips for Success
Achieving light, flaky, and tender scones every time comes down to understanding a few fundamental baking principles. These aren’t just suggestions; they are the bedrock of scone perfection!
1. Do Not Overwork the Dough
This is perhaps the most crucial rule for scones, much like when you’re making Buttermilk Biscuits. The less you handle and knead the dough, the more tender, flaky, and utterly delicious your scones will be. Overworking develops the gluten in the flour, which leads to a tough, dense, and dry scone – exactly what we want to avoid! Mix just until the ingredients are combined and no dry streaks of flour remain. A shaggy, slightly uneven dough is a sign of success, not failure.
2. Use Very Cold Ingredients
The temperature of your ingredients, especially the butter and heavy cream, makes a monumental difference. When cold butter bits are incorporated into the dough, they create pockets that release steam during baking, pushing apart the layers of dough and resulting in that desirable flaky texture. If your butter warms up too much during mixing, it will melt into the flour rather than creating those crucial pockets. To ensure maximum coldness, grate your butter and even pop it in the freezer for a few minutes after grating. Keep your heavy cream chilled until ready to use.
3. Chill the Scones Before Baking
This simple yet highly effective tip can dramatically improve your scones. After shaping and cutting your scones, place them on the baking sheet and chill them in the refrigerator for at least 15 minutes (or even up to 30 minutes if you have time) before they go into the hot oven. This brief chilling period re-solidifies any butter that might have softened during handling, ensuring it creates maximum steam and lift when it hits the heat. It’s a fantastic safeguard against tough scones, especially if you accidentally handled the dough a little too much.
4. Don’t Twist the Cutter (If Using Round Cutters)
While this recipe calls for cutting into wedges, if you ever opt for round scones, remember not to twist your biscuit or scone cutter. Press straight down and lift straight up. Twisting seals the edges of the dough, preventing the scones from rising properly and creating those beautiful flaky layers.
Serving Suggestions and Delicious Variations
These chocolate chip scones are fantastic on their own, but they also pair wonderfully with a variety of toppings and drinks. Enjoy them warm with a dollop of whipped cream, a smear of jam, or even a drizzle of chocolate sauce for an extra decadent treat. They are, of course, a perfect companion to your morning coffee, a robust cup of tea, or a glass of cold milk.
Feeling adventurous? Here are some ideas for variations:
- Nutty Scones: Add 1/2 cup of chopped walnuts or pecans along with the chocolate chips.
- Orange or Lemon Zest: Incorporate 1-2 teaspoons of fresh orange or lemon zest into the dry ingredients for a bright, citrusy lift.
- Different Chocolates: Experiment with white chocolate chips, dark chocolate chunks, or a combination of various types of chocolate.
- Spiced Scones: A pinch of cinnamon or nutmeg can add a lovely warmth.
More Tasty Breakfast Recipes You’ll Love
If you enjoyed these chocolate chip scones, be sure to explore more delightful breakfast and brunch options from our collection. We have something for every craving!
- Monkey Bread Muffins
- Breakfast Tacos
- Chocolate Pancakes
- Orange Julius
- Cinnamon Roll Pancakes
- Chocolate Chip Coffee Cake
- Blueberry French Toast Bake

Chocolate Chip Scones
By Erin Sellin
These Chocolate Chip Scones are wonderfully moist and tender, packed with delicious chocolate chips. Featuring a delightful crumbly outside and a soft center, they are absolutely delicious and perfect for breakfast or a snack any time of day.
Cook Time: 20 mins
Total Time: 45 mins
Servings: 8
Rate Recipe
Print Recipe
Ingredients
- 2 1/2 cups all-purpose flour
- 1/2 cup granulated sugar
- 1 Tablespoon baking powder
- 1/2 teaspoon salt
- 1 1/4 cup chocolate chips
- 1/2 cup cold butter (1 stick, unsalted preferred)
- 2/3 cup + 2 Tablespoons heavy cream, divided
- 1 large egg
- 1 teaspoon vanilla extract
- Coarse sugar for sprinkling
Instructions
- In a large bowl, mix together the flour, sugar, baking powder, and salt until well blended.
- Use a box grater to grate your cold butter directly into the flour mixture. For extra coldness, place the grated butter in the freezer for a few minutes.
- Add the grated butter to the flour mixture. Using a pastry cutter, cut in the butter until the mixture forms pea-sized crumbs. Place in the fridge.
- In a separate bowl, whisk together 2/3 cup heavy cream, the egg, and vanilla until smooth.
- Pour the heavy cream mixture and chocolate chips into the flour mixture. Gently mix until everything is just blended and moist, avoiding overmixing.
- Turn the dough onto a lightly floured surface. Gently work the dough into a ball with your hands, adding a tiny bit more flour if too sticky, or a tablespoon of heavy cream if too dry. Press the ball into an 8-inch disk, about 1 inch thick.
- Use a sharp knife to cut the disk into 8 wedges.
- Place the wedges onto a lined baking sheet. Brush with the remaining 2 tablespoons of heavy cream and sprinkle with coarse sugar. Refrigerate for 15 minutes. Preheat oven to 400ºF (200°C) during this time.
- Bake scones for 20-22 minutes until edges and top are lightly golden brown.
- Remove from the oven and let cool for at least a few minutes on the baking sheet before serving.
Nutrition Information
Nutrition information is automatically calculated, so should only be used as an approximation.
- Serving: 1g
- Calories: 449kcal
- Carbohydrates: 61g
- Protein: 6g
- Fat: 22g
- Saturated Fat: 13g
- Polyunsaturated Fat: 7g
- Trans Fat: 1g
- Cholesterol: 58mg
- Sodium: 420mg
- Fiber: 3g
- Sugar: 28g
Like this recipe? Leave a comment below!
I created a fun group on Facebook, and I would love for you to join us! It’s a place where you can share YOUR favorite recipes, ask questions, and see what’s new at Dinners, Dishes and Desserts (so that you never miss a new recipe)!
Be sure to follow me on Instagram and tag #dinnersdishes so I can see all the wonderful DINNERS, DISHES, AND DESSERTS recipes YOU make!
Be sure to follow me on my social media, so you never miss a post!
Facebook |
Twitter |
Pinterest |
Instagram
