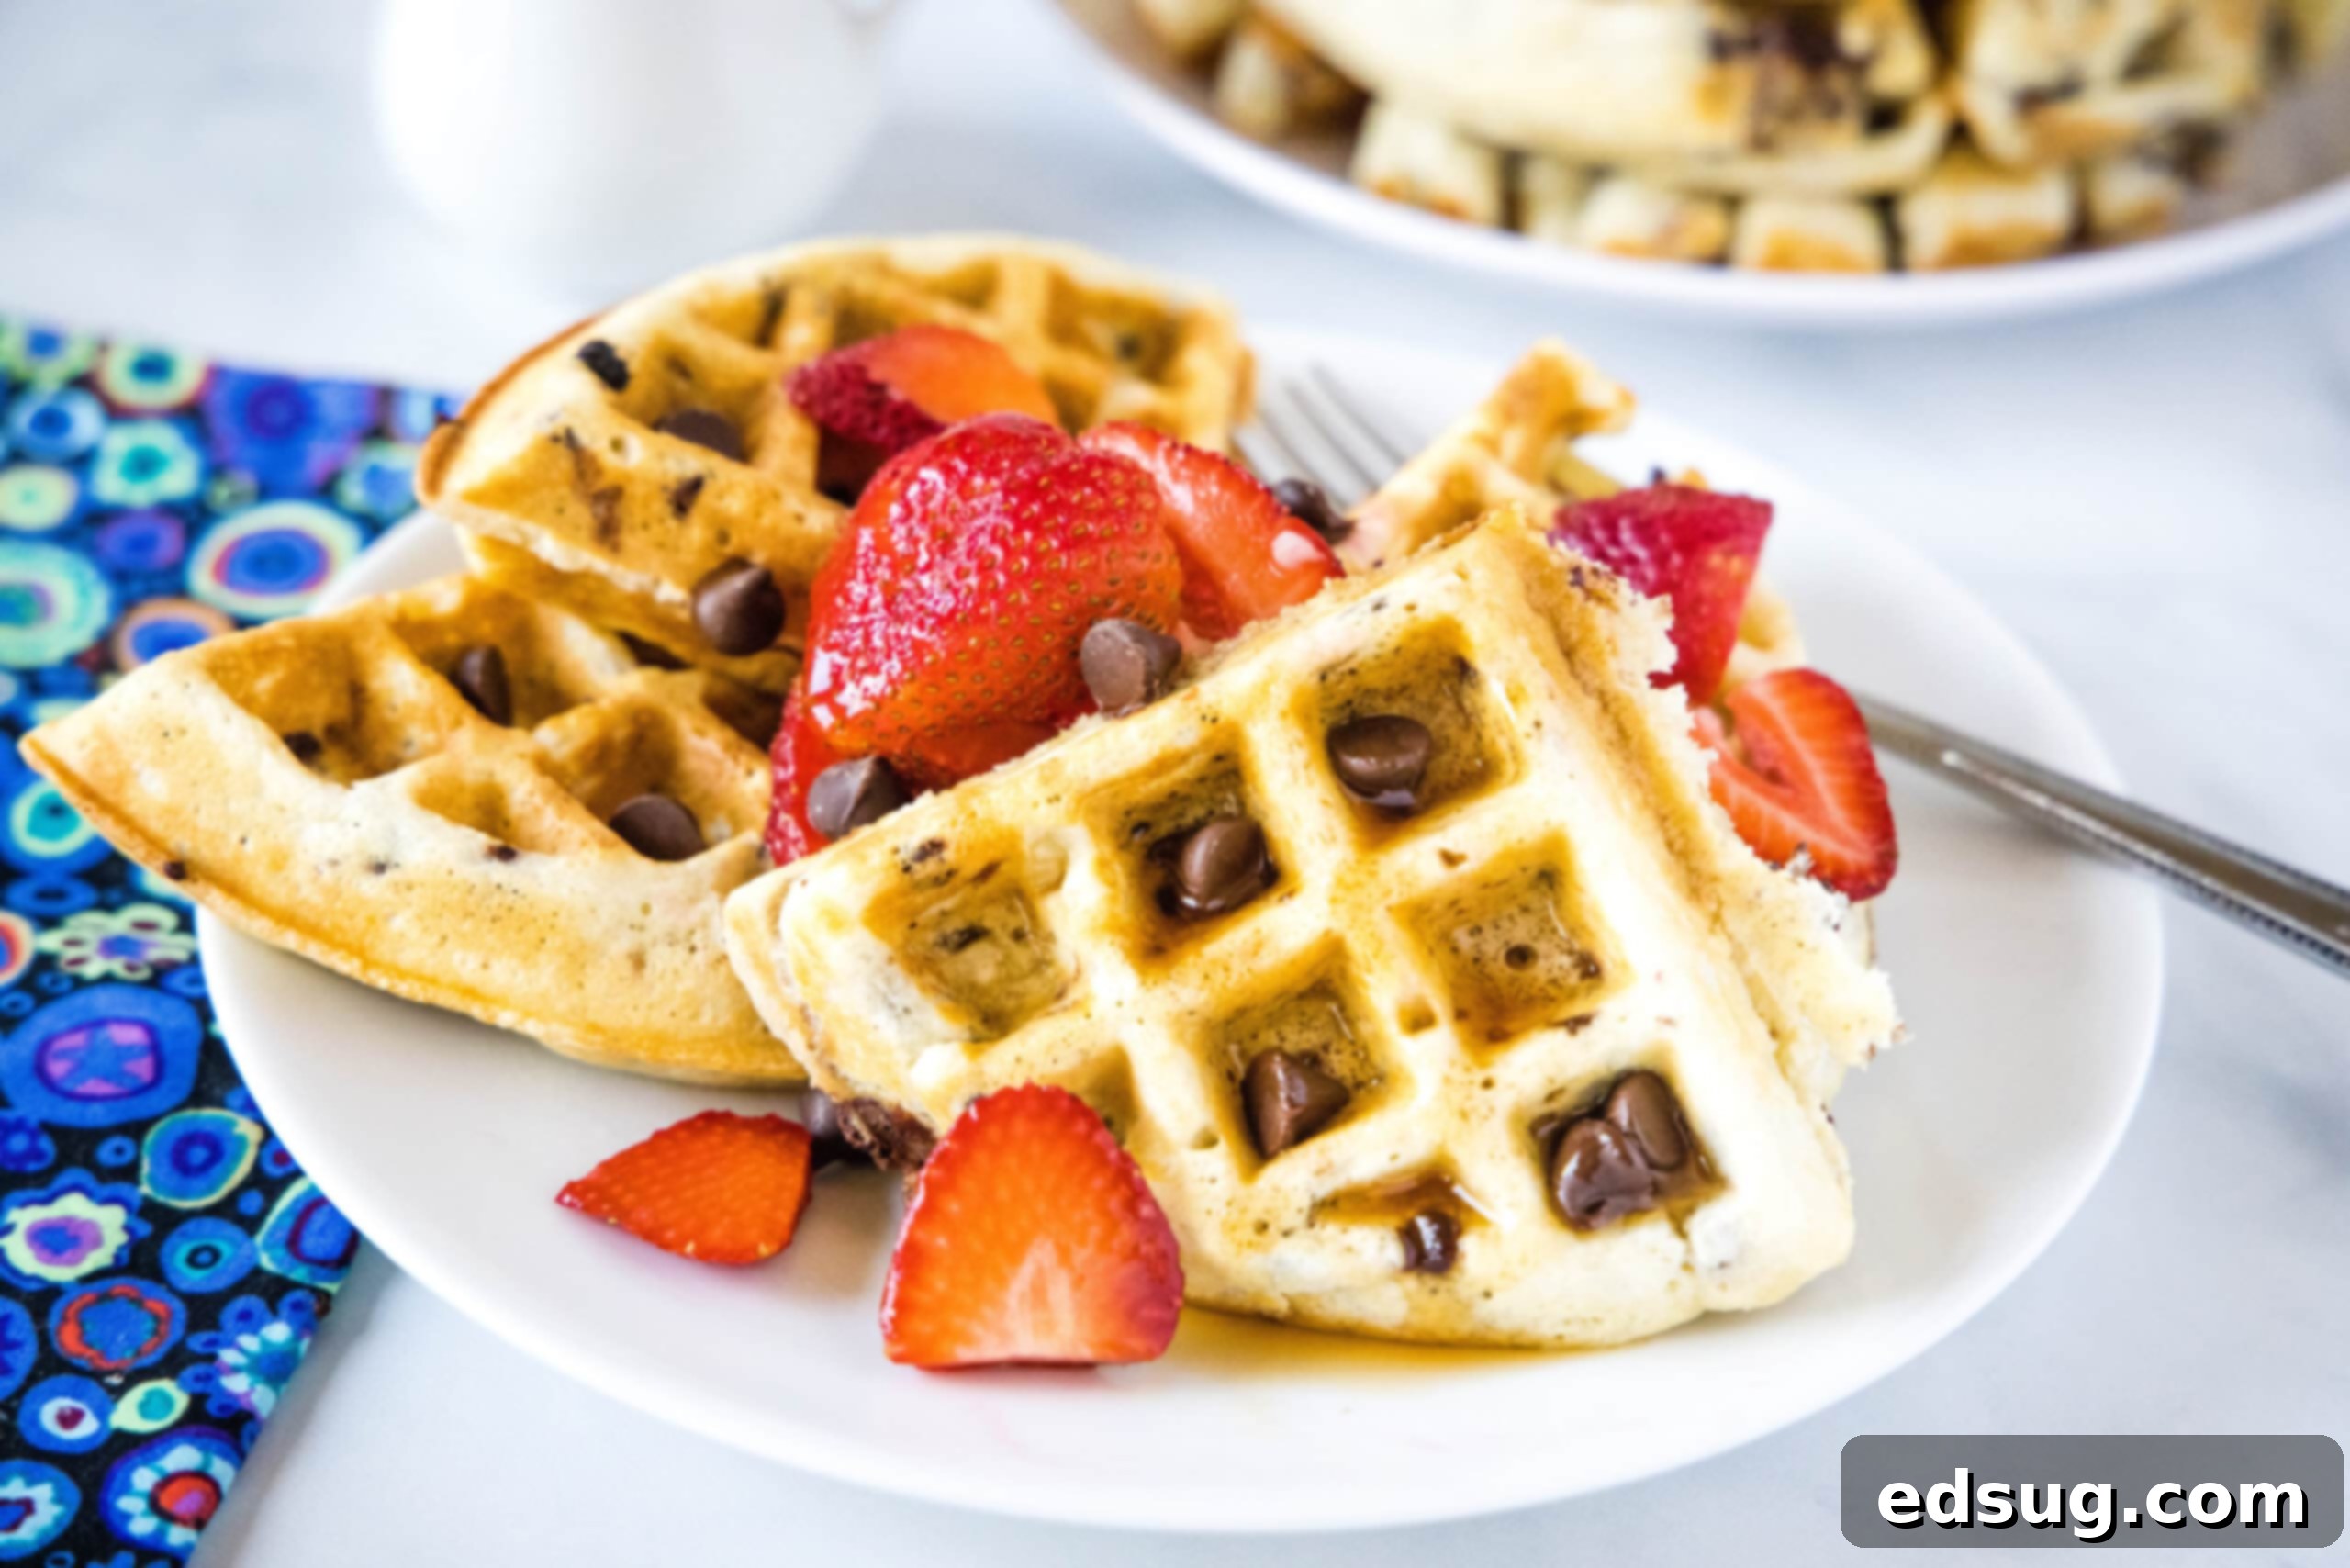
Ultimate Homemade Chocolate Chip Waffles: Fluffy, Crispy & Irresistible
There’s nothing quite like a lazy weekend morning that starts with the comforting aroma and delightful taste of a homemade breakfast. While many enjoy savory options, my heart always leans towards something sweet, and if that involves chocolate, you can bet I’m all in! Imagine waking up to golden-brown waffles, perfectly light and fluffy on the inside with a satisfying crisp on the outside, each bite bursting with warm, melty chocolate chips. These aren’t just any waffles; these are the ultimate homemade chocolate chip waffles, a sweet treat that promises to elevate any morning into a special occasion.
Forget those bland, store-bought mixes. Once you experience the unparalleled taste and texture of freshly made waffles, you’ll never look back. This recipe delivers a truly superior product – waffles that are airy yet substantial, with a delicate crispness that provides the perfect contrast to the soft interior. And the best part? They’re incredibly easy to make, transforming your kitchen into a beacon of deliciousness. Beyond the sheer indulgence, homemade waffles offer incredible versatility. You can enjoy them fresh off the iron, or make a larger batch to freeze and enjoy throughout the week, making busy mornings a breeze. Just pop them in the toaster, and a gourmet breakfast is ready in minutes, no fuss required.

Many people shy away from making waffles from scratch, assuming it’s a complicated endeavor. However, the truth is quite the opposite! Crafting homemade waffles is a straightforward process that yields incredibly rewarding results. The simple combination of pantry staples transforms into a batter that bakes into pure breakfast magic. The secret to their irresistible texture lies in a balanced recipe and a few key techniques, which we’ll cover in detail. This recipe for chocolate chip waffles is designed to be approachable for home cooks of all skill levels, ensuring success every time. The satisfaction of serving a stack of these warm, chocolatey delights to your loved ones is unmatched, making them a staple for weekend brunches or even a festive weekday surprise.
And let’s not overlook the convenience factor. Batch cooking these chocolate chip waffles means you can enjoy a wholesome, delicious breakfast even on your busiest days. Imagine grabbing a homemade waffle from the freezer, toasting it to golden perfection, and having a satisfying meal ready before you’ve even finished your first cup of coffee. It’s a game-changer for meal prep and a much healthier, tastier alternative to highly processed frozen options. So, whether you’re planning a leisurely Sunday brunch or prepping for a hectic week, these homemade chocolate chip waffles are your answer to a delightful and effortless sweet start to the day.
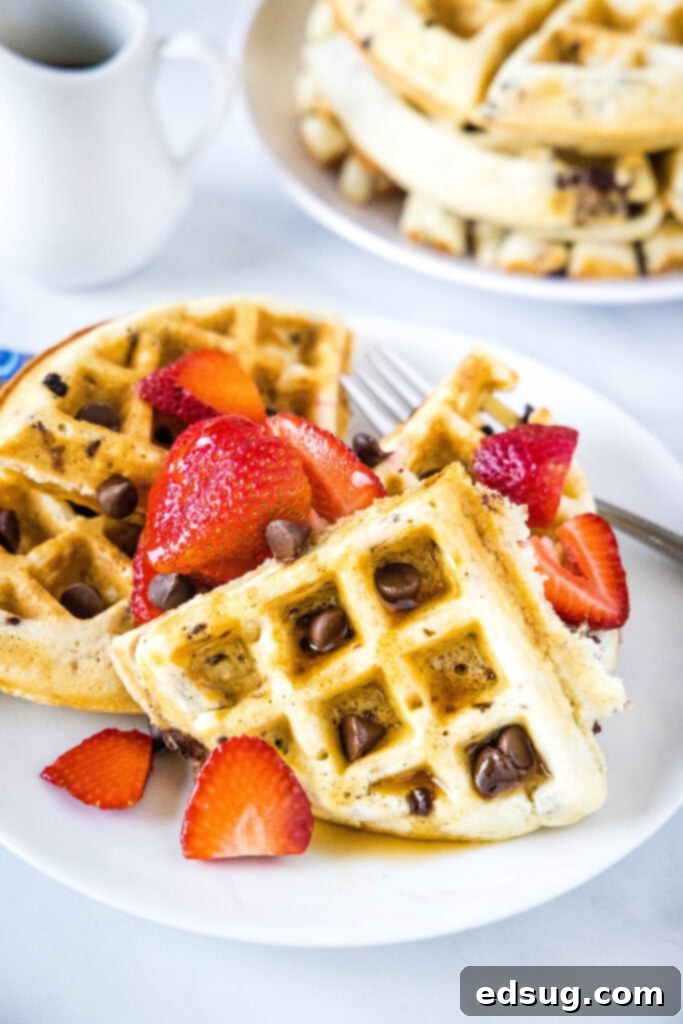
Key Ingredients for Perfect Homemade Waffles
The beauty of homemade chocolate chip waffles lies in their simple, wholesome ingredients. While the chocolate chips are a delightful addition in this version, the base recipe is incredibly versatile and can be enjoyed plain or customized with other mix-ins. Understanding the role each ingredient plays is key to achieving that perfect light, fluffy, and crispy texture. Below is a comprehensive list of what you’ll need, along with some insights and tips for the best results. Be sure to scroll to the bottom of the post for the FULL PRINTABLE recipe card with exact measurements.
- All-Purpose Flour: The foundation of our waffles. Using good quality all-purpose flour ensures a tender crumb.
- Baking Powder: This is our primary leavening agent, responsible for those wonderfully light and airy waffles. Don’t confuse it with baking soda; they have different chemical reactions.
- Salt: A pinch of salt enhances all the other flavors, balancing the sweetness and bringing out the richness of the chocolate.
- Granulated Sugar: Provides sweetness and also contributes to the golden-brown crust and slight crispness.
- Eggs: Eggs add richness, structure, and help bind the ingredients together, contributing to the waffle’s fluffy texture.
- Unsalted Butter: Melted butter infuses the waffles with a rich, buttery flavor and helps create a tender interior. I always recommend using unsalted butter in baking so you can control the salt content precisely. Make sure it’s cooled slightly after melting to prevent it from scrambling the eggs.
- Vanilla Extract: A classic flavor enhancer that adds warmth and depth to the sweet profile of the waffles. Use a good quality pure vanilla extract for the best taste.
- Buttermilk (or Milk + Lemon/Vinegar): Buttermilk is a secret weapon for tender, flavorful waffles. Its acidity reacts with the baking powder, leading to extra lift and a subtle tangy note. If you don’t have buttermilk, you can easily make a substitute: simply add one tablespoon of lemon juice or white vinegar to a measuring cup, then fill the rest of the way to two cups with regular milk. Let it sit for 5-10 minutes until it slightly curdles before using. Any type of milk you have on hand will work.
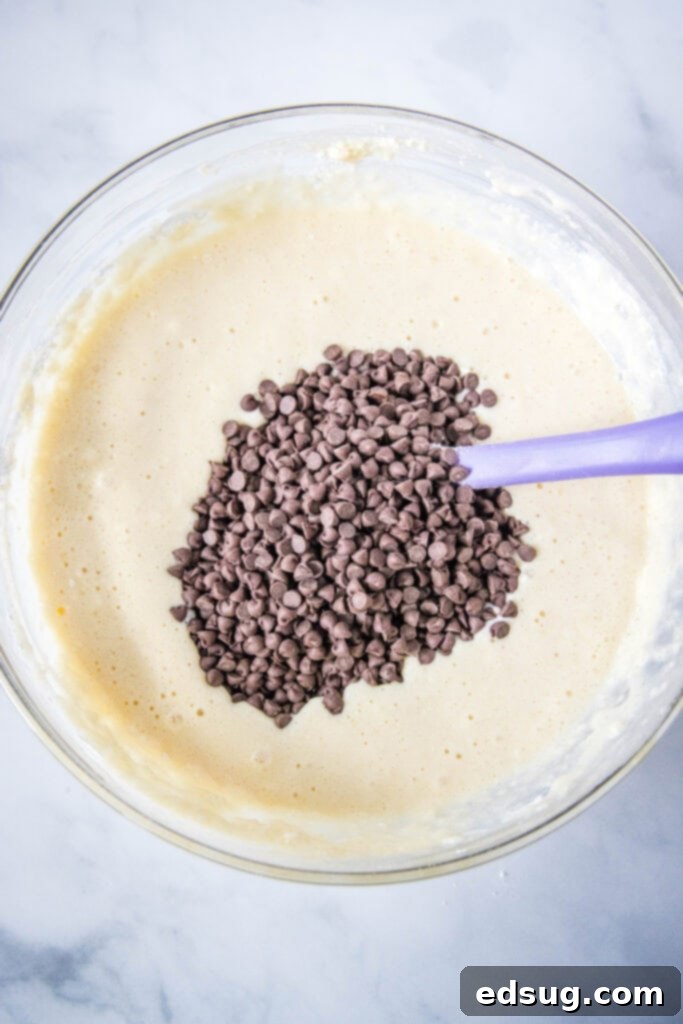
- Mini Chocolate Chips: The star of the show! Mini chocolate chips ensure that you get a burst of chocolate in every single bite. Their smaller size melts beautifully throughout the waffle without making it too heavy. You can adjust the amount to your liking, or even use regular-sized chocolate chips if preferred.
Crafting Your Homemade Chocolate Chip Waffles: A Step-by-Step Guide
Making these delicious chocolate chip waffles is a straightforward process, but a few key steps and tips will ensure you achieve the perfect texture and flavor every time. Follow these instructions carefully, and you’ll be enjoying warm, chocolatey waffles in no time!
- Prepare Your Butter: Begin by melting the unsalted butter in a microwave-safe bowl. Heat it just until it’s fully melted, then set it aside to cool slightly. It’s crucial that the butter isn’t too hot when you combine it with other wet ingredients, especially the milk and eggs, to prevent curdling. This cooling step helps maintain the integrity of your batter.
- Combine Dry Ingredients: In a large mixing bowl, whisk together the all-purpose flour, granulated sugar, baking powder, and salt. Make sure these dry ingredients are thoroughly combined and no lumps of baking powder remain. This even distribution is essential for consistent leavening throughout your waffles.
- Prepare Wet Ingredients: In a separate, medium-sized bowl, whisk the eggs and the remaining granulated sugar (if specified separately in the recipe card) until the mixture is light, pale yellow, and slightly fluffy. This step incorporates air, which contributes to the waffles’ lightness.
- Integrate Liquid Components: Pour the slightly cooled melted butter, vanilla extract, and buttermilk (or your milk substitute) into the egg mixture. Whisk everything together until the wet ingredients are completely smooth and well-combined. Ensure there are no streaks of unmixed butter or vanilla.
- Combine Wet and Dry Mixtures: Gradually add the dry flour mixture to the wet ingredients. Using a whisk or a spatula, stir gently until just blended. This is a critical step: DO NOT OVERMIX! Overmixing develops the gluten in the flour too much, which can lead to tough, dense waffles. A few small lumps in the batter are perfectly normal and actually desirable for tender waffles.
- Fold in Chocolate Chips: Gently fold in the mini chocolate chips until they are just incorporated into the batter. You want them evenly distributed but avoid overmixing during this step as well.
- Allow Batter to Rest: This step is often overlooked but is key to achieving truly light and airy waffles. Let the batter rest for at least 5 minutes while your waffle iron preheats. This allows the flour to fully hydrate and the gluten to relax, resulting in a more tender and fluffy waffle.
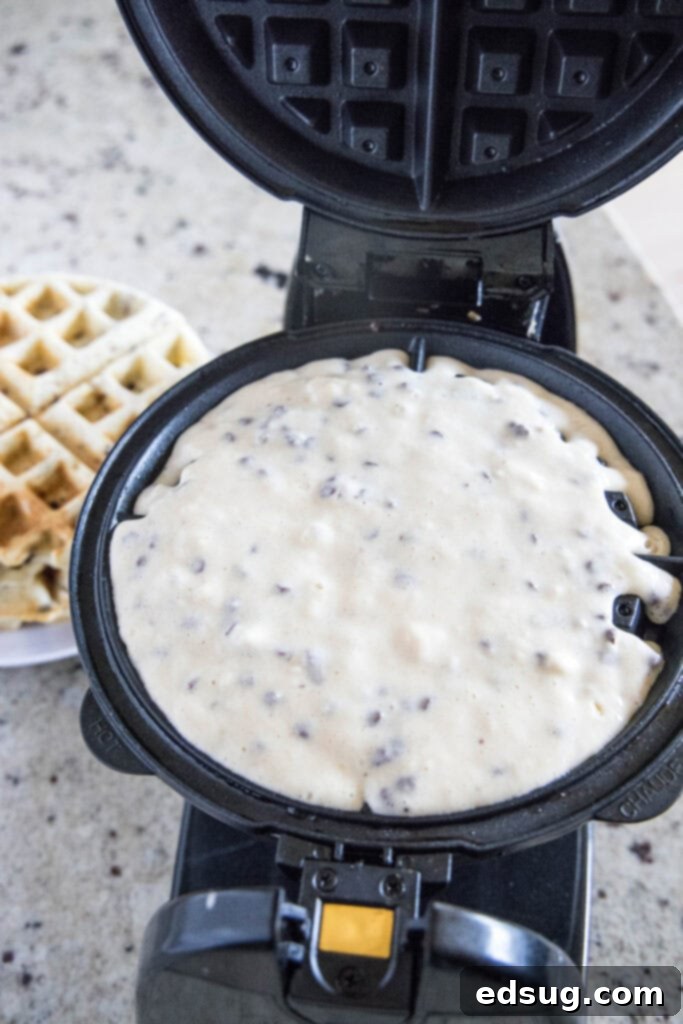
- Cook Your Waffles: While the batter rests, preheat your waffle iron according to the manufacturer’s instructions. Once it’s hot and ready, lightly grease the plates with non-stick cooking spray or a brush of oil (even if it’s non-stick, a little grease helps with crispness and release). Pour the appropriate amount of waffle batter onto the hot waffle iron – typically enough to fill it without overflowing, as indicated by your specific model (Belgian or traditional). Cook until golden brown and steam stops escaping, which usually signals they are done. Cooking times vary by waffle iron, so follow your device’s guidelines.
- Serve and Enjoy: Once cooked, carefully remove the waffles from the iron. For the best experience, serve them immediately. If you’re cooking a large batch, you can keep finished waffles warm in a 200°F (95°C) oven on a wire rack while you finish cooking the remaining batter. This helps prevent them from getting soggy.
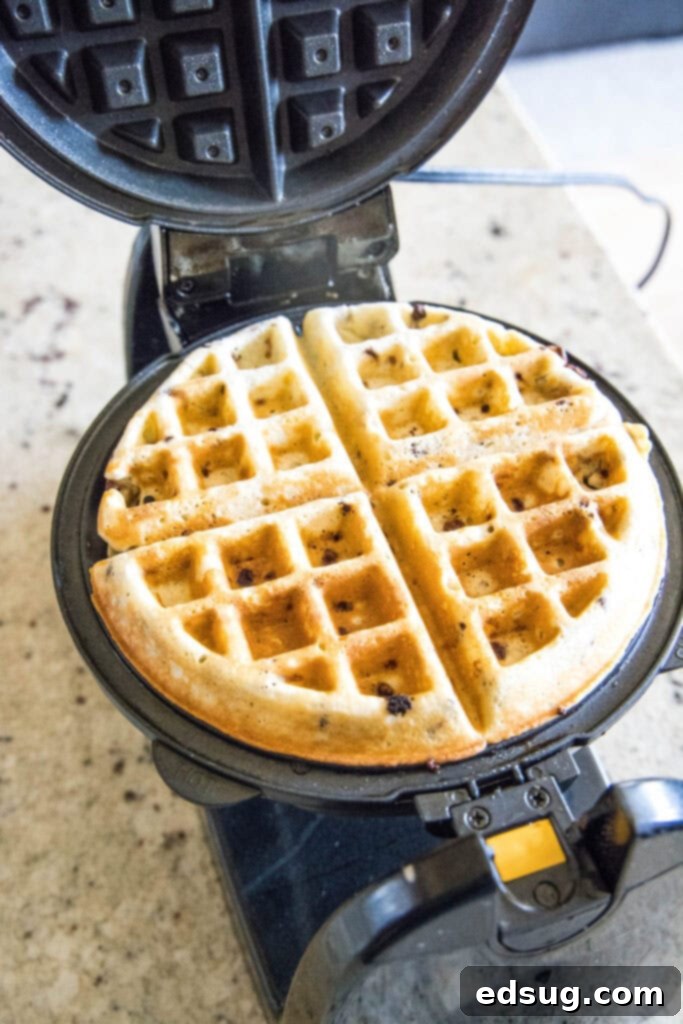
Pro Tips for the Best Chocolate Chip Waffles
While the recipe instructions will guide you to delicious results, these extra tips will ensure your chocolate chip waffles reach their absolute peak of perfection:
- Perfect Batter Consistency: The batter should be pourable but not overly thin. If it’s too thick, add a tablespoon or two of milk until it reaches the right consistency. Too thin, and your waffles might lack structure. Remember, a few lumps are fine, but aim for a relatively smooth mixture.
- Don’t Skimp on Preheat Time: A properly preheated waffle iron is crucial for crispy exteriors and even cooking. If you start cooking too soon, your waffles might stick and turn out pale and soggy. Wait for the indicator light or the specified time by your manufacturer.
- Grease the Iron (Even Non-Stick): Even with non-stick waffle irons, a light spray of cooking oil or melted butter before each waffle (or every few waffles, depending on your iron) helps achieve that desirable crispy crust and prevents sticking.
- Resist the Urge to Peek: Opening the waffle iron too early can interrupt the cooking process, leading to separation and uneven results. Wait until the steam significantly reduces or stops, and the indicator light signals that they are done.
- Quality Chocolate Matters: The type of chocolate chips you use can make a difference. High-quality mini chocolate chips melt beautifully and provide a superior flavor. Feel free to experiment with milk chocolate, semi-sweet, or even dark chocolate chips!
- Keep Them Warm and Crispy: If serving a crowd, place cooked waffles on a wire rack set over a baking sheet in a 200°F (95°C) oven. This keeps them warm without steaming and getting soggy. Avoid stacking them, as this traps steam and softens the exterior.
- Adjust Sweetness: Taste your batter before adding eggs (if you’re comfortable) or after mixing. You can adjust the sugar slightly if you prefer a sweeter or less sweet waffle, especially depending on your toppings.
Unleash Your Creativity: Best Waffle Toppings
Once you have a stack of warm, golden chocolate chip waffles, the fun truly begins with customizing them with your favorite toppings. While they are undeniably delicious on their own, a little extra something can transform them into an unforgettable breakfast or dessert. Here are some of my top recommendations for complementing the rich flavor of chocolate chips:
- Pure Maple Syrup: A classic for a reason! The rich, earthy sweetness of real maple syrup is the perfect partner for warm waffles and melty chocolate.
- Fresh Berries: Bright, juicy berries like strawberries, blueberries, raspberries, or a mix of all three add a wonderful freshness and slight tang that cuts through the sweetness of the chocolate. They also provide beautiful color and a healthy touch.
- More Chocolate Chips: For the ultimate chocolate lover, a sprinkle of extra mini chocolate chips on top of hot waffles will melt slightly, creating an extra gooey texture.
- Homemade Whipped Cream: Light, airy, and delicately sweet, a dollop of fresh whipped cream adds a touch of luxuriousness that pairs wonderfully with the warmth of the waffles and the chocolate.
- Strawberry Syrup: Move beyond plain maple! A vibrant homemade strawberry syrup offers a burst of fruity flavor that’s utterly delicious with chocolate.
- Sliced Bananas: The creamy texture and natural sweetness of bananas are a fantastic complement to chocolate. A sprinkle of cinnamon can take this combination to the next level.
- Easy Raspberry Sauce: Tangy and sweet, a homemade raspberry sauce provides a sophisticated and incredibly flavorful contrast to the rich chocolate.
- Powdered Sugar: A simple dusting of powdered sugar adds an elegant finish and a subtle touch of sweetness without overwhelming the other flavors.
- Nutella Drizzle: For an even more decadent chocolate experience, a swirl of warm Nutella on top is an absolute dream come true.
- Chopped Nuts: A sprinkle of toasted pecans, walnuts, or almonds can add a delightful crunch and nutty flavor.
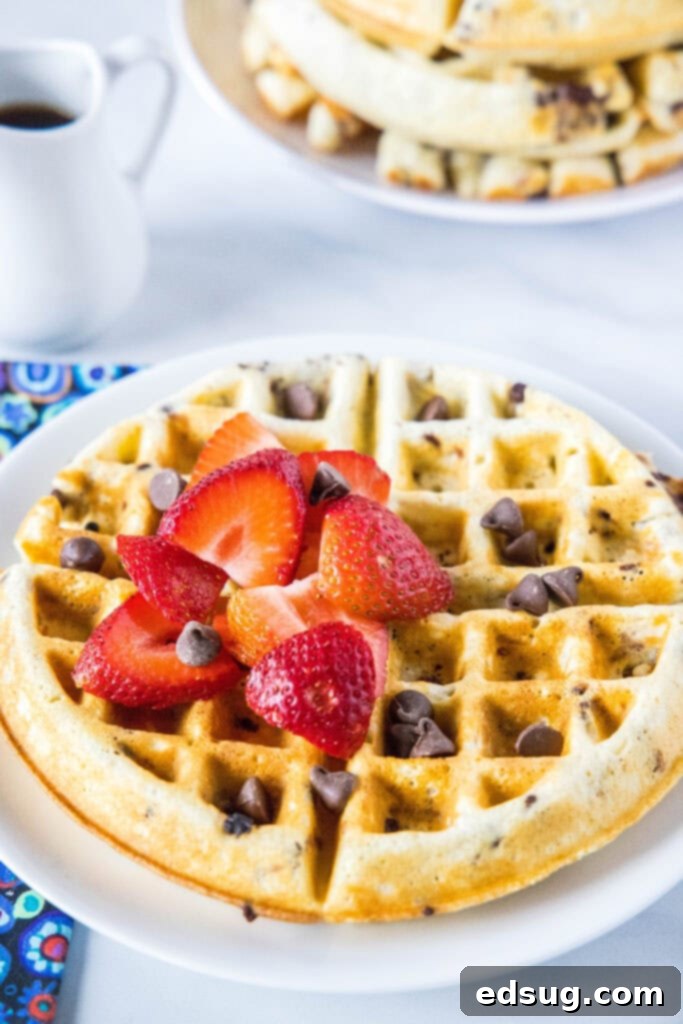
Storing and Reheating Your Homemade Waffles
One of the absolute best advantages of making homemade waffles is the ability to prepare a larger batch and enjoy them for days, or even weeks! Say goodbye to less-than-stellar store-bought frozen waffles and hello to your own delicious, convenient breakfast solutions. Proper storage is key to maintaining their fresh taste and texture.
Freezing for Long-Term Storage:
Freezing waffles is an excellent way to have quick and easy breakfasts ready whenever you need them. To ensure they freeze perfectly and don’t stick together, follow these steps:
- First, allow the freshly cooked waffles to cool completely to room temperature on a wire rack. This is crucial; if you freeze them while warm, condensation will form and lead to soggy, icy waffles.
- Once fully cooled, arrange the waffles in a single layer on a baking sheet. Place the baking sheet in the freezer for about 1-2 hours, or until the waffles are completely frozen solid. This step, known as flash freezing, prevents them from clumping together in the storage container.
- After flash freezing, transfer the frozen waffles to an airtight freezer-safe bag or container. Squeeze out as much air as possible if using a bag to prevent freezer burn.
- Properly stored, homemade chocolate chip waffles can last in the freezer for up to 3 months, ready to be reheated on demand.
Refrigerating for Short-Term Storage:
If you plan to enjoy your leftover waffles within a few days, refrigeration is a good option.
- Allow the waffles to cool completely before storing.
- Place them in an airtight container or a resealable bag.
- Store in the refrigerator for up to 5 days.
Reheating Instructions for Convenience:
Reheating your homemade waffles is simple and can be done in several ways, depending on how you like them and how much time you have:
- Toaster or Toaster Oven: This is my preferred method for achieving ultimate crispiness. Place frozen or refrigerated waffles directly into your toaster or toaster oven. Toast on a medium-high setting until they are heated through and golden brown, usually 2-4 minutes. This method revives their crispy exterior beautifully.
- Conventional Oven: For reheating a larger batch, preheat your oven to 300°F (150°C). Place frozen or refrigerated waffles in a single layer on a baking sheet. Bake for about 5-10 minutes, or until warm and slightly crispy.
- Microwave (for speed, not crispness): If you’re in a hurry and don’t mind a softer waffle, the microwave works. Heat for 30-60 seconds, or until warm. Note that this method will not yield a crispy waffle.
With these storage and reheating tips, you’ll always have a delightful, chocolatey breakfast within reach, making healthy and delicious eating incredibly simple, even on the busiest of mornings.

Frequently Asked Questions About Homemade Waffles
New to waffle making or just looking for some quick answers? Here are some common questions about making perfect homemade chocolate chip waffles:
- Can I use regular milk instead of buttermilk? Yes, absolutely! If you don’t have buttermilk on hand, you can easily create a substitute. Simply add 1 tablespoon of white vinegar or lemon juice to a liquid measuring cup, then fill it up to the 2-cup mark with regular milk. Let it sit for 5-10 minutes until it slightly curdles, then use it as directed in the recipe.
- Why are my waffles not crispy? Several factors can lead to soft waffles: 1) The waffle iron might not have been hot enough when you started cooking. 2) You might be overfilling the iron, which prevents proper cooking. 3) The batter might be too thick or too thin. 4) Stacking warm waffles immediately after cooking traps steam, making them soggy. Always let them cool on a wire rack or keep them warm in a low oven in a single layer.
- Can I make the waffle batter ahead of time? Yes, you can! You can prepare the waffle batter (without the chocolate chips) and store it in an airtight container in the refrigerator for up to 24 hours. When you’re ready to cook, give it a gentle stir, add the chocolate chips, and proceed with the recipe. The baking powder might lose some of its potency over time, so waffles made with pre-made batter might be slightly less fluffy, but still delicious.
- What kind of chocolate chips are best? Mini chocolate chips are recommended because they distribute evenly throughout the waffle and melt beautifully in every bite. You can use semi-sweet, milk chocolate, or even dark chocolate chips, depending on your preference. High-quality chocolate will always yield better flavor.
- Can I add other mix-ins to the batter? Of course! This base waffle recipe is very flexible. Besides chocolate chips, you can experiment with fresh blueberries, chopped nuts, sprinkles, or even a dash of cinnamon or nutmeg for extra flavor. Just be mindful not to overcrowd the batter.
- How do I prevent waffles from sticking to the iron? Ensure your waffle iron is properly preheated and lightly greased with cooking spray or melted butter before adding each batch of batter. If your iron is old or the non-stick coating is worn, sticking can be a common issue.
Explore More Delicious Breakfast Recipes
If you love these chocolate chip waffles, you’re in for a treat! There’s a whole world of delightful breakfast recipes waiting to be discovered. Whether you’re craving something sweet, savory, or a little bit of both, these recipes are sure to inspire your next morning meal:
- No Yeast Cinnamon Rolls: Enjoy classic cinnamon rolls without the long wait!
- Chocolate Waffles: For the ultimate chocolate experience, try waffles where the batter itself is chocolatey.
- Sourdough French Toast: A gourmet twist on a breakfast favorite, using tangy sourdough bread.
- Strawberry Shortcake Pancakes: Combine two dessert classics into one irresistible breakfast.
- Chocolate French Toast Bake: A decadent and easy-to-make casserole, perfect for feeding a crowd.
- Cinnamon Roll Pancakes: The best of both worlds – the flavors of cinnamon rolls in a fluffy pancake.
- Homemade Donuts: Treat yourself to freshly baked donuts, a true weekend indulgence.

Chocolate Chip Waffles
Pin Recipe
Rate Recipe
Print Recipe
Ingredients
- 2 1/2 cups all-purpose flour
- 2 tablespoons granulated sugar
- 2 teaspoons baking powder
- 1/2 teaspoon salt
- 2 whole large eggs
- 1/2 cup unsalted butter, melted and cooled slightly
- 1 teaspoon vanilla extract
- 2 cups milk
- 1 cup mini chocolate chips
Instructions
-
Preheat waffle iron according to manufacturer instructions.
-
In a bowl, whisk together flour, sugar, baking powder, and salt.2 1/2 cups all-purpose flour, 2 tablespoons granulated sugar, 2 teaspoons baking powder, 1/2 teaspoon salt
-
In a separate bowl beat eggs, butter, vanilla, and milk until well blended and smooth.2 whole large eggs, 1/2 cup unsalted butter, 1 teaspoon vanilla extract, 2 cups milk
-
Slowly add flour mixture and stir until combined. Fold in chocolate chips until evenly distributed.1 cup mini chocolate chips
-
Once waffle iron is hot, spray with non-stick spray, and add waffle batter. cook until golden.
-
Serve hot with maple syrup, fruit, or whipped cream.
Nutrition
Nutrition information is automatically calculated, so should only be used as an approximation.
Additional Info
Like this recipe? Leave a comment below!
I’ve created a fantastic community on Facebook, and I’d be thrilled for you to join us! It’s a wonderful place where you can share your favorite recipes, ask cooking questions, and stay updated on all the new delicious content from Dinners, Dishes and Desserts, ensuring you never miss a new recipe.
Make sure to follow me on Instagram and tag #dinnersdishes so I can see all the amazing DINNERS, DISHES, AND DESSERTS creations YOU make!
Stay connected and follow me on my social media channels so you never miss a post!
Facebook | Twitter | Pinterest | Instagram
