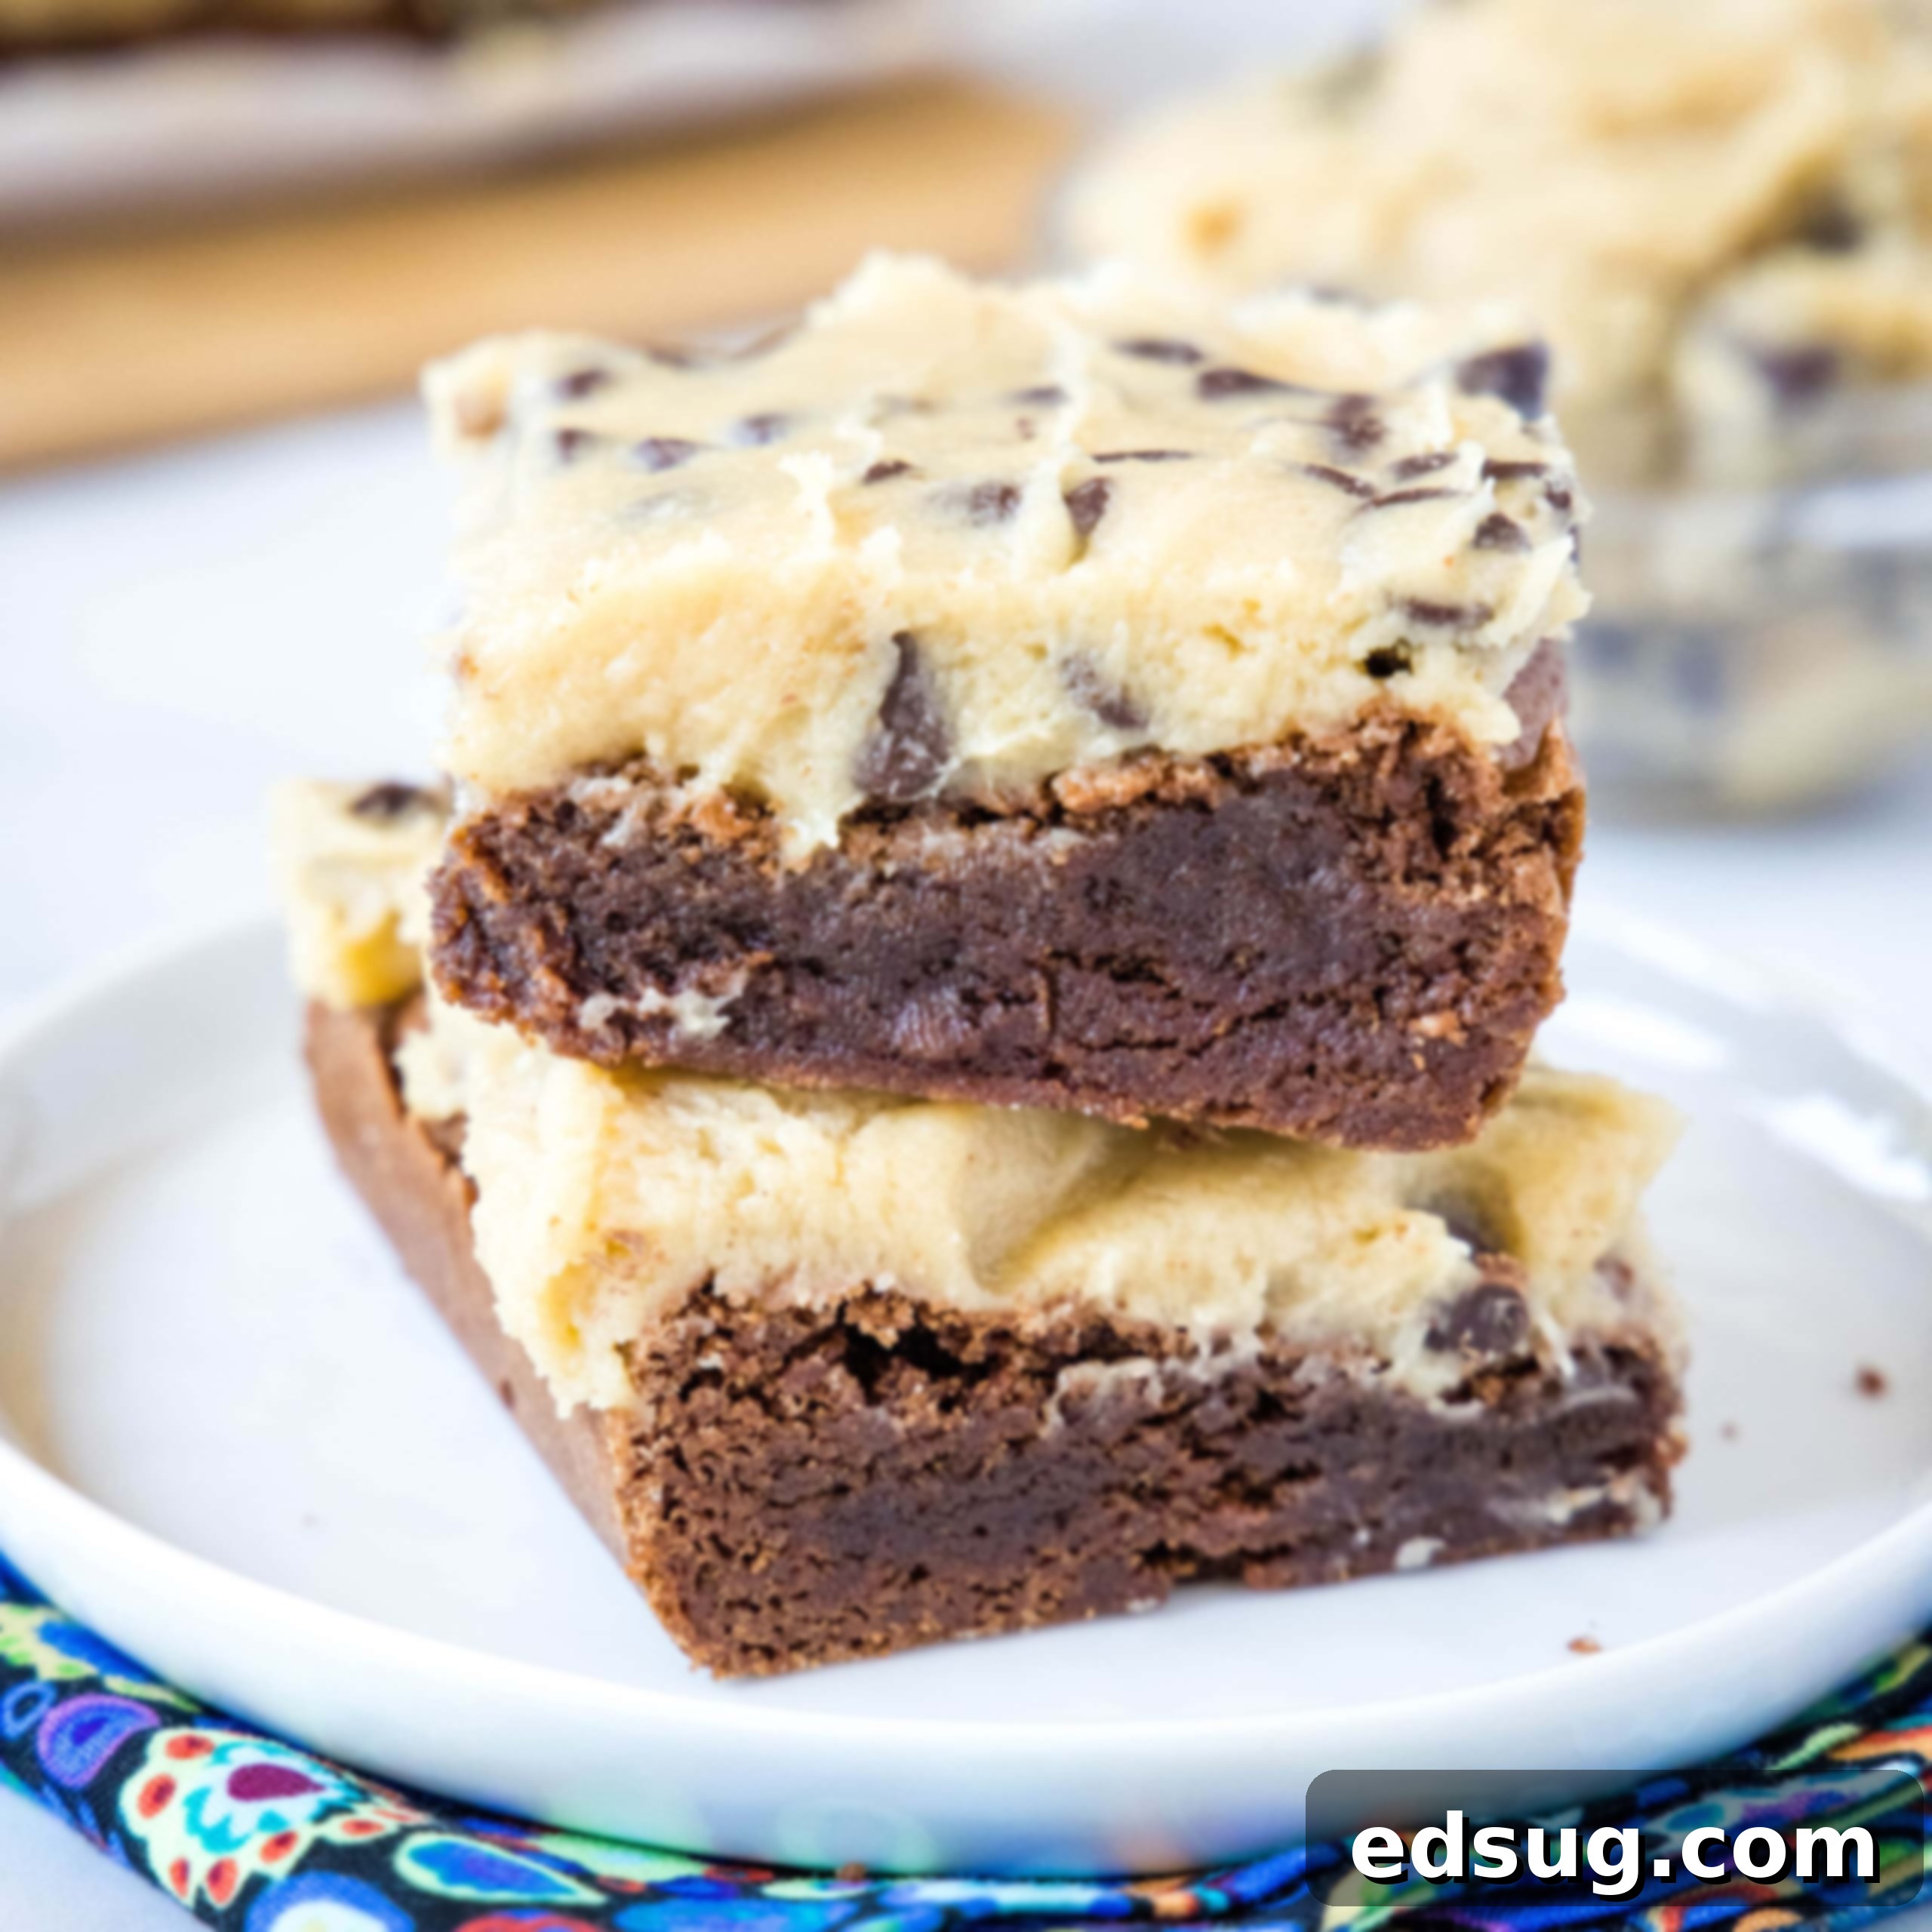
The Ultimate Edible Cookie Dough Frosting: Safe, Spreadable & Seriously Delicious!
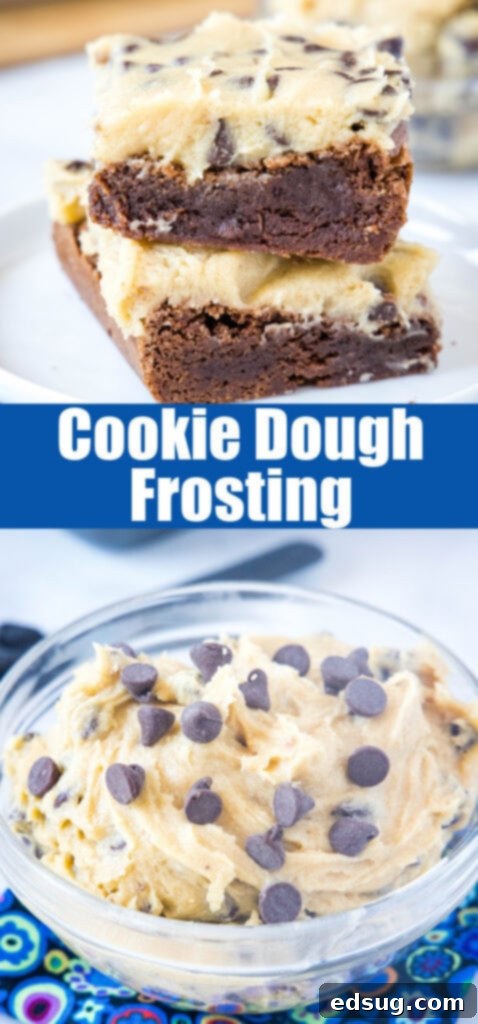
Indulge in your cookie dough cravings with this incredible Cookie Dough Frosting recipe! Transform safe-to-eat cookie dough into a perfectly spreadable frosting that’s ideal for topping cakes, cookies, cupcakes, brownies, or even enjoyed as a decadent dip. It’s so easy to make and utterly delicious – a true dream come true for cookie dough lovers!
Are you one of those people who believes the best part of making cookies is sneaking a spoonful of raw cookie dough? If so, you’re in for a treat! This recipe is tailor-made for you. We’re taking that irresistible, comforting flavor of homemade cookie dough and transforming it into a luxurious, perfectly safe, and spreadable frosting. Say goodbye to worries about raw eggs or flour, and hello to all your edible cookie dough dreams becoming a delightful reality.
This recipe has been a fan favorite for over a decade, first making its appearance as a topping for humble brownie bites and quickly becoming a massive hit. Its versatility and undeniable deliciousness mean you truly can’t go wrong, whether you’re frosting a festive cake or simply digging in with a spoon! Prepare to wow your friends and family with this incredibly simple yet utterly addictive dessert topping.
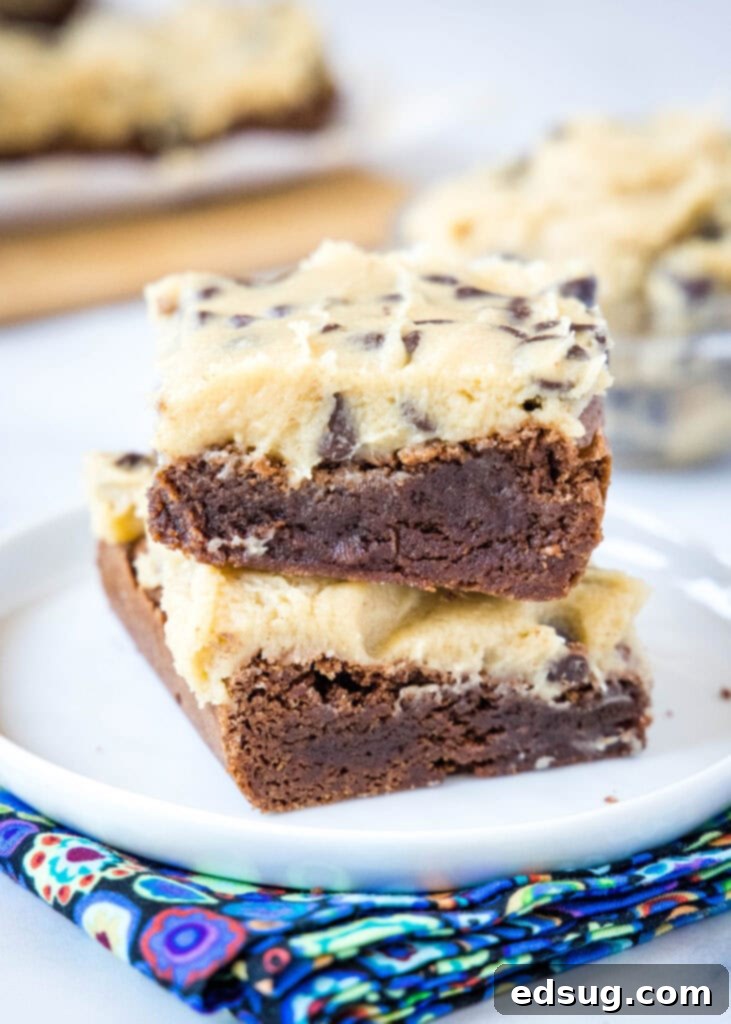
Why Edible Cookie Dough Frosting is a Must-Try
The allure of raw cookie dough is undeniable. That sweet, buttery, chocolate-chip-studded goodness often tempts us straight from the mixing bowl. However, traditional cookie dough, with its raw eggs and uncooked flour, poses health risks due to potential bacteria like Salmonella and E. coli. This edible cookie dough frosting recipe completely bypasses those concerns, offering all the delightful flavor and texture you crave, but in a safe-to-eat format.
We’ve meticulously crafted this recipe to ensure every bite is worry-free. By using heat-treated flour and omitting raw eggs, you can indulge freely. This means you get to enjoy the nostalgic taste of classic chocolate chip cookie dough, transformed into a smooth, creamy frosting that’s perfect for any occasion. It’s not just a frosting; it’s a dessert revolution for anyone who’s ever wished they could eat unlimited cookie dough without the guilt or the risk.
Essential Ingredients for Your Cookie Dough Frosting
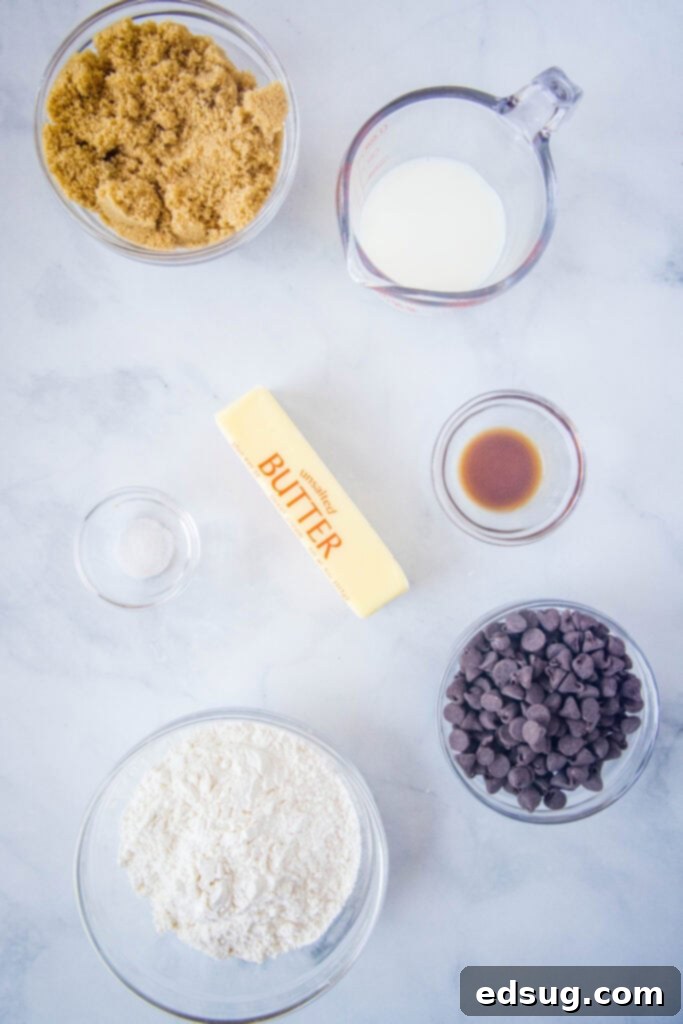
Creating this irresistible edible cookie dough frosting requires just a few simple ingredients, most of which you likely already have in your pantry. Each component plays a vital role in achieving that perfect texture and classic flavor. Here’s a closer look at what you’ll need and why:
- Butter (1/2 cup, softened): Unsalted butter is preferred to control the overall saltiness. It must be softened to room temperature for optimal creaming with the brown sugar, ensuring a smooth, lump-free base for your frosting. This provides the richness and classic buttery flavor.
- Brown Sugar (3/4 cups): Light brown sugar is key for that signature molasses flavor and moist texture reminiscent of real cookie dough. The granulated sugar in brown sugar combined with its moisture content contributes significantly to the frosting’s spreadable consistency and deep, sweet profile.
- Vanilla Extract (1 teaspoon): A high-quality pure vanilla extract is essential. It enhances all the other flavors, adding a warm, aromatic depth that makes the frosting taste truly homemade and authentic to classic cookie dough.
- Salt (1/4 teaspoon): Just a small amount of fine sea salt is crucial for balancing the sweetness of the sugars and butter. It also amplifies the chocolate flavor, making the entire frosting more complex and enjoyable.
- All-Purpose Flour (3/4 cups, heat-treated): This is the primary structural ingredient. As mentioned, it *must* be heat-treated to eliminate any potential harmful bacteria found in raw flour. It provides the characteristic bulk and slight chewiness of cookie dough.
- Milk (1/3 cup): Any type of milk (dairy or non-dairy, like almond or oat milk) works perfectly to adjust the frosting’s consistency. You’ll add it gradually to achieve a smooth, creamy, and easily spreadable texture.
- Chocolate Chips (3/4 cup): Semi-sweet chocolate chips are the classic choice, delivering bursts of rich chocolate throughout the frosting. You can experiment with milk chocolate, dark chocolate, or even white chocolate chips to customize the flavor.
When selecting your chocolate chips, consider the application. If you’re slathering this frosting on large surfaces like sheet cakes or brownies, traditional-sized chocolate chips provide satisfying chunks. However, for smaller treats like cupcakes or as a dip where a smoother texture is preferred, mini chocolate chips are often easier to eat and integrate seamlessly. Choose what best suits your dessert vision!
How To Make Irresistible Cookie Dough Frosting
Once your ingredients are prepped, especially your safely heat-treated flour, the process of making this cookie dough frosting is incredibly straightforward and quick. Follow these detailed steps to achieve a perfectly smooth, creamy, and utterly delicious result that tastes just like the real thing!
- Prepare the Flour Safely: This is the crucial first step for edible dough. Spread your measured all-purpose flour thinly and evenly on a baking sheet. Bake in a preheated oven at 350ºF (175ºC) for exactly 5 minutes. Alternatively, place the flour in a microwave-safe bowl and microwave in 30-second intervals, stirring thoroughly after each, until it reaches an internal temperature of 160ºF (71ºC). Let the flour cool completely to room temperature before proceeding with the recipe. This step is non-negotiable for food safety.
- Cream Butter and Brown Sugar: In the large bowl of an electric mixer fitted with the paddle attachment (or using a hand mixer), combine the softened butter and brown sugar. Beat on medium-high speed for 2-3 minutes until the mixture becomes light, fluffy, and visibly creamy. Ensure there are no gritty sugar crystals remaining; this aeration is key for a light frosting.
- Incorporate Vanilla Extract: Add the vanilla extract to the creamed butter and sugar. Mix on low speed until it is fully combined and fragrant. Make sure to scrape down the sides of the bowl with a spatula to ensure all ingredients are well incorporated.
- Add Heat-Treated Flour and Salt: Reduce the mixer speed to low. Gradually add the cooled, heat-treated flour and salt to the wet ingredients. Mix only until just combined. The mixture will look quite thick and crumbly at this stage, resembling dry cookie dough bits, but don’t worry, this is correct! Avoid overmixing here to prevent developing the flour’s gluten.
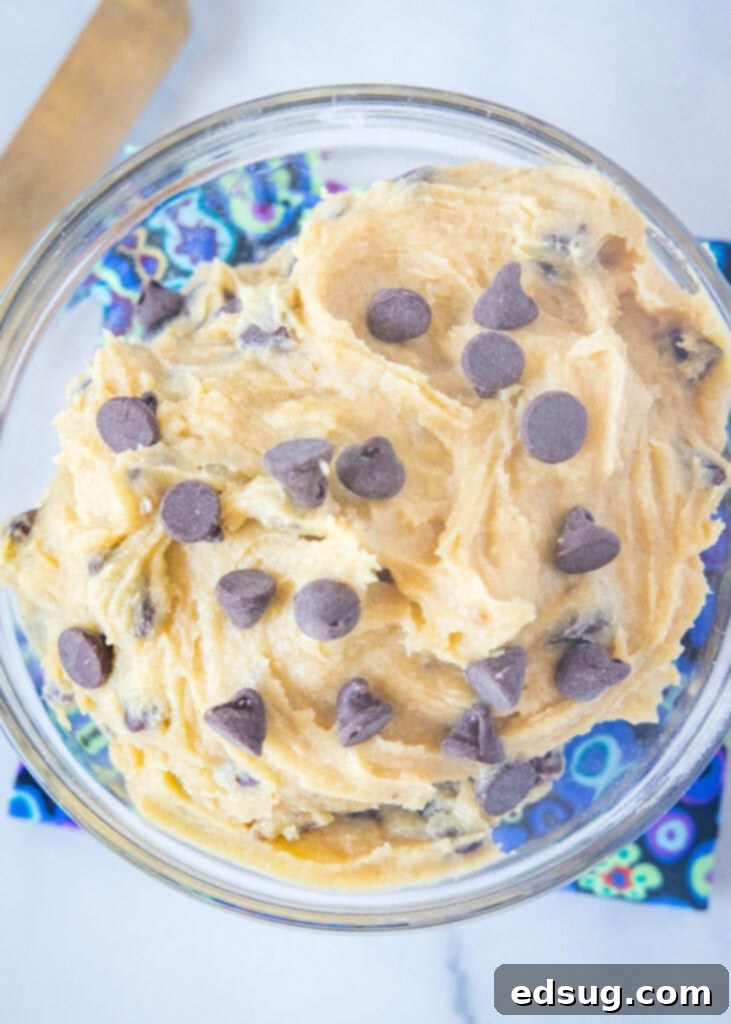
- Achieve Spreadable Consistency with Milk: With the mixer still on low speed, slowly pour in the milk, one tablespoon at a time. Continue beating until the mixture transforms into a smooth, creamy, and easily spreadable consistency. The exact amount of milk needed might vary slightly, so add it gradually until you reach your desired texture—it should be firm enough to hold its shape but soft enough to spread effortlessly without tearing your cake or brownie.
- Fold in Chocolate Chips: Remove the bowl from the mixer. Using a spatula, gently fold in your chosen chocolate chips until they are evenly distributed throughout the frosting. This ensures every bite has that delightful chocolatey crunch.
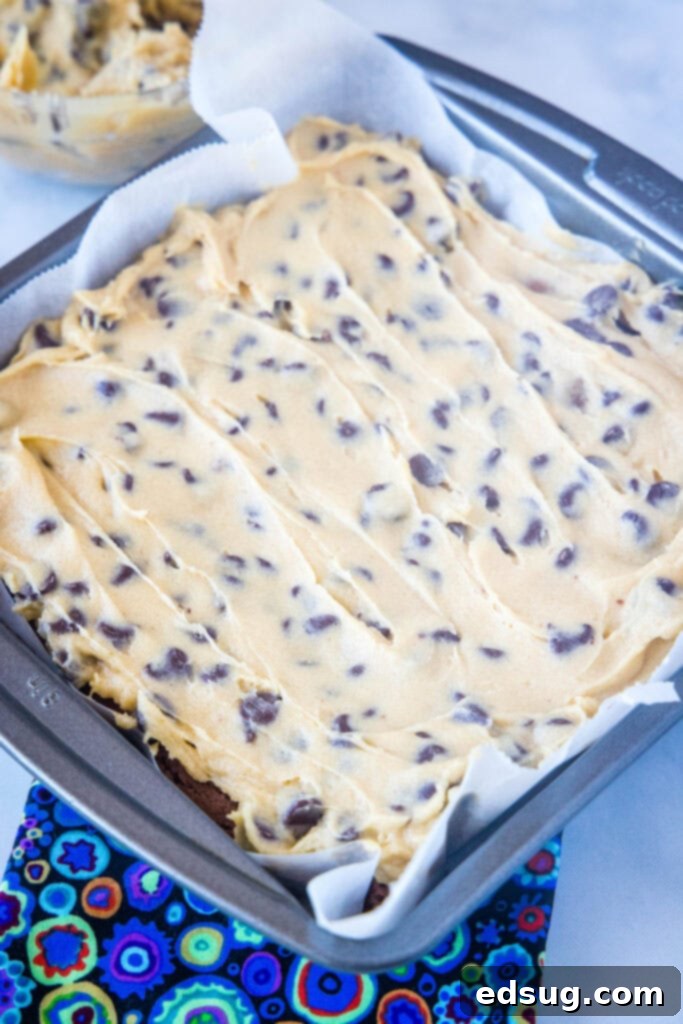
- Serve and Enjoy: Your delicious, safe-to-eat cookie dough frosting is now ready! Generously spread it over your favorite brownies, cupcakes, cakes, or simply serve it as a fantastic dip with crackers, pretzels, or fruit.
To store your homemade cookie dough frosting, place it in an airtight container, covered, in the fridge for up to 5 days. Please note that the frosting will firm up significantly when chilled. For the best spreadability and ease of use, allow it to come back to room temperature for approximately 30-60 minutes before applying or serving. If it’s still too stiff, you can give it a quick whip with your electric mixer to restore its creamy texture.
Versatile Uses for Your Cookie Dough Frosting
This edible cookie dough frosting is not only incredibly delicious but also remarkably versatile, capable of transforming a wide array of desserts into extraordinary treats. Its sweet, buttery, and familiar cookie dough flavor makes it a fantastic addition to almost anything. Here are some popular and creative ways to incorporate this delightful frosting into your culinary creations:
- Classic Frosting for Baked Goods: This is its shining moment! Spread it generously over a warm batch of Homemade Brownies to create the ultimate fudgy cookie dough brownie experience. It’s equally perfect for topping light and airy Nutella Cupcakes, rich Chocolate Cupcakes, or even a simple Air Fryer Cake, adding a delightful chewiness and flavor contrast.
- Cookie Dough Sandwich Cookies: Take your cookie game to the next level by using this frosting as a luscious, thick filling between two soft cookies. Imagine these delightful Cookie Dough Sandwich Cookies, but with even more intense cookie dough flavor!
- Sweet Dip Sensation: Serve it as a fun, interactive, and decadent dip for parties or a casual snack! It pairs wonderfully with crisp graham crackers, salty pretzels (for that sweet-and-salty combo), fresh fruit slices (apples, bananas), vanilla wafers, or even extra cookies. It’s an instant crowd-pleaser and a conversation starter.
- Layered Dessert Filling: Use it as an exciting filling for various desserts. Layer it inside elegant trifles, between cake layers for a delicious surprise, or pipe it into small chocolate cups for charming, bite-sized delights.
- Ice Cream Topping Extravaganza: A spoonful (or two, or three!) of this rich frosting spooned over a scoop of plain vanilla, chocolate, or coffee ice cream creates an instant gourmet dessert. It adds both texture and an incredible flavor boost.
- Unexpected Breakfast Indulgence: For those truly indulgent mornings, spread a thin layer on warm toast, pancakes, or waffles. It’s a decadent treat that feels like pure luxury.
With its rich texture and universally loved flavor, this cookie dough frosting is guaranteed to bring smiles and satisfy any sweet tooth. Don’t be afraid to experiment and find your own favorite ways to enjoy it!
The Importance of Heat-Treating Flour for Edible Desserts
You might have seen warnings on bags of flour or heard that raw flour isn’t safe to eat. This isn’t an old wives’ tale; raw flour can indeed contain harmful bacteria, specifically E. coli, which can cause severe illness. Unlike processed foods that undergo heat treatment, flour isn’t typically treated to kill these pathogens during the milling process. This means that when you consume raw flour in no-bake recipes, you’re exposing yourself to potential health risks. That’s why heat-treating flour is an absolutely crucial and non-negotiable step for any edible, no-bake dough or frosting recipe, including this delicious cookie dough frosting.
The good news is that ensuring your flour is safe is incredibly simple and adds only a few minutes to your prep time. The primary objective is to heat the flour to an internal temperature of 160ºF (71ºC), which effectively kills any potential bacteria. This ensures your edible cookie dough frosting is not only delightful but also completely safe for everyone to enjoy without a second thought. Here are two easy and effective methods:
Oven Method for Heat-Treating Flour
This is a straightforward and reliable method for heat-treating any amount of flour, especially convenient for larger quantities:
- Preheat Oven: Set your oven to a temperature of 350ºF (175ºC).
- Spread Flour: Evenly spread the desired amount of all-purpose flour in a thin layer onto a baking sheet. A thin layer promotes uniform heating and ensures all parts of the flour reach the safe temperature.
- Bake: Place the baking sheet in the preheated oven and bake for precisely 5 minutes. This duration is generally sufficient to bring the flour to the necessary 160ºF (71ºC) internal temperature.
- Cool Completely: Carefully remove the baking sheet from the oven. Allow the flour to cool completely to room temperature before you use it in your cookie dough frosting recipe. It’s vital for the flour to be cool to prevent it from melting your butter or altering the texture of your frosting.
Microwave Method for Heat-Treating Flour
For smaller amounts of flour or when you’re in a hurry, the microwave method is a quick and efficient alternative:
- Place in Bowl: Put the flour in a large, microwave-safe bowl. Using a larger bowl than necessary helps prevent any flour from puffing up and overflowing during heating.
- Microwave in Intervals: Heat the flour on high power in 30-second intervals.
- Stir and Check Temperature: After each interval, remove the bowl and stir the flour thoroughly. Stirring is crucial to distribute the heat evenly and prevent hot spots. Continue microwaving and stirring until the flour reaches an internal temperature of 160ºF (71ºC). Use an instant-read thermometer to verify the temperature. Depending on your microwave’s wattage and the amount of flour, this can take anywhere from 2 to 4 intervals.
- Cool Down: Once the flour reaches the safe temperature, remove it from the microwave and let it cool completely before incorporating it into this or any other no-bake recipe.
Taking this small, extra step ensures that your edible cookie dough frosting is not only incredibly delicious but also completely safe for everyone to enjoy without any health concerns. Prioritizing food safety is always paramount when creating delightful no-bake treats.
Tips and Tricks for Perfect Cookie Dough Frosting
Achieving the best edible cookie dough frosting is simple with a few expert tips. Follow these suggestions to ensure your frosting is always smooth, creamy, and utterly delightful:
- Perfect Room Temperature Butter: This is a game-changer. Your butter should be genuinely softened, but not melted. It should yield easily to a gentle press, leaving an indentation, but still hold its shape. Properly softened butter creams beautifully with sugar, creating an airy, smooth foundation.
- Don’t Over-mix Once Flour is Added: Once you add the heat-treated flour, mix only until it’s just combined. Overmixing can develop the gluten in the flour, which could lead to a tougher, less creamy frosting texture.
- Adjust Consistency with Care: The amount of milk needed can vary slightly depending on your climate and how soft your butter is. If your frosting seems too thick, add more milk in very small increments (1/2 teaspoon at a time), mixing well after each addition until it reaches your desired spreadable consistency. If by chance it becomes too thin, chilling it briefly can help, or you can try adding a tiny amount of powdered sugar, though this will increase sweetness.
- Accurate Flour Measurement: For consistent results, spoon your heat-treated flour into the measuring cup and then level it off with the back of a knife or a straight edge. Avoid scooping directly with the measuring cup, as this can compact the flour and lead to using too much.
- Customize Your Mix-Ins: While semi-sweet chocolate chips are classic, feel free to get creative! Consider using milk chocolate, dark chocolate, white chocolate chips, peanut butter chips, or even adding a sprinkle of mini M&M’s or chopped nuts for different flavor profiles and textures.
- Piping Considerations: If you plan to pipe the frosting for intricate decorations, you might want a slightly firmer consistency. After mixing, chill the frosting in the refrigerator for about 15-20 minutes, then give it a quick stir before transferring to a piping bag.
Frequently Asked Questions (FAQ)
- Can I make this frosting vegan or dairy-free?
- Yes, absolutely! To make this cookie dough frosting vegan and/or dairy-free, simply substitute the dairy butter with a high-quality plant-based butter (look for stick versions that perform well in baking, like Miyoko’s Kitchen or Earth Balance). Also, replace regular milk with your favorite non-dairy milk, such as almond milk, soy milk, or oat milk. Ensure your chocolate chips are also certified dairy-free or vegan.
- How long does edible cookie dough frosting last?
- When stored correctly in an airtight container in the refrigerator, this frosting will maintain its freshness and quality for up to 5 days. For the best flavor and texture, it’s generally recommended to consume it within 3-4 days of preparation.
- Can I freeze this cookie dough frosting?
- While it is possible to freeze this frosting, its texture might change slightly upon thawing. It’s best enjoyed fresh or simply refrigerated. If you do choose to freeze it, store it in an airtight, freezer-safe container for up to 1 month. Thaw it completely in the refrigerator overnight, then let it come to room temperature before re-whipping it briefly with an electric mixer to restore its creamy, spreadable consistency.
- What if my frosting is too stiff after being in the refrigerator?
- It’s completely normal for the frosting to firm up when chilled due to the butter content. To make it spreadable again, simply remove it from the refrigerator and let it sit at room temperature for 30-60 minutes, or until it softens to your desired consistency. You can also give it a quick whip with your electric mixer for a minute or two to bring back its smooth, creamy texture and make it easier to work with.
- Do I really need to heat-treat the flour for edible cookie dough?
- Yes, absolutely! This is a critical food safety step that should never be skipped for any edible raw dough or frosting recipe. Raw flour can contain harmful bacteria like E. coli, which can cause severe illness. Heat-treating the flour to 160ºF (71ºC) effectively kills these potential pathogens, making your cookie dough frosting perfectly safe to consume uncooked.
More Fun Dessert Recipes
If you’re a fan of delicious, indulgent desserts, especially those featuring the delightful taste of cookie dough, then you’re in the right place! After mastering this amazing cookie dough frosting, explore these other fantastic recipes from our kitchen that you’re sure to love and add to your baking repertoire:
- Cookie Dough Cheesecake: A rich and creamy cheesecake featuring luscious layers of irresistible edible cookie dough.
- Biscoff Rice Krispie Treats: A delightful and aromatic twist on a classic childhood favorite, infused with the warm, spiced flavor of Biscoff.
- Cookie Dough Ice Cream: Craft your own homemade ice cream, generously packed with chunks of safe-to-eat cookie dough and plenty of chocolate.
- Homemade Star Crunch Cookies: Recreate this beloved nostalgic chocolate, caramel, and crispy rice treat right in your own kitchen.
- Cookie Dough Truffles: Indulgent, bite-sized balls of edible cookie dough, enrobed in a smooth chocolate coating – perfect for gifting or a quick, satisfying treat.
- Oreo Stuffed Chocolate Chip Cookies: The ultimate decadent indulgence – classic chocolate chip cookies with a delightful, creamy Oreo surprise baked inside.
- Homemade Milky Way: Learn how to craft your own version of this iconic candy bar, complete with fluffy nougat, rich caramel, and a decadent chocolate shell.

Cookie Dough Frosting
Pin Recipe
Rate Recipe
Print Recipe
Ingredients
- 1/2 cup butter, softened
- 3/4 cups brown sugar
- 1 teaspoon vanilla extract
- 1/4 teaspoon salt
- 3/4 cups all-purpose flour
- 1/3 cup milk
- 3/4 cup semi-sweet chocolate chips
Instructions
-
Spread flour on a baking sheet or place in a microwave safe bowl. Bake at 350ºF (175ºC) for 5 minutes, and then cool completely. Or microwave for 30-second intervals, stirring after each, until it reaches 160ºF (71ºC). Cool completely before making recipe.
-
In an electric mixer, cream together softened butter and brown sugar until smooth and creamy, about 2-3 minutes.
-
Mix in vanilla extract until well combined, scraping down the sides of the bowl.
-
Add the heat-treated flour and salt. Beat on low speed until the dough is just combined and appears crumbly.
-
Gradually beat in the milk, one tablespoon at a time, until the mixture becomes creamy and reaches a smooth, spreadable consistency.
-
Gently stir in the chocolate chips until evenly distributed throughout the frosting.
-
Spread over your favorite brownies, cupcakes, cakes, or serve as a dip!
Nutrition
Nutrition information is automatically calculated, so should only be used as an approximation.
Additional Info
Like this recipe? Leave a comment below!
I created a fun group on Facebook, and I would love for you to join us! It’s a place where you can share YOUR favorite recipes, ask questions, and see what’s new at Dinners, Dishes and Desserts (so that you never miss a new recipe)!
Be sure to follow me on Instagram and tag #dinnersdishes so I can see all the wonderful DINNERS, DISHES, AND DESSERTS recipes YOU make!
Be sure to follow me on my social media, so you never miss a post!
Facebook | Twitter | Pinterest | Instagram
