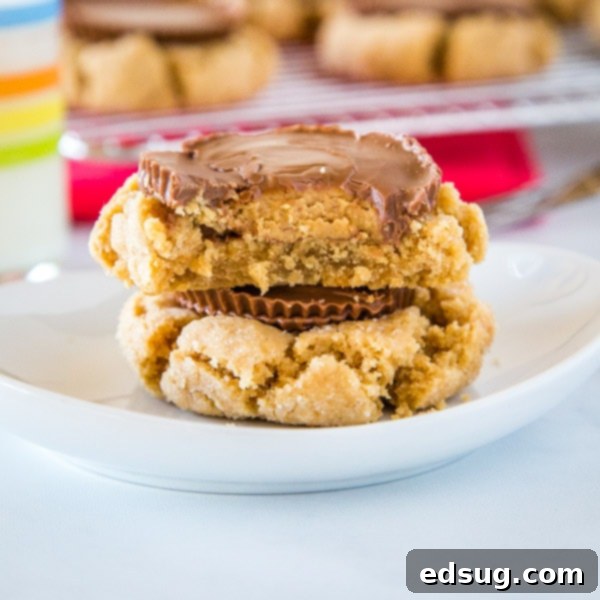
Irresistible Peanut Butter Cup Blossom Cookies: The Ultimate Holiday Baking Treat
Take classic Christmas cookies to a whole new level and really impress with these amazing Peanut Butter Cup Blossom Cookies! The addition of whole Peanut Butter Cups makes these cookies truly over the top, transforming a beloved classic into an unforgettable dessert.
The holiday season is synonymous with cookie baking – a time-honored tradition that fills homes with warmth, laughter, and the irresistible aroma of freshly baked treats. From festive Frosted Sugar Cookies to delicate Coconut Macaroons and everything in between, the options are endless. Among these cherished recipes, peanut butter blossom cookies have always held a special place in my heart, a must-have on our holiday dessert platter every single year.
Years ago, a brilliant twist on this traditional recipe started appearing around the web, and it instantly captured my attention. Imagine the soft, chewy peanut butter cookie base, but instead of the usual chocolate kiss, it’s crowned with a whole, glorious peanut butter cup! For any peanut butter lover, this isn’t just an upgrade; it’s a game-changer, elevating the classic to a truly decadent experience. These Peanut Butter Cup Blossom Cookies are truly a masterpiece for your holiday spread or any occasion that calls for something extra special.
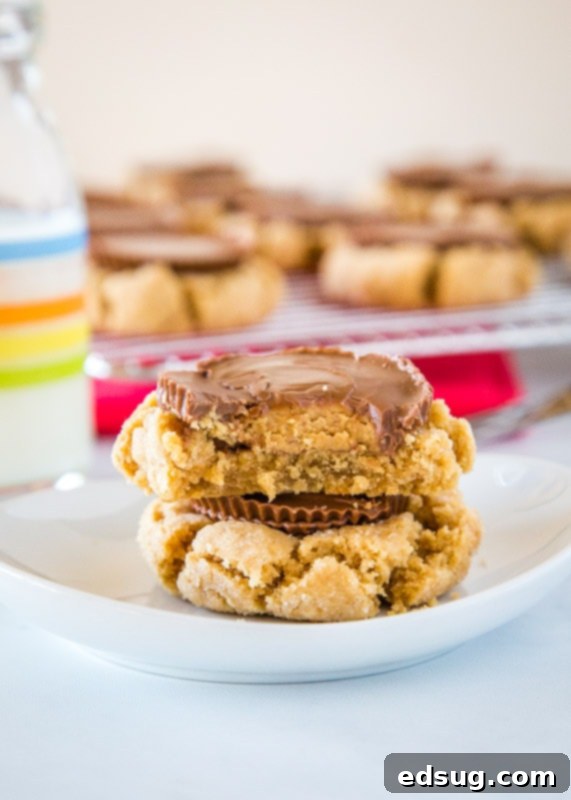
Why These Peanut Butter Cup Blossom Cookies Are a Must-Bake
There are countless reasons why these Peanut Butter Cup Blossom Cookies deserve a prime spot in your baking repertoire. They’re not just a cookie; they’re an experience!
- The Ultimate Peanut Butter Upgrade: While traditional peanut butter blossoms are delightful, these cookies take the concept to an entirely new dimension. Swapping out a chocolate kiss for a full-sized peanut butter cup (or even a mini one!) means more peanut butter goodness and a richer, more satisfying chocolate-peanut butter combination in every bite. It’s basically the classic, but made even better!
- Perfect for Planning Ahead: Holiday baking can be hectic, but this recipe offers fantastic flexibility. You can prepare the cookie dough ahead of time and store it in the refrigerator, ready to bake whenever the craving strikes or guests arrive. This means less stress on busy days and more time to enjoy the festivities.
- Freezer-Friendly Convenience: Not only can you make the dough in advance, but you can also freeze the baked cookies for up to three months! This is a lifesaver for last-minute entertaining or simply having a delicious treat on hand. Just thaw and enjoy.
- Versatility in Size and Shape: The original recipe might suggest a full-sized peanut butter cup, which results in a wonderfully substantial cookie. However, Reese’s offers various sizes of peanut butter cups, including mini and thin versions. This allows you to customize your cookies to be smaller, similar to the traditional Hershey’s Kiss size, or to offer a variety of sizes on your dessert platter.
- Crowd-Pleasing & Impressive: These cookies are showstoppers. The visible peanut butter cup on top makes them incredibly appealing and signals a treat that’s a step above the ordinary. They’re guaranteed to impress family and friends at any gathering.
- A Harmony of Flavors and Textures: The soft, chewy peanut butter cookie pairs exquisitely with the creamy, melty chocolate and peanut butter filling of the cup. The slight warmth from a recently baked cookie allows the chocolate to become perfectly soft, creating an indulgent texture contrast that is truly addictive.
I confess, I have a slight obsession with peanut butter, especially when combined with chocolate. Reese’s Fudge is probably my ultimate weakness during this time of year. But there’s also something uniquely comforting and satisfying about a soft and chewy cookie. These Peanut Butter Cup Blossom Cookies are truly at their peak when they’ve cooled just enough to set, but are still warm enough for the chocolate of the peanut butter cup to be perfectly melted and gooey. Oh, they are absolutely divine!
Essential Ingredients for Your Peanut Butter Cup Blossoms
Creating these delightful cookies requires a few pantry staples, each playing a crucial role in achieving that perfect texture and flavor. Here’s a breakdown of what you’ll need:
- Vegetable Shortening: This is key for creating a wonderfully tender cookie with a soft crumb. Shortening helps prevent the cookies from spreading too much and contributes to their signature chewy texture.
- Creamy Peanut Butter: The star of the show! Opt for creamy peanut butter for a smooth, consistent dough. While natural peanut butter can be used, ensure it’s well-stirred and a no-stir variety for best results, as separated oils can affect dough consistency.
- Granulated Sugar: Provides sweetness and helps with the crispness around the edges, especially when used for rolling the dough balls.
- Light Brown Sugar: Adds a deeper, molasses-rich flavor and contributes significantly to the chewiness and moisture of the cookies.
- Egg: Acts as a binder, holding all the ingredients together and adding richness.
- Milk: Adds moisture to the dough, ensuring the cookies remain soft and tender.
- Vanilla Extract: A crucial flavor enhancer that complements the peanut butter beautifully. Don’t skip it!
- All-Purpose Flour: The structural base of the cookie. Make sure to measure it correctly, preferably by weight, or spoon and level to avoid a dense cookie.
- Baking Soda: This leavening agent helps the cookies rise and achieve that classic slightly puffed shape.
- Salt: Balances the sweetness and enhances all the other flavors, particularly the peanut butter.
- Peanut Butter Cups: The crowning glory! Whether you choose full-sized, mini, or Reese’s Thins, these are what elevate the cookie. Make sure they are unwrapped and ready to go.
- Extra Granulated Sugar (for rolling): This coating creates a sparkling, slightly crisp exterior on the cookies, adding an extra layer of texture and visual appeal.
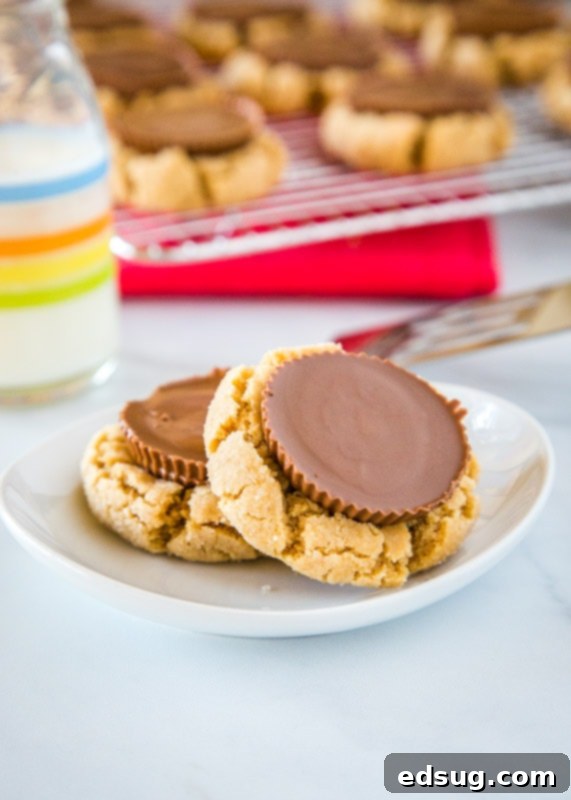
Step-by-Step Guide: How to Bake Perfect Peanut Butter Cup Blossom Cookies
Making these peanut butter cup blossoms is straightforward and incredibly rewarding. Follow these steps for perfect results every time:
- Prepare Your Oven: Start by preheating your oven to 350ºF (175ºC). This ensures the oven is at the correct temperature when your cookies go in, promoting even baking. Line a baking sheet with parchment paper for easy cleanup and to prevent sticking.
- Cream Fats Together: In the bowl of an electric mixer (or a large bowl with a hand mixer), combine the vegetable shortening and creamy peanut butter. Beat them together on medium speed until they are thoroughly blended and smooth. This creates the creamy base for your cookies.
- Add Sugars: Next, add both the granulated sugar and light brown sugar to the mixture. Continue to beat on medium-high speed for 2-3 minutes until the mixture becomes light, fluffy, and noticeably paler in color. This step incorporates air, which is essential for a tender cookie texture.
- Incorporate Wet Ingredients: Mix in the egg, milk, and vanilla extract. Beat until everything is well combined and the egg is completely incorporated into the batter. Scrape down the sides of the bowl to ensure all ingredients are evenly mixed.
- Combine Dry Ingredients: Gradually add the all-purpose flour, baking soda, and salt to the wet ingredients. Mix on low speed until the dry ingredients are just combined with the wet, and a soft dough forms. Be careful not to overmix, as this can lead to tough cookies.
- Form and Roll Dough Balls: Using approximately 2 tablespoons of dough for each cookie, roll the dough into uniform balls. This portion size works well for standard peanut butter cups. For smaller peanut butter cups, you might use slightly less dough (around 1.5 tablespoons). Roll these dough balls generously through the extra granulated sugar, ensuring they are well coated. Place them about 2 inches apart on your prepared baking sheet. Gently press down slightly on the top of each dough ball; this helps them spread evenly.
- Bake to Golden Perfection: Bake the cookies for 11-13 minutes, or until the edges are lightly browned and the centers are still slightly soft. The exact baking time can vary depending on your oven, so keep a close eye on them. You want them just set, not overbaked.
- Add the Peanut Butter Cups: As soon as you remove the cookies from the oven, immediately place an unwrapped peanut butter cup in the center of each hot cookie. Gently press down on the peanut butter cup until the cookie starts to crack slightly around the edges. The residual heat from the cookie will perfectly melt the chocolate, allowing it to conform to the cookie and become beautifully gooey.
- Cool Completely: Carefully transfer the cookies to a wire rack to cool completely. This step is crucial for the cookies to set properly and for the peanut butter cups to firm up slightly, preventing them from falling off when handled.
Expert Baking Tips for Peanut Butter Cup Blossom Cookies
Achieving the perfect Peanut Butter Cup Blossom Cookie is easy with a few helpful tips:
- Preventing Overly Melted Peanut Butter Cups: If you prefer your peanut butter cups to retain more of their original shape and just be slightly softened rather than fully melted, here’s a trick: as soon as you remove the cookies from the baking sheet and place the cups, transfer the baking sheet to the freezer for about 15-30 minutes. This will cool the cookies quickly, helping the peanut butter cups set faster and maintain their distinct form.
- Optimal Storage for Freshness: To keep your cookies soft and fresh, store them in an airtight container at room temperature for 3-4 days. For longer storage, see the freezing tips below.
- Make-Ahead Dough: Save time during busy periods by preparing the cookie dough in advance. Roll the dough into balls, coat them in sugar, and then freeze them on a baking sheet until solid. Once frozen, transfer the dough balls to a freezer-safe bag. When you’re ready to bake, simply let them thaw slightly on the counter (about 15-20 minutes) and then bake as directed in the recipe, perhaps adding an extra minute or two to the baking time.
- Freezing Baked Cookies: These cookies freeze beautifully! Once completely cooled, place them in a single layer on a baking sheet and freeze until solid. Then, transfer them to an airtight freezer-safe container or bag, separating layers with parchment paper. They can be frozen for up to 3 months. Thaw at room temperature before serving.
- Peanut Butter Cup Size Variations: Don’t feel limited to full-sized peanut butter cups. Reese’s Thins or the Mini size are excellent alternatives, especially if you prefer a smaller, bite-sized cookie or want to offer a variety. The smaller cups are also closer in size to the traditional Hershey’s Kisses, offering a more classic look with an upgraded flavor.
- Don’t Overbake: For the chewiest cookies, remove them from the oven when the edges are set and lightly golden, but the centers still look slightly soft. They will continue to cook slightly on the hot baking sheet as they cool.
- Use Room Temperature Ingredients: Ensure your egg and milk are at room temperature. This helps them incorporate more smoothly into the batter, creating a more consistent dough and better cookie texture.

Frequently Asked Questions (FAQs) About Peanut Butter Cup Blossom Cookies
Can I use natural peanut butter for these cookies?
While you can use natural peanut butter, it’s generally recommended to use creamy, processed peanut butter (like Jif or Skippy) for consistent results in baking. Natural peanut butter tends to separate more and can make the dough oily or crumbly, affecting the final texture of the cookie. If you do use natural, make sure it’s a “no-stir” variety or thoroughly mixed before adding to the recipe.
Why did my cookies spread too much?
Cookies spreading too much can be due to several factors:
- Softened Shortening/Butter: If your shortening is too warm, it can cause excessive spreading.
- Too Much Flour: Incorrectly measuring flour (too little) can lead to a sticky dough that spreads thin. Make sure to spoon and level your flour.
- Warm Dough: If your kitchen is very warm, chilling the dough for 30 minutes before rolling and baking can help prevent spreading.
- Oven Temperature: An oven that isn’t hot enough can cause cookies to spread before they set. Use an oven thermometer to ensure accuracy.
Can I use crunchy peanut butter?
Yes, you can use crunchy peanut butter for an added texture element! Just be aware that the dough might be slightly less smooth, and the cookies will have small peanut pieces throughout. It’s a great option if you enjoy that extra crunch.
How do I prevent the peanut butter cups from falling off?
The key is to place the peanut butter cups immediately after the cookies come out of the oven. The residual heat softens the cookie dough, allowing the cup to nestle in and adhere as the cookie cools and sets. If the cookies cool too much, the cups might not stick as well. Press them down gently but firmly.
Can I make these gluten-free?
You can experiment with gluten-free all-purpose flour blends. Look for blends that are specifically designed for baking cookies and often contain xanthan gum. Results may vary slightly in texture.
How long do these cookies last?
When stored in an airtight container at room temperature, these Peanut Butter Cup Blossom Cookies will stay fresh and delicious for 3-4 days. For longer storage, they can be frozen for up to 3 months.
More Must-Make Cookie Recipes
If you’re a cookie enthusiast like me, you’ll love exploring these other fantastic recipes:
- Andes Mint Cake Mix Cookies
- Bakery Style Sugar Cookies
- Cosmic Brownie Cookies
- Reese’s Peanut Butter Cookies
- Homemade Star Crunch Cookies
- Cornflake Cookies
- Grinch Sugar Cookie Bites
- Chewy Molasses Cookies

Peanut Butter Cup Blossom Cookies
Pin Recipe
Rate Recipe
Print Recipe
Equipment
-
Kitchen Aid Stand Mixer
Ingredients
- 1/2 cup vegetable shortening
- 3/4 cup creamy peanut butter
- 1/3 cup granulated sugar
- 1/3 cup light brown sugar
- 1 whole large egg
- 2 Tablespoon milk
- 1 teaspoon vanilla extract
- 1 1/2 cups all-purpose flour
- 1 teaspoon baking soda
- 1/2 teaspoon salt
- 24 Peanut Butter Cup candies
- 1/4 cup sugar, for dipping
Instructions
-
Preheat oven to 350º F.
-
In a bowl for an electric mixer combine shortening and peanut butter. Mix until well blended.
-
Add sugar and brown sugar, and mix until light and fluffy.
-
Add egg, milk, and vanilla. Stir until well combined.
-
Add flour, baking soda, and salt and mix until everything just comes together
-
Using about 2 tablespoons of dough form into balls. Roll the balls through the extra sugar. Place on a baking sheet. Gently press down slightly on the dough.
-
Bake for 11-13 minutes, until the cookies are lightly browned.
-
Remove from oven, and immediately place a peanut butter cup on top. Press gently until the cookie starts to crack.
-
Remove to a wire rack to cool completely.
Notes
Nutrition
Nutrition information is automatically calculated, so should only be used as an approximation.
Additional Info
Like this recipe? Leave a comment below!
There’s something truly magical about the aroma of freshly baked cookies filling your home. These Peanut Butter Cup Blossom Cookies are more than just a dessert; they’re a celebration of classic flavors with an exciting, decadent twist. Whether you’re baking for a holiday gathering, a special treat, or simply to satisfy a peanut butter craving, this recipe is sure to become a new favorite. The combination of the soft, tender peanut butter cookie with the melty, rich peanut butter cup is simply irresistible.
I hope you try this recipe and share the joy with your loved ones. Happy baking!
I created a fun group on Facebook, and I would love for you to join us! It’s a place where you can share YOUR favorite recipes, ask questions, and see what’s new at Dinners, Dishes and Desserts (so that you never miss a new recipe)!
Be sure to follow me on Instagram and tag #dinnersdishes so I can see all the wonderful DINNERS, DISHES, AND DESSERTS recipes YOU make!
Be sure to follow me on my social media, so you never miss a post!
Facebook | Twitter | Pinterest | Instagram
