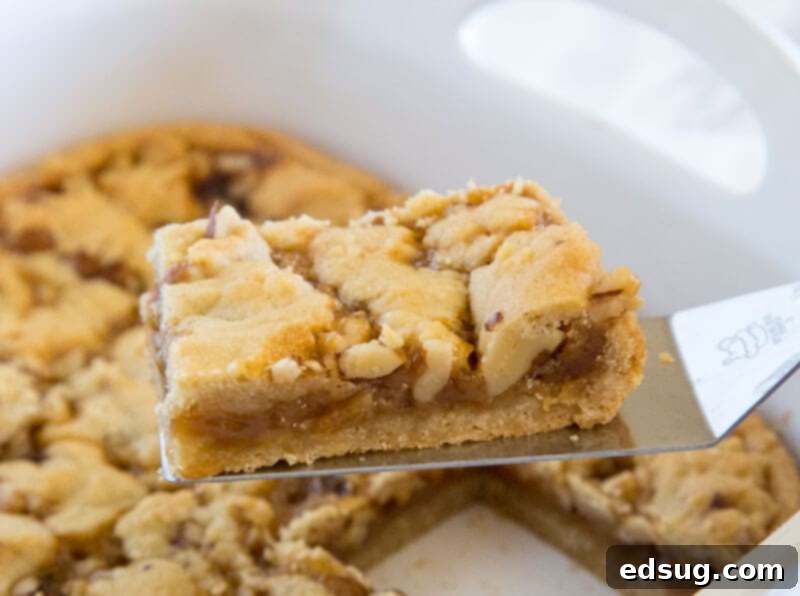
Easy 5-Ingredient Salted Caramel Crumble Bars: Your Go-To Quick Dessert Recipe
Indulge in the buttery, sweet, and perfectly salty delight of these Salted Caramel Crumble Bars! Made with just 5 simple ingredients, these bars are incredibly easy to prepare and absolutely irresistible. Get ready to add this amazing recipe to your baking repertoire immediately!
There’s something truly magical about the combination of sweet and salty, especially when it comes to gooey caramel. When paired with a golden, buttery crust and a crumbly topping, you have a dessert that promises to captivate every palate. These Salted Caramel Crumble Bars are not just delicious; they are a testament to how effortless baking can be, relying on a clever store-bought shortcut to bring them to life in record time. Perfect for busy weeknights, holiday gatherings, or any time a craving for something extraordinary strikes!
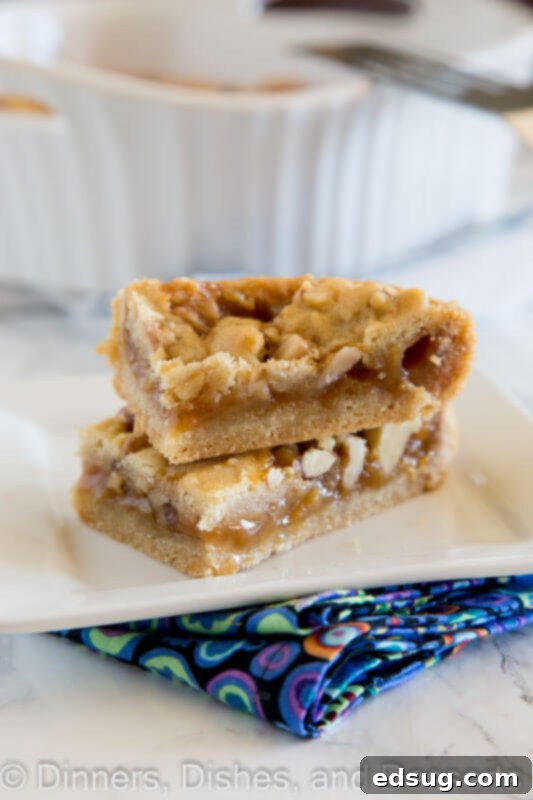
Imagine sinking your teeth into a bar with a tender, chewy sugar cookie base, followed by a luscious layer of salted caramel, all crowned with a delightful, buttery pecan crumble. Each bite offers a harmonious blend of textures and flavors that will leave you wanting more. This recipe is designed for maximum flavor with minimal effort, making it an ideal choice for both novice and experienced bakers alike. Whether you’re making them for a quiet evening at home or to impress a crowd, these bars are guaranteed to be a hit.
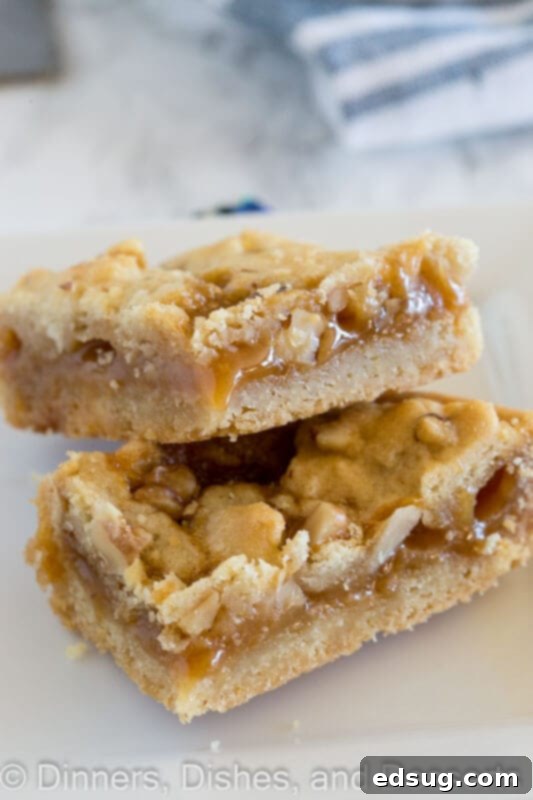
Effortless Baking with a Smart Shortcut
These salted caramel bars couldn’t be simpler to create, primarily thanks to a brilliant store-bought shortcut: refrigerated sugar cookie dough. This convenient base significantly cuts down on prep time, allowing you to enjoy these treats sooner. While the recipe leans on this convenience, don’t hesitate to use your favorite homemade sugar cookie dough if you prefer a from-scratch approach! A robust recipe like Frosted Sugar Cookies works wonderfully as a base, or you could adapt a recipe like Sugar Cookie Bars and press it into an 11×17 inch pan for a larger batch, perfect for feeding a crowd or a big potluck.
When preparing for a larger gathering, like a potluck or family event, scaling up this recipe is straightforward. If you opt for a bigger pan (like the 11×17 mentioned), simply triple the quantities of the remaining ingredients to maintain that perfect balance of crust, caramel, and crumble. These bars are known for disappearing quickly, so making an extra-large batch is often a wise decision!
Beyond their incredible taste, the beauty of these salted caramel crumble bars lies in their versatility. They’re a fantastic addition to any cookie tray during the holidays, yet elegant enough to be the star dessert at a party. Their layered appearance suggests a complex baking process, but your secret to their simplicity is safe with us!
Gather Your 5 Simple Ingredients
Preparing these delightful bars requires only a handful of ingredients, many of which you likely already have in your pantry. Be sure to scroll to the bottom of the post for the FULL PRINTABLE recipe card with exact measurements and detailed instructions.
- Sugar Cookie Dough: The foundation of our bars! We recommend a 16.5 oz roll of refrigerated sugar cookie dough, like Pillsbury, for ultimate convenience. If you prefer to make your own, ensure it’s a sturdy dough that bakes up well in a bar form.
- All-Purpose Flour: This is a crucial ingredient for thickening the caramel topping, preventing it from becoming too runny and ensuring a perfectly set layer.
- Caramel Topping: The star of the show! Look for a pourable caramel sauce, similar to what you’d use for drizzling over ice cream sundaes. Avoid very thick, chewy caramels or hard caramel candies, as they won’t blend smoothly with the flour.
- Coarse Sea Salt: This is where the “salted” in salted caramel comes from! Coarse sea salt provides bursts of briny goodness that beautifully contrast and enhance the sweetness of the caramel. A little goes a long way in elevating the flavor profile.
- Chopped Pecans: These add a lovely crunch and nutty flavor to the crumble topping and the base. While pecans are traditional, you can truly use any nut you like! Walnuts, almonds, or even peanuts would make excellent substitutions, allowing you to customize the bars to your preference.
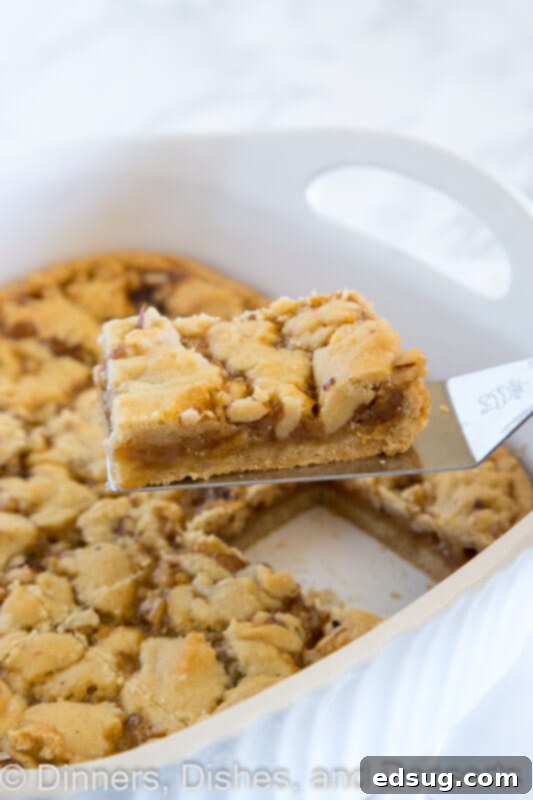
Crafting Your Salted Caramel Crumb Bars: Step-by-Step
With only 5 ingredients and a straightforward process, you can easily whip up these impressive bars even when time is tight. They’re perfect for adding to a diverse cookie platter or showcasing as a sophisticated treat at your next gathering.
- Prepare Your Pan: Begin by preheating your oven to 350°F (175°C). Lightly spray an 8-inch square baking pan with cooking spray, or line it with parchment paper, leaving an overhang on the sides for easy removal later. This crucial step ensures your bars don’t stick and are simple to lift out once cooled.
- Form the Base: Take half of the sugar cookie dough and break it into pieces. Press these pieces evenly into the bottom of the prepared pan, forming a solid, uniform crust. Reserve the other half of the cookie dough for the crumble topping.
- Pre-Bake the Crust: Bake the cookie dough crust for 15 to 20 minutes, or until it achieves a light golden-brown hue around the edges. This initial bake sets the base, providing a sturdy foundation for the caramel layer. Once baked, remove the pan from the oven and let it cool for about 10 minutes. This cooling period is important to prevent the caramel from seeping into a hot crust.
- Prepare the Caramel Filling: While the crust is cooling, in a small mixing bowl, combine the caramel topping with the all-purpose flour. Stir vigorously until the mixture is thoroughly blended and smooth. The flour helps to thicken the caramel, ensuring it sets nicely when baked.
- Add the Caramel Layer: Carefully pour the caramel and flour mixture over the cooled cookie crust in the pan. Gently spread it out with a spatula, ensuring an even layer that extends to within about 1/4-inch from the edges of the crust.
- Season and Garnish: Generously sprinkle the coarse sea salt over the caramel layer. The salt provides that signature “salted” flavor, cutting through the sweetness of the caramel. Then, evenly scatter 1/4 cup of the chopped pecans over the salted caramel.
- Create the Crumble Topping: In the small bowl where you mixed the caramel (no need to wash it!), combine the remaining cookie dough and the remaining chopped pecans. Use your fingers or a fork to mix them until well blended and crumbly.
- Top and Bake: Evenly crumble this dough-and-pecan mixture over the caramel layer in the pan. This will form a delicious, textural topping. Bake the bars for an additional 30 to 35 minutes, or until the crumble topping is beautifully golden brown.
- Cool Completely: This is arguably the most important step for perfectly cut bars! Allow the bars to cool in the pan for at least 1 hour at room temperature before attempting to slice and serve. For the cleanest cuts and best set caramel, allowing them to cool for even longer, or chilling them slightly, is ideal.
The beauty of these layered bars is how effortlessly they come together. With a humble sugar cookie dough as the foundation and a few pantry staples, you create a dessert that tastes incredibly gourmet. Don’t be surprised if your guests assume you spent hours crafting these delectable treats – you certainly don’t have to reveal how easy they truly were!
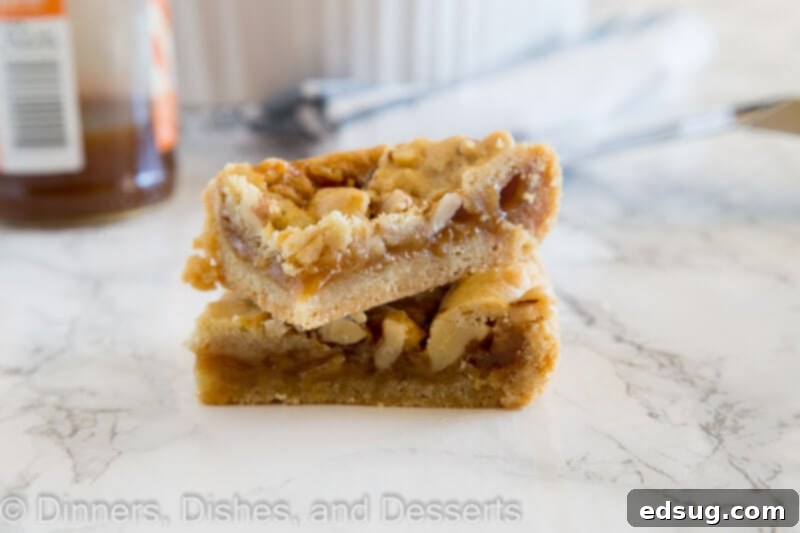
Recipe Tips, Customizations & Serving Suggestions
To ensure your Salted Caramel Crumble Bars turn out perfectly every time, and to inspire some delicious variations, consider these helpful tips:
- Patience is Key for Slicing: While it’s tempting to dive right in, allowing the bars to cool completely is essential. Ideally, let them set up for at least an hour at room temperature, or even pop them in the refrigerator for 20-30 minutes, before attempting to slice. This allows the caramel layer to firm up, preventing it from being too runny and creating a sticky mess, ensuring clean, beautiful cuts.
- Customize Your Nuts: Feel free to experiment with different types of nuts! While pecans offer a classic flavor, walnuts, almonds, or even a mix of nuts like pistachios would be fantastic swaps. For an extra touch of flavor, you can lightly toast the nuts before incorporating them into the recipe.
- Choose the Right Caramel: The type of caramel sauce you use matters. Opt for a liquid caramel topping, like the kind you’d drizzle over ice cream. Thicker caramels or chewy caramel candies will be difficult to blend with the flour and won’t spread as smoothly. If your caramel topping is very thick, you can gently warm it for a few seconds in the microwave to make it more pourable.
- A Hint of Chocolate: For chocolate lovers, a sprinkle of mini chocolate chips or finely chopped chocolate over the caramel layer before adding the crumble topping is a divine addition. The chocolate melts slightly during baking, creating an extra layer of richness.
- Spice it Up: A pinch of cinnamon, nutmeg, or even a touch of pumpkin pie spice mixed into the cookie dough crumble can add a warm, autumnal flavor profile, perfect for holiday baking.
- Serving Suggestions: These bars are wonderful on their own, but for an extra special treat, serve them warm with a scoop of vanilla bean ice cream and an extra drizzle of caramel sauce. They also pair beautifully with a hot cup of coffee or a cold glass of milk.
- Gifting Idea: These bars make a fantastic homemade gift. Once cooled and sliced, arrange them in a decorative box or tin. They travel well and are always appreciated!
Storage & Freezing Instructions
Properly storing your Salted Caramel Crumble Bars will help maintain their delicious texture and flavor for days. Here’s how to keep them fresh:
- Room Temperature: These bars are best stored at room temperature in an airtight container for 3-4 days. The caramel remains slightly gooey and soft at room temperature, which is ideal for their texture. Keeping them airtight prevents them from drying out.
- Refrigeration (Not Recommended): While you can refrigerate them, it’s generally not recommended for extended periods. Cold temperatures tend to harden the caramel, making the bars less gooey and enjoyable. If you do refrigerate them, let them come to room temperature for about 30 minutes before serving for the best texture.
- Freezing for Longer Storage: If you want to enjoy these bars over a longer period, they freeze beautifully! Once the bars are completely cooled and sliced, arrange them in a single layer on a baking sheet and freeze until solid (about 1-2 hours). Once firm, transfer the frozen bars to a freezer-safe airtight container or a heavy-duty freezer bag, separating layers with parchment paper to prevent sticking. They can be stored in the freezer for up to 2-3 months.
- Thawing Frozen Bars: To thaw, simply remove the desired number of bars from the freezer and let them sit at room temperature for an hour or until thawed. You can also gently warm them in the microwave for a few seconds if you prefer them slightly warm and extra gooey.
More Tasty Dessert Recipes to Explore
If you loved these easy and delicious Salted Caramel Crumble Bars, you’re in for a treat! Here are a few more fantastic dessert recipes that are sure to satisfy your sweet tooth:
- S’mores Cookie Bars
- Cake Batter Cookies
- Lunch Lady Brownies
- Sugar Cookie Chex Mix
- Peanut Butter Cake

Salted Caramel Crumble Bars
Ingredients
- 1 roll, (16.5 oz) Pillsbury refrigerated sugar cookies, or your favorite homemade sugar cookie dough
- 1/4 cup plus 2 Tablespoons all-purpose flour
- 1/2 cup pourable caramel topping (ice cream topping style)
- 1/2 tsp coarse sea salt
- 1/2 cup chopped pecans (or walnuts, almonds, etc.)
Instructions
- Preheat your oven to 350°F (175°C). Prepare an 8-inch square pan by spraying it lightly with cooking spray or lining it with parchment paper, leaving an overhang on the sides for easy removal.
- Break up half of the sugar cookie dough and press it evenly into the bottom of the prepared pan, forming a uniform crust. Set aside the other half of the dough.
- Bake the crust for 15 to 20 minutes, or until it turns a light golden brown. Remove from the oven and allow it to cool in the pan for 10 minutes.
- While the crust cools, in a small bowl, stir together the caramel topping and all-purpose flour until they are thoroughly blended and smooth.
- Pour the caramel mixture over the cooled crust in the pan. Carefully spread it out evenly with a spatula, ensuring it reaches within about 1/4-inch from the edges.
- Evenly sprinkle the coarse sea salt over the caramel layer. Then, scatter 1/4 cup of the chopped pecans over the caramel.
- In the small bowl (no need to wash), mix the remaining cookie dough with the remaining chopped pecans until well blended and crumbly. Crumble this mixture evenly over the bars in the pan.
- Bake for an additional 30 to 35 minutes, or until the crumble topping is golden brown.
- Allow the bars to cool completely in the pan for at least 1 hour at room temperature before slicing and serving. For best results and clean cuts, cooling for longer or chilling briefly is recommended.
Notes
Nutrition
Nutrition information is automatically calculated and should only be used as an approximation. Variations in ingredients and preparation methods may alter nutritional values.
Additional Info
Join Our Baking Community! I’ve created a fun and engaging group on Facebook, and I would absolutely love for you to become a part of it! It’s a vibrant space where you can share YOUR favorite recipes, ask questions, get inspiration, and stay updated on all the exciting new recipes and happenings at Dinners, Dishes and Desserts. Never miss a delicious update!
Be sure to follow me on Instagram and tag #dinnersdishes so I can see all the wonderful DINNERS, DISHES, AND DESSERTS recipes YOU create and share!
Stay Connected! Make sure to follow me on all my social media channels so you never miss a post or a new recipe release!
Facebook | Twitter | Pinterest | Instagram
.
**This post is sponsored by Pillsbury. I was compensated for my time to make this recipe. All thoughts and opinions expressed are 100% my own. We only recommend products and brands we genuinely love and use in our own kitchen.
Save
Save
Save
