Easy No-Bake Strawberry Milkshake Pie: Your Ultimate Summer Dessert with a Waffle Cone Crust
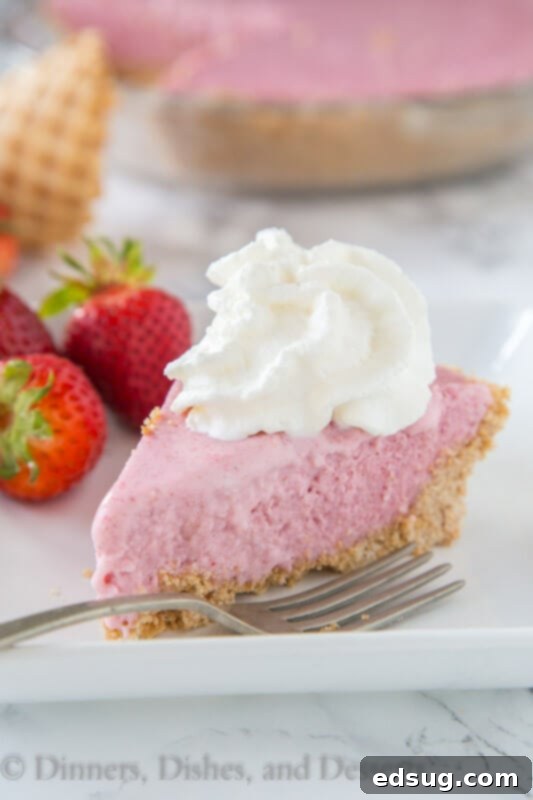
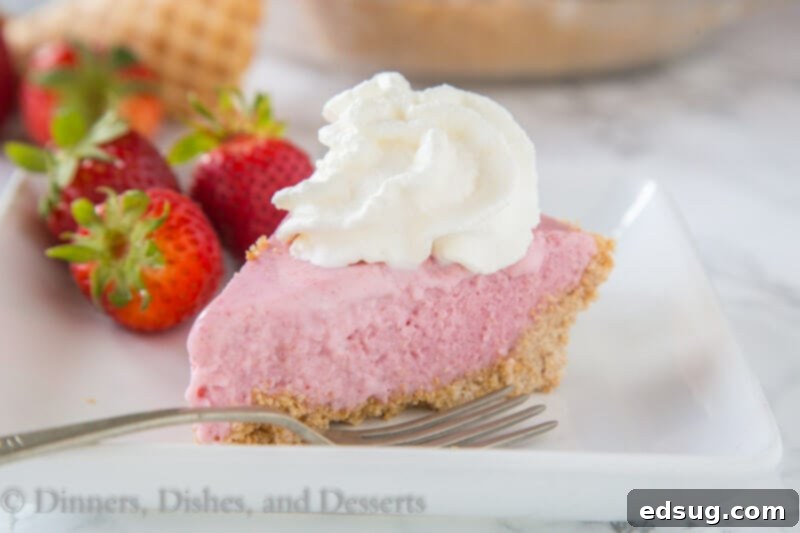
Transforming a classic strawberry milkshake into a delightful frozen pie has never been easier or more delicious! This **Strawberry Milkshake Pie** is a dreamy no-bake dessert, featuring a unique, crunchy waffle cone crust that perfectly complements its creamy, fruit-filled center. Ideal for any summer gathering, backyard BBQ, or a simple weeknight treat, this pie captures all the nostalgic charm of your favorite diner milkshake in an irresistible, sliceable form.
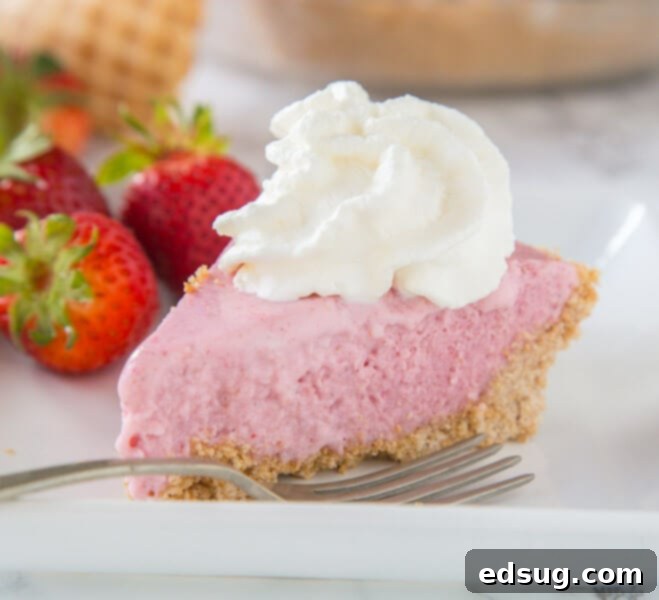
Imagine the vibrant, sweet flavor of fresh strawberries, blended into a smooth, luscious ice cream filling, all nestled within a toasted, sweet waffle cone crust. This recipe isn’t just about combining ingredients; it’s about crafting an experience. Each bite delivers a harmonious blend of creamy, sweet, and crunchy textures, making it a standout among summer desserts. Forget the oven and the stress of baking; this make-ahead marvel is designed for pure enjoyment and effortless preparation. It’s the perfect way to cool down and indulge in the freshest flavors of the season without breaking a sweat in the kitchen.

The Secret Behind the Irresistible Waffle Cone Crust
One of the true stars of this Strawberry Milkshake Pie is its ingenious waffle cone crust. Moving beyond traditional graham cracker or cookie crusts, the waffle cone base adds an entirely new dimension of flavor and texture that sets this dessert apart. When crushed and mixed with melted butter and a touch of sugar, these crispy cones transform into a firm yet delightfully crumbly foundation. The subtle hint of toasted sweetness from the waffle cones evokes memories of enjoying ice cream right from the parlor, making every mouthful a journey down memory lane. This unique crust not only provides a satisfying crunch that contrasts beautifully with the smooth filling but also infuses the entire pie with a distinct, comforting aroma and taste that is truly unforgettable.
Crafting this crust is surprisingly simple, requiring minimal effort for maximum impact. You’ll process store-bought waffle cones into fine crumbs, which then bind together effortlessly with melted butter and a small amount of granulated sugar. The butter acts as the glue, creating a stable and flavorful base. Pressing this mixture firmly and evenly into your pie plate creates a sturdy, delicious, and subtly sweet platform that’s perfectly ready for the creamy strawberry filling. Chilling is a crucial step here, allowing the butter to set and solidify the crust, ensuring it holds up perfectly when sliced and served, preventing any crumbling disasters.
The Luscious Strawberry Filling: A Burst of Fresh Flavor
The heart of this pie lies in its incredibly flavorful and refreshing strawberry filling. The recipe begins with fresh, ripe strawberries, which are absolutely non-negotiable for achieving that authentic, vibrant fruit taste that truly shines through. These strawberries are carefully sliced and then gently tossed with granulated sugar, a classic culinary technique known as maceration. This simple step is a game-changer, elevating the natural sweetness and juiciness of the berries. By allowing the sugared strawberries to sit for about 30 minutes, their natural juices are drawn out, creating a rich, intensely flavored syrupy liquid. This natural syrup not only intensifies the strawberry flavor but also sweetens the fruit and contributes significantly to the overall smooth and luxurious texture of the pie filling when blended.
Once the strawberries have beautifully macerated and are brimming with their concentrated flavor, they are combined with creamy vanilla ice cream and a splash of milk. We recommend using a good quality vanilla ice cream as it provides a smooth, sweet base that perfectly complements the strawberries without overpowering their delicate taste. The milk ensures the filling achieves the perfect pourable consistency before freezing, resulting in a delightfully smooth and scoopable texture when set. Blending these ingredients creates a thick, luxurious mixture that pours effortlessly into the prepared waffle cone crust. The result is a filling that truly tastes like a frozen, concentrated version of your favorite strawberry milkshake – cool, refreshing, and utterly delightful, making every bite a pure taste of summer.
Why This Strawberry Milkshake Pie Will Be Your New Favorite
There are countless compelling reasons to fall head over heels for this irresistible dessert, especially during the warmer months when light and refreshing treats are most desired. Its remarkable convenience, adaptable nature, and undeniable deliciousness make it a top contender for any occasion, from casual family dinners to celebratory gatherings.
- No-Bake Convenience: When the summer sun is blazing and you’re trying to keep your home cool, turning on the oven is often the last thing you want to do. This recipe completely eliminates the need for any baking, keeping your kitchen cool and your energy levels high. The entire process involves simple mixing, assembling, and freezing, making it the ultimate hassle-free dessert solution for hot days or when you’re short on time but still want to impress with a decadent treat. It’s truly a lifesaver for summer entertaining.
- Child-Friendly Recipe: Looking for a fun and engaging kitchen activity to do with the kids? This pie is absolutely perfect! With no sharp knives (once the strawberries are prepped), no hot oven to worry about, and simple, hands-on steps like crushing waffle cones and blending ingredients, children can safely and enthusiastically participate in creating this treat. They’ll gain confidence and develop an interest in cooking, and perhaps even better, they’ll enjoy eating a dessert they helped make even more! It’s a wonderful way to create lasting family memories.
- Perfect Make-Ahead Dessert: Planning a party, hosting a BBQ, or simply need a sweet treat ready for unexpected guests? This Strawberry Milkshake Pie is your ideal answer. You can prepare it hours, or even a full day or two, in advance and keep it frozen until it’s time to serve. This incredible make-ahead capability frees up valuable time on the day of your event, allowing you to relax, socialize, and enjoy the company without the last-minute stress of preparing a complex dessert.
- Easy Substitutions for Different Diets: This recipe boasts incredible versatility, allowing you to cater to various dietary needs without sacrificing flavor or texture.
- To make it **gluten-free**, simply swap out regular waffle cones for gluten-free versions, which are becoming increasingly available in most grocery stores and specialty shops.
- For a **lower-fat** option, opt for low-fat vanilla ice cream and skim milk. The richness of the strawberries and butter in the crust will still provide plenty of flavor.
- To make it **dairy-free**, choose a high-quality dairy-free vanilla ice cream (such as almond milk, coconut milk, or oat milk-based varieties) and your preferred plant-based milk. These substitutions ensure that everyone can enjoy a delightful slice of this pie, making it inclusive and delicious for all.

Gather Your Ingredients for This Delightful Pie
Before you embark on crafting this delicious dessert, ensure you have all your ingredients measured and ready. Don’t forget to scroll to the bottom of the post for the FULL PRINTABLE recipe card with precise measurements and detailed instructions!
For the Creamy Strawberry Filling:
- Fresh Strawberries: You’ll need about 1 pound of ripe, vibrant fresh strawberries, hulled and sliced. The fresher your berries, the more intense and natural the strawberry flavor in your pie will be. Look for bright red, firm berries for the best results.
- Granulated Sugar: A quarter cup of granulated sugar is used primarily to macerate the strawberries, drawing out their juices and enhancing their sweetness, which forms a delicious syrup that sweetens the entire filling.
- Vanilla Ice Cream: One quart of your favorite vanilla ice cream, softened slightly to make blending easier. A high-quality vanilla ice cream will provide the smoothest, creamiest texture and a rich flavor base that perfectly complements the fresh strawberries.
- Milk: Half a cup of milk is added to achieve the perfect milkshake-like consistency for the filling. Any type of milk works well, from whole milk for a richer pie to skim milk or even a plant-based alternative for a lighter or dairy-free option.
For the Crunchy Waffle Cone Crust:
- Waffle Cones: Approximately 8 standard-sized waffle cones are needed. These are the key to the pie’s signature crunch and unique, toasted sweet flavor that mimics an ice cream parlor experience.
- Unsalted Butter: Five tablespoons of unsalted butter, melted. This is the crucial binding agent that holds the waffle cone crumbs together, creating a firm and flavorful crust. Using unsalted butter allows you to control the overall saltiness of the pie.
- Granulated Sugar: Another quarter cup of granulated sugar is incorporated into the crust mixture. This adds an extra layer of sweetness and helps the crust crisp up beautifully as it chills, providing a delightful contrast to the creamy filling.
Step-by-Step Guide: Crafting Your Perfect Strawberry Milkshake Pie
Creating this stunning no-bake dessert is incredibly straightforward and fun. Follow these simple, detailed steps for a perfect pie every single time, even if you’re a novice baker.
- Step 1: Prepare the Strawberries for Maximum Flavor. Begin by thoroughly washing your fresh strawberries under cool running water. Carefully hull them (remove the green leafy tops) and then slice them into uniformly small pieces. In a medium-sized mixing bowl, gently toss these sliced strawberries with 1/4 cup of granulated sugar. Allow them to sit at room temperature for at least 30 minutes. This essential maceration process is crucial; it draws out the natural juices and concentrates the inherent strawberry flavor, creating a delicious, thick, and flavorful syrup that will deeply infuse your pie with incredible taste and natural sweetness.
- Step 2: Construct the Unique Waffle Cone Crust. While your strawberries are luxuriating and macerating, turn your attention to preparing the distinct crust. Place the waffle cones into a food processor and pulse until they are transformed into very fine crumbs. If you don’t have a food processor, you can place them in a sturdy Ziploc bag and crush them with a rolling pin or the bottom of a heavy glass. The finer the crumbs, the more cohesive and uniform your crust will be. In a separate bowl, combine these fine waffle cone crumbs with 5 tablespoons of melted unsalted butter and 1/4 cup of granulated sugar. Mix thoroughly with a spoon or your hands until the mixture is evenly coated and resembles damp sand. Pour this mixture into a 9-inch pie plate and press it very firmly and evenly into the bottom and slightly up the sides of the dish. Use the bottom of a flat-bottomed glass or your knuckles to ensure a compact and even layer. Once formed, refrigerate the crust for at least 30 minutes (or freeze for 15 minutes) to allow the butter to set and solidify, creating a firm base that won’t crumble when sliced.
- Step 3: Blend the Creamy Milkshake Filling. Once the strawberries have macerated beautifully and released their vibrant juices, transfer them, along with all the delicious syrup they’ve created, into a high-speed blender. Add the slightly softened vanilla ice cream and the milk to the blender. Blend on high speed until the mixture is completely smooth, thick, and creamy, perfectly resembling a luscious strawberry milkshake. Be careful not to over-blend, as this can cause the ice cream to melt too much and make the filling too runny, which can affect its final set.
- Step 4: Assemble Your Magnificent Pie. Retrieve your perfectly chilled waffle cone crust from the refrigerator. Carefully pour the freshly blended strawberry and ice cream mixture directly into the prepared crust. Use a spatula to gently spread the filling evenly across the crust, ensuring a smooth, beautiful top layer. This creates a visually appealing dessert with distinct, appealing layers.
- Step 5: Freeze to Perfection. Place the assembled pie into the freezer, uncovered for the first hour to allow the top to firm up slightly, then loosely covered with plastic wrap. It needs a minimum of 4 hours to set properly. For the absolute best results, achieving a truly firm, sliceable pie with thoroughly melded flavors, leaving it to freeze overnight (for 6-8 hours or even longer) is often ideal. This extended freezing time ensures the pie holds its shape and consistency perfectly.
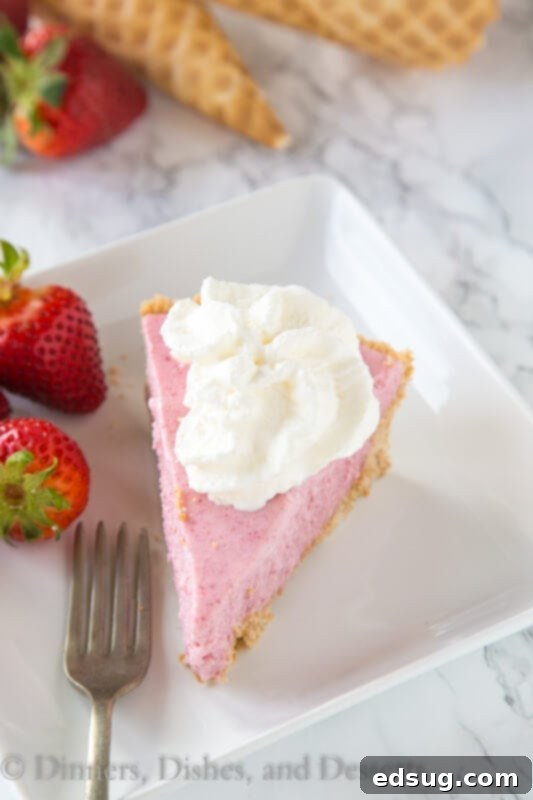
- Step 6: Garnish and Serve Your Chilled Masterpiece. Once fully set, remove the pie from the freezer. Allow it to thaw at room temperature for about 10 to 15 minutes before attempting to slice. This brief thawing period will soften the filling just enough to make slicing much easier and prevent the crust from cracking. For an extra touch of indulgence and a playful nod to its milkshake origins, garnish each individual slice with a generous dollop of freshly whipped cream, a few whole fresh strawberries, and perhaps a maraschino cherry. Serve immediately and savor the cool, creamy, and wonderfully crunchy delight!

Expert Tips & Tricks for the Best Strawberry Milkshake Pie
Achieving pie perfection is easy when you keep these helpful hints and creative ideas in mind. They’ll ensure your Strawberry Milkshake Pie is nothing short of spectacular.
- Ensure Fine Waffle Cone Crumbs: For a crust that holds together perfectly, is easy to slice, and provides a consistent crunch in every bite, it’s absolutely essential to crush the waffle cones into very fine crumbs. Larger, uneven pieces might result in a crumbly or inconsistent crust. A food processor is your best tool for this, but a sturdy blender or even a Ziploc bag with a rolling pin will work effectively with a little elbow grease.
- Chill the Crust Properly: Do not skip or rush the crucial refrigeration step for the crust. A minimum of 30 minutes in the refrigerator (or 15 minutes in the freezer if you’re in a hurry) before adding the filling is vital. This allows the melted butter to fully solidify, binding the crumbs together firmly and creating a robust barrier that prevents the crust from becoming soggy once the creamy filling is poured in.
- Check Pie Consistency Before Serving: While 4 hours is the recommended minimum freezing time, your freezer’s temperature settings can vary, affecting how quickly the pie sets. After 4 hours, gently press on the center of the pie; it should feel very firm to the touch. If it feels too hard, let it sit out at room temperature for an additional 5-10 minutes before attempting to slice. If it’s still a bit soft, give it another hour or two in the freezer.
- Prevent Freezer Burn for Optimal Freshness: If you plan to store the pie for more than a few hours, or if you’re making it ahead for an event, proper wrapping is key. Once the pie is completely set, wrap it first in plastic wrap, pressing it directly onto the surface of the pie to prevent ice crystals. Then, wrap it again securely with aluminum foil. This dual layer effectively protects it from freezer burn, preserving its fresh flavors and smooth texture for up to a week.
- Milkshake-Inspired Garnishes: Elevate your pie’s presentation and flavor with creative garnishes that pay homage to a classic strawberry milkshake. Beyond the traditional dollop of fresh whipped cream and a whole fresh strawberry, consider adding a sprinkle of colorful rainbow sprinkles, a delicate drizzle of strawberry or chocolate syrup, or even a mini waffle cone or a chocolate-dipped cookie on top of each slice for an extra whimsical touch.
- Vary the Flavor Profile: While delicious as is, feel free to experiment with flavor variations to suit your taste. A tiny squeeze of fresh lemon juice or a hint of orange zest added to the strawberry blend can brilliantly brighten the overall flavors. You could also swirl in a spoonful of homemade or good-quality strawberry jam for an extra burst of concentrated fruitiness or swap out vanilla ice cream for a good strawberry ice cream for an even more intense strawberry experience.
- Effortless Slicing for Clean Cuts: For clean, professional-looking slices that hold their shape beautifully, use a sharp, thin-bladed knife. For best results, run your knife under hot water for a few seconds and wipe it dry between each cut. This simple trick helps the knife glide through the frozen pie smoothly and cleanly, preventing it from sticking or dragging.
Frequently Asked Questions (FAQ) About Strawberry Milkshake Pie
Yes, you can absolutely use frozen strawberries if fresh ones are not in season or readily available. However, it’s crucial to thaw them completely first. Once thawed, make sure to drain them thoroughly to remove any excess moisture. Too much liquid could make your pie filling too watery and prevent it from setting properly. You can gently press them in a sieve or pat them dry with paper towels after thawing to ensure they are as dry as possible before macerating with sugar.
For the Strawberry Milkshake Pie to achieve its ideal firm and sliceable consistency, it typically needs to freeze for at least 4 hours. However, freezing times can vary depending on your freezer’s temperature settings and the initial temperature of your ingredients. For optimal results, especially if you prefer a very firm pie that holds its shape beautifully, we strongly recommend freezing it overnight (6-8 hours or more). Always check the consistency by gently pressing the center before attempting to slice.
Absolutely! This Strawberry Milkshake Pie is an excellent make-ahead dessert, making it perfect for parties, picnics, or simply having a delicious treat ready whenever a craving strikes. You can prepare and freeze the entire pie up to a week in advance. Just be sure to cover it tightly with multiple layers of plastic wrap, pressing the first layer directly onto the surface of the pie, and then an outer layer of aluminum foil to prevent freezer burn and maintain its fresh flavor and smooth texture.
If your waffle cone crust isn’t binding well and seems too crumbly, it usually means there isn’t enough melted butter, or the crumbs aren’t fine enough. Ensure your waffle cones are crushed into very fine crumbs using a food processor for best results. Then, gradually add a little more melted butter (1-2 teaspoons at a time) to the mixture until it has the consistency of damp sand and holds together when pressed firmly in your hand. Make sure to press it very firmly into the pie plate and chill it thoroughly as instructed.
While vanilla ice cream is recommended as it allows the fresh, vibrant strawberry flavor to truly shine, you can certainly experiment with other ice cream flavors if you wish! Strawberry ice cream would create an even more intense, monochromatic strawberry experience. Alternatively, you could try a subtle complement like cream cheese ice cream for added tang, or even a very mild pistachio ice cream for a unique twist. Just be mindful that stronger or very distinct ice cream flavors might overshadow the delicate taste of the macerated strawberries.
Explore More Easy No-Bake Desserts
If you’ve fallen in love with the simplicity, convenience, and deliciousness of no-bake treats, you’re in luck! There’s a whole world of delightful desserts that require absolutely no oven time. These recipes are perfect for keeping your kitchen cool during the sweltering summer months or for when you simply need a quick and easy sweet fix without the fuss of baking. Here are some more fantastic no-bake recipes to add to your repertoire, promising effortless indulgence:
- Fruity Pebbles Bars: A colorful, whimsical, and incredibly fun cereal bar that’s both wonderfully chewy and delightfully sweet, loved by kids and adults alike for its nostalgic charm.
- Cake Batter Dip: A whimsical, dippable dessert that captures all the joy and deliciousness of raw cake batter in a creamy, easy-to-make, and utterly addictive dip, perfect for parties.
- Oreo Lasagna (No-Bake Oreo Cream Squares): Layers of crunchy crushed Oreos, a rich and creamy cheesecake filling, and decadent chocolate pudding combine to create a heavenly, chilled dessert that’s a crowd-pleaser every time.
- Key Lime Ice Box Cake: Tangy, zesty, and incredibly refreshing, this layered dessert combines bright key lime flavors with layers of fluffy whipped cream and crisp graham crackers for a light, summery treat that’s bursting with flavor.
- Strawberry Lush: A popular and easy-to-make layered dessert featuring a buttery, crunchy crust, a smooth and creamy cheesecake layer, and a vibrant, fruit-filled strawberry topping, creating a harmonious blend of textures and tastes.
This Strawberry Milkshake Pie is more than just a dessert; it’s a vibrant celebration of summer, a testament to culinary simplicity, and a source of pure joy in every bite. With its lively strawberry flavor, luxuriously creamy texture, and the distinctive, satisfying crunch of its waffle cone crust, it promises to be a memorable and highly requested addition to any menu. Whether you’re hosting a casual backyard gathering, preparing for a special event, or simply craving a cool and indulgent treat on a warm day, this no-bake pie delivers on all fronts with ease and spectacular taste. We encourage you to try making and sharing this delightful creation with your loved ones!

5 votes
Strawberry Milkshake Pie
Erin Sellin
45
minutes
4
hours
4
hours
45
minutes
8
Pin Recipe
Rate Recipe
Print Recipe
Ingredients
Filling
-
1
pound
fresh strawberries
,
hulled and sliced -
1/4
cup
granulated sugar
-
1
quart
vanilla ice cream -
1/2
cup
milk
Waffle Cone Crust
-
8
waffle cones -
5
tablespoons
unsalted butter
,
melted -
1/4
cup
granulated sugar
Instructions
-
In a bowl, mix sliced strawberries with 1/4 cup sugar. Let marinate for about 30 minutes, until they are nice and juicy.
-
Meanwhile prepare crust. Using a blender or food processor, process waffle cones until they are crumbs. Mix in melted butter and sugar until the consistency of wet sand. Pour and press evenly into a pie plate. Refrigerate until ready to use.
-
Once strawberries are juicy, blend together ice cream, milk and strawberries until smooth. Pour into prepared crust and place in freezer for 4 hours, or until set.
-
To serve, let pie thaw for 10 minutes before slicing. Top with whipped cream if desired.
Nutrition
Serving:
1
slice
|
Calories:
510
kcal
|
Carbohydrates:
62
g
|
Protein:
9
g
|
Fat:
26
g
|
Saturated Fat:
11
g
|
Polyunsaturated Fat:
13
g
|
Cholesterol:
101
mg
|
Sodium:
455
mg
|
Fiber:
2
g
|
Sugar:
32
g
Nutrition information is automatically calculated, so should only be used as an approximation.
Additional Info
Erin Sellin
45
minutes
4
hours
4
hours
45
minutes
Dessert Recipes
American
8
510
Like this recipe? Leave a comment below!
