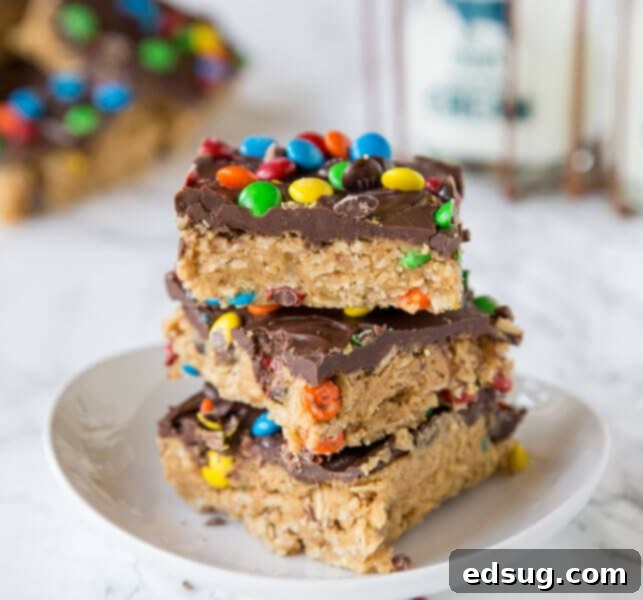
Easy Monster Cookie No-Bake Bars: The Ultimate Peanut Butter Chocolate Treat
Indulge in the irresistible flavors of classic monster cookies without ever turning on your oven! These Monster Cookie No-Bake Bars are incredibly simple to make, packed with peanut butter, chocolate, oats, and M&M’s, making them a perfect dessert for any occasion.
No-bake desserts are a true lifesaver, especially during warm weather when you want to avoid heating up your kitchen. But their appeal extends far beyond summer; they’re simply a go-to for quick, fuss-free treats all year round. If you’re a fan of the glorious combination of peanut butter, rich chocolate, and classic monster cookie elements, then these no-bake bars are about to become your new favorite obsession. They capture all the beloved flavors of traditional monster cookies in a delightfully easy, grab-and-go bar form.
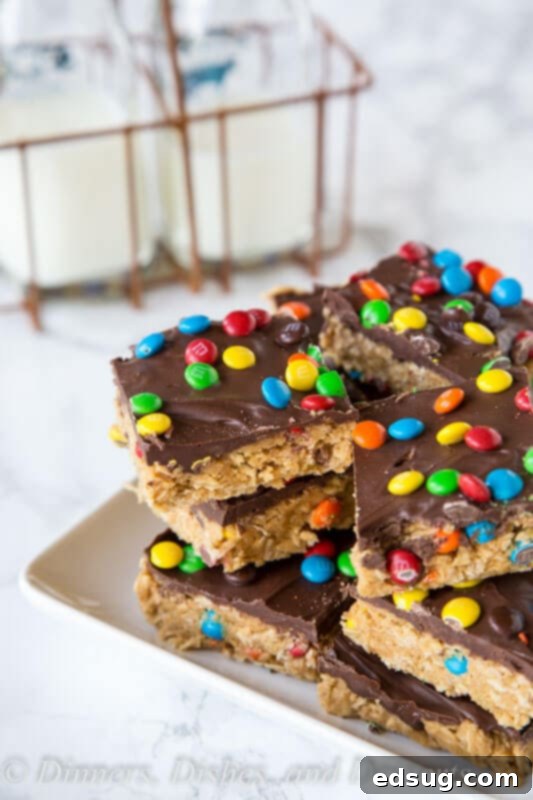
These Monster Cookie Bars offer a fantastic no-bake alternative to their baked counterparts. They deliver that iconic taste – a harmonious blend of sweet, salty, and chewy – but with a remarkably simple preparation process. They’re perfect for potlucks, parties, or simply satisfying that sweet tooth craving without the extra effort of baking.
Why These Monster Cookie No-Bake Bars Are a Must-Try
There’s a lot to love about this particular no-bake recipe. Here are just a few reasons why you’ll want to add these Monster Cookie No-Bake Bars to your regular dessert rotation:
- No Oven Required: Keep your kitchen cool! This is perfect for hot days or when your oven is busy with other dishes.
- Quick & Easy: With minimal prep time and no baking, these bars come together incredibly fast. Most of the “waiting” is just chilling time.
- Classic Monster Cookie Flavor: All the iconic elements are here: peanut butter, chocolate, oats, and colorful M&M’s.
- Customizable: Easily adapt the mix-ins to suit your preferences or what you have on hand.
- Perfect for Crowds: Bars are simple to transport, slice, and serve, making them ideal for gatherings.
Essential Monster Cookie Bar Ingredients
Get ready to gather your pantry staples! For precise measurements and the FULL PRINTABLE recipe card, make sure to scroll to the bottom of this post.
- Creamy Peanut Butter: For the best texture and consistency in these no-bake bars, I highly recommend using a commercial brand creamy peanut butter, such as Jif or Skippy. Natural peanut butters tend to separate more and have a different oil content, which can result in a greasier or less firm bar. If you prefer a little crunch, you can certainly opt for a crunchy commercial brand, but stick to the processed varieties for optimal results.
- Unsalted Butter: This provides richness and helps bind the bars together. Ensure it’s softened to room temperature for smooth mixing.
- Granulated Sugar: Contributes to the overall sweetness and provides a fine texture in the base.
- Light Brown Sugar: Adds a deeper, molasses-rich flavor and helps keep the bars soft and chewy thanks to its moisture content.
- All-Purpose Flour: Essential for creating a cookie-dough like texture. It’s crucial to heat-treat the flour before use in any no-bake recipe to ensure safety. We’ll dive into how to do this easily below.
- Pure Vanilla Extract: A splash of vanilla enhances all the other flavors, adding warmth and depth to the bars.
- Heavy Cream: This is a key ingredient for the luscious chocolate ganache topping. It helps the chocolate melt smoothly and gives it a soft, decadent consistency that doesn’t become too hard when chilled. You could substitute with whole milk if heavy cream isn’t available, but the topping might be slightly firmer.
- Old Fashioned Rolled Oats: These provide the classic chewy texture that monster cookies are known for. They hold their shape well and add a hearty element. While quick-cooking oats can be used in a pinch, they will result in a softer bar.
- Colorful M&M’s: The quintessential monster cookie mix-in, adding vibrant color and a delightful candy crunch. Mini M&M’s work particularly well for even distribution, but regular M&M’s are also fine.
- Semi-Sweet Chocolate Chips: Used primarily for the rich chocolate topping, but you can also add a few to the cookie base for extra chocolatey goodness.
The Crucial Step: How To Make Raw Flour Safe To Eat
Important Safety Warning: This recipe, like many no-bake cookie doughs, includes raw all-purpose flour. While flour might seem harmless, raw flour can sometimes contain harmful bacteria, such as E. coli, which can cause foodborne illness. It is absolutely essential to heat-treat your flour before incorporating it into this recipe to ensure it’s safe for consumption. Thankfully, this step is incredibly quick and easy!
You need to heat the flour to a temperature of 160°F (71°C) to effectively kill any potential bacteria. Here are two simple and reliable methods:
- Microwave Method:
Place the required amount of flour in a microwave-safe bowl. Heat it in the microwave on high power for 60 seconds, stirring thoroughly every 20 seconds to ensure even heating. Use a probe thermometer to check that the flour has reached 160°F (71°C). If it hasn’t, continue heating in 10-15 second intervals until it reaches the target temperature. Once heated, let it cool completely before adding it to your other ingredients.
- Oven Method:
Spread the flour evenly in a thin layer on a baking sheet. Bake in a preheated oven at 350°F (175°C) for approximately 5 minutes. Again, verify with a probe thermometer that it has reached 160°F (71°C). Allow the flour to cool completely before proceeding with the recipe. Cooling is important to prevent it from melting your butter when you mix it in.
Always ensure the flour is cooled to room temperature before mixing it into your wet ingredients to prevent it from affecting the butter’s consistency.
Step-by-Step Guide: How to Make Monster Cookie Bars
Creating these delightful no-bake bars is straightforward. Follow these steps for perfect results every time:
- Prepare Your Flour: Begin by heat-treating your all-purpose flour using one of the methods described above (microwave or oven). This is a critical safety step. Allow the flour to cool completely to room temperature before moving on.
- Line Your Pan: Line a 9-inch square baking dish with foil or parchment paper, leaving an overhang on the sides. This overhang will act as handles, making it much easier to lift the bars out of the pan once they’ve set, ensuring clean cuts.
- Cream Wet Ingredients: In a large mixing bowl, combine the softened butter, granulated sugar, and light brown sugar. Beat with an electric mixer (or by hand) until the mixture is light, fluffy, and smooth. This creaming process incorporates air, giving the bars a pleasant texture.
- Add Peanut Butter & Vanilla: Next, add the creamy peanut butter and vanilla extract to the creamed butter and sugar mixture. Mix thoroughly until everything is well combined and uniform in color and texture. Scrape down the sides of the bowl to ensure no streaks remain.
- Incorporate Flour: Gently stir in the cooled, heat-treated flour. Mix only until just incorporated. Overmixing can lead to a tougher bar, even without baking.
- Add Oats Gradually: Now, add the old-fashioned oats to the dough, one cup at a time. This method helps to distribute the oats evenly throughout the thick dough, preventing them from clumping together and ensuring every bite has that perfect chewy texture.
- Fold in M&M’s: Finally, gently fold in the 3/4 cup of mini M&M’s (or regular M&M’s). Once mixed, press the entire dough mixture firmly and evenly into your prepared 9-inch square pan. Use the back of a spoon or your hands to ensure it’s compact and smooth across the surface.
- Prepare Chocolate Topping: While the base sets slightly, prepare your decadent chocolate topping. In a microwave-safe bowl, combine the semi-sweet chocolate chips and heavy cream. Microwave in 30-second increments, stirring well after each interval, until the mixture is completely smooth and glossy. Be careful not to overheat. Alternatively, you can melt them together in a double boiler over simmering water.
- Top and Decorate: Pour the smooth chocolate ganache evenly over the pressed cookie dough base in the pan. Use an offset spatula or the back of a spoon to spread it to the edges. Immediately sprinkle the remaining 1/4 cup of mini M&M’s over the wet chocolate topping. This ensures they adhere nicely.
- Chill to Set: Place the pan in the refrigerator for 1-2 hours, or until the chocolate topping is completely set and firm. This chilling time is essential for the bars to firm up and become easy to slice. If you’re not in a hurry, you can also let them sit at room temperature for a few hours, though refrigeration speeds up the process.
- Slice and Serve: Once completely chilled and set, use the foil or parchment overhangs to lift the entire slab out of the pan. Place it on a cutting board and slice into 16 (or more, depending on your preferred size) squares. Enjoy your perfectly crafted Monster Cookie No-Bake Bars!
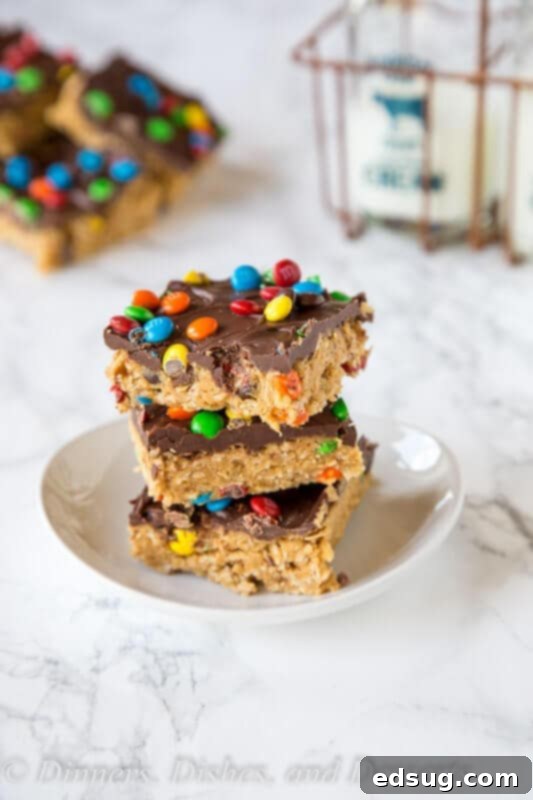
Expert Recipe Tips & Tricks for No-Bake Perfection
Achieving outstanding no-bake bars is simple with a few insider tips:
- Don’t Skip Heat-Treating the Flour: We cannot emphasize this enough. Raw flour can contain bacteria. This quick step ensures your bars are perfectly safe to eat without baking. It takes only a few minutes and is non-negotiable for food safety.
- Choose the Right Peanut Butter: For the ideal texture and structure in these bars, commercial-brand creamy peanut butters (like Jif or Skippy) work best. Natural peanut butters tend to be oilier and can cause the bars to be too soft or greasy, and the oils might separate. Their consistency simply isn’t as conducive to a firm no-bake base.
- Get Creative with Your Mix-ins: While M&M’s are a monster cookie staple, feel free to customize! You can use various types of chocolate chips (milk, dark, white, peanut butter chips, butterscotch chips), chopped nuts (peanuts, pecans, walnuts), or even sprinkles for extra flair. Anything you enjoy in traditional Monster Cookies will work beautifully here.
- Old-Fashioned Oats are Preferred: This recipe specifically calls for old-fashioned rolled oats because they provide a robust, chewy texture that stands up well in no-bake desserts. If you’re in a pinch and only have quick-cooking oats, you can use them, but be aware that your bars will have a softer, slightly less chewy consistency.
- Proper Pan Preparation is Key: Lining your 9-inch square pan with foil or parchment paper and leaving an overhang is crucial. This step isn’t just for easy cleanup; it allows you to lift the entire slab of bars out of the pan cleanly, making slicing much simpler and resulting in neat, uniform pieces.
- Press Firmly for Best Results: When pressing the cookie dough mixture into the pan, make sure to press it down very firmly and evenly. A compact base will hold together better and provide a satisfying density.
- Patience During Chilling: While it’s tempting to dig in immediately, allowing the bars to chill for the recommended 1-2 hours (or until the chocolate is firm) is essential. This allows the base to set and the chocolate topping to harden, making the bars easier to cut and ensuring they hold their shape.
Storage for Maximum Freshness
To keep your Monster Cookie No-Bake Bars at their best, store them in an airtight container. I highly recommend keeping them in the refrigerator, as this ensures the chocolate topping remains perfectly set and prevents the bars from becoming too soft, especially in warmer environments. They will stay fresh in the fridge for up to 5-7 days.
For the absolute best flavor and texture, take the bars out of the fridge about 15-20 minutes before serving. This allows them to come closer to room temperature, making the base slightly creamier and the chocolate topping softer and more indulgent – truly absolutely delicious!
Can you freeze Monster Cookie No-Bake Bars? Yes, you absolutely can! Once the bars are completely set, slice them into individual servings. Place them in a single layer on a baking sheet and freeze until solid. Once frozen, transfer the bars to an airtight freezer-safe container or a heavy-duty freezer bag, separating layers with parchment paper to prevent sticking. They can be stored in the freezer for up to 2-3 months. Thaw in the refrigerator overnight or at room temperature for about 30 minutes before serving.
More No Bake Treats to Love
If you loved the ease and deliciousness of these Monster Cookie No-Bake Bars, you’re in luck! The world of no-bake desserts is vast and wonderful. Here are a few more fantastic recipes to keep your oven off and your sweet tooth happy:
- No Bake Peanut Butter Cheesecake: A rich and creamy cheesecake bursting with peanut butter flavor, no baking required.
- Easy No Bake Avalanche Cookies: A quick and simple treat featuring peanut butter, chocolate, and marshmallows.
- No Bake Strawberry Jello Pie: A light, refreshing, and fruity pie that’s perfect for summer.
- No Bake Mint Chocolate Chip Pie: A cool and creamy mint chocolate dessert that’s incredibly easy to prepare.
- Boston Cream Pie Icebox Cake: Layers of vanilla wafers, pudding, and chocolate ganache, creating a stunning dessert without an oven.
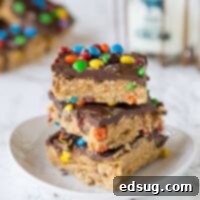
Monster Cookie No Bake Bars
Pin Recipe
Rate Recipe
Print Recipe
Video
Ingredients
Cookie Dough
- 1/2 cup butter, softened
- 1/2 cup granulated sugar
- 1/4 cup light brown sugar
- 1 cup creamy peanut butter
- 1/2 cup all-purpose flour
- 1 teaspoon vanilla extract
- 2 cups old fashioned oats
- 3/4 cup mini M&M’s
Topping
- 1 1/4 cup semi-sweet chocolate chips
- 3 Tablespoons heavy cream
- 1/4 cup mini M&M’s
Instructions
-
Start by heating your flour. You can microwave for 1 minute, stirring every 20 seconds, or bake at 350º F for 5 minutes. You want the flour to be 160º F. Let it cool completely.
-
Line a 9-inch baking dish with foil or parchment paper, leaving an overhang on the sides.
-
Combine softened butter, granulated sugar, and light brown sugar together in a large bowl. Mix at medium speed until light and smooth.
-
Add creamy peanut butter and vanilla extract, mix until well blended and uniform.
-
Stir in the cooled, heat-treated flour mixing until just incorporated.
-
Slowly add old fashioned oats, 1 cup at a time, mixing until evenly distributed and it forms a thick dough.
-
Gently fold in 3/4 cup of M&M’s. Press the mixture firmly and evenly into the prepared 9-inch square pan.
-
In a microwave safe bowl, melt together 1 1/4 cups chocolate chips and heavy cream, heating in 30-second increments and stirring until completely smooth. Pour over the cookie dough mixture, spread evenly, and sprinkle with the remaining 1/4 cup M&M’s.
-
Refrigerate for 1-2 hours, or until the chocolate topping is completely set and firm, before lifting out and slicing to serve.
Notes
Nutrition
Nutrition information is automatically calculated, so should only be used as an approximation.
Additional Info
Like this recipe? Leave a comment below!
Frequently Asked Questions (FAQs)
- Can I use natural peanut butter for these bars?
While you can try, it’s not recommended for the best results. Natural peanut butter often separates more and has a thinner, oilier consistency, which can lead to bars that are too soft, greasy, or don’t hold their shape as well. For a firm, classic texture, commercial creamy peanut butter like Jif or Skippy is preferred.
- Do I really have to heat treat the flour?
Yes, this step is crucial for food safety. Raw flour can contain harmful bacteria. Heat-treating (either by microwaving or baking briefly) ensures that any potential pathogens are killed, making the bars safe to eat without baking.
- How long do these Monster Cookie No-Bake Bars last?
When stored in an airtight container in the refrigerator, these bars will stay fresh and delicious for about 5-7 days.
- Can I freeze these bars?
Absolutely! These bars freeze beautifully. Once fully set and sliced, arrange them in a single layer on a baking sheet and freeze until solid. Then, transfer them to an airtight freezer-safe container or bag, using parchment paper between layers to prevent sticking. They can be frozen for up to 2-3 months. Thaw them in the refrigerator overnight or at room temperature for about 30 minutes before enjoying.
- What if I don’t have old-fashioned oats? Can I use quick oats?
Old-fashioned oats are recommended for their robust chewiness. Quick oats can be used as a substitute, but be aware that the bars will have a softer, less chewy texture. The flavor will still be great!
- Can I make these gluten-free?
To make these bars gluten-free, ensure you use certified gluten-free oats. Many brands offer GF oats, but always check the label. The rest of the ingredients are typically naturally gluten-free, but it’s wise to double-check all packaging for cross-contamination warnings if severe allergies are a concern.
Join Our Delicious Community!
I’ve created a fun and engaging group on Facebook, and I would absolutely love for you to join us! It’s a vibrant space where you can share your favorite recipes, ask cooking and baking questions, and stay up-to-date with all the new delicious content from Dinners, Dishes and Desserts, ensuring you never miss a new recipe or helpful tip!
Be sure to follow me on Instagram and tag #dinnersdishes so I can see all the wonderful DINNERS, DISHES, AND DESSERTS recipes YOU make!
Don’t forget to follow me on my other social media channels, so you never miss a post and stay connected with all our culinary adventures!
Facebook | Twitter | Pinterest | Instagram
.
Save
