The Easiest No-Bake Avalanche Cookies: 4 Ingredients, 5 Minutes!
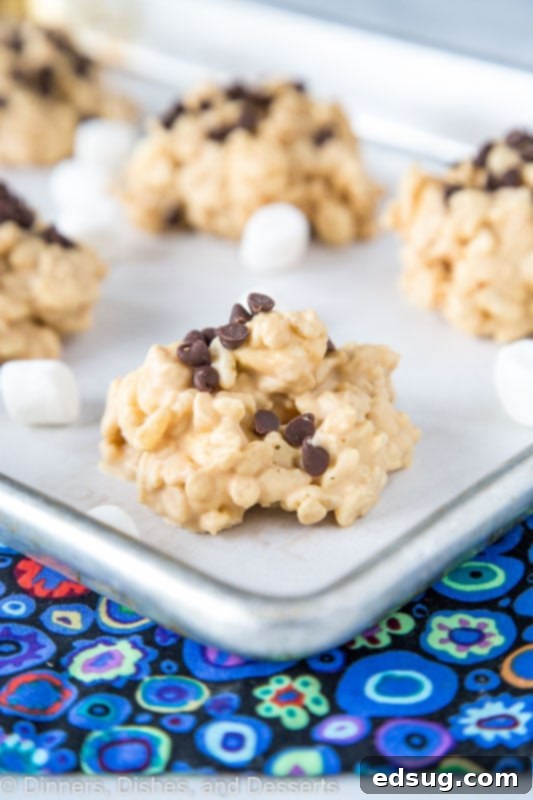
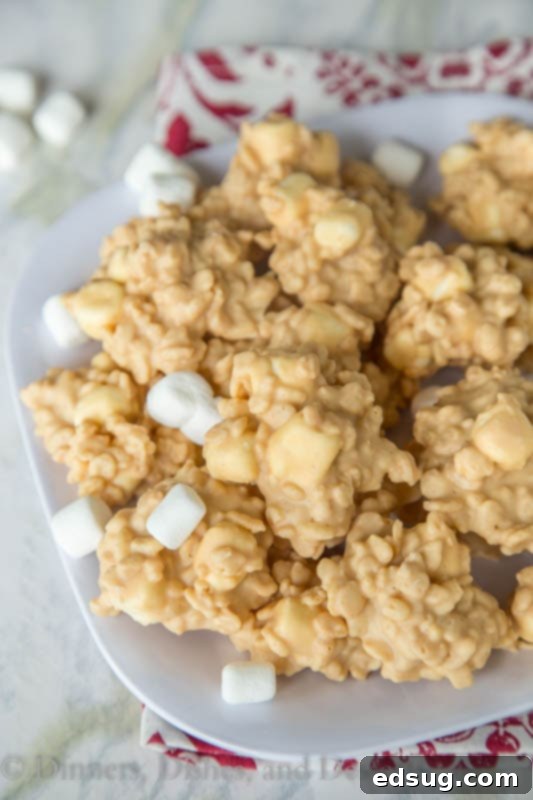
Discover the ultimate no-fuss dessert with these incredible No-Bake Avalanche Cookies. Perfect for any occasion, from last-minute holiday treats to refreshing summer sweets, these cookies are ready in just 5 minutes of active prep time and require only 4 simple ingredients. If you love the famous Rocky Mountain Chocolate Factory’s Avalanche Bark, you’re going to adore this easy, bite-sized cookie version!
My love for effortless, no-bake desserts runs deep, and these avalanche cookies truly sit at the pinnacle of simplicity. There’s no need to turn on your oven, making them ideal for beating the summer heat when you crave something sweet. They’re also a fantastic, stress-free addition to your holiday dessert platter, offering a delightful contrast to baked goods like Reese’s Fudge. The best part? They taste absolutely divine and come together so quickly, you’ll wonder why you haven’t made them sooner.

These chewy, crispy, and sweet treats are a classic around Christmas time, but their incredible ease and delightful flavor make them a year-round favorite in our home. With just four key ingredients, you can whip up a batch in about 5 minutes of hands-on work. The most challenging part is undoubtedly the waiting game as they set up!
For those who adore chocolate, you might also enjoy our No Bake Chocolate Avalanche Bars, which feature three different kinds of chocolate for an extra rich experience. This recipe focuses on the classic white chocolate and peanut butter combination, a pairing that is simply irresistible.
Essential Ingredients for Your No-Bake Avalanche Cookies
Creating these delightful avalanche cookies requires just a handful of staple ingredients, which you likely already have in your pantry. Simplicity is key, but choosing the right type of each ingredient can elevate your cookies from good to absolutely amazing. For the precise measurements and the full printable recipe card, please scroll to the bottom of this post.
- White Chocolate: I highly recommend using a quality white almond bark or vanilla melting wafers. These melt incredibly smoothly and consistently, providing the perfect base for your cookies. Avoid using white chocolate chips if possible, as they often contain stabilizers that prevent them from melting as fluidly, potentially leading to a grainy texture.
- Peanut Butter: Creamy peanut butter is your best friend here. For the best results and a smooth, consistent mixture, opt for a commercial brand like Jif or Skippy. Natural peanut butter, while delicious, tends to separate its oils, which can make the mixture oily and harder to set properly in a no-bake recipe like this.
- Rice Krispie Cereal: The iconic crispy texture of Rice Krispies is essential for that signature “avalanche” crunch. Ensure your cereal is fresh and crisp for the best results.
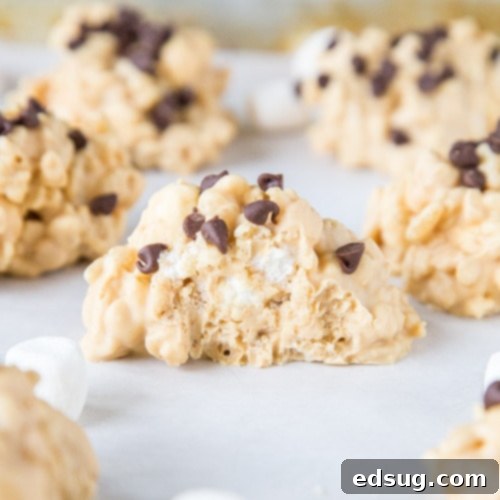
- Mini Marshmallows: These add a wonderful chewiness and extra sweetness that truly completes the cookie. Mini marshmallows are easier to incorporate and distribute evenly throughout the mixture than larger ones.
- Mini Chocolate Chips (Optional, but highly recommended): A sprinkle of mini semi-sweet chocolate chips on top offers a delightful visual appeal and a lovely flavor contrast to the sweetness of the white chocolate and marshmallows.
When I prepare a batch, I often top about half of them with mini chocolate chips. The slight bitterness or semi-sweetness of the chocolate perfectly balances the rich sweetness from the marshmallows and almond bark. However, since my husband prefers them without chocolate, I always leave some plain for him, demonstrating how versatile these cookies are to suit different tastes.
Choosing the Right Chocolate for No-Bake Success
The type of white chocolate you use can significantly impact the final texture and ease of preparation for your avalanche cookies. As mentioned in the ingredients, my top recommendation is to use the white almond bark or vanilla candy coating found in the baking aisle of most grocery stores. Here’s why it’s superior:
- Smooth Melting: Almond bark is formulated to melt very smoothly and evenly, creating a silky base that beautifully coats the cereal and marshmallows.
- Consistency: It holds its shape well once set, ensuring your cookies have the perfect firmness without being too brittle or too soft.
- Ease of Use: It’s incredibly forgiving and melts easily in the microwave or a double boiler, making the process stress-free.
While tempting, white chocolate chips are often designed to hold their shape when baked, which means they contain stabilizers that prevent them from melting into a perfectly smooth liquid. If you absolutely must use white chocolate chips, add a teaspoon of coconut oil or vegetable shortening to help them melt more fluidly. However, for guaranteed success and the best texture, stick with almond bark or candy melts.
Feeling adventurous? You can certainly experiment with other chocolate varieties. Our Chocolate Avalanche Bars recipe offers a delicious alternative using a mix of different chocolates, which can easily be adapted into cookie form if you’re a true chocoholic looking for a darker, richer twist.

Simple Steps to Make Perfect No-Bake Avalanche Cookies
You’ll be amazed at how quickly these delicious cookies come together. With just about 5 minutes of active preparation, you’ll have a batch of these irresistible treats cooling on your counter. Remember to find the FULL PRINTABLE recipe card with exact quantities at the very bottom of this post.
- Melt the White Chocolate and Peanut Butter: Begin by combining your white almond bark (or vanilla melting wafers) and creamy peanut butter in a large microwave-safe bowl. Heat in the microwave in 30-second intervals, stirring thoroughly after each interval, until the mixture is completely smooth and creamy. Be careful not to overheat the chocolate, as this can cause it to seize. Alternatively, you can use a double boiler on the stove for a more controlled melting process.
- Combine with Cereal and Marshmallows: Once your chocolate-peanut butter mixture is perfectly melted and smooth, gently add in the Rice Krispie cereal and mini marshmallows. Use a spatula to mix everything together, ensuring all the cereal and marshmallows are thoroughly coated with the delicious melted chocolate mixture. Work relatively quickly here, as the mixture will start to set as it cools.
- Form and Top the Cookies: Using two spoons, scoop portions of the mixture onto a baking sheet lined with parchment paper or a silicone baking mat. Aim for roughly tablespoon-sized cookies, shaping them slightly with the back of a spoon if desired. This lining will prevent sticking and make for easy removal. If you’re adding mini chocolate chips, now is the time to sprinkle a few over the top of each freshly formed cookie while the chocolate is still soft.
- Allow to Set: This is the hardest part – patience! Let the cookies sit at room temperature for at least 2 hours, or until the white chocolate has fully hardened. For quicker setting, you can place the baking sheet in the refrigerator for about 30-60 minutes. Once firm, they are ready to be enjoyed!
That’s it! Incredibly simple, with minimal cleanup, these cookies require only a large bowl, a sturdy spatula, and a baking sheet. No special equipment, no complex techniques – just pure, delicious no-bake magic.
Peanut Allergy Friendly Variations and Delicious Alternatives
If you or someone you’re baking for has a peanut allergy, or if you simply want to experiment with different flavor profiles, these avalanche cookies are incredibly adaptable. Here are some fantastic substitutes for peanut butter that maintain the delicious texture and taste:
- Biscoff (Cookie Butter) Spread: This Speculoos cookie-flavored spread is an absolute dream in this recipe. It adds a unique, spiced, and caramelly note that is simply amazing and a wonderful alternative to peanut butter.
- SunButter (Sunflower Seed Butter): For those with tree nut allergies in addition to peanut allergies, SunButter is an excellent option. It provides a similar creamy texture and nutty flavor profile, making it a safe and delicious substitute.
- Other Nut Butters: If tree nuts are acceptable, almond butter, cashew butter, or even a decadent hazelnut spread like Nutella would be delightful. Each will impart its own distinct flavor, allowing for endless customization.
I’ve personally experimented with these cookies multiple times, using traditional peanut butter, Biscoff spread, and even a combination of both, and each version has been a hit! Feel free to mix and match to discover your family’s favorite. You can still sprinkle mini chocolate chips on top to achieve that classic Rocky Mountain Chocolate Factory avalanche bark appearance, regardless of the butter alternative you choose.
Storing Your No-Bake Avalanche Cookies
Proper storage is key to keeping your delicious no-bake avalanche cookies fresh and irresistible. These cookies are quite stable and forgiving, making them excellent for making ahead or enjoying over several days.
- Room Temperature: Store your avalanche cookies in an airtight container at room temperature for up to 4 days. Ensure they are kept away from direct sunlight or heat, which could soften the chocolate.
- Refrigerator: For an extended shelf life or a firmer, chewier texture, store them in an airtight container in the refrigerator for up to a week. Chilling them can also make them extra refreshing, especially during warmer months.
- Freezer: These cookies freeze beautifully! Place them in a single layer on a baking sheet to freeze until firm, then transfer them to a freezer-safe airtight container or a heavy-duty freezer bag. They will last for 4-5 months in the freezer. When you’re ready to enjoy them, simply let them thaw at room temperature for about 15-30 minutes, or until softened to your desired consistency.
Always ensure they are in an airtight container to prevent them from drying out or absorbing other odors.

Tips for Perfect No-Bake Avalanche Cookies Every Time
While incredibly simple, a few extra tips can ensure your no-bake avalanche cookies turn out perfectly crisp, chewy, and delicious:
- Don’t Overheat the Chocolate: When melting the white chocolate and peanut butter, use short intervals and stir frequently. Overheating white chocolate can cause it to seize and become grainy or clumpy, making it unusable.
- Use Fresh Ingredients: Ensure your Rice Krispie cereal is fresh and hasn’t gone stale; its crispness is crucial for the cookie’s texture.
- Work Quickly: Once the chocolate mixture is melted, add the cereal and marshmallows and mix promptly. The mixture will start to set as it cools, making it harder to combine evenly if you delay.
- Parchment Paper is Your Friend: Always line your baking sheet with parchment paper or a silicone mat. This prevents the cookies from sticking and makes cleanup a breeze.
- Uniform Size: Try to make your cookies roughly the same size for even setting and a more professional appearance. A small cookie scoop or two spoons work great.
- Chill for Speed: If you’re short on time, a stint in the refrigerator (30-60 minutes) or freezer (15-20 minutes) will speed up the setting process considerably.
- Flavor Boost: A tiny splash of vanilla extract (about 1/2 teaspoon) can enhance the flavors of the white chocolate and peanut butter mixture. Add it after the chocolate and peanut butter are melted and before adding the dry ingredients.
Frequently Asked Questions (FAQs)
- Can I use a different type of cereal?
- You can experiment with other crispy cereals, but keep in mind that the texture and flavor will change. Rice Krispies provide a distinct light and airy crunch that is characteristic of avalanche cookies.
- My cookies are too sticky/greasy. What went wrong?
- If your cookies are greasy, you might have used a natural peanut butter where the oils separated. Commercial, creamy peanut butter is best for this recipe. If they’re too sticky, they might not have set long enough or the proportions of liquid to dry ingredients might be off.
- How can I make these more festive for holidays?
- Add holiday-themed sprinkles (red and green for Christmas), crushed candy canes, or a few drops of peppermint extract to the melted chocolate mixture for a festive twist!
- Do I need special equipment?
- Nope! A microwave-safe bowl, a spatula, and a baking sheet are typically all you need. A double boiler is an alternative for melting, but not essential.
More Delightful No-Bake & Summer Dessert Recipes
If you’re a fan of easy, no-bake desserts or looking for more refreshing treats perfect for warmer weather, be sure to explore these other fantastic recipes:
- No Bake Peanut Butter Cheesecake
- No Bake Strawberry Jello Pie
- Fresh Strawberry Pie
- Ice Cream Sandwich Icebox Cake
- No Bake Oreo Cheesecake
- Strawberry Cheesecake Lasagna
- Monster Cookie No Bake Bars
- No Bake Mint Chocolate Chip Pie
Each of these offers a unique way to satisfy your sweet tooth without turning on the oven, perfect for any time of year!

Easy No Bake Avalanche Cookies
Pin Recipe
Rate Recipe
Print Recipe
Video Tutorial
Equipment You’ll Need
-
Large Mixing Bowls
-
Parchment Paper or Silicone Baking Mat
-
Sturdy Spatula
Ingredients
- 2 cups Rice Krispie cereal
- 1 1/2 cup mini marshmallows
- 1 pound white chocolate, (vanilla almond bark or melting wafers), melted
- 1/2 cup creamy peanut butter
- 1/4 cup mini chocolate chips, optional, for topping
Instructions
-
In a large bowl, combine the Rice Krispie cereal and mini marshmallows. Set this mixture aside for now.
-
In a separate microwave-safe bowl (or using a double boiler), melt the white chocolate (almond bark or melting wafers) with the creamy peanut butter until completely smooth and free of lumps. Stir well to combine.
-
Pour the melted white chocolate and peanut butter mixture over the cereal and marshmallow mixture. Gently but thoroughly mix with a spatula until all the cereal and marshmallows are well coated.
-
Using two spoons, scoop individual portions of the mixture onto a baking sheet lined with parchment paper or a silicone baking mat. If desired, lightly press them into cookie shapes. If you are using mini chocolate chips, sprinkle a few over the top of each cookie while the chocolate is still soft.
-
Allow the cookies to set at room temperature for at least 2 hours, or until the white chocolate has fully hardened. For faster setting, you can place the baking sheet in the refrigerator for 30-60 minutes.
-
Once set, store the delicious avalanche cookies in an airtight container.
Notes
Nutrition Information
Nutrition information is automatically calculated and should be used as an approximation. It can vary based on specific brands and exact quantities used.
Additional Recipe Information
Love these cookies? Leave a comment and rating below!Your feedback helps others discover delicious recipes!
Join Our Community! I’ve created a fun and engaging group on Facebook, and I’d be absolutely thrilled for you to become a part of it! It’s a fantastic space where you can share your favorite recipes, ask questions, get cooking inspiration, and stay updated on all the latest delicious creations from Dinners, Dishes and Desserts – so you never miss a new recipe!
Make sure to follow me on Instagram and don’t forget to tag #dinnersdishes in your posts! I absolutely love seeing all the wonderful DINNERS, DISHES, AND DESSERTS recipes YOU make and share with your loved ones!
Stay connected and never miss out on new recipes, cooking tips, and culinary adventures by following me on all my social media channels:
Facebook | Twitter | Pinterest | Instagram
