Quick & Easy Bisquick Muffins: Your Go-To Recipe for Delicious Homemade Treats
Discover the secret to incredibly tender, fluffy muffins that come together in a flash – all thanks to the magic of Bisquick mix! This simple recipe for Bisquick Muffins transforms a pantry staple into a delightful breakfast, a perfect snack, or a sweet treat for any occasion.
Far more versatile than just pancakes and waffles, Bisquick is your ultimate shortcut to baking success. Whether you’re a seasoned baker or just starting out, these muffins promise foolproof results every time. Forget complicated ingredient lists and lengthy prep; with just a handful of basic items, you’ll have warm, golden muffins ready to enjoy in under 30 minutes. This classic baking mix streamlines the process, ensuring consistent texture and flavor, making it an indispensable tool for any home baker looking for quick, high-quality results.
Bisquick has been a beloved kitchen hero for generations, with its pre-mixed blend of flour, leavening, salt, and shortening. This convenience makes it ideal for busy mornings or when a sudden craving for something sweet strikes. If you have extra Bisquick mix after making these muffins, don’t let it go to waste! You can whip up a batch of incredibly easy and delicious Bisquick Cookies, a fantastic way to utilize every bit of this versatile mix and keep the baking fun going!

The Charm of Bisquick Muffins: Simple, Speedy, and Scrumptious
These aren’t just any muffins; they’re a testament to how simple ingredients can create something truly spectacular. Our Bisquick Muffin recipe requires only six core ingredients, significantly cutting down on prep time compared to traditional muffin recipes that call for individual measurements of flour, baking powder, and more. The result? A batch of impossibly fluffy and tender muffins that are ready to customize to your heart’s content. While classic Chocolate Chip Muffins are always a hit, the beauty of this Bisquick base lies in its adaptability. You can effortlessly transform these muffins with your favorite fruits, nuts, spices, or decadent chocolate chips, making them a fresh and exciting experience every time you bake.
Today, we’re diving into the universally loved chocolate chip version because it’s a family favorite, but the possibilities are truly endless. You’ll generally need about ¾ cup of your chosen mix-in. Fresh blueberries are an absolute classic, lending a burst of juicy sweetness. Raspberries, sliced strawberries, or even tart blackberries also work wonderfully, adding vibrant color and flavor. Imagine waking up to the aroma of freshly baked muffins, knowing they took minimal effort to create! These muffins are perfect for a grab-and-go breakfast, a satisfying afternoon snack, or a delightful addition to any brunch spread.
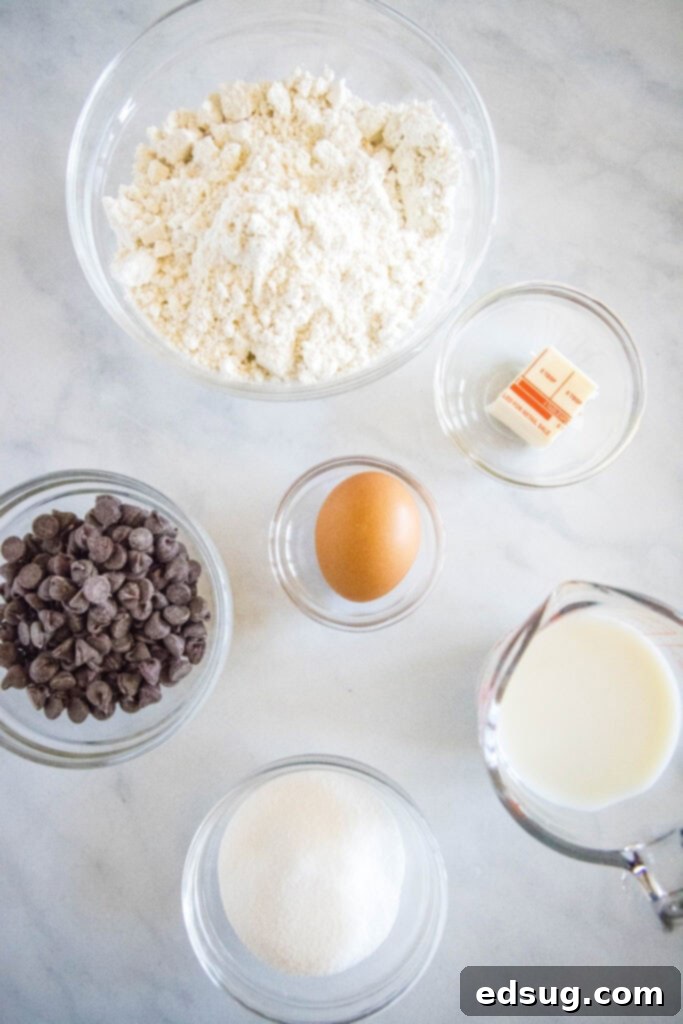
Essential Ingredients for Your Bisquick Muffin Masterpiece
Crafting these delightful muffins requires just a few basic ingredients, most of which you likely already have in your pantry and refrigerator. The magic truly begins with a good quality Bisquick mix, which forms the foundation of our tender muffins.
- Bisquick Mix: The star of our recipe, providing the perfect pre-mixed blend of dry ingredients for convenience and consistent results.
- Granulated Sugar: To add just the right amount of sweetness, balancing the flavors without being overly sugary.
- Milk: Contributes to the moist texture and helps bind the batter. Any type of milk (whole, 2%, skim, or even non-dairy alternatives like almond or soy milk) will work beautifully.
- Melted Butter: Adds richness and a lovely golden crumb to the muffins. Ensure it’s melted and slightly cooled before adding to the batter.
- Egg: Acts as a binder, contributing to the muffin’s structure, rise, and overall tender crumb.
- Your Favorite Mix-in: Whether it’s classic chocolate chips, fresh berries, chopped nuts, or a combination, this is where you personalize your batch and add a burst of flavor!
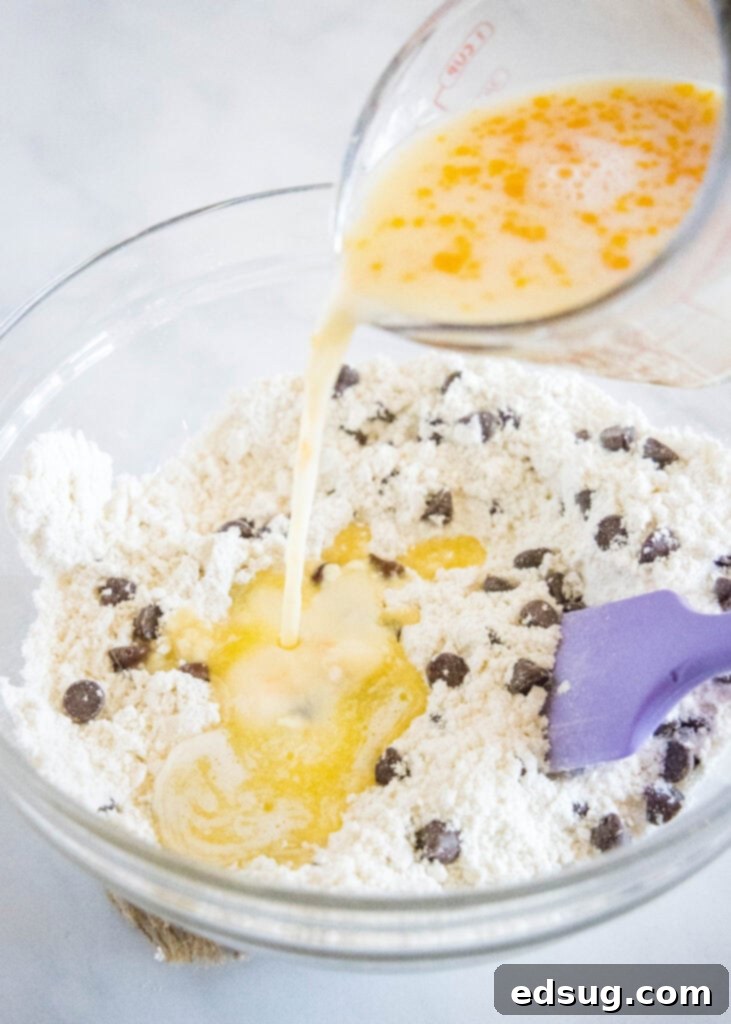
Step-by-Step Guide to Perfect Bisquick Muffins
For precise measurements and detailed nutritional information, please scroll to the bottom of this post for the FULL PRINTABLE recipe card.
- Preheat Your Oven and Prepare Muffin Tin: Start by preheating your oven to a steady 400°F (200°C). This initial high heat helps the muffins rise quickly, creating those desirable domed tops. Thoroughly grease 9 standard muffin cups with non-stick spray, or line them with paper liners if preferred. Proper preparation prevents sticking and ensures easy removal.
- Combine Dry Ingredients & Mix-ins: In a large mixing bowl, whisk together the Bisquick mix and granulated sugar until well combined. If using chocolate chips or other sturdy mix-ins like berries, gently fold in about ¾ cup of them now. This crucial step coats your mix-ins with flour, preventing them from sinking to the bottom of the muffin cups during baking and ensuring even distribution throughout each delicious bite.
- Prepare Wet Ingredients: In a separate 1-cup liquid measuring cup, pour in your milk. Crack in the egg and whisk them vigorously until they are well combined and smooth. This pre-mixing of wet ingredients helps prevent overmixing later, which is key to achieving exceptionally tender muffins.
- Gently Combine Wet and Dry: Pour the whisked milk-and-egg mixture along with the melted butter into the bowl of dry ingredients. Using a spoon or spatula, mix until *just* combined. A few small lumps in the batter are perfectly normal and even desired – overmixing develops gluten, which can lead to tough, chewy muffins. Stop mixing as soon as no dry streaks of flour remain in the batter.
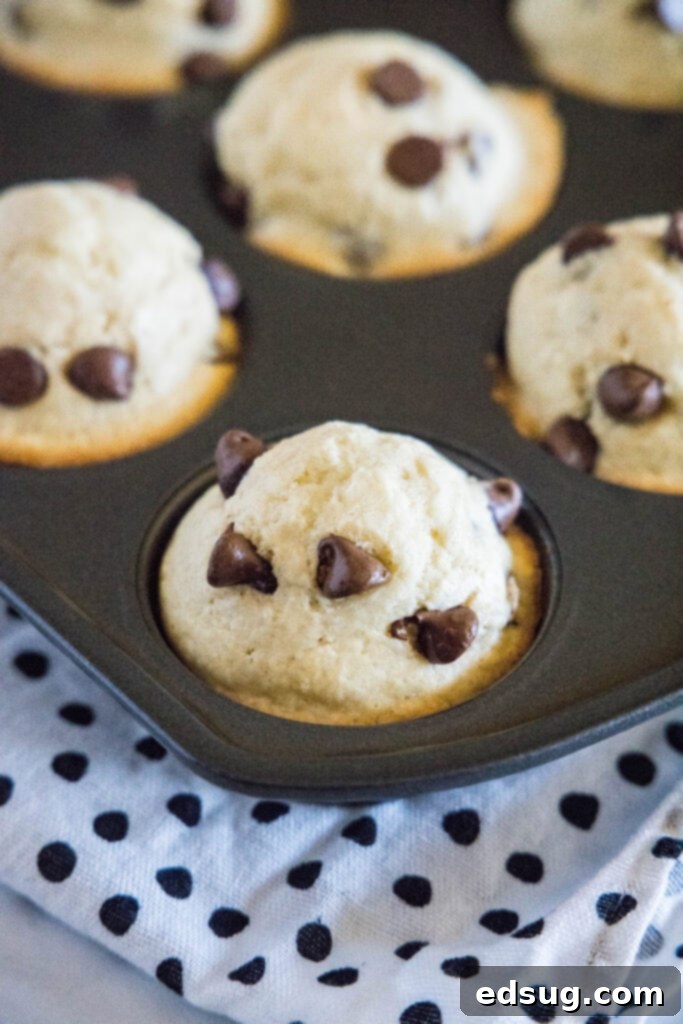
- Fill Muffin Cups & Add Toppings: Evenly scoop the batter into the prepared muffin cups, filling each about two-thirds full. If you have any remaining mix-ins (like a sprinkle of chocolate chips or a few extra berries), now is the perfect time to add them to the tops of each muffin for a beautiful presentation and an extra pop of flavor.
- Bake to Golden Perfection: Transfer the muffin tin to your preheated oven and bake for approximately 18-22 minutes. Baking time can vary slightly depending on your oven, so keep a close eye on them. The muffins are done when they spring back lightly when gently touched on top, or when a toothpick inserted into the center comes out with moist crumbs, but no wet batter. They should also have a beautiful light golden-brown color on top.
- Cool and Enjoy: Once baked, remove the muffin tin from the oven and allow the muffins to rest in the tin for about 5 minutes. This brief cooling period helps them firm up and makes them easier to remove from the cups without falling apart. Then, carefully transfer them to a wire rack to cool completely. While they are delicious warm, cooling allows their flavors and texture to fully develop.
Crafting Cute Mini Bisquick Muffins: A Bite-Sized Delight
Absolutely! This Bisquick muffin recipe is incredibly adaptable and scales beautifully for mini muffins, making them perfect for parties, lunchboxes, or little hands. Our standard recipe yields about 9 full-sized muffins, but by utilizing a mini muffin pan, you can easily create approximately 24 charming bite-sized muffins. The exact yield might vary slightly based on how full you fill each mini cup. When opting for mini muffins, a helpful tip is to use mini chocolate chips or finely chopped fruits and nuts. This ensures that each small muffin gets a good distribution of delicious add-ins, enhancing their appeal and flavor profile. Adjust the baking time for mini muffins to about 10-15 minutes, or until they are lightly golden brown and a toothpick inserted into the center comes out clean.
Smart Storage for Your Delicious Homemade Muffins
To maintain the freshness, moistness, and delicious texture of your homemade Bisquick muffins, proper storage is paramount. Once completely cooled, store your muffins in an airtight container at room temperature. They will remain wonderfully fresh and enjoyable for about 4-5 days, making them perfect for grab-and-go breakfasts, quick snacks throughout the week, or an easy dessert. For longer preservation, freezing is your best option. I highly recommend placing cooled muffins in a freezer-safe plastic bag or an airtight container, where they will keep beautifully for 4-5 months without losing quality. When you’re ready to enjoy them, simply thaw them on the counter for a couple of hours, or for a quick warm treat, microwave individual muffins for approximately 30-40 seconds. This makes them an ideal solution for convenient, homemade breakfasts on busy mornings or a sudden sweet craving.
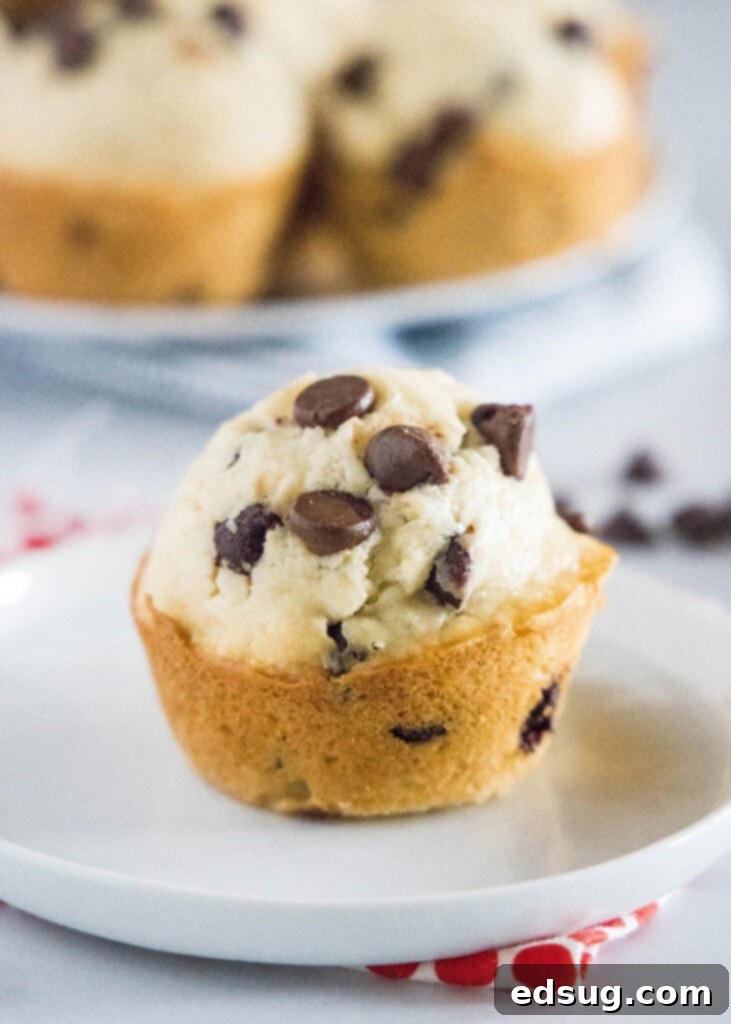
Expert Tips for Unbeatable Muffin Texture and Taste Every Time
- Muffin Liners: Your Choice! Muffin liners are often a matter of personal preference, and most of the time, they are not strictly necessary. Unless you’re making elaborate creations like Double Chocolate Cheesecake Muffins or Gingerbread Cheesecake Muffins where a liner helps contain fillings or delicate structures, a good non-stick spray is usually sufficient. Using non-stick spray allows muffins to release perfectly without waste and often results in a nicer, crispier edge.
- The Golden Rule: Do NOT Overmix! This is perhaps the most crucial tip for achieving tender muffins. The reason we whisk the egg with the milk separately before adding it to the dry ingredients is to minimize mixing once the flour is introduced. As soon as all the dry flour streaks disappear and the ingredients are just combined, stop mixing. Overmixing develops the gluten in the flour, leading to dense, tough, and chewy muffins. For that irresistible soft, tender, and fluffy texture, mix only until the batter is barely moistened. Embrace a few lumps!
- Watch Your Baking Time Closely: Overbaked muffins are dry muffins. Keep a close eye on your batch towards the end of the suggested baking time. Muffins are typically done when they spring back gently when you lightly touch the top. You can also use the toothpick test: insert a toothpick into the center; it should come out with moist crumbs attached, but no wet batter. Remember, muffins continue to cook for a few minutes after they’re removed from the oven due to residual heat, so it’s often better to slightly underbake than overbake them to prevent dryness.
- Achieve Perfect Muffin Tops: To get those beautiful, domed muffin tops, start baking at a higher temperature (like the 400°F recommended here) for the initial few minutes (e.g., 5 minutes), then reduce the temperature to finish baking (e.g., to 375°F for the remaining time). This initial burst of heat activates the leavening agents rapidly, causing the batter to rise quickly before the exterior sets, locking in that lovely domed shape.
- Resting Batter for Superior Texture: For an even fluffier and more tender muffin, consider letting your batter rest for 10-15 minutes after mixing and before scooping into the muffin tin. This allows the flour to fully absorb the liquid and the gluten to relax, resulting in a lighter, more delicate crumb.
- Freezing for Freshness: As mentioned, extra muffins are fantastic to freeze. They are a lifesaver for quick breakfasts or snacks. Simply grab one from the freezer, pop it in the microwave for 30-40 seconds, and you have a warm, homemade treat in an instant – perfect for busy mornings or an on-the-go boost.
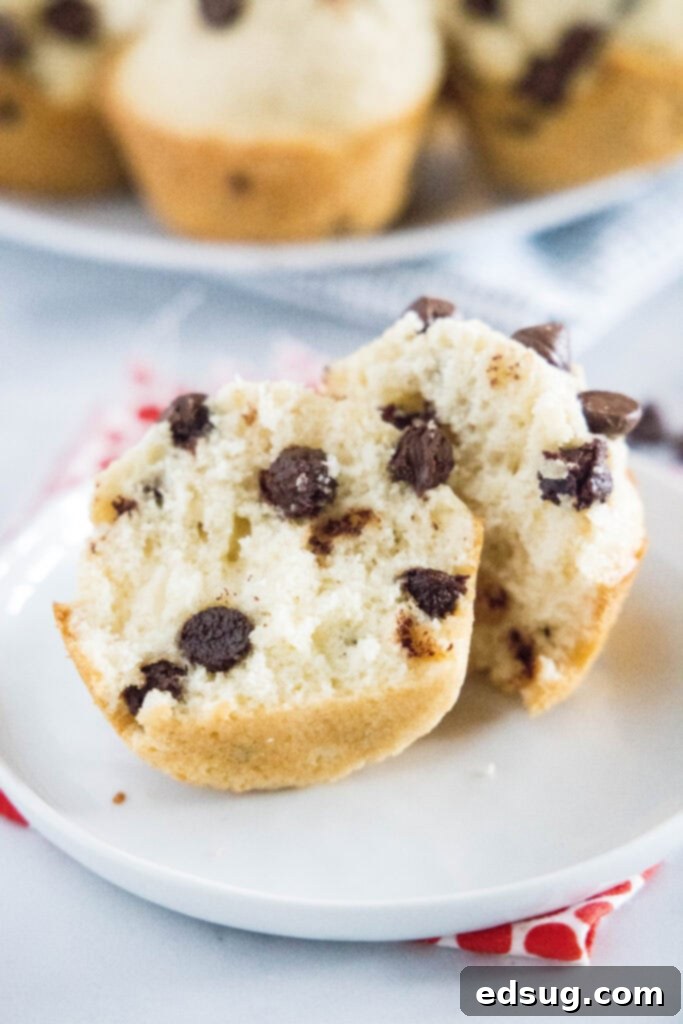
Beyond Chocolate: Creative Bisquick Muffin Flavor Combinations
The versatility of these Bisquick muffins is truly remarkable, allowing for endless customization to suit any palate or occasion. While chocolate chips are a beloved classic, don’t hesitate to experiment with other delightful mix-ins to create unique and exciting batches!
- Other Chip Varieties: Explore beyond semi-sweet! Dark chocolate chips offer a richer, more intense flavor. White chocolate chips add a creamy sweetness, while peanut butter chips bring a nutty, savory twist. Butterscotch or cinnamon chips are also fantastic for spiced or autumnal flavors.
- Fresh & Frozen Fruit: Berries are always a winner. Blueberries (fresh or frozen), raspberries, sliced strawberries, or blackberries all provide a burst of natural sweetness and moisture. If using frozen fruit, there’s no need to thaw it beforehand; simply toss it directly into the dry ingredients to prevent discoloration of the batter. Chopped apples, peaches, or even mashed bananas also make for wonderful fruit muffins.
- Nutty Additions: Enhance the texture and flavor with chopped nuts like pecans, walnuts, or almonds. For an extra special treat, combine chocolate chips with walnuts or pecans for a delightful crunchy-sweet contrast that’s always a crowd-pleaser.
- Spiced Muffins: Elevate your muffins with warm spices. Add 1-2 teaspoons of ground cinnamon, a pinch of nutmeg, or even a touch of ground ginger to the dry mixture. For an irresistible topping, sprinkle a mixture of cinnamon and granulated sugar over the muffin batter just before baking.
- Surprise Fillings: Create a delightful surprise inside your muffins! Fill the muffin cups about halfway with batter, then add a spoonful of Nutella for a rich hazelnut chocolate swirl, your favorite fruit jam (like Mixed Berry Jam or apricot preserves), or even a dollop of creamy peanut butter. Top with the remaining batter, ensuring the filling is fully enclosed for a wonderful center.
- Lemon Zest & Poppy Seeds: For a bright, citrusy flavor, add the finely grated zest of one lemon to your dry ingredients. Pair it with a teaspoon of poppy seeds for a classic and refreshing lemon-poppy seed muffin.
- Coconut & Pineapple: For a delightful tropical twist, mix in shredded coconut and small, drained pineapple chunks. This combination transports your taste buds to a sunny paradise.

Common Questions About Baking Bisquick Muffins
- Why are my Bisquick muffins dry? Dry muffins are typically a result of two main culprits: overmixing the batter or overbaking. Remember the “just combined” rule for mixing – a few lumps are good! And keep a close eye on your oven; baking for even a few minutes too long can wick away precious moisture, leading to a dry crumb.
- Can I use a homemade Bisquick substitute? Absolutely! If you prefer to make your own mix from scratch, many excellent recipes for homemade “baking mix” are available online. Ensure it has a similar flour-to-leavening ratio for the best results in this muffin recipe.
- What kind of milk should I use? Any type of milk will work wonderfully in this recipe – whole milk, 2%, skim, or even non-dairy alternatives like almond or soy milk. The fat content might slightly affect the richness of the muffin, but the overall structure and deliciousness will remain consistent.
- Can I add a streusel topping? Yes, a streusel topping would be a fantastic and highly recommended addition! Before baking, simply sprinkle a homemade streusel mixture (typically a combination of flour, sugar, cold butter, and a touch of cinnamon) over the tops of the filled muffin cups for an extra layer of delightful texture and sweet flavor.
- How do I get my muffins to rise high and have domed tops? Two key factors contribute to those desirable high-rising, domed muffin tops: starting with a high oven temperature (like the 400°F in this recipe) for an initial burst of steam and lift, and crucially, not overmixing the batter, which can prevent the leavening agents from working effectively.
Expand Your Baking Repertoire: More Delicious Muffin Recipes to Explore
If you’ve loved the simplicity and deliciousness of these Bisquick Muffins, you’ll be thrilled to discover the wide world of muffin baking! We have a treasure trove of other fantastic muffin recipes waiting for you to explore. From decadent chocolate creations to fruity delights, there’s a muffin for every taste and occasion. Dive in and find your next favorite!
- Oreo Muffins
- Strawberry Rhubarb Muffins
- Monkey Bread Muffins
- Pancake Muffins
- Banana Chocolate Chip Muffins
- Apple Cinnamon Muffins
- Banana Nut Muffins

Bisquick Muffins
Pin Recipe
Rate Recipe
Print Recipe
Ingredients
- 2 cups Bisquick Baking Mix
- 1/3 cup granulated sugar
- 2/3 cup milk
- 2 Tablespoons melted butter
- 1 large egg
- 1 cup semi-sweet chocolate chips, divided (¾ cup for batter, ¼ cup for topping)
Instructions
-
Preheat your oven to 400°F (200°C). Prepare a 9-cup muffin tin by greasing it with non-stick spray or lining with paper cups.
-
In a large bowl, whisk together the Bisquick mix, granulated sugar, and ¾ cup of the chocolate chips. Coating the chips in the dry mix helps prevent them from sinking.
-
In a 1-cup liquid measuring cup, combine the milk and egg. Whisk thoroughly until well blended.
-
Pour the milk-and-egg mixture and the melted butter into the dry ingredients. Stir gently with a spoon or spatula until just combined. A few lumps are fine; avoid overmixing.
-
Evenly distribute the batter into the 9 prepared muffin cups, filling each about two-thirds full. Sprinkle the remaining ¼ cup of chocolate chips over the tops of the muffins.
-
Bake for 18-22 minutes, or until the tops are golden brown and spring back when lightly touched. A toothpick inserted into the center should come out with moist crumbs, not wet batter.
-
Remove the muffin tin from the oven and let the muffins cool in the tin for 5 minutes before transferring them to a wire rack to cool completely.
Nutrition
Nutrition information is automatically calculated, so should only be used as an approximation.
Additional Info
Like this recipe? Leave a comment below!
I created a fun group on Facebook, and I would love for you to join us! It’s a place where you can
share YOUR favorite recipes, ask questions, and see what’s new at Dinners, Dishes and Desserts (so that you never miss a new recipe)!
Be sure to follow me on Instagram and
tag #dinnersdishes so I can see all the wonderful DINNERS, DISHES, AND DESSERTS
recipes YOU make!
Be sure to follow me on my social media, so you
never miss a post!
Facebook | Twitter | Pinterest | Instagram
.
