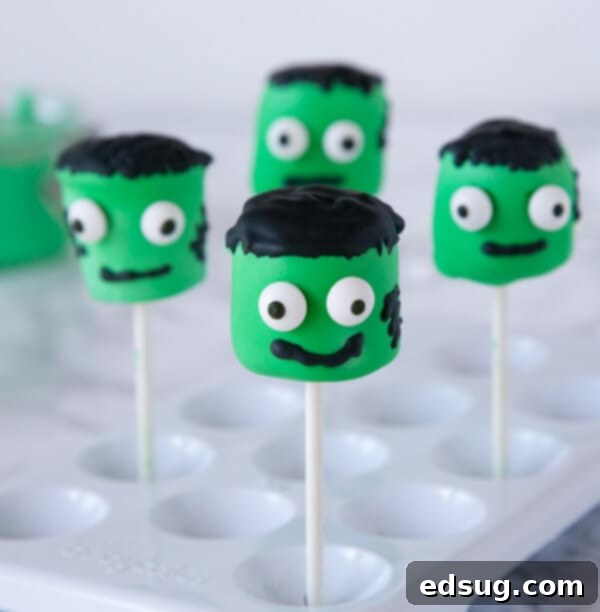
Spooktacularly Simple Frankenstein Marshmallow Pops: The Ultimate Easy Halloween Treat!
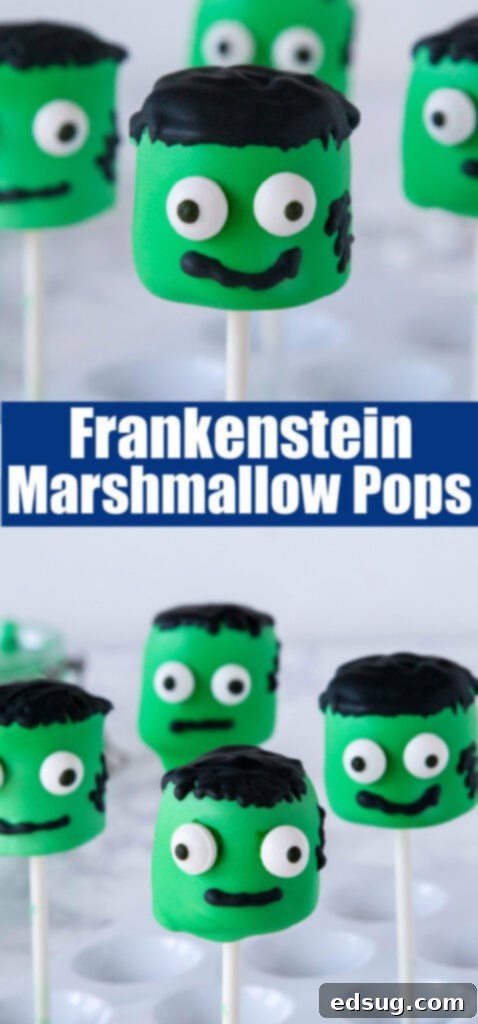
Get ready for a ghoulishly good time this Halloween with these adorable and incredibly easy Frankenstein Marshmallow Pops. They’re a super cute, no-bake treat that kids and adults will absolutely adore!
As autumn leaves begin to rustle and a crisp chill fills the air, it’s a sure sign that Halloween is just around the corner. This enchanting holiday calls for costumes, spooky decorations, and, of course, a plethora of delicious and fun treats! While intricate desserts can be a joy to create, sometimes you need a recipe that’s quick, easy, and guaranteed to bring smiles – especially when little monsters are eager to help in the kitchen. That’s where our Frankenstein Marshmallow Pops come to the rescue!
These delightful marshmallow pops transform simple, fluffy marshmallows into iconic Frankenstein’s monsters with just a few basic ingredients and a touch of creativity. What makes them truly special is their incredible simplicity: they are completely no-bake, meaning you can whip up a batch in minutes. The only real waiting involved is allowing the royal icing to dry and harden, which ensures your spooky creations hold their shape perfectly. Get ready to dip, decorate, and enjoy these charmingly ghoulish treats that are sure to be the star of any Halloween party or a fun activity for a family afternoon!
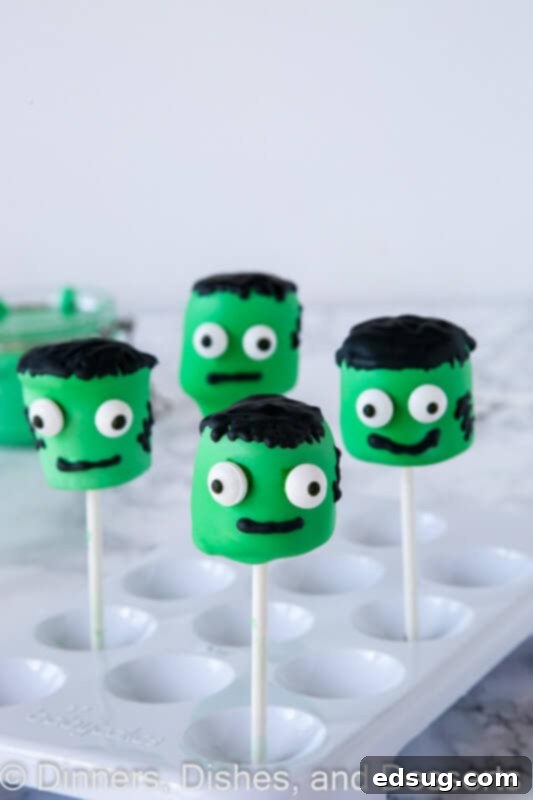
Why These Frankenstein Marshmallow Pops Are a Must-Make Halloween Treat
There are countless reasons why these Frankenstein Marshmallow Pops should be at the top of your Halloween treat list. First and foremost, they are incredibly kid-friendly. The simple act of dipping marshmallows and adding candy eyes is perfect for little hands, making it a fantastic activity to involve children in the holiday preparations. It fosters creativity and fine motor skills, all while producing a delicious reward!
Secondly, their “no-bake” nature is a huge time-saver. In the busy lead-up to Halloween, who has hours to spend in the kitchen? These pops require minimal cooking skills and no oven time, allowing you to focus on other festivities or simply enjoy a relaxing crafting session. This also makes them ideal for school parties or last-minute potluck contributions where you need an impressive yet effortless dessert.
Finally, the visual appeal is undeniable. These Frankenstein Marshmallow Pops are undeniably cute and instantly recognizable, adding a whimsical touch to any Halloween spread. You can easily customize the expressions and “scars” on each monster, giving them individual personalities. They’re not just a treat; they’re an edible piece of Halloween art that everyone will be talking about!
Gathering Your “Monster Mash” Ingredients
To embark on your Frankenstein Marshmallow Pop creation journey, you’ll need a handful of readily available ingredients. The beauty of this recipe lies in its simplicity, requiring items that are easy to find at most grocery or craft stores. Quality ingredients make a difference, especially when it comes to the royal icing, which forms the core of our monster’s green skin and black details.
Here’s what you’ll need to transform ordinary marshmallows into extraordinary Halloween delights:
- Powdered Sugar: Also known as confectioners’ sugar, this is the base for our smooth royal icing. Sifting it is crucial for a lump-free consistency.
- Egg Whites: These provide the structure and glossy finish for the royal icing, allowing it to harden beautifully. Using pasteurized egg whites from a carton is a safe option if you’re concerned about raw eggs.
- Lemon Juice: A small amount of lemon juice adds a subtle tang and helps stabilize the royal icing, giving it a bright white color before coloring.
- Large Marshmallows: The canvas for our Frankenstein monsters! Large marshmallows are easier to dip and provide a good surface for decorating.
- Black Food Coloring (Gel): Essential for Frankenstein’s hair, mouth, and stitches. Gel food coloring provides vibrant color without thinning the icing too much.
- Green Food Coloring (Gel): The signature color for our Frankenstein. Again, gel coloring is recommended for intensity.
- Candy Eyes: These edible eyeballs bring your monsters to life! You can find them in various sizes in the baking aisle of most supermarkets or craft stores.
- Lollipop Sticks: These are indispensable for turning your marshmallows into “pops.” They make dipping easier and provide a handle for eating.
Lollipop sticks are generally easy to source. You can usually find them in the baking or craft section of major supermarkets, craft stores like Michaels or Hobby Lobby, or even large retailers like Walmart. If you’re planning ahead or buying in bulk, Amazon is always a reliable option for ordering them directly to your door. Having a good supply ensures your entire batch of Frankenstein Marshmallow Pops stands tall and proud!
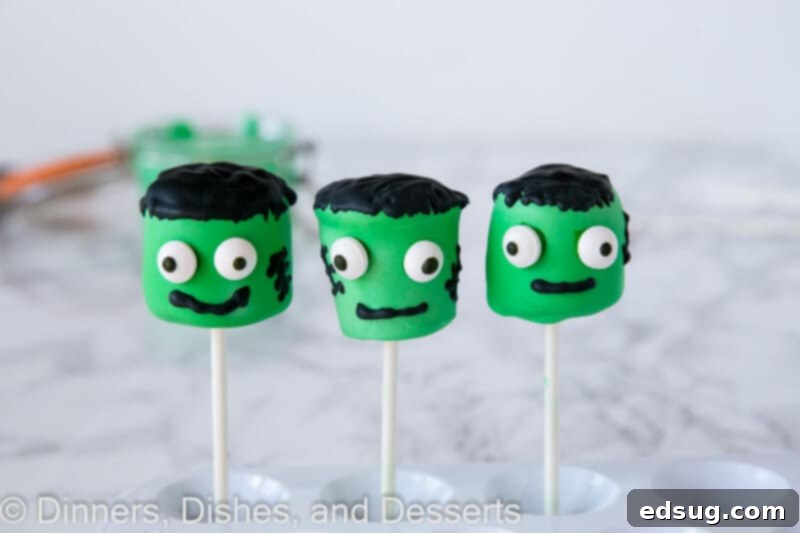
Step-by-Step: Crafting Your Frankenstein Marshmallow Pops
Now that you’ve gathered all your essential ingredients, it’s time to bring your Frankenstein Marshmallow Pops to life! The process involves making the royal icing, coloring it, dipping the marshmallows, and then adding those iconic spooky details. Follow these steps carefully for the best results, and remember to have fun along the way!
- Prepare the Royal Icing Base: Begin by sifting your powdered sugar into a large mixing bowl. Sifting is a key step to prevent lumps and ensure your icing is perfectly smooth. Add the egg whites and lemon juice to the sifted powdered sugar. Using an electric mixer with a paddle attachment, beat these ingredients on low speed until they are just combined and all the sugar is incorporated. Once combined, increase the mixer speed to high and continue beating for approximately 7 minutes. You’ll know the royal icing is ready when it becomes thick, glossy, and holds stiff peaks, meaning it retains its shape when you lift the beater. This firm consistency is essential for dipping.
- Divide and Color the Icing: Carefully divide the prepared royal icing into two separate bowls. Allocate about two-thirds of the icing into one bowl – this will be for your vibrant green Frankenstein skin. Place the remaining one-third of the icing into the second bowl, which you’ll color black for the details. In the larger bowl, add your green gel food coloring, starting with a few drops and mixing well. Gradually add more coloring until you achieve your desired shade of Frankenstein green. For the ideal dipping consistency, slowly add water, one teaspoon at a time, mixing thoroughly after each addition, until the green icing is smooth and fluid enough for dipping marshmallows. Repeat this process for the smaller bowl, adding black gel food coloring until you achieve a deep, rich black. For the black icing, aim for a slightly thicker consistency initially, as it will be used for piping details, which requires more control.
- Preserve the Black Icing: Royal icing can dry out quickly when exposed to air. To prevent your black icing from hardening prematurely while you work on the green layer, cover the bowl with plastic wrap. Make sure to press the plastic wrap directly onto the surface of the icing, creating an airtight seal. Set this bowl aside until you are ready to use it for decorating.
- Dip the Marshmallows in Green: Take your lollipop sticks and gently insert one into the center of each large marshmallow. Hold the stick and dip each marshmallow into the prepared green icing, ensuring it’s fully coated. Lift the marshmallow, gently shaking off any excess icing. If needed, use a small knife or an offset spatula to smooth out any drips or uneven spots. Once dipped, place the marshmallow pops upright in a foam block or a special lollipop stand to allow the green icing to harden completely. This is a crucial step – patience here will prevent colors from bleeding later. Depending on humidity, this can take anywhere from 1-3 hours, or even overnight.
- Attach the Candy Eyeballs: Once the green icing on your Frankenstein Marshmallow Pops is completely dry and firm to the touch, it’s time to give them their eyes. Retrieve your black icing (it should still be covered). Transfer a small amount of the black icing into a piping bag fitted with a very small round tip (like a Wilton #1 or #2). Pipe a tiny dot of black icing onto the back of each candy eyeball. Carefully place two eyeballs onto the green marshmallow, pressing gently. Hold each eye in place for a few seconds until it adheres securely to the dry green icing.
- Add Frankenstein’s Features: With the candy eyes in place, use the same piping bag with black icing to add the finishing touches to your Frankenstein monsters. Pipe on a jagged mouth, characteristic stitches or scars, and a wild, unruly mop of hair on top of each marshmallow pop. Don’t be afraid to get creative with your designs – each Frankenstein can have its own unique personality! Once all the details are piped, allow the black icing to harden completely. This might take another hour or two, or you can leave them overnight for best results. Once fully set, your Frankenstein Marshmallow Pops are ready to be served and enjoyed!
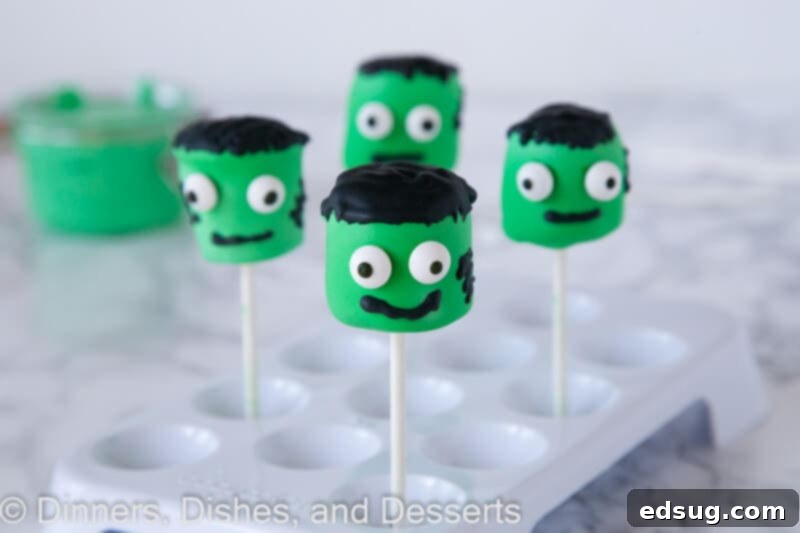
Expert Tips for Perfect Pops
Crafting perfect Frankenstein Marshmallow Pops is an enjoyable process, but a few expert tips can make it even smoother and ensure your treats look spectacular and last longer. From alternative ingredients to clever drying methods, these pointers will help you achieve impressive results every time.
- Food Coloring Choices: While gel food coloring offers the best vibrant color without affecting icing consistency, if you don’t have black gel food coloring on hand, black icing gel in a tube (often found in the baking aisle) can be a convenient alternative. These pre-packaged gels are super easy to use for piping designs directly. Just be aware that they tend to have a slightly shinier finish compared to royal icing made with gel coloring, but they work wonderfully for mouths, scars, and hair.
- Patience with Drying Time: This is perhaps the most critical tip for success! Allow the green icing to harden completely before you even think about adding the black decorating. If the green layer is still wet or tacky, the black icing will smear and bleed into the green, creating muddy colors and a less-than-ideal Frankenstein. Depending on humidity and air circulation, this drying time can vary, so plan accordingly. A good test is to gently touch the green surface; if it’s firm and smooth and leaves no residue on your finger, it’s ready for the next step.
- Optimal Drying Setup: To ensure your marshmallow pops dry evenly and without sticking, proper support is key. There are various lollipop trays or foam blocks specifically designed for holding pops upright while they set. These are incredibly useful for keeping the marshmallows from touching each other or the counter, preventing smudges and ensuring perfect shapes. If you don’t have a specialized tray, you can use short, sturdy cups filled with rice or sugar, making sure the lollipop sticks are long enough to extend above the cup’s rim. This DIY method works just as well to keep them upright and stable.
- Achieving the Right Icing Consistency: When adjusting your royal icing with water, add it very slowly, one teaspoon at a time. The goal for dipping consistency (green icing) is thin enough to coat the marshmallow smoothly but thick enough not to drip excessively. For piping consistency (black icing), you want it thicker – think toothpaste – so it holds its shape when piped. If your icing becomes too thin, you can add a little more sifted powdered sugar.
- Involving Kids Safely: These pops are fantastic for kids! Let them help with dipping the marshmallows (with supervision), sticking on the candy eyes, or even drawing the simple mouths and scars if they’re a bit older. It’s a wonderful way to build their confidence in the kitchen and enjoy some quality time together.
Storage & Enjoyment
Once your Frankenstein Marshmallow Pops are fully decorated and the icing has completely hardened, they are quite robust and easy to store. The hardened royal icing acts as a protective shell, keeping the marshmallows fresh and preventing them from sticking together.
You do not need to keep them in a special tray once the icing is completely dry. Simply stack them gently in an airtight container. Store them at room temperature, away from direct sunlight or excessive heat. They will remain fresh and delicious for approximately 4-5 days. For the best flavor and texture, consuming them within this timeframe is recommended. These are perfect for lunchbox treats, party favors, or a delightful after-dinner Halloween dessert!
More Spooktacular Halloween Recipes
If you’re looking to expand your Halloween treat repertoire beyond these delightful Frankenstein Marshmallow Pops, we’ve got you covered! Here are some other fun and festive recipes that will add even more magic to your Halloween celebrations. From creepy crawly brownies to ghostly goodies, these recipes are sure to be a hit:
- Halloween Jello Shots (for the grown-ups!)
- Witches Brew
- Spooky Spider Brownies
- Ghost Cupcakes
- Monster Brownies
- Ghost Pretzels
- Mummy Granola Bars
Save
Frankenstein Marshmallow Pops
Pin Recipe
Rate Recipe
Print Recipe
Ingredients
- 24 large marshmallows
- 24 lollipop sticks
- 48 Candy eyeballs
- Green food coloring
- Black food coloring
- Royal Icing
- 2 cups powdered sugar
- 2 large egg whites
- 1 teaspoon lemon juice
Instructions
-
After measuring powdered sugar, sift it into a mixing bowl to ensure a smooth, lump-free royal icing.
-
Add the egg whites and lemon juice to the sifted powdered sugar. Using a paddle attachment on an electric mixer, beat on low speed until all ingredients are just combined. Then, increase to high speed and mix for seven minutes, or until the royal icing becomes thick, glossy, and holds its shape in stiff peaks.
-
Divide the prepared royal icing into two bowls: place approximately 2/3rds in one bowl (for green) and the remaining 1/3 in another (for black).
-
Add green food coloring to the larger bowl of icing and mix until you achieve the desired vibrant Frankenstein green color. Slowly add water, 1 teaspoon at a time, mixing thoroughly after each addition, until the icing is smooth and has a consistency suitable for dipping marshmallows.
-
Add black food coloring to the smaller bowl of icing. Mix until you get a rich, deep black color. Cover this black icing with plastic wrap, pressing the plastic directly onto the surface of the icing to prevent it from drying out. Set aside until you’re ready to use it for detailing.
-
Carefully place a lollipop stick into the center of each marshmallow. Dip each marshmallow into the green icing, ensuring it’s fully coated. Gently shake off any excess icing and use a knife or small offset spatula to smooth the surface if necessary. Place the dipped marshmallows upright in a foam block or lollipop stand and allow the green icing to harden completely. This is a crucial step that may take 1-3 hours, or even overnight, depending on humidity.
-
Once the green icing is completely dry and firm, pipe a small dot of black icing (from your reserved black batch) onto the back of each candy eyeball. Place two eyes onto each marshmallow, holding them gently in place for a few seconds until the eye adheres securely.
-
Transfer the remaining black icing into a piping bag fitted with a small round decorating tip (size 2 or 3 is ideal). Pipe on the classic Frankenstein features: a jagged mouth, characteristic stitches or scars, and wild, spiky hair on top of each marshmallow pop.
-
Allow the black icing details to harden completely before serving or storing. This will prevent smudging and ensure your Frankenstein Marshmallow Pops look their best!
Nutrition
Nutrition information is automatically calculated, so should only be used as an approximation.
Additional Info
Like this recipe? Leave a comment below!
We hope you have an absolutely monstrous time making these Frankenstein Marshmallow Pops! They are a testament to how simple ingredients can transform into something truly magical and memorable for the Halloween season. Whether you’re making them for a party, a school event, or just a fun family activity, these no-bake treats are guaranteed to be a screaming success. Don’t forget to get creative with the expressions – a little bit of personality goes a long way with these adorable monsters!
Want to connect with other Halloween enthusiasts and share your culinary creations? I created a fun group on Facebook, and I would love for you to join us! It’s a vibrant community where you can share YOUR favorite recipes, ask questions, and stay updated on what’s new at Dinners, Dishes and Desserts (so that you never miss a new recipe!).
Be sure to follow me on Instagram and tag #dinnersdishes so I can see all the wonderful DINNERS, DISHES, AND DESSERTS recipes YOU make! I love seeing your spooky creations and how you bring these recipes to life.
Don’t miss out on any of our exciting new recipes and holiday inspiration! Be sure to follow me on my social media channels, so you never miss a post!
Facebook | Twitter | Pinterest | Instagram
.
