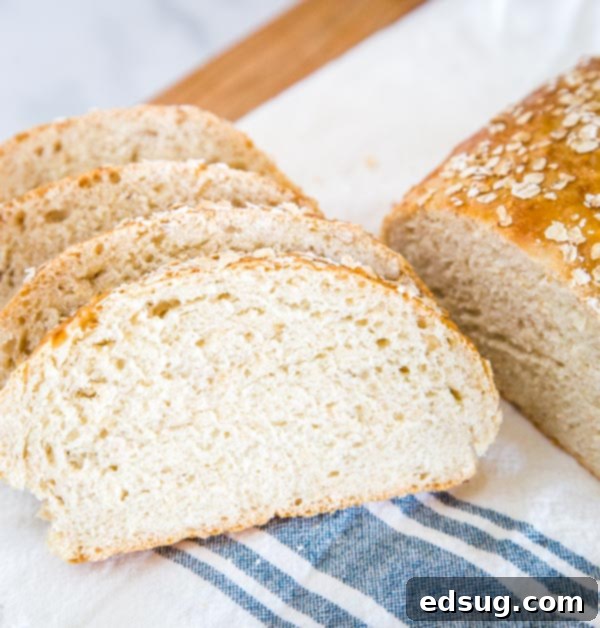
The Ultimate Guide to No-Knead Honey Oat Bread: Easy & Delicious Homemade Loaves
Imagine the comforting aroma of freshly baked bread filling your home. With this incredible no-knead honey oat bread recipe, that dream becomes a delicious reality, week after week! Say goodbye to tedious kneading and hello to a soft, tender, and slightly sweet loaf that’s perfect for any occasion. Whether you’re making toast for breakfast, a hearty sandwich for lunch, or serving it alongside a warm bowl of soup for dinner, this easy recipe will quickly become a cherished favorite.
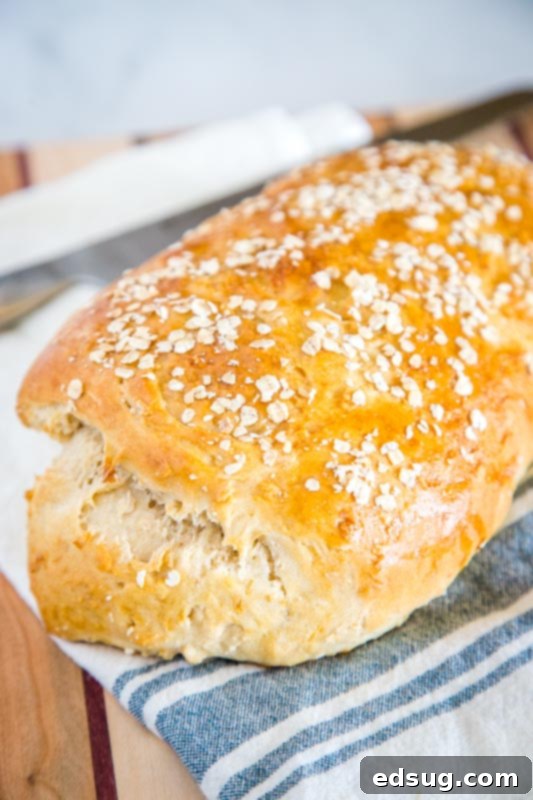
Understanding No-Knead Bread: The Science Behind the Simplicity
No-knead bread has revolutionized home baking, making the art of bread-making accessible to everyone, regardless of their experience level. The core concept is simple: instead of relying on vigorous kneading to develop the gluten structure, this method utilizes an extended rising period. This allows the gluten to develop naturally over time, resulting in a beautifully textured loaf without the physical effort.
The Role of Gluten
In traditional bread making, kneading vigorously develops and strengthens the gluten network, which is essential for trapping gases produced by yeast and creating that signature chewy, airy texture. In contrast, with no-knead bread, the magic happens during the long fermentation (rising) process. As the yeast slowly produces carbon dioxide, these gas bubbles gently stretch and align the gluten proteins over several hours. This gradual development results in a surprisingly strong and elastic gluten structure, achieving a similar outcome to kneading but with minimal manual effort.
The Magic of Long Fermentation
This prolonged rest and fermentation are crucial. Not only does it allow the gluten to develop without kneading, but it also significantly enhances the bread’s flavor profile, creating more complex and nuanced tastes compared to quick-rise breads. A typical no-knead dough is also much wetter than a traditional dough. This higher hydration level contributes to a more open, tender, and moist interior (crumb). While some no-knead recipes aim for a very crusty exterior (often achieved by baking in a Dutch oven), this particular honey oat bread focuses on a wonderfully soft crust and tender crumb, making it incredibly versatile for everyday use.
Key Ingredients for Perfect Honey Oat Bread
Crafting the perfect loaf of honey oat bread starts with understanding the role each ingredient plays in creating its unique flavor and texture.
- Yeast Activation: The First Step: Active dry yeast is the essential leavening agent that makes your bread rise. Activating it in warm water (ideally between 105-115°F or 40-46°C) is crucial to ensure it’s alive and ready to work. Look for a foamy layer to appear on top after a few minutes – that’s your visual confirmation that your yeast is active and viable!
- Honey: More Than Just Sweetness: Honey provides the characteristic sweetness and a beautiful golden hue to the bread’s crust. Beyond flavor, it also contributes to the bread’s moisture content and acts as a natural preservative, helping to keep it fresh for longer. The natural sugars in honey also feed the yeast, aiding in a robust fermentation process.
- Oats: Texture and Wholesome Flavor: Quick-cooking oats are incorporated into the dough, adding a delightful, wholesome texture and a subtle, nutty flavor. They also play a significant role in moisture retention, contributing to the bread’s tender and moist crumb. When sprinkled on top, they add an appealing visual and textural element.
- Flour & Other Staples: All-purpose flour provides the primary structure of the bread. Canola oil adds richness, improves the texture, and contributes to the bread’s overall softness and moisture. Salt is essential for balancing the sweetness, enhancing flavor, and also plays a role in regulating yeast activity, preventing it from rising too quickly.
- The Egg Wash: A simple mix of beaten egg and water, applied before baking, gives the finished loaf a beautiful golden-brown, shiny crust and helps the sprinkled oats adhere firmly to the surface.
Storing Your Homemade Honey Oat Bread
One of the best things about homemade bread is its unparalleled fresh taste. However, because it lacks the preservatives found in commercial loaves, it’s best enjoyed within a few days of baking. This recipe yields two generous loaves, making it convenient to enjoy one fresh and save the other for later.
Short-Term Storage
For loaves you plan to consume within 3-4 days, proper storage is key to maintaining freshness. Once the bread has completely cooled (this is very important!), wrap it tightly in plastic wrap or aluminum foil. You can also place it in an airtight bread box or a sealed plastic bag. Store the wrapped bread at room temperature, away from direct sunlight or excessive heat. A common mistake is refrigerating homemade bread; while it might seem counterintuitive, the refrigerator actually accelerates the staling process, making your bread dry out faster.
Freezing for Long-Term Freshness
If you anticipate not finishing both loaves quickly, freezing is an excellent method for preserving their quality. Allow the bread to cool completely after baking – any residual warmth will create condensation inside the wrapping, leading to ice crystals and potential freezer burn. Once thoroughly cooled, wrap each loaf first in a layer of plastic wrap, ensuring it’s sealed as tightly as possible. Follow this with an additional layer of heavy-duty aluminum foil. This double-layer protection is crucial for preventing moisture loss and freezer burn, keeping your bread fresh. Properly wrapped, your honey oat bread can be stored in the freezer for 2-3 months. To enjoy, simply thaw at room temperature or gently warm in the oven for a “freshly baked” experience.
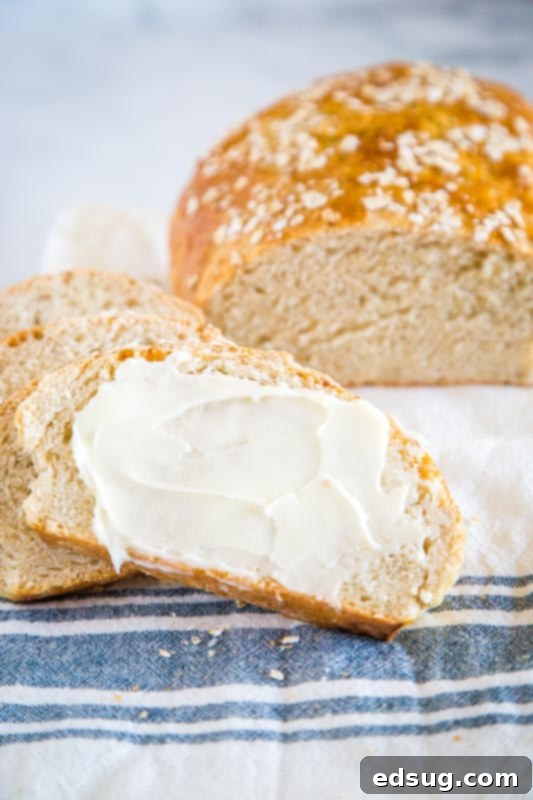
Delicious Ways to Enjoy Your Honey Oat Bread
This versatile honey oat bread pairs wonderfully with a wide array of dishes, making it suitable for any meal of the day. Its subtle sweetness and tender texture make it a delightful addition to both savory and sweet preparations.
- Breakfast & Brunch Ideas: Start your day right with a slice of this bread. Toast it to golden perfection and spread it with butter, cream cheese, or your favorite fruit jam. It also makes a fantastic accompaniment to scrambled eggs, a fresh fruit salad, or even a classic breakfast spread.
- Lunchtime Sandwiches: The soft, slightly sweet profile of this bread makes it an ideal base for both classic and creative sandwiches. Build a hearty turkey and cheddar, a classic peanut butter and jelly, or experiment with gourmet fillings. Its sturdy yet soft texture holds up well to various ingredients.
- Hearty Dinners & Soups: This bread is a perfect companion to warming soups and stews. Use it to soak up the rich broth of a tomato soup, a creamy mushroom soup, or a spicy chili. It also complements roasted meats, savory casseroles, and fresh salads beautifully, adding a comforting element to your dinner table.
Pairing Suggestions:
- Carrot Ginger Soup
- Oven Baked Pork Chops
- Sausage & Wild Rice Salad
- Honey Dijon Chicken
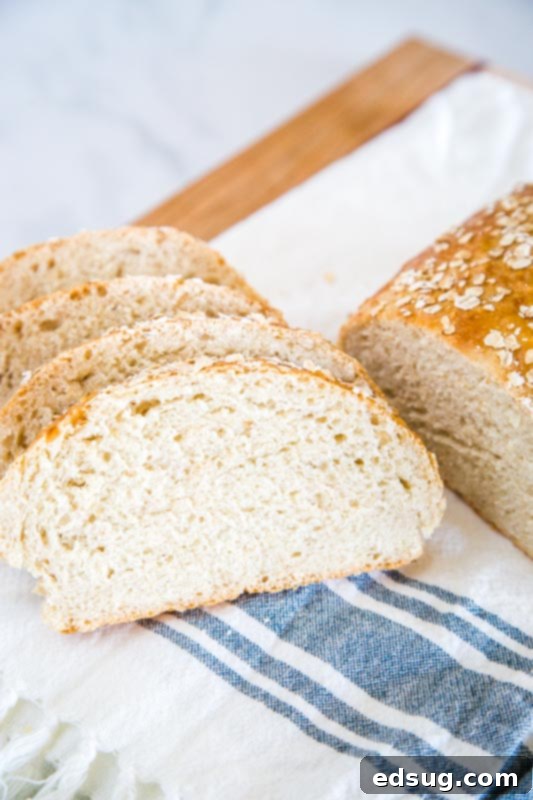
Step-by-Step: Crafting Your Honey Oat Loaves
Making this no-knead honey oat bread is a straightforward process that yields incredibly rewarding results. Follow these simple steps for perfect loaves every time:
-
Activate the Yeast
In a large mixing bowl, combine the warm water and sprinkle the active dry yeast over its surface. Let this mixture sit undisturbed for about 10 minutes. You’ll know it’s ready when it becomes frothy and bubbly, indicating the yeast is active and alive. This initial step is vital for a good rise and successful bread.
-
Mix the Dough
Next, add the quick-cooking oats, honey, canola oil, and salt to the yeast mixture. Stir everything together until well combined. Gradually add the all-purpose flour, starting with about 4 ½ cups. Mix until the ingredients come together to form a soft, shaggy dough. You can use a sturdy spatula or a stand mixer with a paddle attachment for this; there’s no need for extensive kneading, just enough to combine everything thoroughly. Adjust flour as needed; the dough should be soft and slightly sticky, not dry or stiff.
-
First Rise (Bulk Fermentation)
Lightly coat a large bowl with non-stick cooking spray or a thin layer of oil. Transfer the dough to this prepared bowl, turning it once to ensure it’s coated with oil, which prevents it from sticking as it rises. Cover the bowl tightly with plastic wrap, then drape a clean kitchen towel over it for extra insulation. Place the bowl in a warm, draft-free spot and let the dough rise for approximately 1 hour, or until it has visibly doubled in volume. This extended rise is key to developing both flavor and texture in your bread.
-
Form the Loaves
Once the dough has risen sufficiently, gently “punch it down” to release the accumulated air. Turn the dough out onto a lightly floured surface and divide it into two equal portions. Shape each portion into a compact loaf. You can either free-form them directly onto a baking sheet lined with parchment paper for a rustic look, or place them into greased standard loaf pans for a more traditional shape. Using loaf pans may require a slightly longer baking time.
-
Second Rise (Proofing)
Cover the shaped loaves again and let them rise for another 20 minutes. This second, shorter rise is known as proofing, and it gives the bread its final lift, contributing to a light and airy crumb structure in the finished product.
-
Bake to Golden Perfection
While the loaves are proofing, preheat your oven to 350°F (175°C). In a small bowl, whisk together the large egg and 1 tablespoon of water to create an egg wash. Gently brush this mixture over the top of each loaf; this will give your bread a beautiful golden, shiny crust. Sprinkle the additional 2 tablespoons of oats evenly over the egg-washed loaves for extra texture and visual appeal. Bake for 35-40 minutes, or until the crust is deeply golden brown and the internal temperature reaches between 200-210°F (93-99°C). A traditional test is to tap the bottom of the loaf; if it sounds hollow, it’s typically done. Transfer the baked loaves to a wire rack to cool completely before slicing and serving.
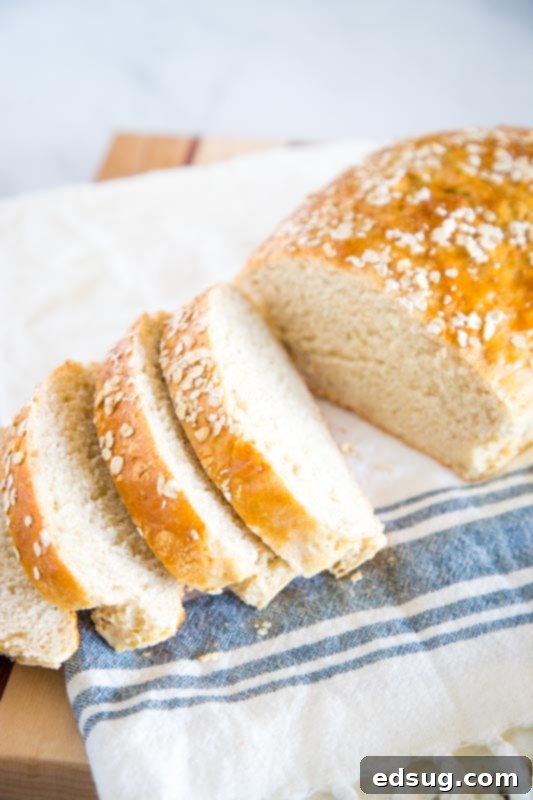
If you’re a fan of the classic Subway honey oat bread, you’ll find this homemade version incredibly satisfying and remarkably similar in flavor. While the traditional recipe yields a full loaf, you could easily form the dough into smaller sub buns if you prefer. You’ll achieve the same delightful combination of slightly sweet, dense yet soft, and wonderfully chewy bread. The fresh aroma and wholesome ingredients truly elevate it. It’s perfect toasted with jam for breakfast, as the foundation for your favorite sandwich, or simply enjoyed warm with a comforting bowl of soup. This versatile bread is sure to become a staple in your home.
Frequently Asked Questions about No-Knead Honey Oat Bread
Have questions about making your perfect no-knead honey oat bread? Here are some common queries and their answers to help you along the way:
- Can I use different types of oats? Quick-cooking oats are recommended for this recipe as they integrate well into the dough without making it too dense or coarse. Rolled oats (old-fashioned) can be used, but they might result in a slightly chewier texture and a more rustic crumb. Steel-cut oats are generally too firm and require longer cooking, making them unsuitable for this bread recipe.
- What if my yeast doesn’t foam? If your yeast doesn’t become frothy and bubbly after 10 minutes, it likely means your water wasn’t the right temperature (either too hot, killing the yeast, or too cold, preventing activation) or your yeast is old and inactive. Discard the mixture and start again with fresh yeast and properly warmed water. Active yeast is absolutely crucial for a successful rise.
- How do I know when the bread is done? Besides the visual cues of a beautiful golden brown crust, and the traditional hollow sound when you tap the bottom of the loaf, a reliable method is to check the internal temperature with a digital thermometer. For a perfectly baked loaf, the interior should read between 200°F and 210°F (93-99°C).
- Can I make this recipe vegan? To make this recipe vegan, you would need to replace the honey with another liquid sweetener like maple syrup or agave nectar. Additionally, you would omit the egg wash; you could brush the loaves with a little plant-based milk or water for a slight sheen, or simply leave them unbrushed. Ensure your oil is plant-based, which canola oil already is.
- Why is my bread dense? Several factors can lead to a dense or heavy loaf:
- Inactive yeast: If your yeast wasn’t properly activated or was old, it won’t produce enough gas to make the bread light and airy.
- Too much flour: Accidentally adding too much flour can make the dough stiff and heavy, hindering its ability to rise and creating a dense texture. Always measure flour accurately.
- Insufficient rise time: If the dough doesn’t get enough time for its first and second rises, it won’t develop an airy structure. Ensure your rising environment is warm and free of drafts.
- Underbaking: Bread that isn’t fully baked through can also appear dense and gummy. Always check for the internal temperature as a reliable indicator of doneness.
By paying attention to these details, you can ensure a light, airy, and delicious loaf every time.
More Irresistible Bread Recipes to Explore
If you’ve discovered the joy and satisfaction of baking this no-knead honey oat bread, you might be eager to explore more homemade bread creations. From savory garlic knots to rich dinner rolls, there’s a wonderful world of delicious bread waiting to be baked. Here are some more of our favorites from our collection of bread recipes:
- Olive Garden Breadsticks
- Parmesan Garlic Knots
- Honey Butter Dinner Rolls
- Italian Cheese Pull Apart Bread
- Rosemary Focaccia
- Classic Oatmeal Bread

Honey Oat Bread
Erin Sellin
5 minutes
45 minutes
1 hour 30 minutes
2 hours 20 minutes
20
Rate Recipe
Print Recipe
Ingredients
- 1 ¾ cup warm water
- 1 Tablespoon Active Dry Yeast
- ¾ cups quick-cooking oats
- 1/3 cup honey
- 3 Tablespoons Canola Oil
- 2 ½ teaspoons salt
- 5 cups about all purpose flour
- 1 large egg, beaten
- 1 Tablespoons water
- 2 Tablespoons additional oats
Instructions
-
Sprinkle the yeast over the warm water, and let set for 10 minutes until frothy.
-
In a large bowl mix together the oats, honey, oil and salt, and the water-yeast mixture. Stir in enough of the flour to form a soft dough (I started with 4 ½ cups and went from there).
-
Coat a large bowl with non-stick spray. Transfer dough to the bowl and turn it over to coat. Cover with plastic wrap and then a kitchen towel. Let rise for about 1 hour, or until doubled in volume.
-
Punch the dough down, and shape into 2 loaves. I just free formed 2 loaves on a baking sheet. But you could use loaf pans if you wanted. Cover and let rise for 20 minutes.
-
Beat together egg and water. Brush over the loaves and sprinkle with the additional oats.
-
Bake at 350 for 35-40 minutes. When you knock on the bottom of the bread and it sounds hollow, it is done.
Notes
Nutrition
Calories: 180kcal |
Carbohydrates: 33g |
Protein: 5g |
Fat: 3g |
Polyunsaturated Fat: 3g |
Cholesterol: 9mg |
Sodium: 296mg |
Fiber: 2g |
Sugar: 5g
Nutrition information is automatically calculated, so should only be used as an approximation.
Additional Info
Erin Sellin
5 minutes
45 minutes
1 hour 30 minutes
2 hours 20 minutes
Bread Recipes
American
20
180
Like this recipe? Leave a comment below!
Join Our Baking Community!
I’ve created a fun group on Facebook, and I would love for you to join us! It’s a vibrant place where you can share YOUR favorite recipes, ask questions, and stay updated on what’s new at Dinners, Dishes and Desserts, ensuring you never miss a new recipe! If you’d like to check it out, you can request to join HERE.
Be sure to follow me on Instagram and tag #dinnersdishes so I can see all the wonderful DINNERS, DISHES, AND DESSERTS recipes YOU make!
Connect with Dinners, Dishes, and Desserts!
Be sure to follow me on my social media, so you never miss a post!
Facebook | Twitter | Pinterest | Instagram
