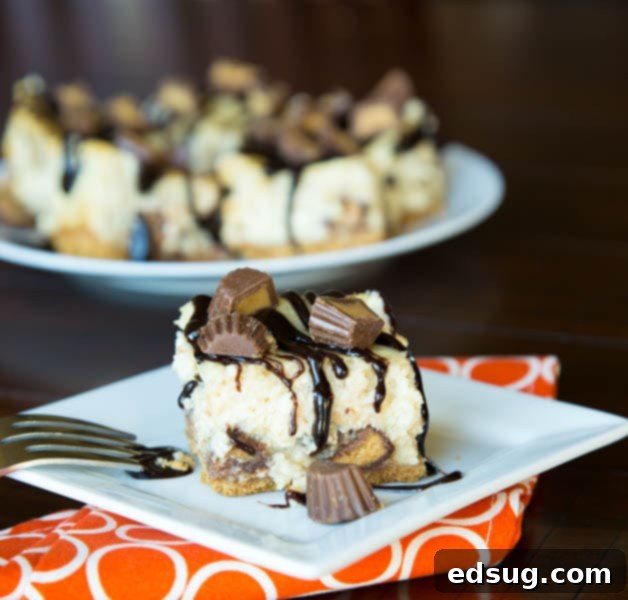
Guilt-Free Indulgence: The Ultimate Skinny Peanut Butter Cup Cheesecake Recipe
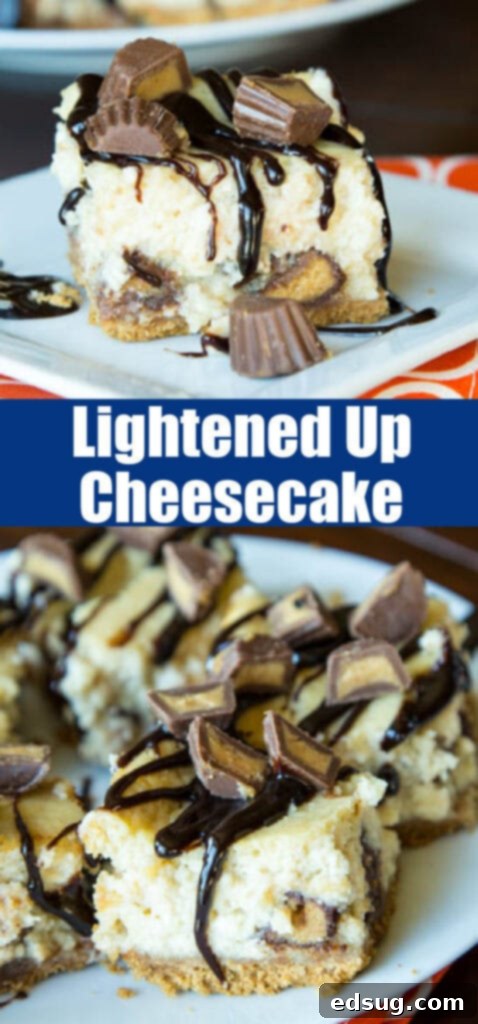
Craving the rich, creamy decadence of a classic cheesecake but looking for a lighter, more health-conscious option? Look no further! This incredible Skinny Peanut Butter Cup Cheesecake delivers all the satisfying richness you desire, without the heavy calorie count. We’ve ingeniously crafted a recipe that maintains a divine creamy texture and irresistible flavor, all while drastically reducing fat and calories. The secret? Smart ingredient swaps and a touch of culinary magic. Plus, with the calories saved, we can generously fold in those beloved peanut butter cups, adding an extra layer of chocolatey, peanut buttery bliss that makes every bite truly special. Forget dense, heavy New York-style cheesecakes; this version is delightfully lighter yet still exquisitely creamy and utterly delicious. It’s the perfect dessert for satisfying your sweet tooth without any guilt.
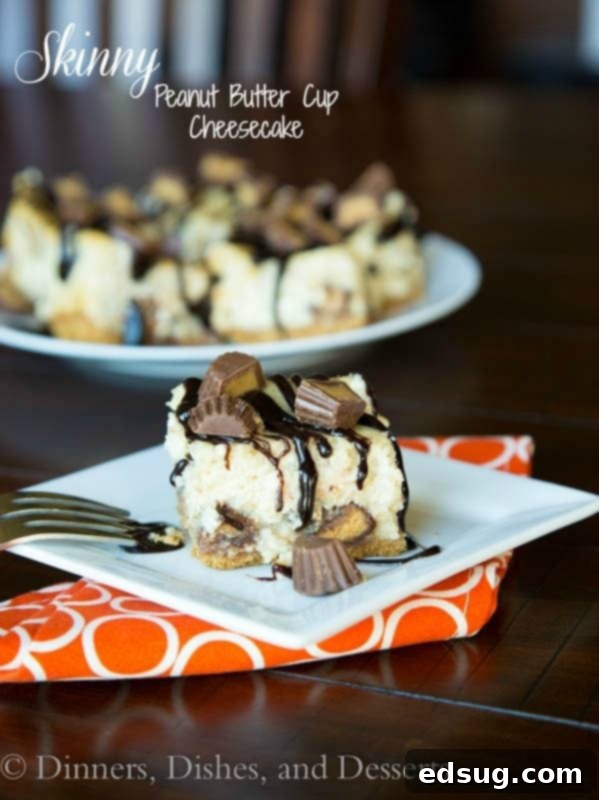
This recipe proves that “skinny” doesn’t mean sacrificing flavor. It’s about making smart choices that enhance the natural deliciousness of ingredients. If you’re looking for a no-bake cheesecake recipe to keep your kitchen cool during warmer months, you might also enjoy a refreshing No-Bake Lemon Cheesecake, but for that peanut butter craving, this baked marvel is simply unbeatable.
Why You’ll Adore This Skinny Peanut Butter Cup Cheesecake
Beyond its delicious taste, this Skinny Peanut Butter Cup Cheesecake offers a multitude of benefits that make it an instant favorite:
- Significantly Lower in Calories and Fat: By intelligently substituting traditional high-fat dairy products with their low-fat counterparts and reducing the butter in the crust, we’ve managed to cut down the calorie and fat content dramatically. This means you can indulge in a generous slice of cheesecake with far less guilt, making it perfect for those watching their intake without wanting to miss out on dessert.
- Effortlessly Easy to Prepare: You don’t need to be a seasoned baker to master this recipe. The cheesecake batter comes together beautifully with the help of a food processor, simplifying the mixing process and ensuring a perfectly smooth and uniform filling every time. Minimal fuss, maximum flavor!
- Bursting with Peanut Butter Cup Delight: We believe that saving calories means you can afford to add extra joy! Generous chunks of real peanut butter cups are folded into the batter, offering bursts of classic peanut butter and chocolate flavor, delightful texture, and a comforting touch of nostalgia. Each bite is an exciting blend of creamy cheesecake and candy crunch.
- Uncompromising on Flavor and Texture: The term “skinny” often conjures images of bland or rubbery desserts. This cheesecake shatters that stereotype! It’s incredibly creamy, rich, and full of the sweet, tangy flavors you expect from a premium cheesecake. The texture is lighter than a dense New York-style cheesecake, yet perfectly satisfying and luscious.
- Excellent for Make-Ahead and Freezing: This dessert is a fantastic option for entertaining or meal prepping. It keeps wonderfully in the refrigerator for up to a week, allowing you to prepare it in advance. For longer storage, it freezes beautifully for several months, ensuring you always have a delicious treat on hand whenever a craving strikes.
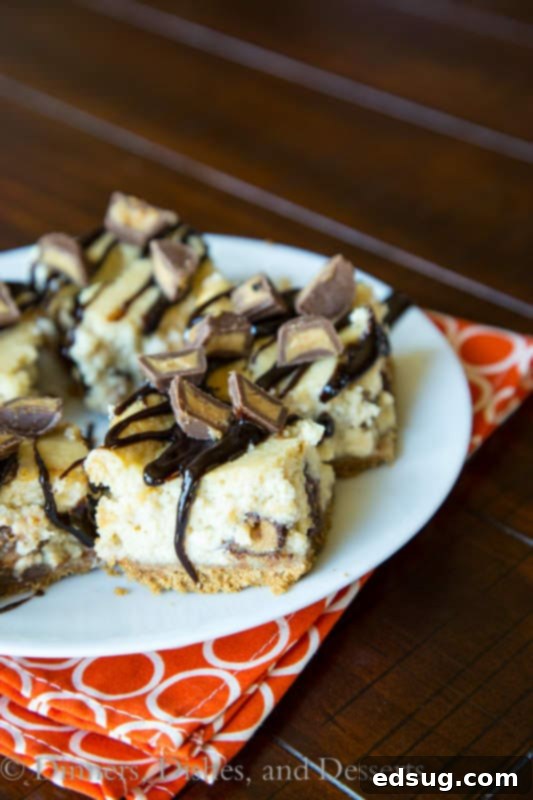
Essential Ingredients for Your Skinny Cheesecake
To create this magnificent dessert, you’ll need a selection of simple yet effective ingredients. Remember to scroll to the bottom of the post for the FULL PRINTABLE recipe card with precise measurements.
- Graham Cracker Crumbs: These form the foundation of our cheesecake, providing a crisp, subtly sweet, and wonderfully delicious crust. You can buy pre-made crumbs or crush whole graham crackers yourself for optimal freshness.
- Fat-Free Cottage Cheese: This is one of our key “skinny” ingredients. When blended thoroughly, it replaces a significant portion of the cream cheese, dramatically lightening the filling while still contributing to a creamy texture and adding protein. Don’t worry, once processed, you won’t detect any curds!
- Light Cream Cheese: While we lighten the recipe, we don’t eliminate the star of any cheesecake. Light cream cheese provides that signature tangy richness and creamy mouthfeel, but with fewer calories and less fat than its full-fat counterpart. Ensure it’s softened to room temperature for the smoothest batter.
- Fat-Free Sour Cream: Essential for adding a delightful tang that balances the sweetness of the cheesecake. It also contributes to the filling’s smooth, moist consistency. As an excellent alternative, plain, fat-free Greek yogurt can be used, offering a similar tang and thickness.
- Peanut Butter Cups: The star mix-in! These add incredible flavor, a contrasting texture, and visual appeal. Chopped into generous pieces, they ensure every slice gets a delicious bite of peanut butter and chocolate.
- Vanilla Extract: A fragrant and essential flavor enhancer. Pure vanilla extract elevates all the other ingredients, adding a perfect touch of sweet aroma and warmth to the cheesecake filling.
- Large Eggs: Whole eggs are crucial for binding the ingredients together, adding structure, richness, and contributing to the overall volume of the cheesecake. Use large eggs for consistency in the recipe.
- Large Egg Whites: Incorporating egg whites allows us to further cut down on calories and fat while also helping to create a lighter, fluffier texture for the cheesecake. They are whipped slightly before being added, contributing to the airy feel.
- Light Brown Sugar: This provides a deeper, more caramel-like sweetness compared to granulated sugar, complementing the peanut butter flavors beautifully. It also helps keep the cheesecake moist.
- Granulated Sugar: For classic sweetness, granulated sugar works alongside brown sugar to achieve the perfect balance.
- All-Purpose Flour: A small amount of flour acts as a stabilizer in the filling, helping to prevent cracks and ensuring the cheesecake sets properly, contributing to its smooth texture.
- Chocolate Sauce (Optional): While optional, a drizzle of chocolate sauce just before serving elevates both the appearance and the flavor profile, adding an extra layer of chocolatey goodness that pairs perfectly with peanut butter.
Crafting Your Skinny Peanut Butter Cup Cheesecake: Step-by-Step
Follow these easy instructions to create your delicious, guilt-free cheesecake. Precision is key for the best results!
- Prepare the Crust: Begin by preheating your oven to 300°F (150°C). Prepare a 9-inch baking pan by lining it with foil and spraying it generously with nonstick cooking spray. Alternatively, and highly recommended for ease of removal, use a springform pan. Firmly press the graham cracker crumbs evenly into the bottom of the prepared pan to form a compact crust.
- Blend the Creamy Filling: In the bowl of a food processor, combine the fat-free cottage cheese and light cream cheese. Process these ingredients until the mixture is completely smooth and free of any lumps, which typically takes about 2 minutes. This step is crucial for achieving the signature silky texture of cheesecake.
- Combine Remaining Filling Ingredients: To the smooth cheese mixture in the food processor, add the light brown sugar, granulated sugar, fat-free sour cream (or Greek yogurt), all-purpose flour, vanilla extract, two whole large eggs, and two large egg whites. Pulse the food processor just until all the ingredients are thoroughly blended. Be careful not to overmix at this stage, as overmixing can incorporate too much air, leading to cracks in the finished cheesecake.
- Incorporate the Peanut Butter Cups: Gently fold in ¾ cup of your chopped peanut butter cups into the cheesecake batter. Use a spatula to ensure they are evenly distributed without crushing them too much, allowing for delightful pockets of candy in every slice.
- Bake to Perfection: Pour the cheesecake batter over the prepared graham cracker crust in the pan. Transfer the pan to the preheated oven and bake for 1 hour, or until the edges are set and the center of the cheesecake has only a slight jiggle when gently shaken. This slight jiggle indicates it’s perfectly cooked and will continue to set as it cools.
- Cool and Chill: Once baking is complete, turn off the oven but leave the cheesecake inside with the oven door closed for an additional hour. This slow cooling process helps prevent cracks. After an hour, remove the cheesecake from the oven and let it cool completely on a wire rack at room temperature. Once cooled, cover the cheesecake with plastic wrap and refrigerate for at least 8 hours, or ideally overnight. Chilling is essential for the cheesecake to fully set and for the flavors to meld beautifully.
- Serve and Garnish: To serve, carefully remove the cheesecake from the pan (especially easy with a springform pan). Garnish each slice with the remaining chopped peanut butter cups and a decadent drizzle of chocolate sauce, if desired, for an extra touch of indulgence.
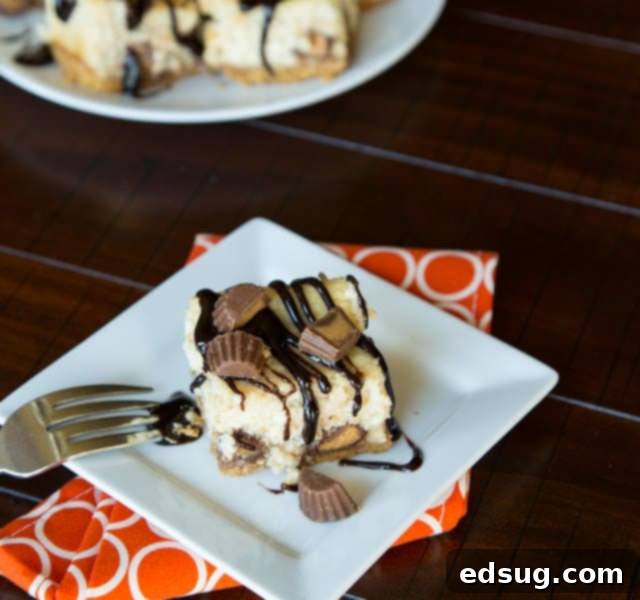
Expert Recipe Tips & Creative Variations
Elevate your cheesecake game with these helpful tips and exciting variations:
- Utilize a Springform Pan: While a regular baking pan can work, a springform pan is highly recommended. Its removable sides make it significantly easier to extract the cooled and set cheesecake without damaging its pristine appearance. If using a regular pan, make sure the foil lining extends above the edges to create “handles” for lifting.
- Experiment with Candies: Peanut butter cups are fantastic, but don’t limit yourself! Feel free to swap them out for your other favorite chopped candies. Excellent options include Rolos for a caramel kick, chopped Snickers bars for nougat and nuts, or chopped Butterfingers for an extra crunch. Mini chocolate chips or white chocolate chunks also make wonderful additions.
- Ensure Room Temperature Ingredients: For the smoothest, most uniform cheesecake batter, it’s crucial that your cream cheese, cottage cheese, sour cream, and eggs are all at room temperature. This allows them to blend together seamlessly without lumps, resulting in a perfectly creamy filling.
- Avoid Overmixing: Once you add the eggs to the batter, mix only until just combined. Overmixing can incorporate too much air, which can cause the cheesecake to puff up too much during baking and then collapse, leading to cracks.
- Consider a Water Bath: For an ultra-creamy, crack-free cheesecake, you can use a water bath. Wrap the outside of your springform pan tightly with several layers of heavy-duty foil. Place the wrapped pan in a larger roasting pan, then carefully pour hot water into the roasting pan until it comes halfway up the sides of the cheesecake pan. The steam from the water bath creates a moist environment, ensuring a slow, even bake.
- Crust Customization: While graham crackers are classic, consider other crushed cookies for the crust. Oreos, vanilla wafers, or even shortbread cookies can create unique flavor profiles. You can also mix in a tablespoon of cocoa powder to the graham cracker crumbs for a chocolate crust.
Seamless Cheesecake Removal from the Pan
Removing a cheesecake from its pan can be daunting, but with a few simple tricks, you can achieve a flawless presentation. Once your chilled cheesecake is completely firm, it’s time to release it. If using a springform pan, carefully unlatch and lift the sides away. Before doing so, run a small offset spatula or a thin paring knife around the inner edge of the pan. This gentle action helps separate the cheesecake from the metal, preventing any sticking or tearing. If you used a foil-lined pan, gently lift the cheesecake using the foil “handles.” For the bottom crust, use a thin, sturdy spatula or knife to gently loosen it from the pan’s base. To transfer the entire cheesecake to a serving platter, recruit the help of a friend. Use a couple of wide, sturdy spatulas, one on each side, to carefully lift and slide the cheesecake onto your desired platter. Patience and a steady hand are key!
Perfectly Baked: Knowing When Your Cheesecake Is Ready
Judging the doneness of a cheesecake is crucial for its texture. The best indicator is a gentle jiggle. Before you remove the cheesecake from the oven, give the pan a slight shake. The edges should appear set and firm, but the very center (about a 2-3 inch circle) should still have a subtle, soft jiggle. It should definitely not look liquidy or wet. This slight jiggle is perfectly normal and desired, as the cheesecake will continue to cook and firm up from the residual heat (carryover cooking) during its cooling period in the oven and later during refrigeration. Overbaking is the most common cause of cracks, so trust the jiggle!
The Art of Slicing Cheesecake
For beautifully clean and professional-looking slices of cheesecake, temperature and technique are everything. Always ensure your cheesecake is thoroughly chilled before slicing; a cold cheesecake holds its shape much better. The secret to a perfect cut lies in a warm, clean knife. Before making your first cut, dip a sharp, thin-bladed knife into a tall glass of very warm water. Wipe the knife completely dry with a clean kitchen towel. The warm, dry blade will glide through the cheesecake effortlessly. Make your cut, then repeat the process: dip the knife in warm water, wipe it clean and dry, and then make the next slice. Cleaning the knife between each cut prevents crumbs and filling from dragging, ensuring every piece is picture-perfect.
Delightful Serving Suggestions
While this Skinny Peanut Butter Cup Cheesecake is fantastic on its own, these pairings can elevate your dessert experience even further:
- Easy Hot Fudge Sauce: Need I say more? A warm, rich drizzle of homemade hot fudge sauce is the ultimate complement to the chocolate and peanut butter flavors, taking this already awesome cheesecake from delicious to extraordinary.
- Raspberry Sauce: If you’re a fan of the classic PB&J flavor combination, or simply wish to add a bright, fruity counterpoint to the rich dessert, serve your cheesecake with a vibrant raspberry sauce. The tartness of the raspberries cuts through the sweetness beautifully.
- Peanut Butter Magic Shell: For a truly indulgent treat, pair a slice of this cheesecake with a scoop of premium vanilla bean ice cream, then douse it in a homemade peanut butter magic shell that hardens on contact. It’s a peanut butter lover’s dream!
- Strawberry Hot Chocolate: Complement the creamy sweetness of the cheesecake with a whimsical and comforting drink. This delightful strawberry hot chocolate, combining white chocolate and strawberries, creates a creamy, subtly pink beverage that pairs wonderfully.
- Kahlua Hot Chocolate: For an adult twist, serve slices of cheesecake with a rich Kahlua hot chocolate. This grown-up take on a classic warm beverage is excellent for a cozy evening, especially after a day out in the cold.
Storing Your Delicious Leftover Skinny Cheesecake
Proper storage is essential to maintain the freshness and flavor of your cheesecake, ensuring you can enjoy it for days to come:
- Refrigerate: Once completely cooled, store any leftover cheesecake in an airtight container in the refrigerator. For optimal freshness and to prevent it from absorbing any odors from other foods, wrap the entire cheesecake or individual slices tightly in plastic wrap before placing them in the container. When stored correctly, it will remain fresh and delicious for up to 7 days.
- Freeze: This cheesecake is also freezer-friendly, making it perfect for preparing in advance or saving for future cravings. To freeze, wrap the whole cheesecake (or individual slices) tightly in several layers of plastic wrap, then follow with a layer of aluminum foil to prevent freezer burn. Store it in a shallow, airtight freezer-safe container. It will keep well in the freezer for up to 3 months. To thaw, simply transfer it to the refrigerator overnight.
More Must-Try Dessert Recipes
If you loved this cheesecake, you’re sure to enjoy these other fantastic dessert creations:
- Special K Bars – A classic no-bake treat that’s always a crowd-pleaser.
- Cherry Cobbler – Warm, fruity, and topped with a delightful biscuit crust.
- Brownie Batter Dip – A decadent and easy dip for all your favorite dippers.
- Chocolate Chip Blondies – Chewy, rich, and packed with chocolatey goodness.
- Cosmic Brownies – Bring back childhood memories with these fudgy, frosted brownies.
- Healthy Peanut Butter Cups – A lighter take on your favorite candy.
- Homemade Milky Way – Indulge in a homemade version of this classic candy bar.
Frequently Asked Questions (FAQs)
- Can I use full-fat dairy products instead? Yes, you can, but then the cheesecake will no longer be “skinny” or lower in calories and fat. The fat-free and light dairy products are key to achieving the healthier profile of this recipe.
- Can I make this cheesecake gluten-free? Absolutely! Simply substitute the graham cracker crumbs with gluten-free graham cracker crumbs or another gluten-free cookie crumb of your choice. Ensure all other ingredients are certified gluten-free if cross-contamination is a concern.
- Why did my cheesecake crack? Cheesecake cracks are often caused by overbaking or sudden changes in temperature. Overbaking can dry out the filling, causing it to shrink and crack. Rapid cooling (e.g., removing it from the oven too quickly) can also lead to cracks. Allowing it to cool slowly in the oven with the door closed helps prevent this.
- Can I use other nut butters or nut butter candies? While this recipe specifically celebrates peanut butter cups, you could experiment with other nut butter-based candies or swirl in some almond or cashew butter into the batter. Just be aware the flavor profile will change, and it won’t be a “peanut butter cup” cheesecake in the traditional sense.
- How long does the cheesecake really need to chill? A minimum of 8 hours is recommended for the cheesecake to fully set and for the flavors to develop and meld together beautifully. Ideally, chilling it overnight will yield the best results for both texture and taste. Don’t rush this step!
- Do I need to grease the foil in the pan? Yes, greasing the foil or the springform pan is important to prevent the crust and cheesecake from sticking, ensuring an easy and clean release.
Skinny Peanut Butter Cup Cheesecake
Erin Sellin
10
1
1
10
16
Rate Recipe
Print Recipe
Ingredients
- 2/3 cup graham cracker crumbs
- 2 cups fat free cottage cheese
- 1 8oz package light cream cheese
- 3/4 cup light brown sugar
- 1/2 cup granulated sugar
- 1/2 cup fat free sour cream (or plain, fat-free Greek yogurt)
- 1/4 cup all-purpose flour
- 2 teaspoon vanilla extract
- 2 whole large eggs
- 2 large egg whites
- 1 cup peanut butter cups, chopped
- Chocolate sauce, optional, for serving
Instructions
-
Preheat oven to 300º F (150°C). Line a 9-inch baking pan with foil and spray with nonstick spray. Alternatively, use a springform pan for easier removal.
-
Press the graham cracker crumbs firmly into the bottom of the prepared pan to form an even crust.
-
Add fat-free cottage cheese and light cream cheese to a food processor. Process until the mixture is completely smooth, about 2 minutes, scraping down the sides as needed.
-
Add light brown sugar, granulated sugar, fat-free sour cream, all-purpose flour, vanilla extract, two whole eggs, and two egg whites to the food processor. Pulse just until all ingredients are blended, being careful not to overmix.
-
Gently fold in ¾ cup of the chopped peanut butter cups into the cheesecake batter using a spatula.
-
Pour the cheesecake batter evenly over the graham cracker crumb crust in the prepared pan.
-
Bake for 1 hour, or until the edges are set and the center has a slight jiggle. Turn off the oven, and allow the cheesecake to set inside the oven for 1 hour with the door closed. This gradual cooling prevents cracking. Remove from the oven and cool completely on a wire rack at room temperature.
-
Once fully cooled, cover the cheesecake with plastic wrap and chill in the refrigerator for at least 8 hours (preferably overnight) to allow it to firm up and flavors to develop.
-
To serve, carefully remove the cheesecake from the pan. Garnish with the remaining chopped peanut butter cups and a drizzle of chocolate sauce, if desired. Slice with a warm, clean knife for best results.
Notes
For best results, ensure all dairy and egg ingredients are at room temperature before blending.
The springform pan greatly simplifies the removal of the cheesecake, making for a cleaner presentation.
Nutrition
Serving:
1slice
|
Calories:
187kcal
|
Carbohydrates:
29g
|
Protein:
5g
|
Fat:
6g
|
Saturated Fat:
2g
|
Polyunsaturated Fat:
3g
|
Cholesterol:
27mg
|
Sodium:
169mg
|
Fiber:
1g
|
Sugar:
23g
Nutrition information is automatically calculated, so should only be used as an approximation.
I created a fun group on Facebook, and I would love for you to join us! It’s a place where you can share YOUR favorite recipes, ask questions, and see what’s new at Dinners, Dishes and Desserts (so that you never miss a new recipe)!
Be sure to follow me on Instagram and tag #dinnersdishes so I can see all the wonderful DINNERS, DISHES, AND DESSERTS recipes YOU make!
Be sure to follow me on my social media, so you never miss a post!
Facebook |
Twitter |
Pinterest |
Instagram
Conclusion
This Skinny Peanut Butter Cup Cheesecake is truly a game-changer for anyone who loves rich desserts but wants to make healthier choices. It proves that you don’t have to compromise on flavor, texture, or the joy of indulging. With its creamy filling, crunchy crust, and delightful bursts of peanut butter cups, this cheesecake is sure to become a cherished recipe in your kitchen. Whether you’re making it for a special occasion or simply to satisfy a craving, its ease of preparation and make-ahead potential make it a versatile and rewarding bake. Give this guilt-free indulgence a try, and prepare to be amazed!
