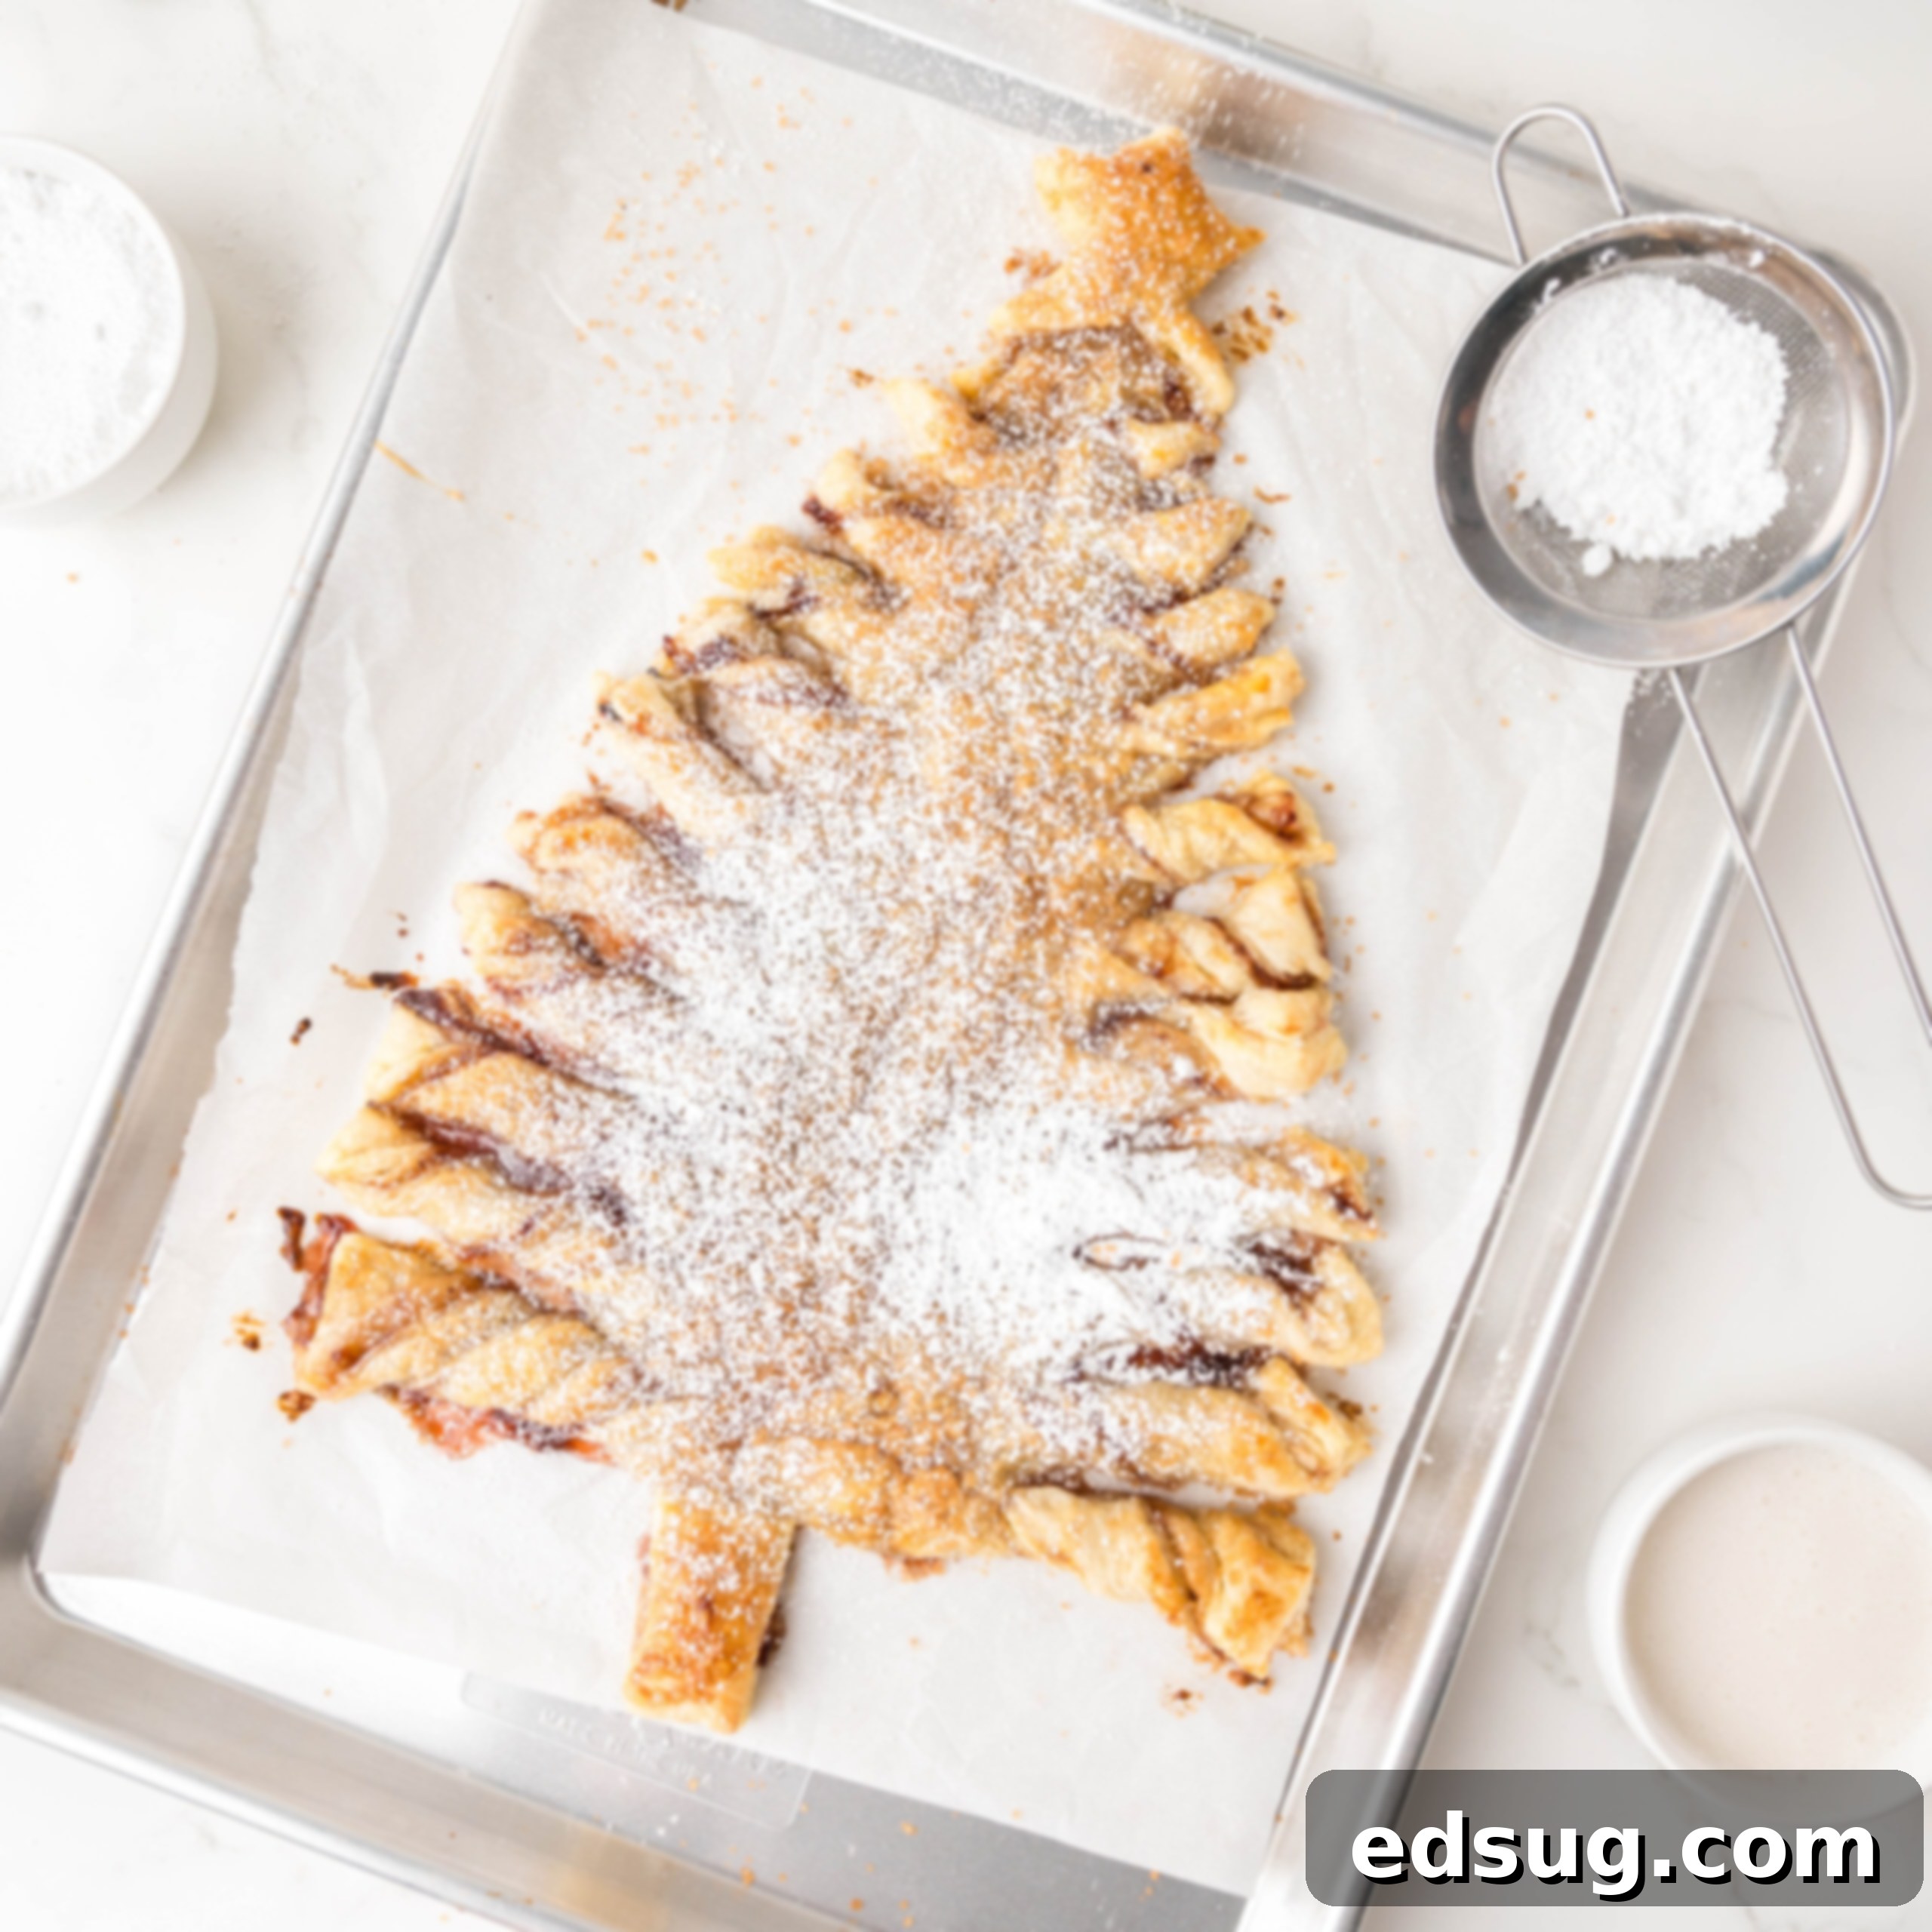
Easy & Delicious Puff Pastry Christmas Tree: Your Ultimate Guide to a Festive Holiday Treat
As the holiday season draws near, the air fills with anticipation, warmth, and the delightful aroma of freshly baked treats. Among the myriad of festive delights, our Puff Pastry Christmas Tree stands out as a truly charming and incredibly fun addition to any holiday table. This recipe isn’t just about creating a dessert; it’s about crafting a memorable centerpiece that’s as enjoyable to make as it is to eat. What makes this recipe truly special is its versatility—you can customize it in countless ways, ensuring it perfectly suits your family’s unique tastes and dietary preferences.
I’ve always been drawn to festive and adorable treats, but my patience often wears thin with recipes that demand intricate precision or extensive effort. If you, like me, prefer a more relaxed approach to baking – something I affectionately describe as “crafting like a 5-year-old” – then this recipe is for you. The beauty of the Puff Pastry Christmas Tree lies in its simplicity. If I can whip this up, absolutely anyone can!
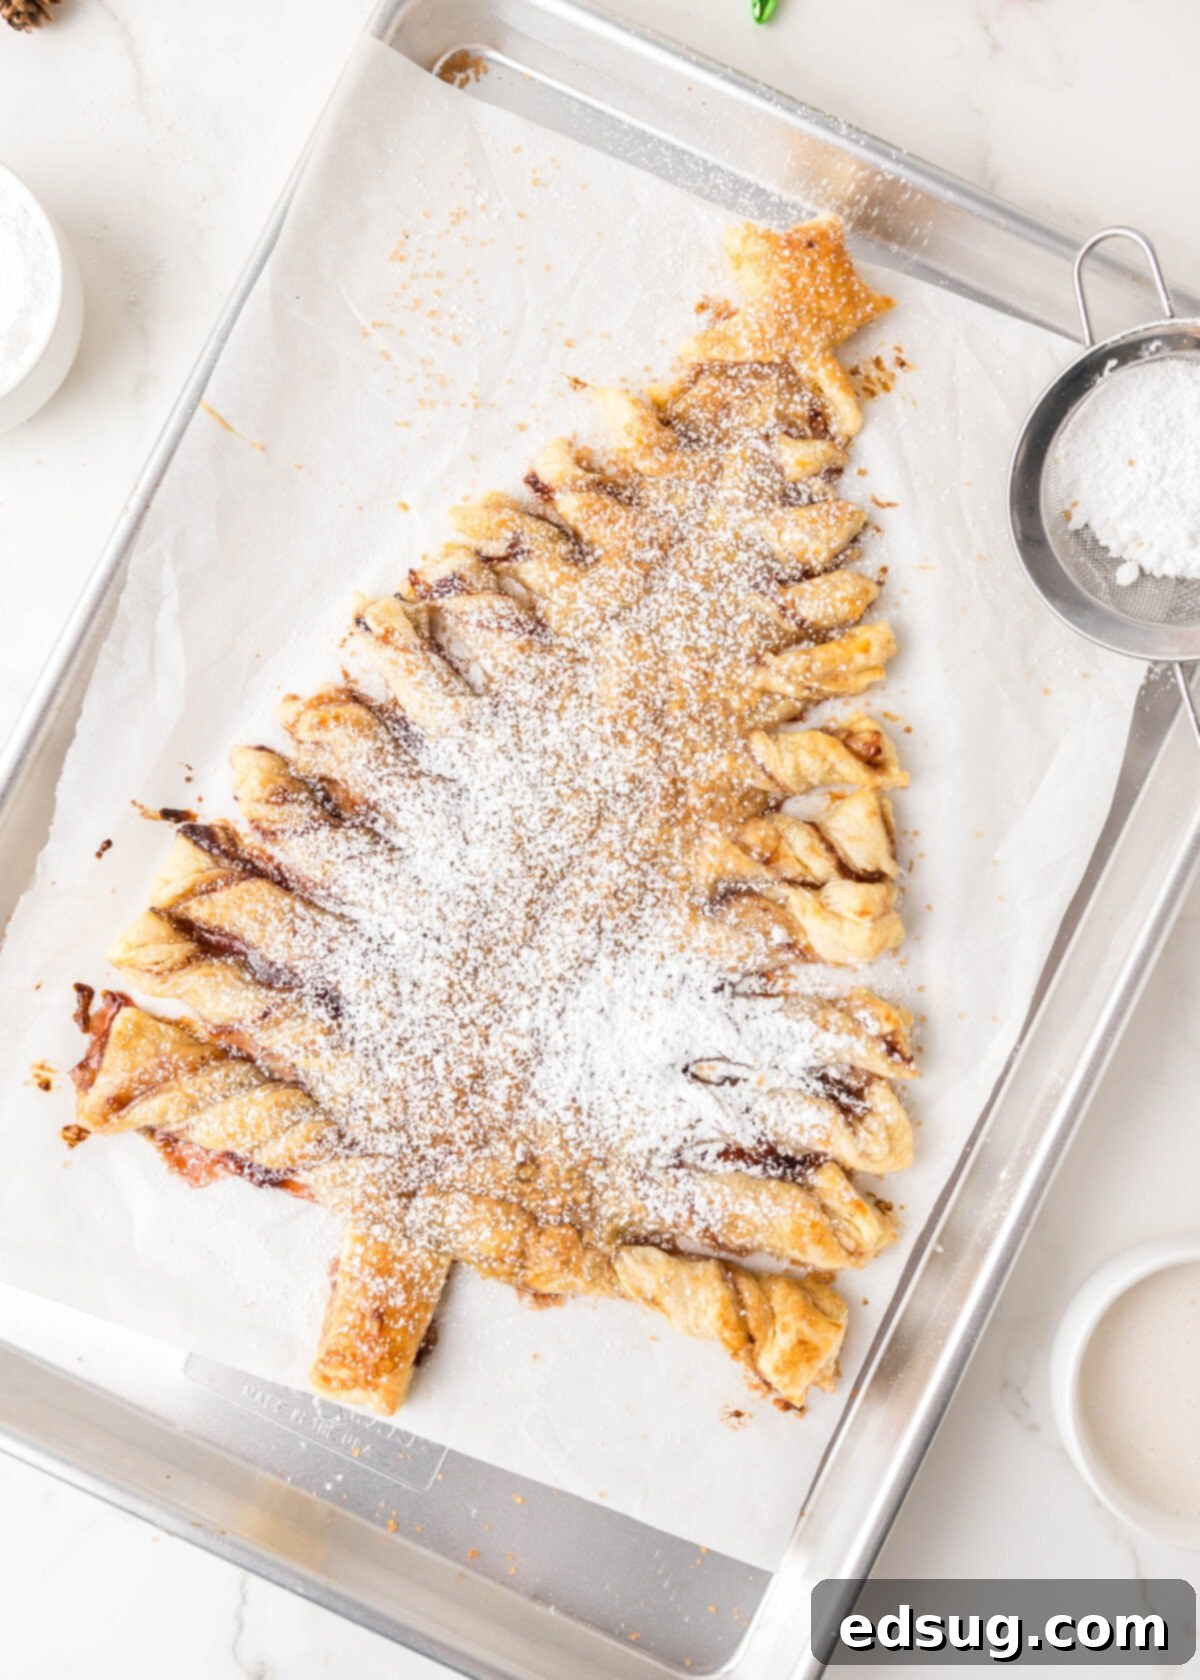
The magic ingredient here is, of course, puff pastry. It transforms what might seem like a complex holiday project into a super easy endeavor, all while delivering an exceptional flavor profile. That rich, buttery, and incredibly flaky texture of puff pastry is always a winner, especially when paired with a sweet filling. For this particular recipe, we’re showcasing a classic strawberry jam filling, but this is just the beginning. The possibilities for creative fillings are truly limitless, allowing you to personalize your tree every single time you bake it.
Imagine swapping the strawberry jam for a different fruit preserve, like raspberry or apricot. Or perhaps you’re in the mood for something decadent—think rich chocolate spread, luscious caramel, or a comforting cinnamon sugar mixture. But don’t feel confined to sweet options! This versatile pastry tree can easily be transformed into a savory delight. Consider a vibrant pesto spread for an Italian twist, a savory olive tapenade, or even a creamy cheese and herb filling. Seriously, the creative choices for your filling are truly endless, making each Puff Pastry Christmas Tree a unique culinary masterpiece.
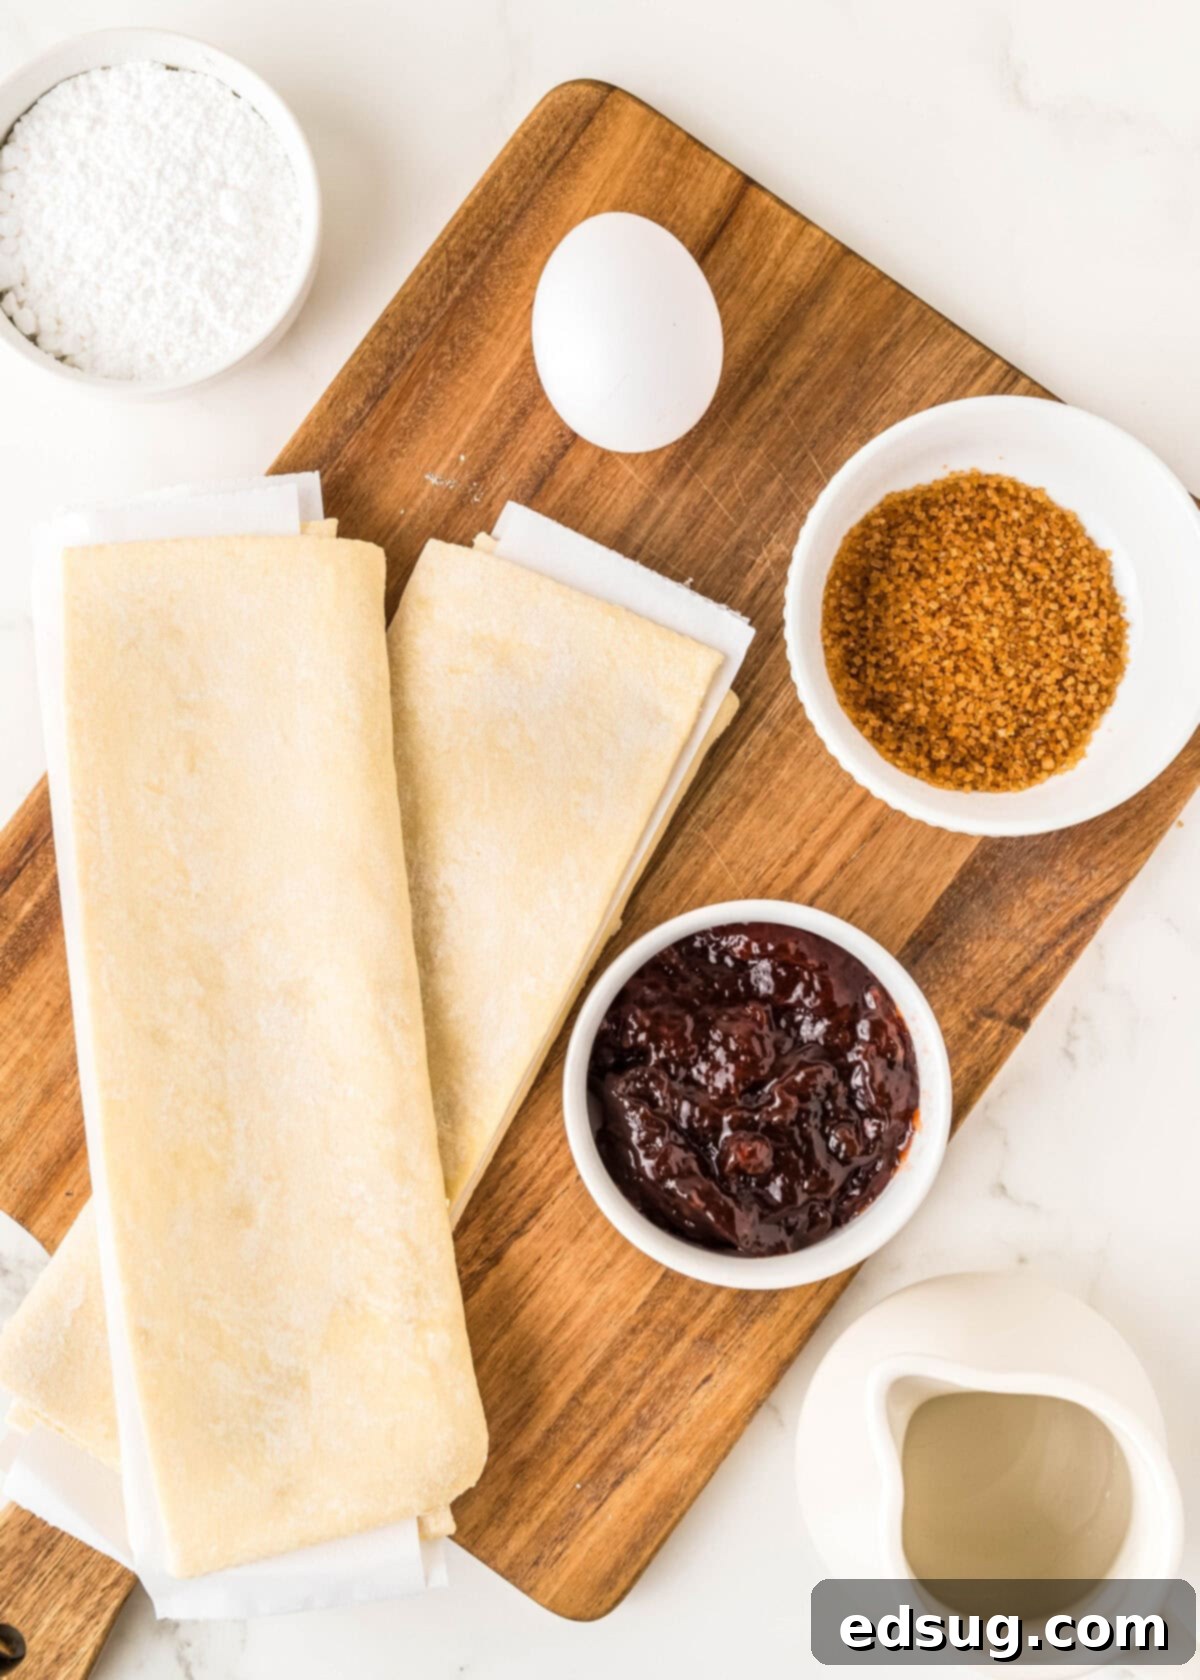
Essential Ingredients for Your Puff Pastry Christmas Tree
Before you embark on this delightful baking adventure, gather these simple ingredients. You’ll find the complete, printable recipe card at the very bottom of this post for your convenience.
- Puff Pastry: You’ll need two sheets, which typically come in one standard 17.3 oz box. Ensure it’s fully thawed before you begin.
- Strawberry Jam: Our recommended classic filling for a sweet and fruity center. Feel free to substitute with your favorite jam or spread.
- Large Egg: This is used for an egg wash, providing a beautiful golden-brown color and a slight sheen to your baked pastry.
- Water: Mixed with the egg to create the perfect egg wash consistency.
- Raw Sugar: Sprinkled on top before baking, it adds a lovely sparkle and a subtle crunch to the finished tree.
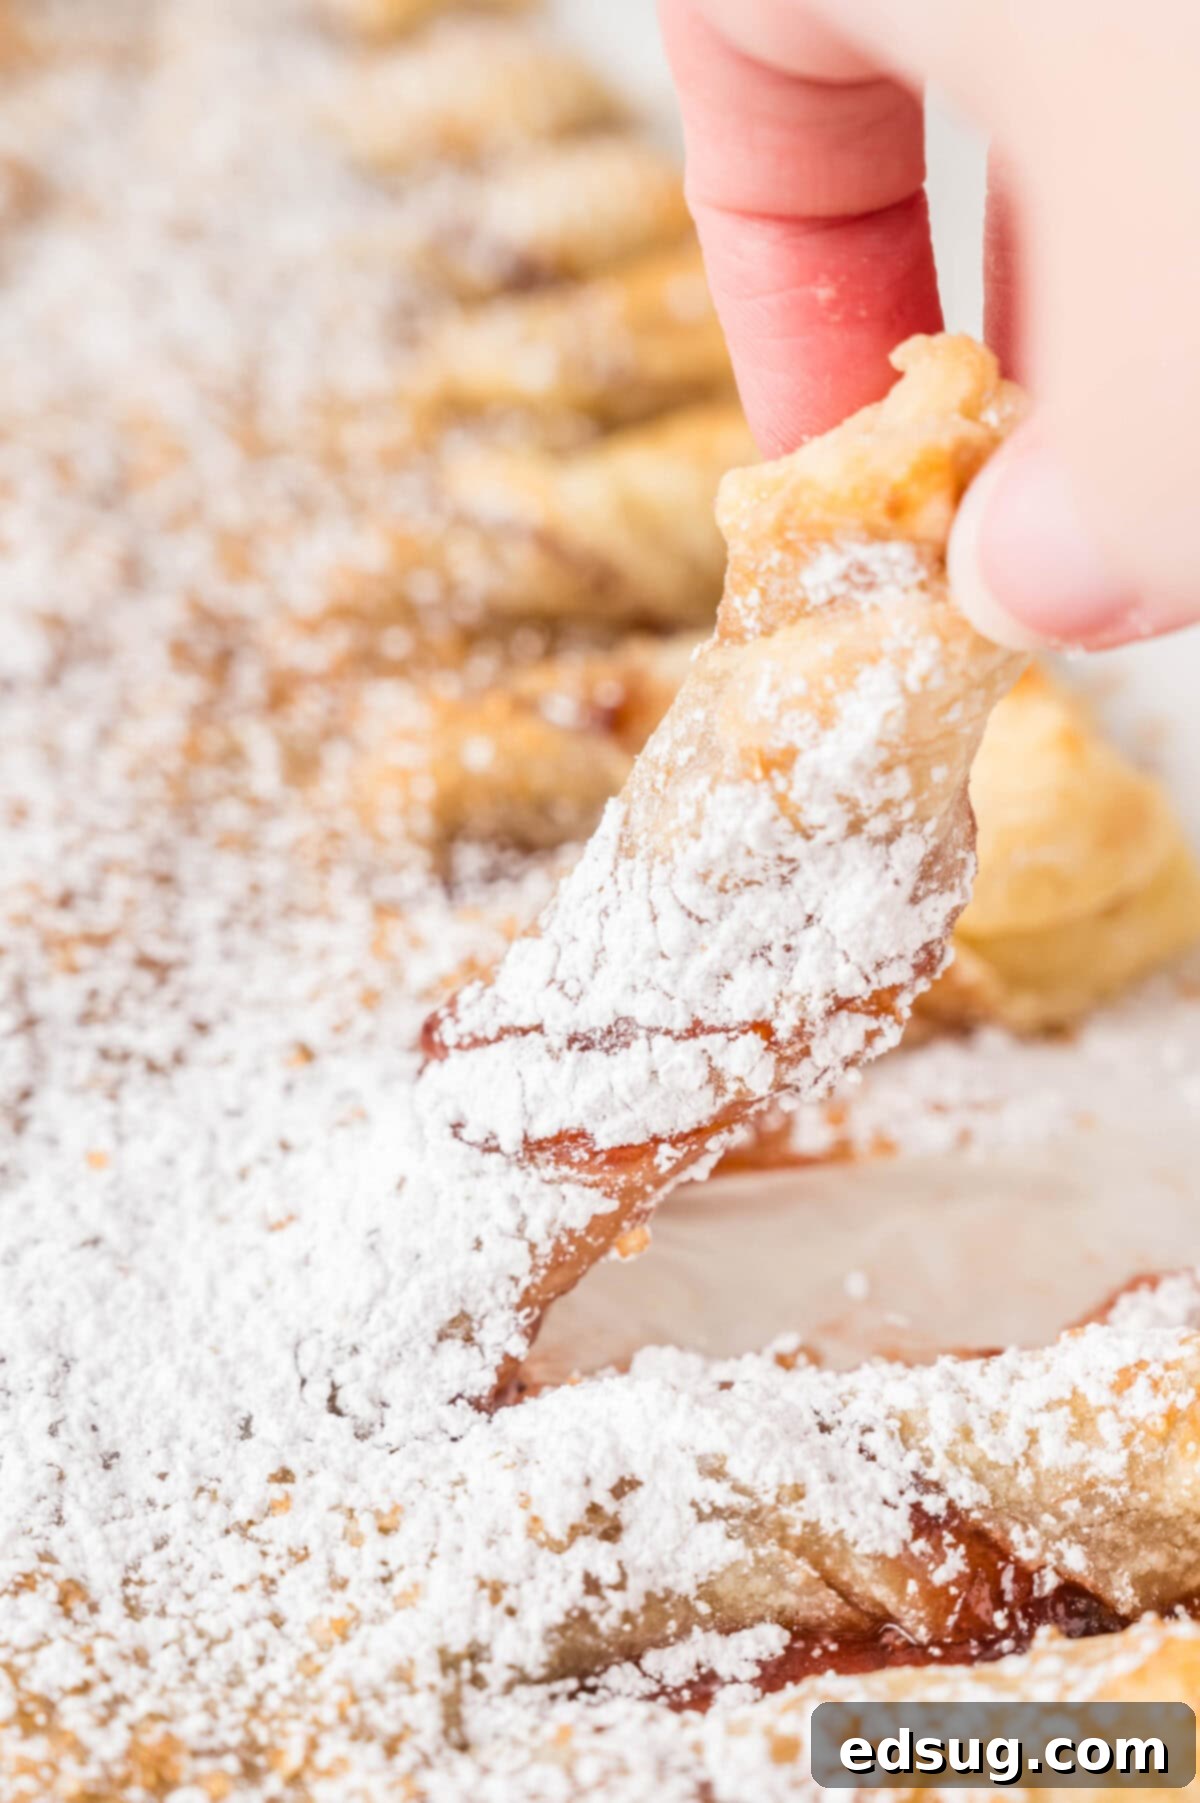
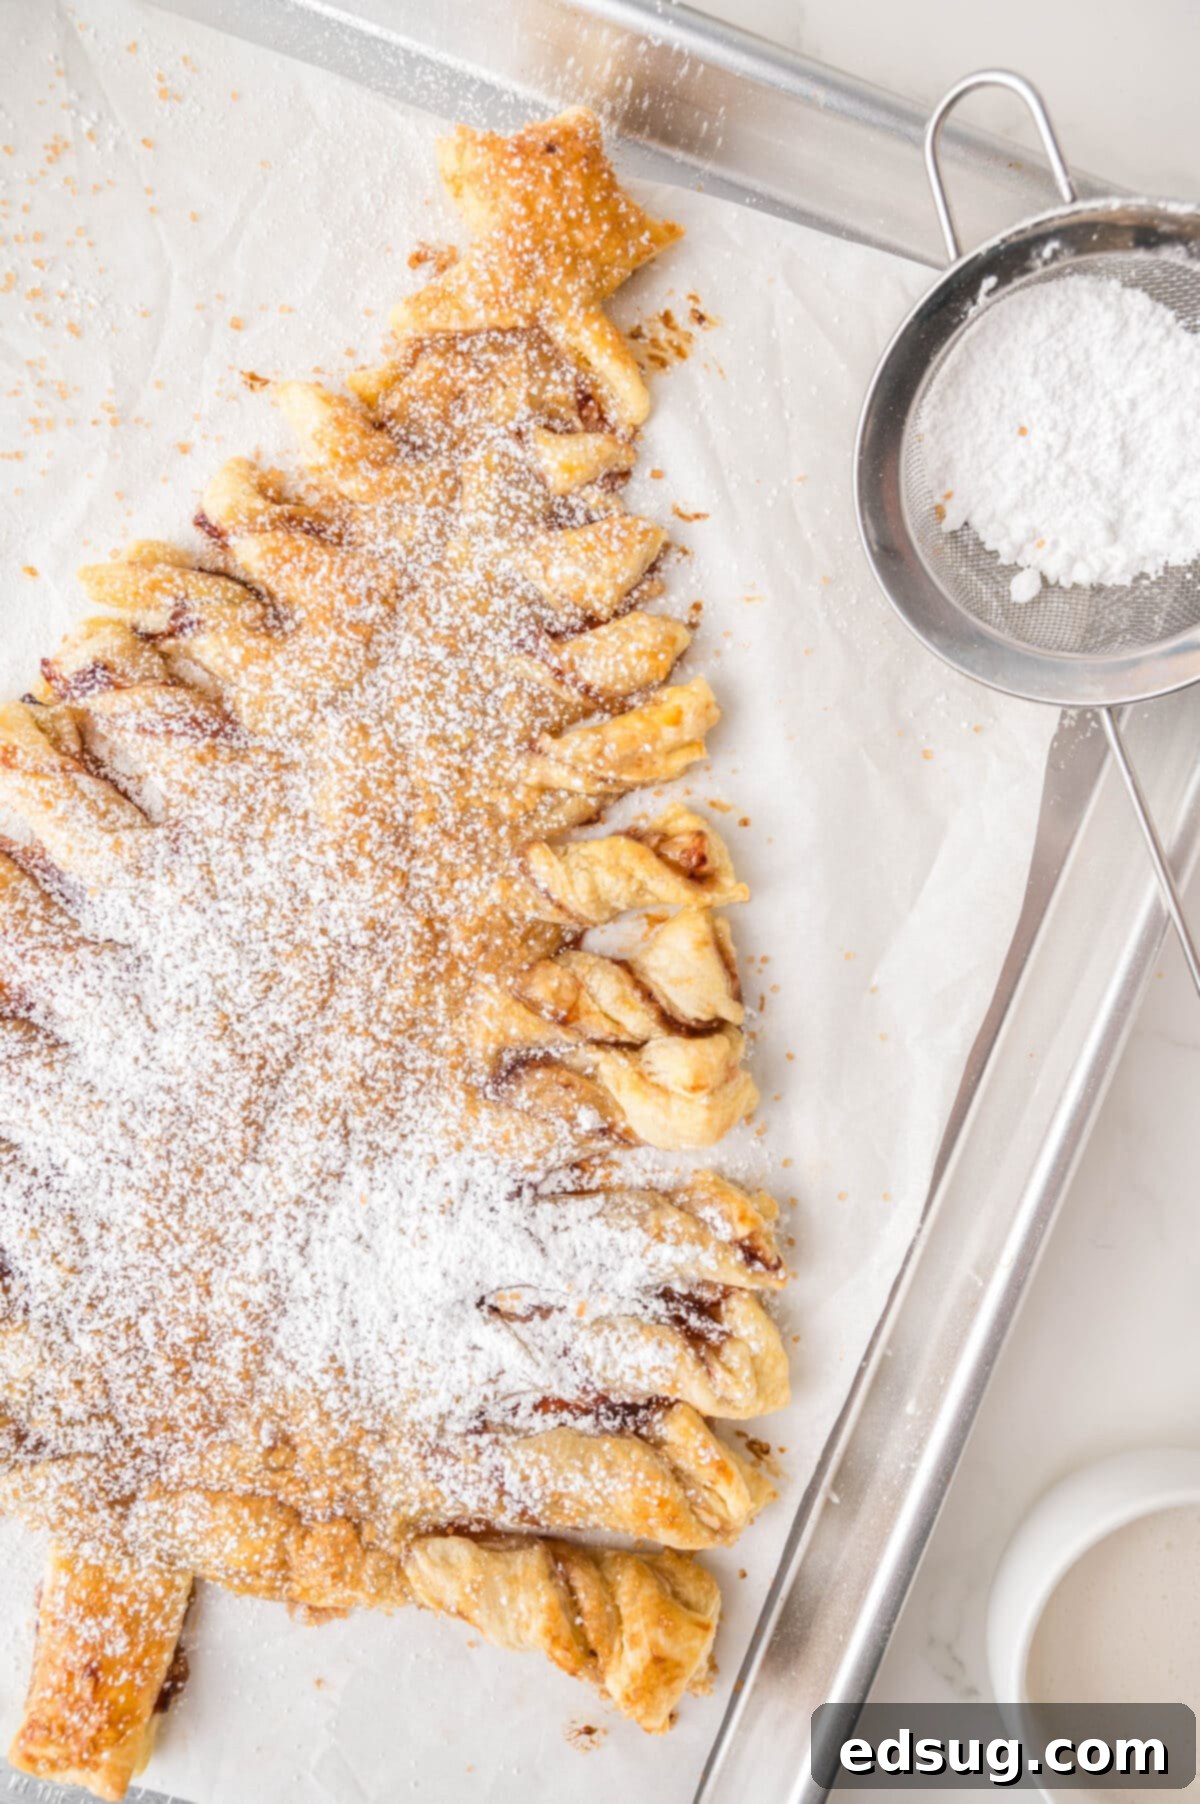
- Powdered Sugar: This is dusted on at the very end. Not only does it make your Christmas tree look extra pretty, mimicking fresh snow, but it also cleverly conceals any minor imperfections, making every tree look perfect!
Crafting Your Puff Pastry Christmas Tree: A Step-by-Step Guide
Creating this festive Puff Pastry Christmas Tree is surprisingly straightforward and incredibly rewarding. Follow these steps to bring your edible holiday masterpiece to life.
- Prepare the Pastry: First, allow your frozen puff pastry sheets to thaw completely at room temperature. This is crucial for easy handling and to prevent cracking. Once thawed, gently unfold each sheet and roll them out slightly into approximately 10×13 inch rectangles. Carefully place one of these rolled sheets onto a baking sheet lined with parchment paper. This parchment paper is key for preventing sticking and for easy cleanup.
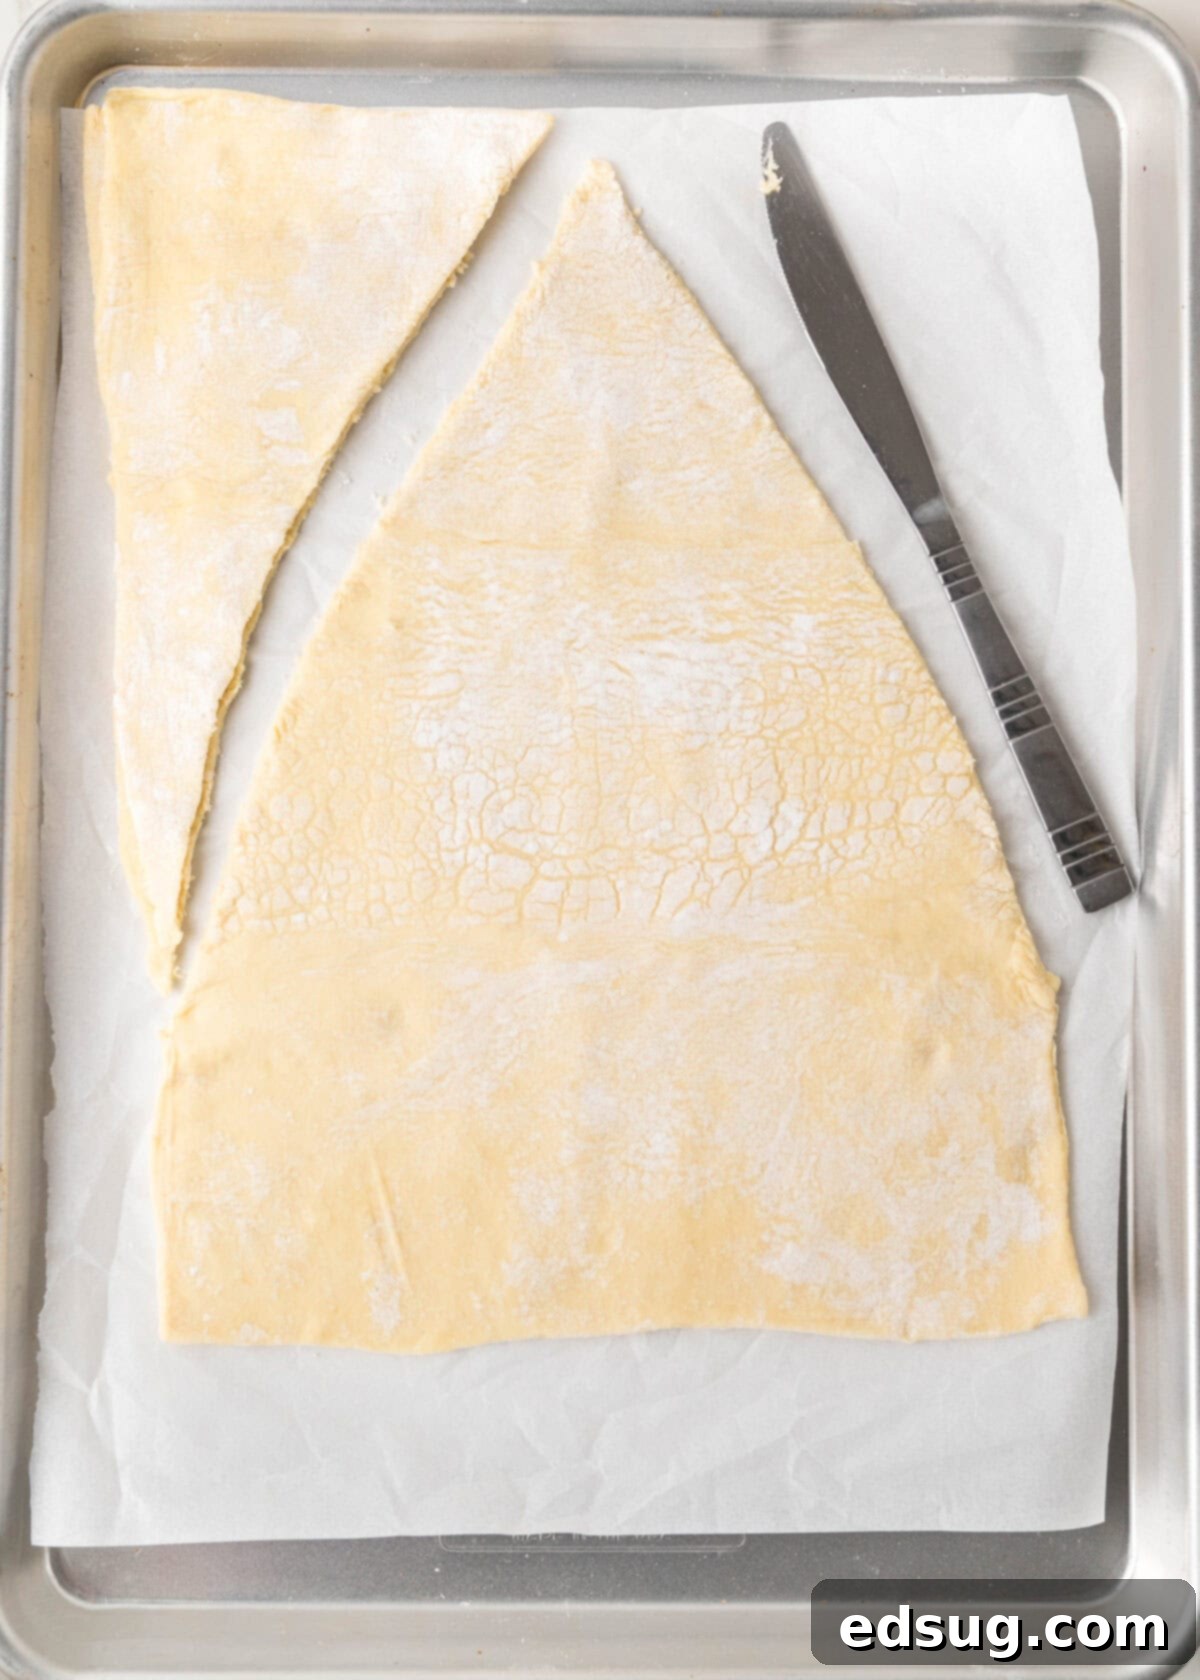
- Shape the Tree: Now, place the second rolled puff pastry sheet directly on top of the first one on your lined baking sheet. Using a sharp knife or even a pizza cutter (which works wonderfully for clean lines), cut the layered pastry into a large Christmas tree shape. Don’t discard the scraps! These are valuable. Use them to cut out a small rectangle for the tree trunk and a festive star for the very top of your tree. You can place these alongside your tree on the baking sheet to bake with it, or wait until assembly if you prefer.
- Create the Branches: Next, it’s time to define your tree’s branches. Starting from the bottom and working your way up, make horizontal cuts into the dough about 1 inch apart on both sides of the tree. The crucial part here is to leave a central strip of about 2 inches completely intact down the middle. This central strip will be the “trunk” that holds your twisted branches together. These cuts don’t need to be perfectly symmetrical; a rustic look adds to the charm!
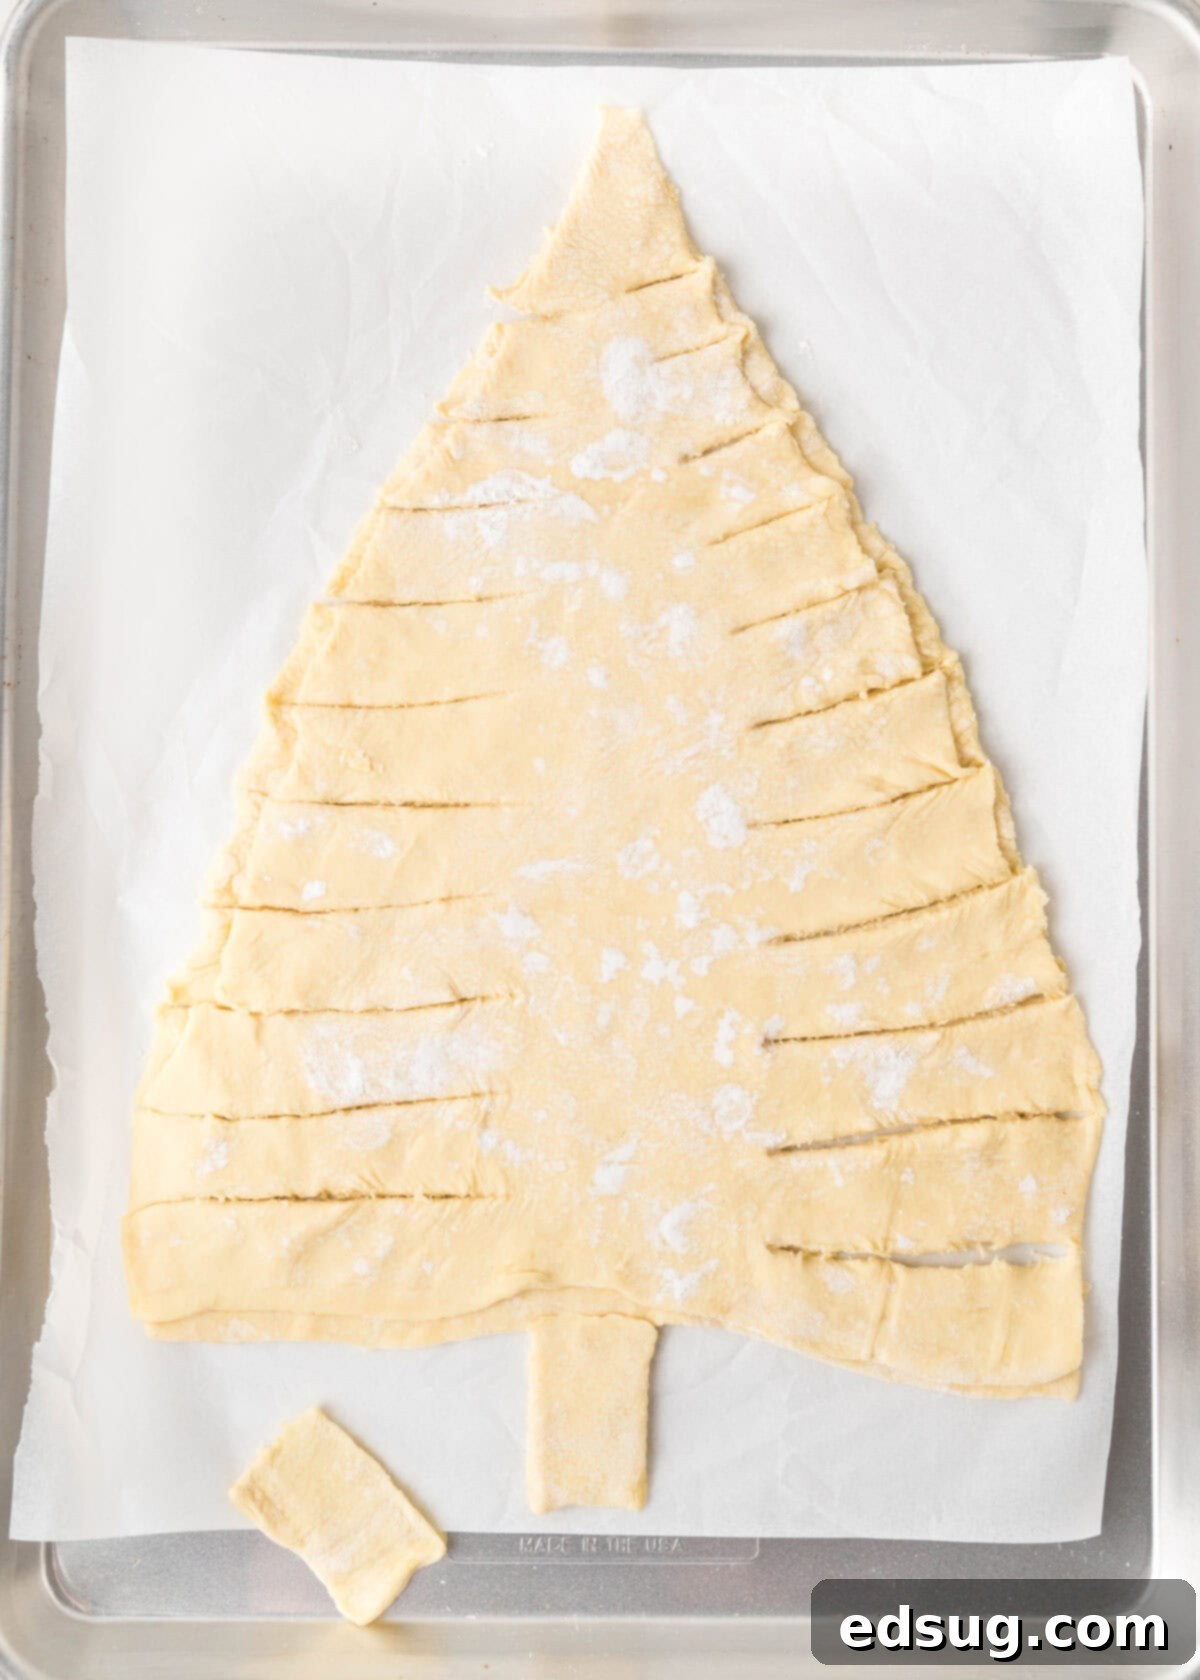
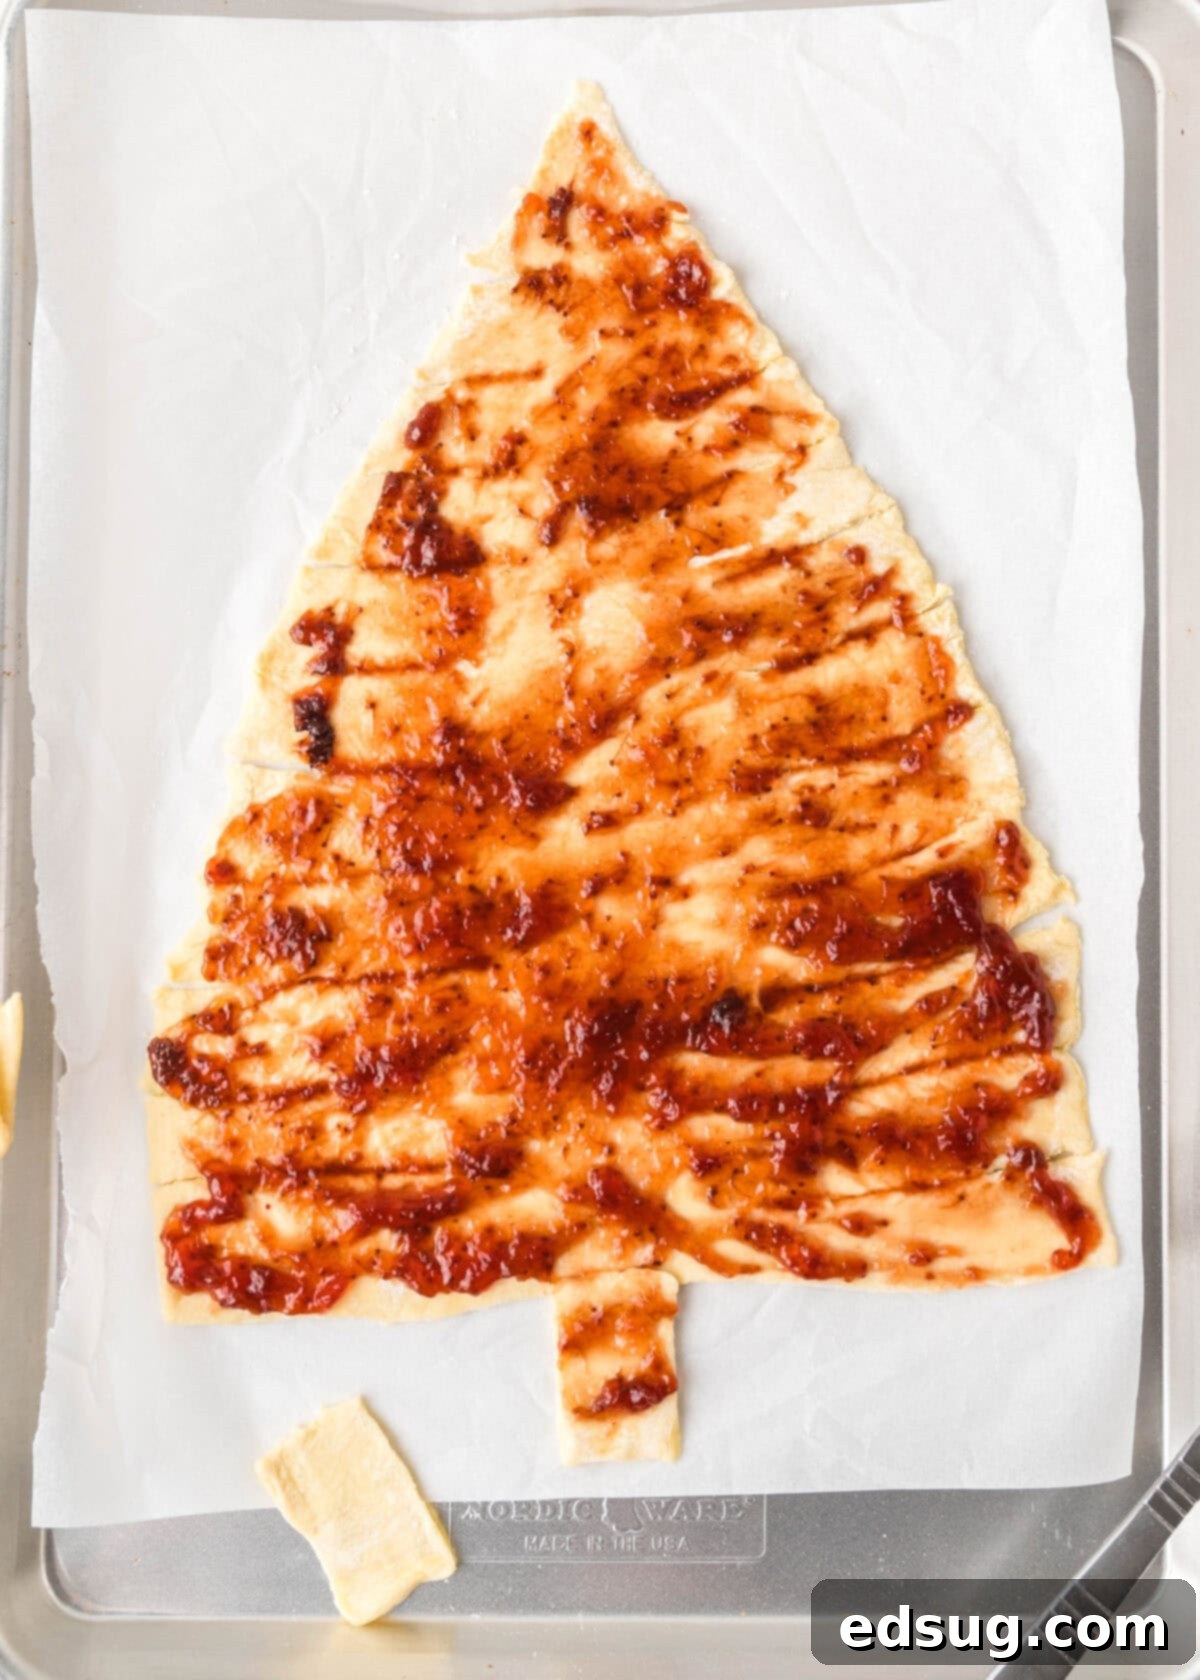
- Spread the Filling: With your branches cut, carefully peel off the top layer of puff pastry from the bottom layer. This might seem tricky, but if the pastry is thawed correctly, it should come apart easily. Now, spread your chosen jam or filling evenly over the entire surface of the bottom pastry layer. Be mindful not to overfill, as too much filling can ooze out during baking. A thin, even layer is best.
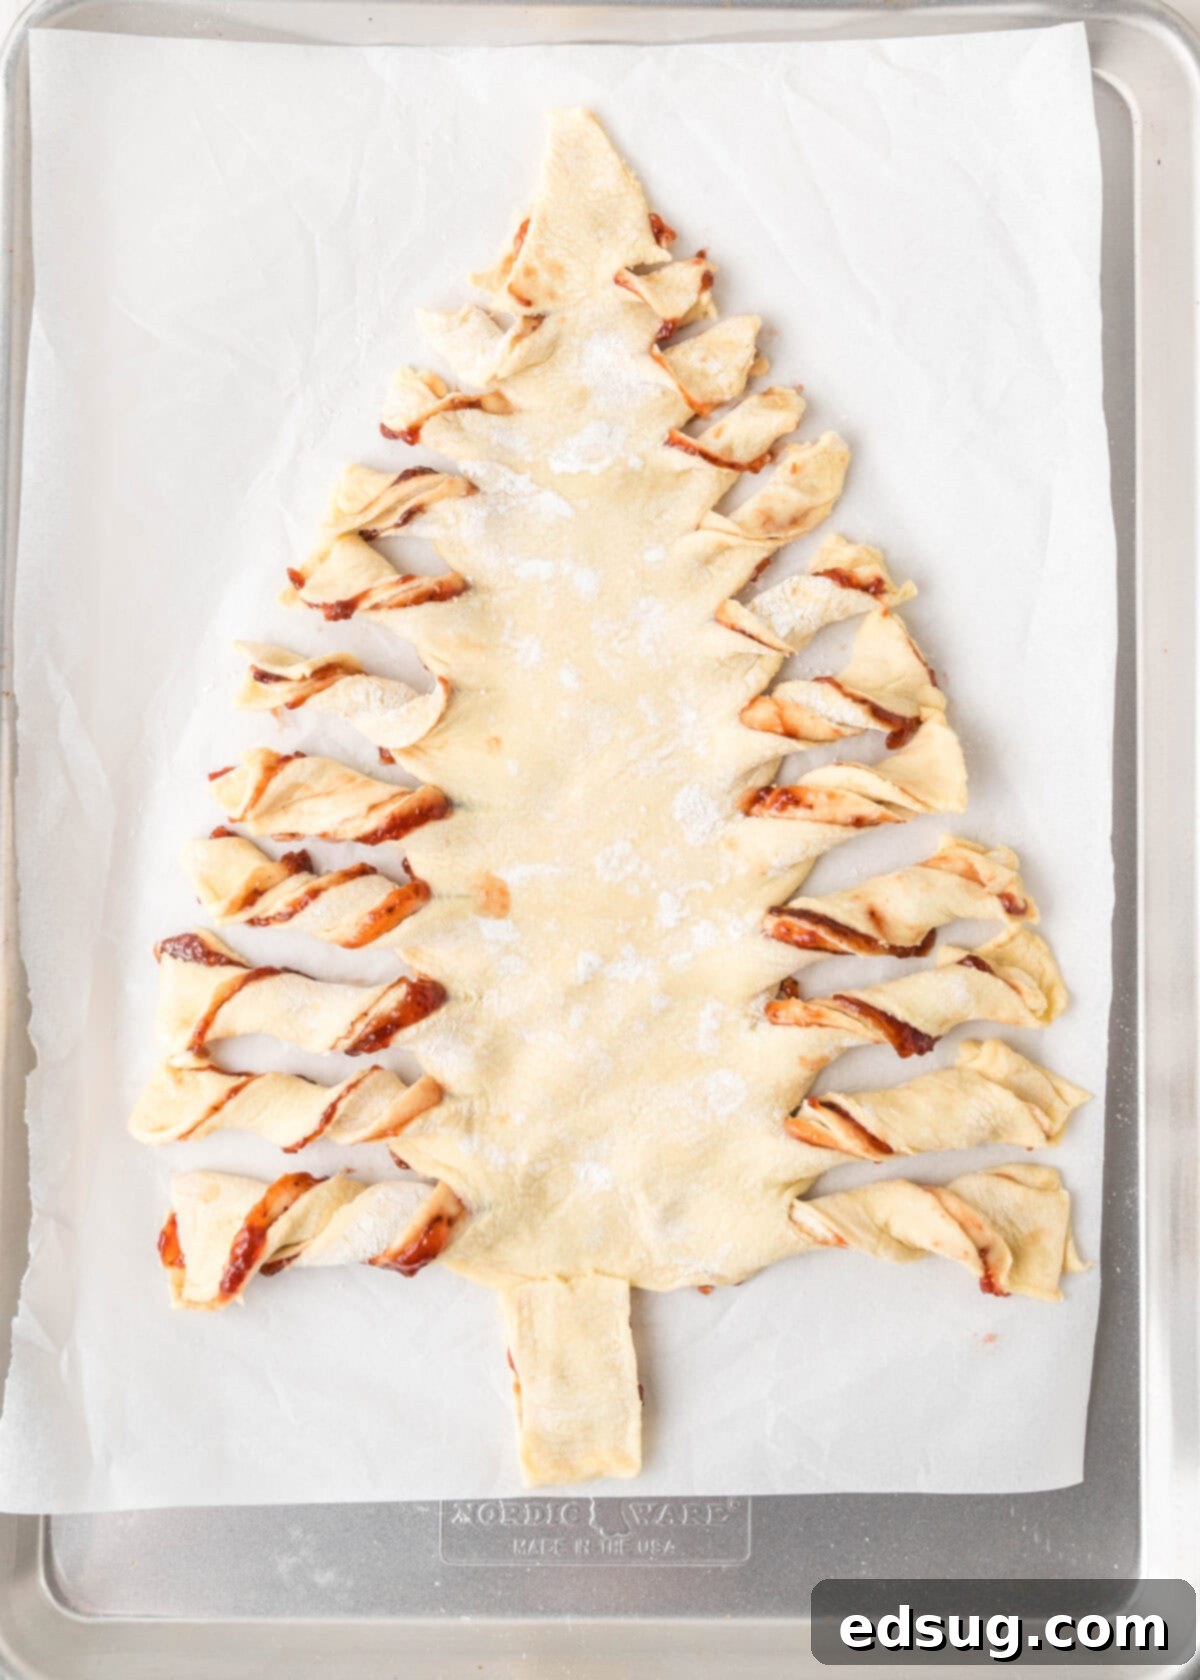
- Assemble and Twist: Gently place the top layer of puff pastry back over the jam-covered bottom layer, aligning the edges as best you can. Now comes the fun part: twisting the branches! Take each individual branch, grasping it by the top and bottom with the jam filling sandwiched in between. Gently twist each branch one to three times. The number of twists will depend on the length of the branch; longer branches at the bottom can handle three twists, while shorter ones at the top might only need one. This twisting motion not only creates a beautiful, rustic effect but also helps to seal the jam within.
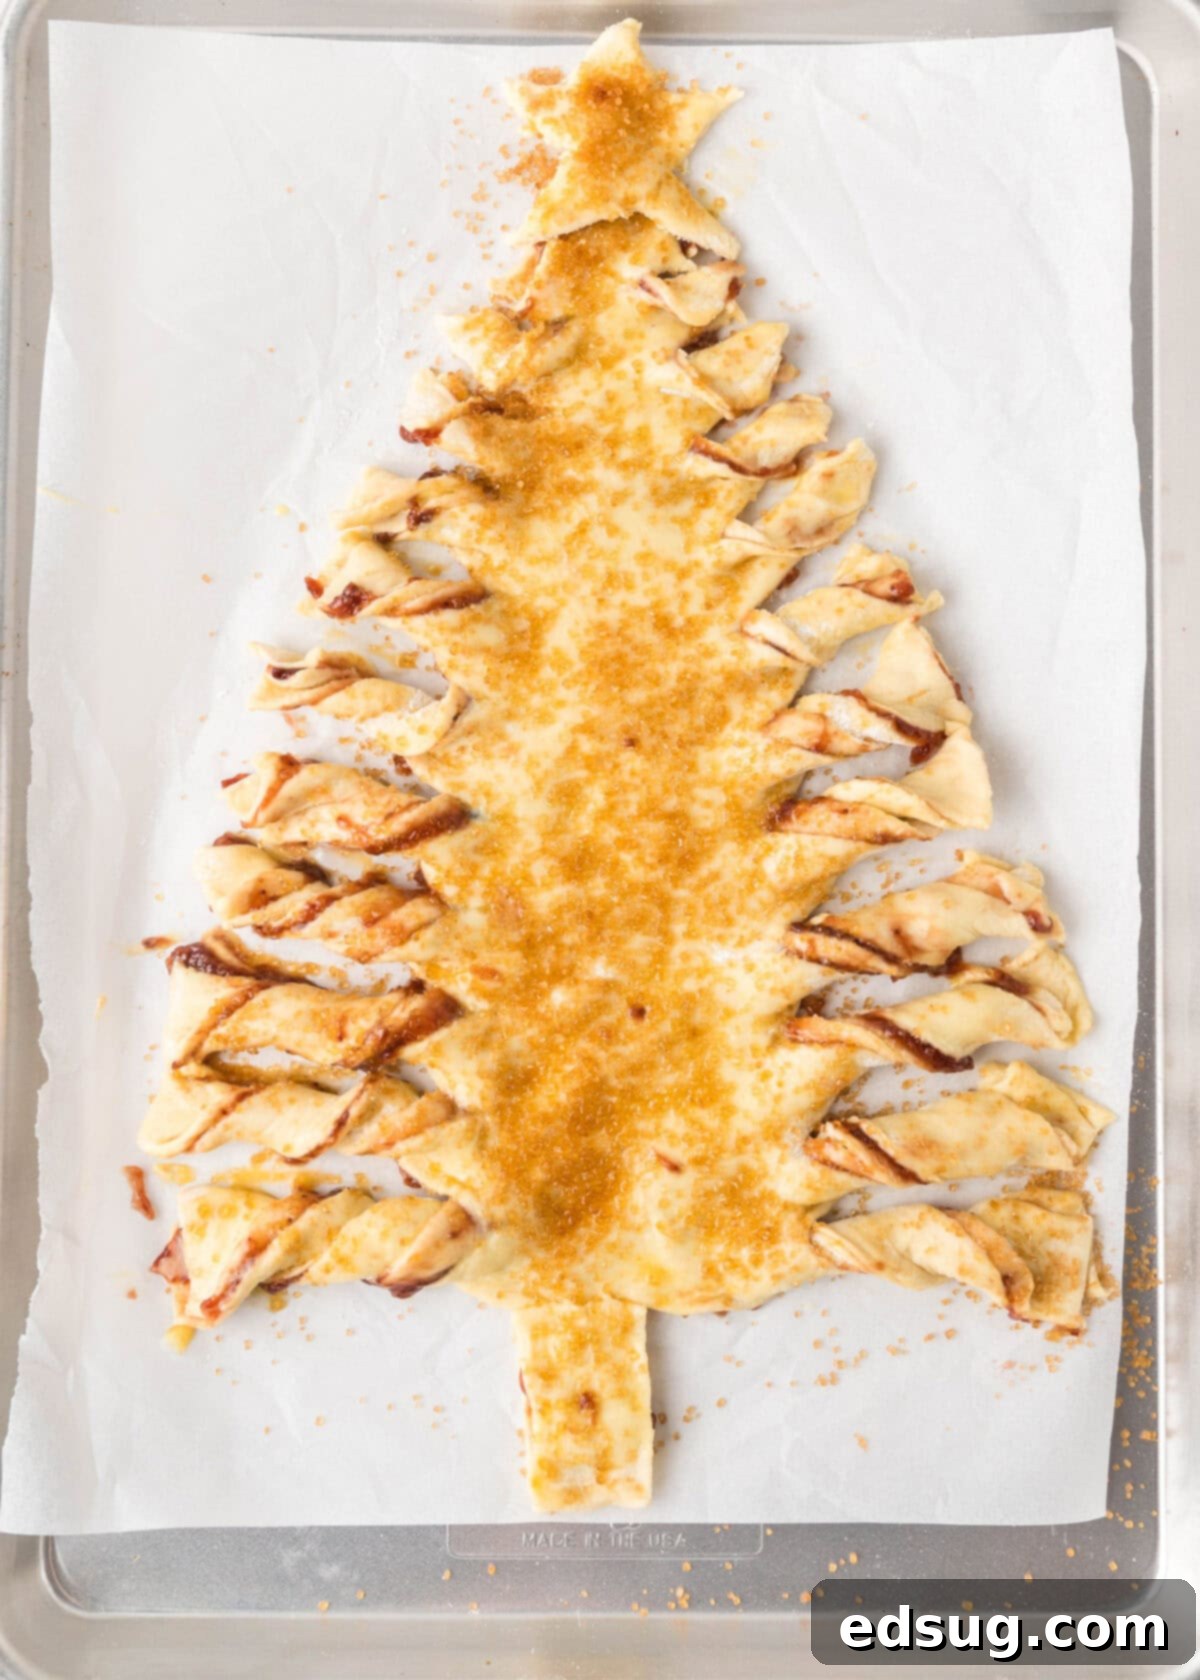
- Egg Wash and Bake: In a small bowl, whisk together the egg and water to create your egg wash. Lightly brush this mixture over the entire top surface of your puff pastry Christmas tree. This wash will give your tree a beautiful golden shine. Then, generously sprinkle the raw sugar over the egg-washed pastry. Bake in a preheated oven according to the recipe card instructions.
- Cool and Dust: Once the tree has puffed up magnificently and achieved a gorgeous golden-brown hue, carefully remove it from the oven. Allow it to cool slightly on the baking sheet. While it’s still warm but not hot, you can dust it generously with powdered sugar for that enchanting, snowy Christmas effect.
- Serve with Glaze (Optional): For an extra touch of sweetness, I love to serve this with a light vanilla glaze for dipping. This is completely optional, but it adds another layer of indulgence. Simply whisk together powdered sugar, a splash of milk, and a tiny bit of vanilla extract until you reach a smooth, dippable consistency.
Pro Tips & Creative Suggestions for Your Puff Pastry Christmas Tree
To ensure your Puff Pastry Christmas Tree turns out perfectly every time and to inspire your culinary creativity, consider these helpful tips and suggestions:
- Experiment with Fillings: This is where the fun truly begins! While strawberry jam is a classic, don’t hesitate to explore other options. Think about a vibrant Mixed Berry Jam, a smooth Raspberry Sauce, or even a rich, homemade Nutella for a decadent twist. For a savory appetizer, a fresh Pesto, a sun-dried tomato spread, or even a blend of caramelized onions and goat cheese would be absolutely delicious. The options are only limited by your imagination!
- Thaw Completely, but Keep Cool: The golden rule for working with puff pastry is to let it thaw fully before attempting to unfold or roll it. If the pastry is still frozen or even partially frozen, it will crack and tear, making it incredibly difficult to work with and achieve that beautiful tree shape. However, once thawed, try to work relatively quickly to keep the pastry cool. If it gets too warm, the butter will soften too much, making it sticky and harder to handle, and potentially affecting its flakiness during baking.
- No Need to Pinch Edges: Unlike many filled pastries where you painstakingly pinch the edges to seal in the filling, you don’t need to do that here. The act of twisting the branches effectively seals the jam (or whatever filling you choose) within the layers of dough. This saves you time and effort, making the assembly process even simpler. Trust the twist!
- Sharp Tools are Your Friend: For clean and precise cuts, whether you’re shaping the tree or creating the branches, a very sharp knife is essential. A pizza cutter is an excellent alternative that often provides even smoother, straighter lines with less effort. While perfection isn’t the goal, using a sharp tool helps prevent the dough from being dragged or ripped, ensuring your tree looks neat and well-formed.
- Don’t Overfill: As mentioned in the instructions, resist the temptation to load up on the filling. A thin, even layer is ideal. Too much filling, especially liquidy jams, will inevitably bubble out from between the layers during baking, creating a sticky mess on your baking sheet and potentially burning. A moderate amount ensures the filling stays put and doesn’t overwhelm the delicate pastry flavor.
- Monitor Baking Closely: Oven temperatures can vary, so keep a close eye on your Christmas tree as it bakes. You’re looking for a beautifully puffed, golden-brown crust. If it starts to brown too quickly, you can loosely tent it with foil. Conversely, if it’s not browning enough after the recommended time, give it a few more minutes until it reaches that perfect golden hue.
Storage Best Practices
Unfortunately, this delightful Puff Pastry Christmas Tree is one of those culinary creations that truly shines when enjoyed fresh. The signature buttery, flaky texture of puff pastry is at its absolute best right out of the oven, or at least while still warm. Reheating puff pastry often results in a less appealing, sometimes soggy or overly dry texture, and it loses that wonderful fresh flakiness.
Therefore, if you’re planning to serve this for a special holiday brunch or as a dessert centerpiece, I highly recommend timing your baking so that the tree comes out of the oven just a few minutes before you intend to serve it. While leftovers can be stored in an airtight container at room temperature for a day, or in the refrigerator for up to two days, be aware that the texture will change. A quick re-warm in a low oven might help crisp it up slightly, but it won’t fully restore its original glory.
Delightful Serving Suggestions
The versatility of the Puff Pastry Christmas Tree extends to its serving possibilities, making it a perfect fit for either brunch or dessert, depending entirely on your chosen filling. If your family enjoys a festive Christmas morning brunch, this tree would be an absolutely stellar and visually stunning addition to your spread. Its pull-apart nature makes it ideal for sharing and easy for guests to enjoy.
Imagine serving it alongside other holiday favorites such as a moist Cranberry Breakfast Cake, a comforting Chile Relleno Casserole, a fragrant Eggnog Coffee Cake, and crispy Air Fryer Bacon for an epic and memorable holiday feast. And, of course, don’t forget to toast the season with refreshing Cranberry Mimosas!
If you’ve opted for a savory filling, this tree transforms into an elegant appetizer. Serve it as a starter for your holiday dinner, perhaps alongside a charcuterie board or a fresh green salad. For a dessert option, especially with sweet fillings, it pairs beautifully with a scoop of vanilla ice cream, a dollop of whipped cream, or that optional vanilla glaze mentioned earlier. The light dusting of powdered sugar adds a touch of simple elegance that suits any holiday occasion.
Discover More Festive Christmas Recipes
Looking for more culinary inspiration to make your holiday season even brighter? Explore these other fantastic Christmas recipes:
- Eggnog French Toast
- Peppermint French Silk Pie
- Candy Cane Pie
- Baileys Chocolate Cheesecake
- Eggnog Pancakes
Puff Pastry Christmas Tree
By Erin Sellin
This Puff Pastry Christmas Tree is such a cute and fun addition to your holiday table. You can customize it a million different ways to make it exactly how your family likes!
Prep Time: 15 mins
Cook Time: 15 mins
Servings: 6
Rate Recipe
Print Recipe
Ingredients
- 1 (17.3 oz) package frozen Puff Pastry, thawed
- 1/3 cup strawberry jam
- 1 large egg
- 1 Tablespoon water
- 2 Tablespoons raw sugar
- 2 Tablespoons Powdered sugar
Vanilla Glaze (optional)
- 1 cup powdered sugar
- 1 Tablespoon milk
- splash vanilla extract
Instructions
- Preheat oven to 400º F (200°C). Line a large baking sheet with parchment paper.
- Let the puff pastry sheets thaw completely. Unfold and gently roll each sheet into a 10×13 inch rectangle. Place one sheet on your lined baking sheet, then place the second sheet directly on top.
- Using a sharp knife or pizza cutter, cut the layered pastry into a large triangle shape to form the Christmas tree. Use the pastry scraps to cut out a rectangle for the tree trunk and a star for the top.
- Cut horizontal slits about 1 inch apart on both sides of the tree, leaving approximately 2 inches in the center intact for the “trunk.”
- Carefully remove the top layer of puff pastry. Spread the strawberry jam evenly over the entire surface of the bottom pastry layer.
- Place the top layer back over the jam. Gently twist each “branch” one to three times, depending on its length.
- Beat together the egg and water to make an egg wash. Brush this mixture over the top of the tree, then sprinkle evenly with raw sugar.
- Bake for 15-17 minutes, or until the pastry is puffed up and golden brown. Remove from the oven and let cool slightly before serving.
- If making the optional vanilla glaze, mix together the powdered sugar, milk, and vanilla extract in a small bowl, stirring until smooth and dippable. Adjust milk quantity to achieve desired consistency.
Nutrition
Calories: 92kcal | Carbohydrates: 20g | Protein: 1g | Fat: 1g | Saturated Fat: 0.3g | Polyunsaturated Fat: 0.2g | Monounsaturated Fat: 0.3g | Trans Fat: 0.003g | Cholesterol: 31mg | Sodium: 19mg | Potassium: 27mg | Fiber: 0.2g | Sugar: 16g | Vitamin A: 45IU | Vitamin C: 2mg | Calcium: 9mg | Iron: 0.3mg
Nutrition information is automatically calculated, so should only be used as an approximation.
Like this recipe? Leave a comment below!
I’ve created a fun and engaging community group on Facebook, and I’d be absolutely delighted for you to join us! It’s a fantastic place where you can share YOUR favorite recipes, ask questions, get inspiration, and stay up-to-date with all the latest delicious content from Dinners, Dishes and Desserts (so you’ll never miss a new recipe!).
Be sure to follow me on Instagram and tag #dinnersdishes so I can see all the wonderful DINNERS, DISHES, AND DESSERTS recipes YOU make!
Don’t miss out on any posts! Be sure to follow me on my social media channels:
Facebook | Twitter | Pinterest | Instagram
