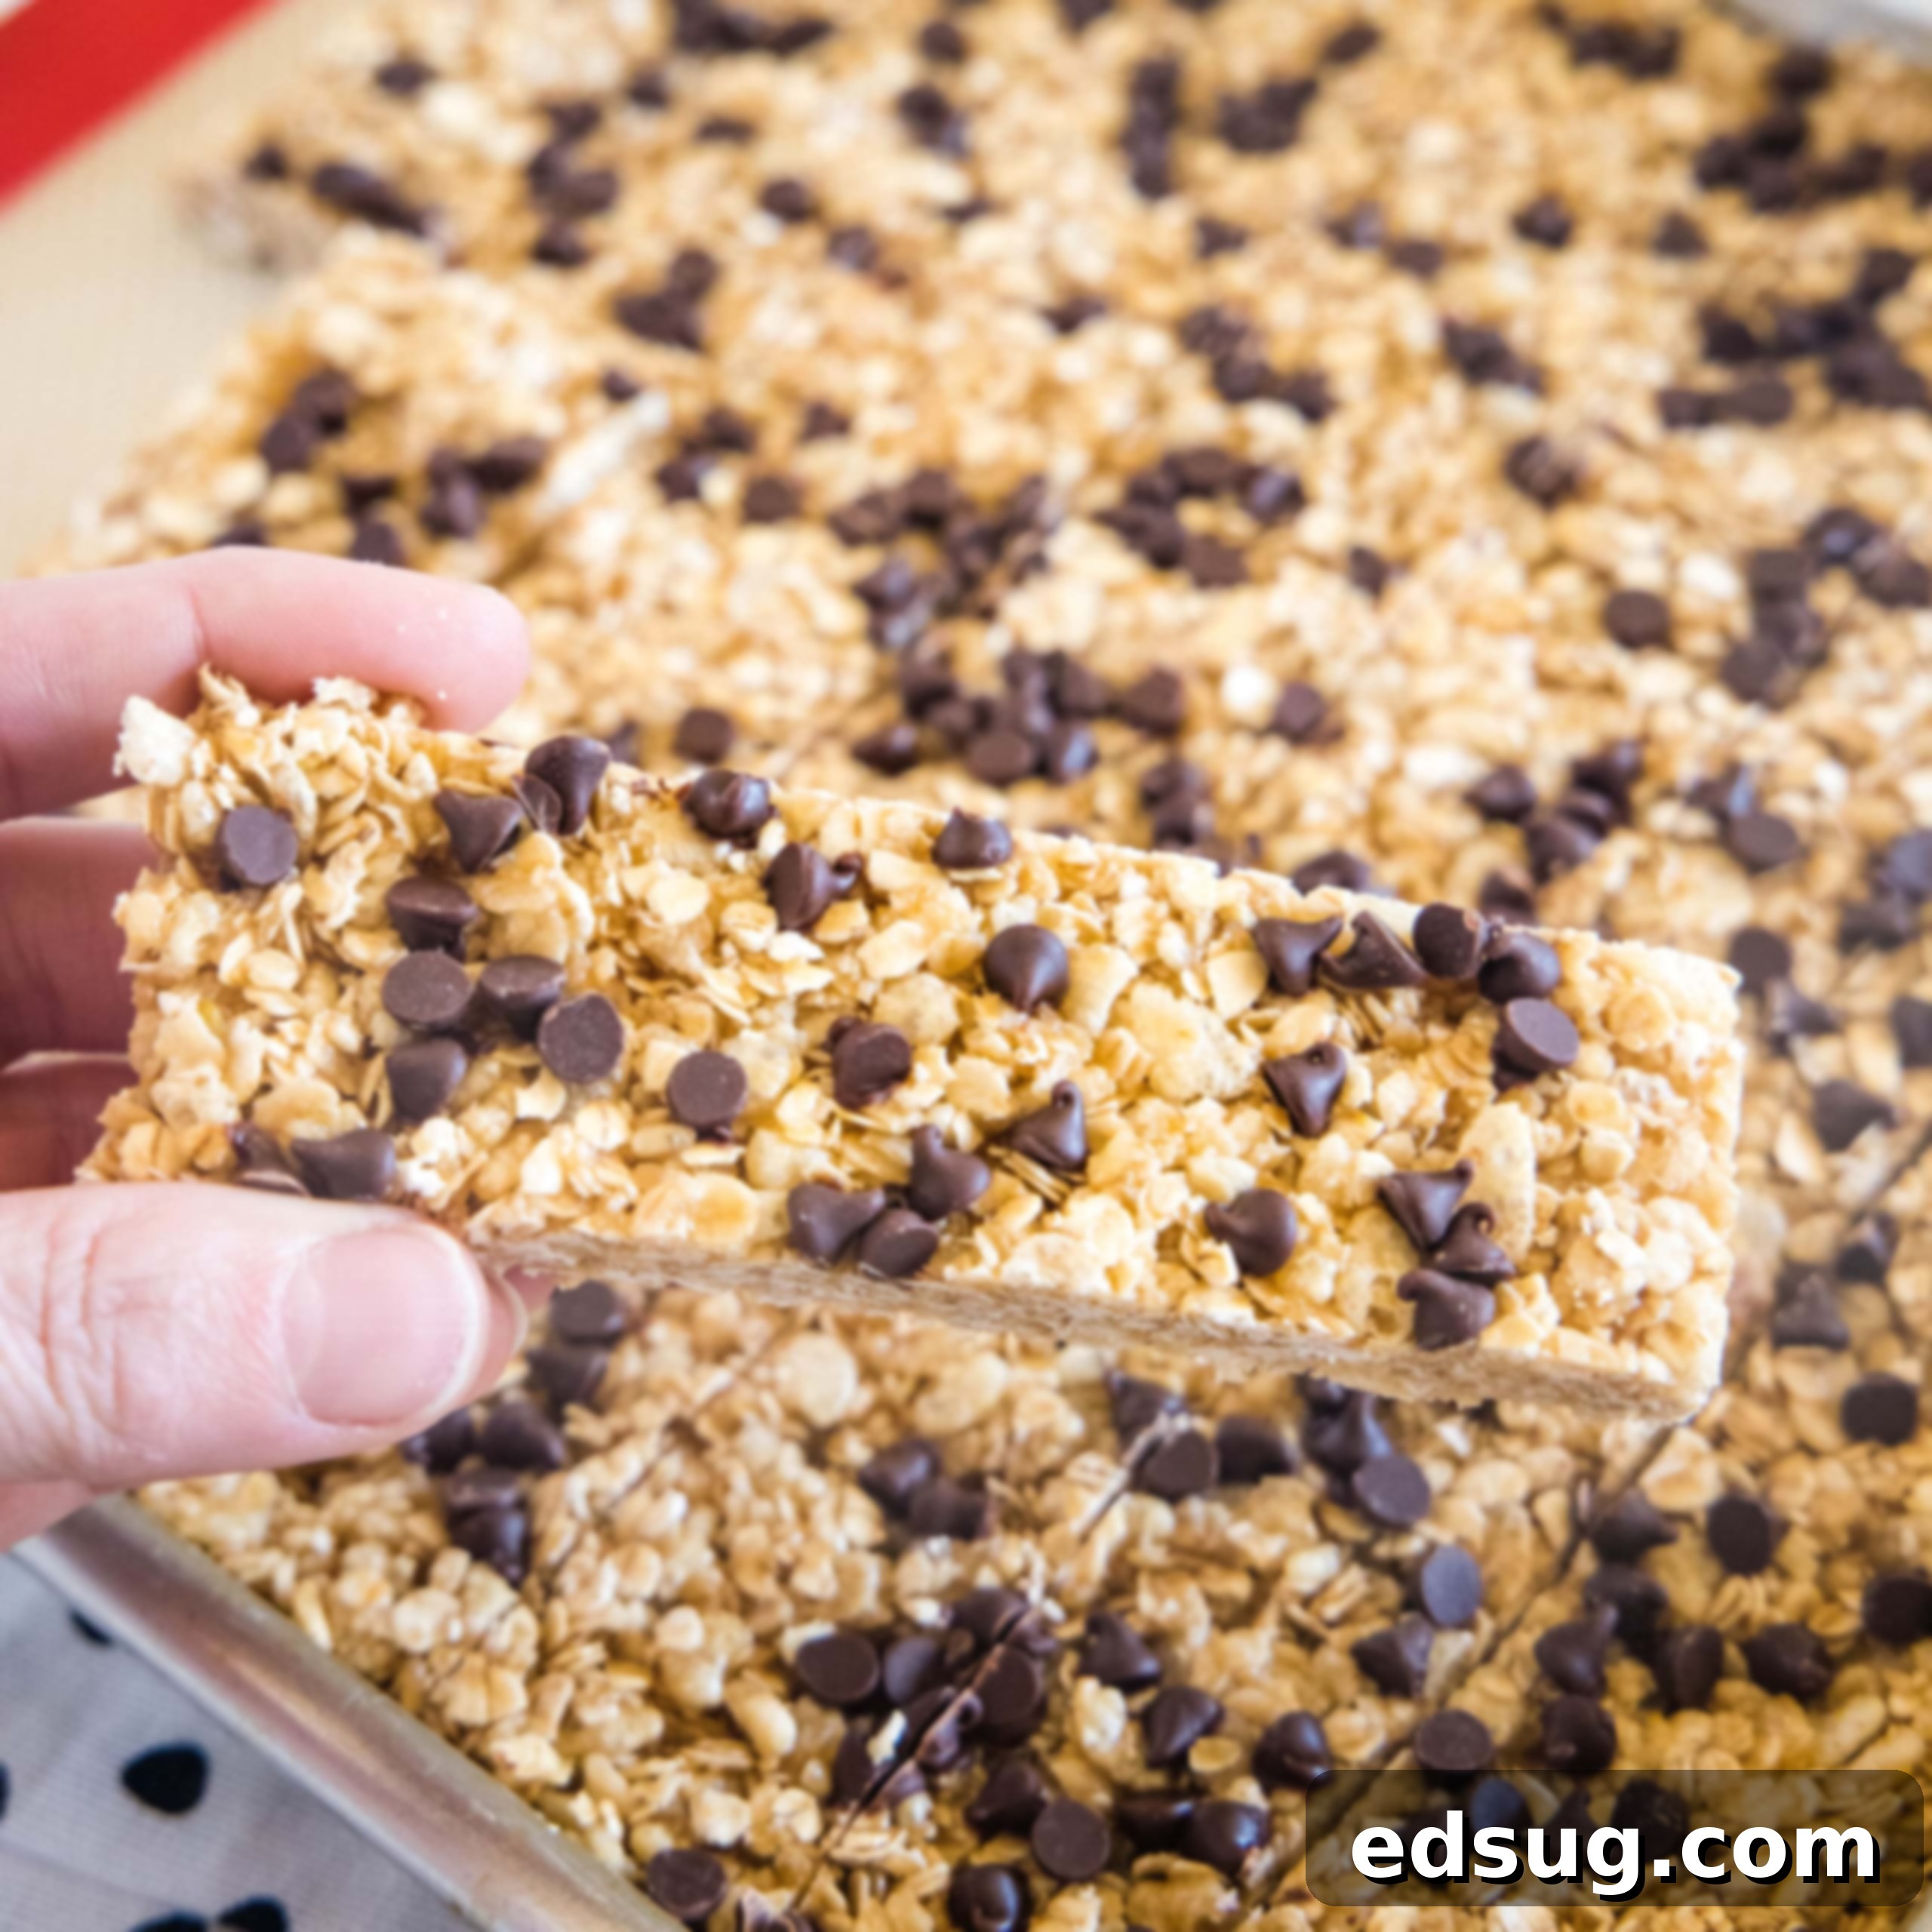
Homemade No-Bake Chewy Granola Bars: Your Ultimate Guide to Healthy, Easy Snacks
Say goodbye to store-bought granola bars! This recipe for chewy, delicious, no-bake granola bars is a game-changer. It’s a healthy and convenient breakfast or snack that the entire family will adore, offering a fresh, wholesome taste far superior to anything you’ll find on grocery store shelves.
Get ready to fall in love with this incredibly simple and satisfying recipe for homemade chewy granola bars. Designed to mimic the delightful texture and flavor of your favorite store-bought varieties, these bars boast just a handful of ingredients and come together effortlessly in less than 10 minutes of active prep time. Not only are they significantly healthier and more economical than pre-packaged alternatives, but they also offer endless possibilities for customization, allowing you to tailor them to your precise taste preferences and dietary needs.
Making your own granola bars means you have complete control over what goes into them, avoiding artificial flavors, preservatives, and excessive sugars often found in commercial products. This makes them an ideal choice for busy mornings, lunchbox additions, post-workout fuel, or simply a wholesome treat to curb those mid-day cravings. Prepare to impress yourself and your family with these delightfully chewy, naturally sweet, and incredibly versatile homemade granola bars!
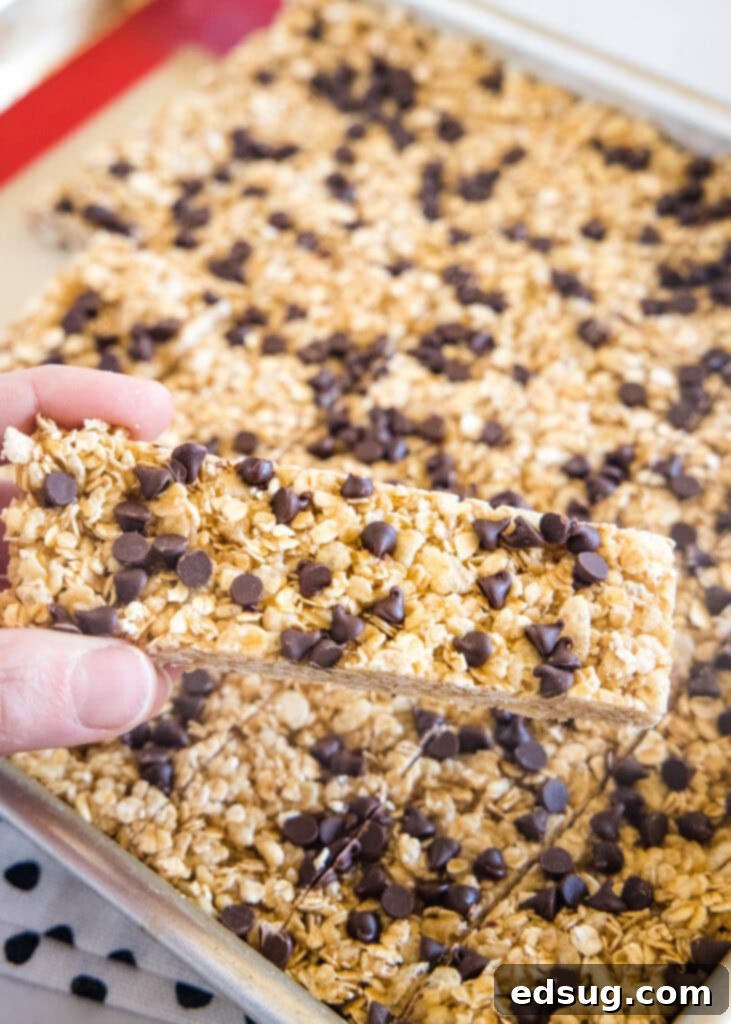
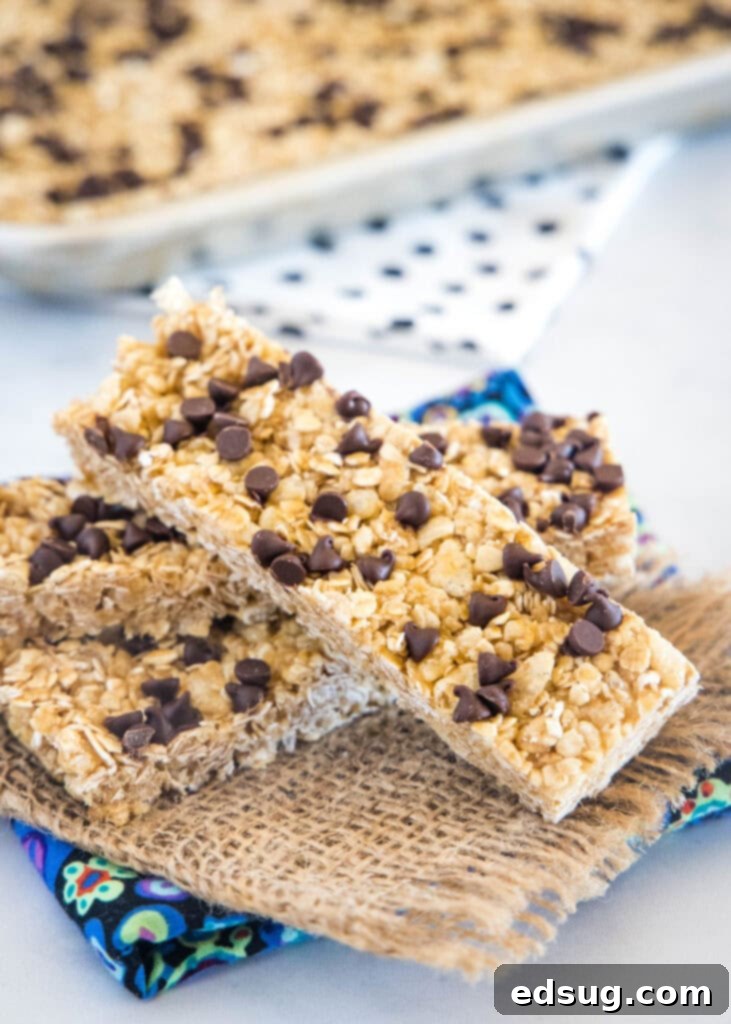
Are Homemade Chewy Granola Bars a Healthy Option?
When it comes to quick and easy fuel, I certainly consider these homemade chewy granola bars a much healthier alternative compared to many traditional breakfast or snack choices I might grab when time is short. While they might not be the absolute pinnacle of a low-calorie, super-food snack, their homemade nature gives you a distinct advantage in managing their nutritional profile.
Think about it: opting for one of these delicious bars over a sugar-laden candy bar from the gas station, or a stack of syrupy pancakes, is a clear step in a healthier direction. By making them yourself, you control the type and amount of sweeteners, fats, and mix-ins. You can choose whole, unprocessed ingredients and avoid the long list of unpronounceable additives often found in store-bought versions. This recipe focuses on simple, wholesome components like oats, natural sweeteners, and optional nutritious additions, providing sustained energy without the hidden nasties.
For those looking to maximize the health benefits, be sure to explore the “Possible Variations” section further down the page. There, you’ll find plenty of creative ideas to boost fiber, protein, and healthy fats, transforming an already good snack into an even more nutrient-dense powerhouse tailored to your dietary goals.
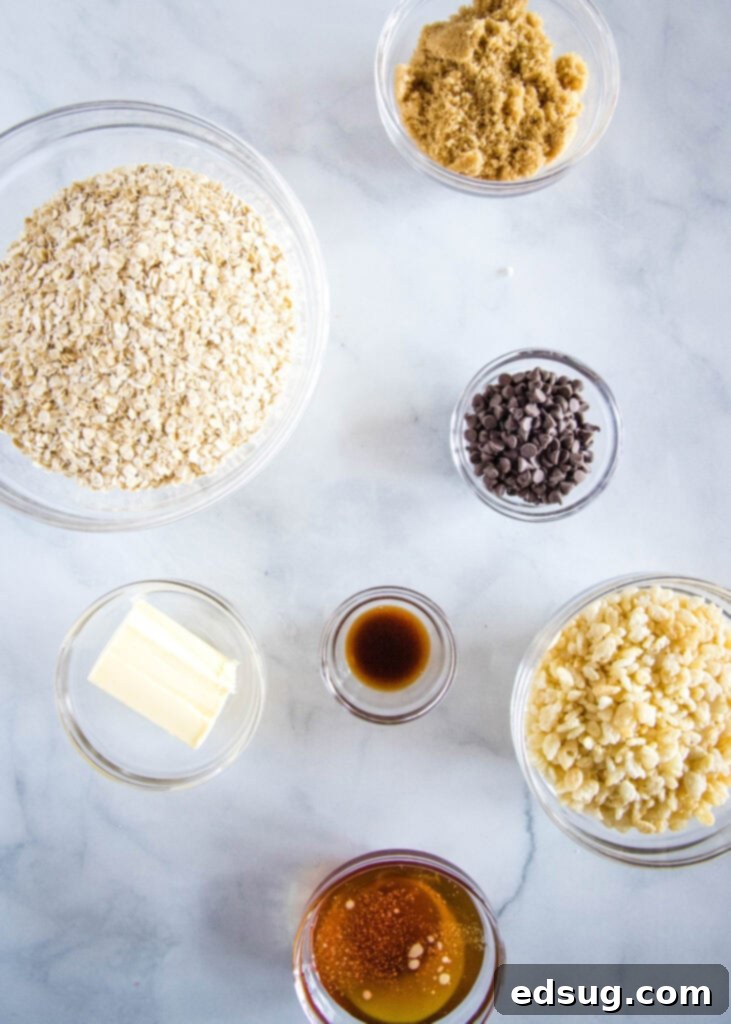
Key Ingredients You’ll Need for Chewy Granola Bars
One of the beauties of this recipe is its reliance on readily available ingredients, most of which you probably already have in your pantry. Each component plays a vital role in achieving that perfect chewy texture and balanced flavor. Here’s a breakdown of what you’ll need:
- Butter: Unsalted butter is preferred to control the salt content. It contributes to the rich flavor profile and helps create a soft, pliable texture in the bars. If you’re looking for a dairy-free option, coconut oil or a plant-based butter substitute can work well.
- Honey: This natural sweetener is crucial for binding the ingredients together, giving the granola bars their signature chewiness. Its distinct flavor also complements the oats beautifully. Maple syrup can be used as a vegan alternative, though it might slightly alter the texture and flavor.
- Brown Sugar: Adds an extra layer of sweetness and a hint of molasses flavor, enhancing the overall depth of taste. Light brown sugar is generally sufficient, but dark brown sugar can be used for a more robust flavor.
- Quick Cooking Oats: This is a critical ingredient for a no-bake recipe. Quick cooking oats are thinner and absorb moisture more readily than rolled (old-fashioned) oats, allowing them to soften without any baking. Do not use rolled oats as they require cooking to become tender and will result in a much firmer, tougher bar in this no-bake method.
- Crispy Rice Cereal: A fantastic addition that provides a delightful textural contrast. The crispy rice cereal ensures each bite has a satisfying crunch, balancing the chewiness of the oats. Ensure you’re using plain, unsweetened crispy rice cereal to avoid adding unnecessary sugar.
- Vanilla Extract: A touch of pure vanilla extract elevates all the other flavors, adding warmth and depth to the bars. Don’t skip this!
- Mini Chocolate Chips: These are optional but highly recommended! The mini size ensures an even distribution of chocolate throughout the bars, guaranteeing a perfect amount of melty goodness in every single bite. Regular chocolate chips can be used, but mini chips integrate better.
How to Effortlessly Make Delicious Chewy Granola Bars
Making these no-bake chewy granola bars is incredibly straightforward, perfect for even the most novice cooks. Follow these detailed steps to achieve perfect results every time:
- Combine Dry Ingredients: In a large mixing bowl, thoroughly combine the quick cooking oats and crispy rice cereal. Take your time to ensure they are well incorporated. This step is crucial for achieving a consistent texture and crispy bite throughout the entire batch of granola bars.
- Prepare the Sweet Syrup Base: In a small saucepan set over medium heat, combine the butter, honey, and brown sugar. Stir these ingredients slowly and consistently as they melt and integrate. The goal is to create a smooth, homogenous syrup.
- Bring to a Gentle Boil: Once the butter, honey, and brown sugar mixture begins to bubble around the edges, reduce the heat slightly. Allow it to cook for exactly 2 minutes, continuing to stir occasionally. This brief boiling helps the syrup reach the right consistency for binding and chewiness.
- Add Flavor Enhancer: After the syrup has cooked for 2 minutes, remove the saucepan from the heat. Immediately stir in the vanilla extract. The warmth of the syrup will help infuse the vanilla flavor beautifully.
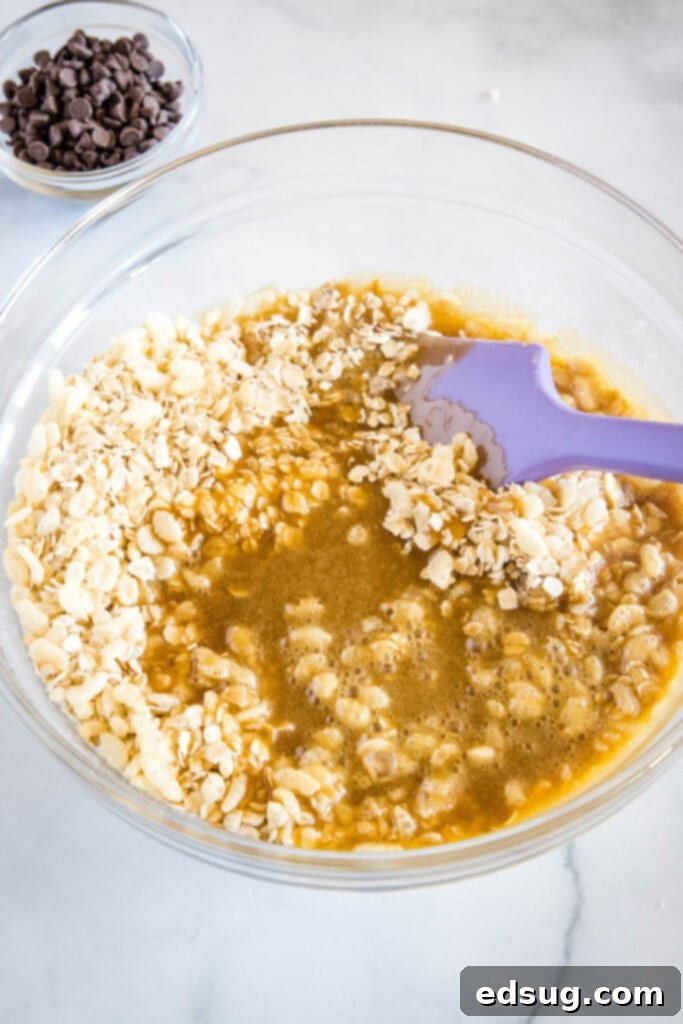
- Combine Wet and Dry: Pour the warm syrup mixture directly over the oats and crispy rice cereal in your large mixing bowl. Using a sturdy spoon or spatula, stir vigorously until the oats and cereal are completely coated with the sweet, sticky syrup. Ensure every flake and oat gets its share of the binding agent.
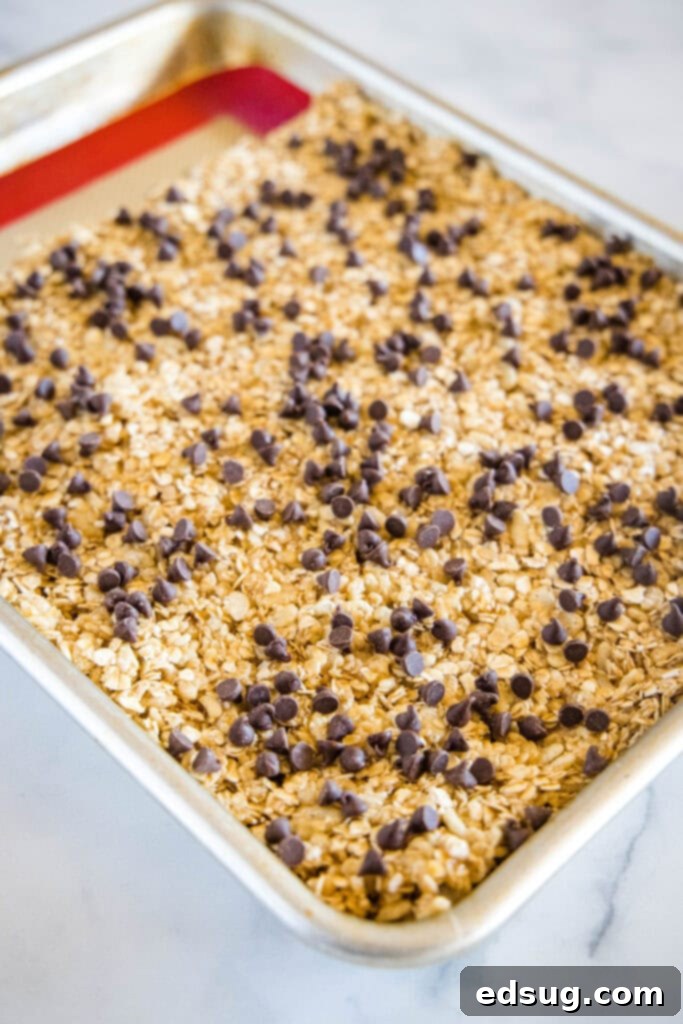
- Press into a Pan: Transfer the entire mixture to a prepared baking sheet (lined with parchment paper for easy removal and lightly greased). Using the back of a spoon or your clean hands (which you might want to slightly dampen to prevent sticking), press the mixture down firmly and evenly into the pan. This step is paramount: press them in hard and tight to compact the mixture as much as possible. This firm compression is what prevents the bars from crumbling and breaking when you cut and store them. Aim for a thickness of about 1/2 an inch, but this can vary slightly depending on the size of your baking sheet.
- Add Chocolate Chips: Grab your mini chocolate chips and sprinkle them generously and evenly over the top of the pressed oat and syrup mixture. Gently press the chocolate chips into the surface of the granola bars. This helps them adhere and ensures they don’t fall off once the bars are set.
- Cool and Set: Allow the chewy granola bars to cool completely at room temperature for at least two hours, or even longer if your kitchen is warm. This cooling period is vital. It allows the warm syrup to fully soak into the oats and then solidify, making the granola bars much more solid, cohesive, and easier to cut. The heat from your hands while pressing the chocolate chips might slightly melt them, so cooling also gives the chocolate a chance to set again.
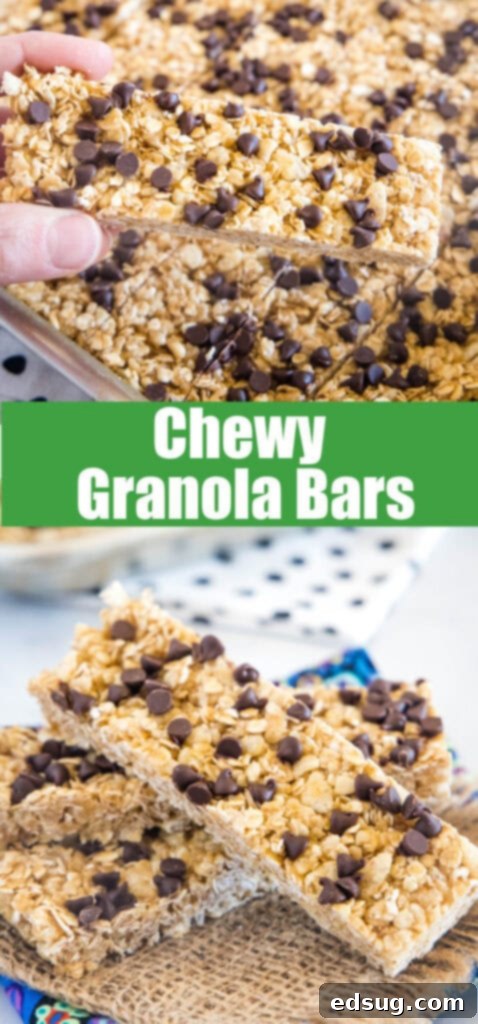
- Cut into Bars: Once fully cooled and firm, use a sharp knife to slice the large slab of granola mixture into individual bars. You can make them as large or as small as you desire. This recipe typically yields around 12 bars, but the exact number will depend on your preferred thickness and width.
Optimal Storage for Your Chewy Granola Bars
One of the fantastic advantages of these homemade chewy granola bars is their excellent shelf life, making them perfect for meal prepping and enjoying throughout the week. Proper storage is key to maintaining their delightful texture and freshness.
For the best results, you can store these bars at room temperature on your countertop for 5-7 days. It’s crucial not to refrigerate these granola bars, as the cold temperature can cause the honey and other binding agents to harden excessively, making the bars incredibly firm and difficult to chew. They simply lose their characteristic chewiness when chilled.
To prevent the bars from sticking together and to make them convenient for grab-and-go snacking, I highly recommend wrapping each individual bar in a piece of parchment paper or wax paper. Once wrapped, place them in a large, airtight container or a resealable bag. This method protects them from drying out and keeps them fresh.
If you’re looking to prepare a larger batch or want to have healthy snacks readily available for even longer, these granola bars freeze exceptionally well. To freeze them, wrap the individual bars securely in parchment paper, then place them in a freezer-safe container or heavy-duty freezer bag. They will maintain their quality in the freezer for up to two months. When you’re ready to enjoy a frozen bar, simply transfer it to a separate container on your countertop and allow it to defrost for approximately 24 hours. Once thawed, they will return to their original chewy deliciousness, ready to be savored.
Exciting & Healthy Variations for Your Granola Bars
This Chewy Granola Bar recipe is truly a masterpiece of versatility, allowing for endless customization to suit any palate or dietary preference. If there’s an ingredient in the base recipe that isn’t to your liking, simply omit it! On the other hand, if you have a beloved flavor combination in mind, feel free to get creative and toss in some extra ingredients. The key is to ensure any added ingredients are precooked or edible raw since this is a no-bake recipe.
With a little imagination, you can transform these already fantastic bars into your perfect breakfast or on-the-go snack. Here are some other flavor combinations and additions I’ve tried, all of which have turned out wonderfully:
- Raisins: The classic addition! Their natural sweetness and slight tartness pair exceptionally well with the rich, sweet base of the bars, adding a lovely chewiness.
- Peanut Butter: For a boost of protein and an irresistible nutty flavor, swirl in 1/4 to 1/2 cup of creamy peanut butter (or almond, cashew, or sunflower butter for nut-free options) with the honey mixture before boiling. This makes them even more satisfying and energy-packed.
- Marshmallows: For a fun, gooey, and slightly decadent twist, mix in a handful of mini marshmallows after the oats are coated with the syrup. The residual heat will soften them, creating pockets of sticky sweetness.
- Cranberries: Dried cranberries offer a vibrant burst of color and a tart-sweet flavor that complements the richness of the bars beautifully. Any other dried fruit like chopped apricots, dried cherries, or blueberries would also work.
- Nuts: Packed with healthy fats, fiber, and protein, chopped nuts such as almonds, walnuts, pecans, or cashews make an excellent addition. Lightly toast them beforehand to enhance their flavor and crunch.
- Coconut: Shredded or flaked coconut, especially toasted, adds a tropical aroma, a delightful texture, and a good source of healthy fats. It pairs wonderfully with chocolate chips!
- Seeds: For an extra nutritional punch, consider adding chia seeds, flax seeds, pumpkin seeds, or sunflower seeds. They boost fiber, omega-3s, and crunch.
- Spices: A pinch of cinnamon, nutmeg, or pumpkin pie spice can add a cozy, aromatic touch, especially if you’re making seasonal variations.
Frequently Asked Questions About Chewy Granola Bars
Can I use old-fashioned (rolled) oats instead of quick-cooking oats?
No, it is highly recommended to use quick-cooking oats for this no-bake recipe. Quick-cooking oats are thinner and more processed, allowing them to soften and bind effectively with the syrup without baking. Old-fashioned oats are thicker and require cooking to become tender; if used in this no-bake recipe, they will result in a much tougher, chewier, and less palatable bar that might not hold together as well.
Are these granola bars gluten-free?
Yes, these granola bars can easily be made gluten-free! The primary ingredient, oats, is naturally gluten-free. However, oats are often processed in facilities that also handle gluten-containing grains, which can lead to cross-contamination. To ensure your granola bars are truly gluten-free, make sure to purchase certified gluten-free quick-cooking oats and crispy rice cereal.
Can I make these granola bars vegan?
Absolutely! To make this recipe vegan, you will need to substitute the butter and honey. For butter, use an equal amount of plant-based butter (like vegan margarine) or coconut oil. For honey, use an equal amount of maple syrup, agave nectar, or brown rice syrup. The texture may vary slightly, but the bars will still be delicious and hold together well.
How can I prevent my granola bars from crumbling?
The key to preventing crumbling is firm compression and sufficient cooling time. When you press the mixture into the pan, make sure to compact it as tightly and evenly as possible using the back of a spoon, a flat spatula, or even another piece of parchment paper over the top. Then, allow the bars to cool completely for at least 2 hours (or longer) at room temperature. This allows the binding syrup to solidify and set firmly, ensuring cohesive bars.
What kind of pan should I use?
A standard 8×8 inch (20×20 cm) or 9×9 inch (23×23 cm) square baking pan works perfectly. You can also use a rectangular pan, such as a 9×13 inch (23×33 cm), but keep in mind that the bars will be thinner and may yield more individual servings. Always line your pan with parchment paper, leaving an overhang on two sides, to make lifting and cutting the bars much easier.
More Homemade Snack Recipes To Try
- Homemade Granola with Pumpkin Seeds, Honey & Cranberries: A baked alternative for those who love crunchy granola.
- Ranch Oyster Crackers: A savory, addictive snack perfect for parties.
- Chewy Coconut Chocolate Chip Granola Bars: A tropical twist on the classic chewy bar.
- Peanut Butter Protein Balls: Another fantastic no-bake, high-protein snack.
- Cinnamon Toast Crunch Granola Bars: A fun, nostalgic option for a sweet treat.
- Party Mix: The ultimate savory mix for entertaining or everyday munching.
- Chocolate Peanut Butter Granola Bars: An irresistible combination of two beloved flavors.
- Biscoff Granola Bars: For cookie butter lovers, a unique and delicious bar.
- Homemade Crackers: Elegant and flavorful crackers perfect with cheese or dips.
If you love these Chewy Granola Bars as much as we do, please make sure to share this fantastic recipe with your friends and family so they can discover the joy of homemade, healthy snacking too!
No Bake Chewy Granola Bars
Rate Recipe
Print Recipe
Ingredients
- 1/4 cup butter
- 1/4 cup honey
- 1/3 cup brown sugar
- 2 cups quick cooking oats
- 1 cup crispy rice cereal
- 1/2 teaspoon vanilla extract
- 2 Tablespoons mini chocolate chips
Instructions
-
Stir oats and rice cereal together in a large bowl. Set aside.
-
Over medium heat, melt butter, honey and brown sugar together in a small saucepan, stirring continuously. Once the mixture begins to bubble, reduce heat, and cook for exactly 2 minutes. Remove from heat and stir in vanilla extract.
-
Pour the warm syrup over the oat and crispy rice cereal mixture. Stir well with a sturdy spoon until all the dry ingredients are completely coated.
-
Press the mixture into a greased and parchment-lined sheet pan. Ensure you press them down very firmly and tightly – this is crucial to prevent crumbling when cutting. The bars should be approximately 1/2 inch thick, though this can vary with your pan size.
-
Sprinkle the mini chocolate chips evenly across the surface of the bars. Gently press the chips into the mixture so they adhere well.
-
Allow the granola bars to cool completely at room temperature for at least 2 hours. Once fully set and firm, cut into desired bar shapes and store in an airtight container at room temperature.
Notes
Nutrition
Nutrition information is automatically calculated and should only be used as an approximation.
Additional Info
Love this recipe? Don’t forget to leave a comment and rate it below!
I’ve created a fantastic community group on Facebook, and I’d be absolutely thrilled for you to join us! It’s a vibrant space where you can share your favorite recipes, ask questions, and stay up-to-date with all the latest happenings and new recipes from Dinners, Dishes and Desserts, ensuring you never miss a delicious update!
Be sure to follow me on Instagram and tag #dinnersdishes so I can see all the wonderful DINNERS, DISHES, AND DESSERTS recipes YOU create!
Stay connected with me on my social media channels so you never miss a post or a new recipe!
Facebook | Twitter | Pinterest | Instagram
